-
CALL US:
- (866) 952-3456
It might seem like a small detail, but securing your dresser to the wall is one of the most important safety tasks you can do in your home, especially if you have little ones running around. This isn't just about being overly cautious; it's a straightforward fix that turns a serious hazard into a stable, secure piece of furniture. A few minutes of work buys you invaluable peace of mind.
We often look at a heavy dresser and think, "There's no way that's tipping over." Unfortunately, that's a common and dangerous assumption. The physics of a tip-over are surprisingly simple. When a curious child pulls out the drawers to use as a makeshift ladder, the dresser's center of gravity shifts forward in an instant. Suddenly, that sturdy piece of furniture becomes dangerously top-heavy and can fall with very little effort.
This isn't just a hypothetical situation; it's a real and preventable tragedy that happens far too often. Even heavy, solid wood dressers aren't immune. Once those drawers are open, they create an irresistible climbing structure for toddlers.
The risk extends beyond curious children. An uneven floor, a dog playfully bumping against the side, or even a minor tremor can be all it takes to destabilize an unanchored dresser. You can dive deeper into the specifics of how to secure furniture to the wall in our comprehensive guide. At the end of the day, this project is about creating a fundamentally safer space for everyone who lives in or visits your home.
Think of anchoring your dresser not as an optional chore, but as a critical part of childproofing. Shifting your mindset to see this as an essential safety action is the first step toward protecting your family.
The growing awareness around this issue is reflected in the demand for better safety hardware. The market for construction anchors is booming, driven by a renewed focus on structural safety in everything from new construction to simple home upgrades.
In fact, the global market for these fasteners was valued at approximately USD 3.01 billion in 2023 and is expected to keep climbing. You can read more about this trend in market research reports on construction anchor industry growth. This data just goes to show how seriously people are taking the need for strong, reliable connections between our furniture and our walls.

Here’s a truth I’ve learned from countless home projects: using the wrong hardware to anchor a dresser to the wall is just as dangerous as not anchoring it at all. The anti-tip kit that came with your furniture is a good starting point, but it's only as strong as its connection to your wall. A screw that bites firmly into a wood stud will rip out of drywall with the slightest tug.
Your first job is to figure out what your walls are actually made of. The most common residential walls are drywall, plaster, and sometimes masonry like brick or concrete. A quick knock test usually gives it away. Drywall has a distinct hollow sound between the studs, while older plaster walls feel much more solid and make a dull thud.
Once you’ve identified your wall type, you can pick an anchor that will create a rock-solid connection. It’s like picking the right tires for your car—what works perfectly on a dry highway is useless in deep snow.
For Drywall: If you're not lucky enough to hit a wood stud, you'll need a good hollow-wall anchor. My go-to options are toggle bolts or snap-toggles. These are fantastic because they pop open behind the drywall, spreading the force over a much larger area. This makes for an incredibly secure hold.
For Plaster: Homes with traditional plaster and lath walls can be a real challenge. Those little plastic anchors you have lying around? They’ll probably fail. A heavy-duty toggle bolt is almost always your most reliable bet for plaster.
For Masonry: Attaching anything to brick or concrete requires a completely different strategy. For these dense materials, you’ll need specific masonry sleeves or screws that are engineered to grip securely without crumbling the surrounding area.
The whole point here is to create a connection that can handle serious force. An anchor isn't just a placeholder; it's a safety device engineered to hold strong against a child pulling or climbing on the furniture.
Choosing the right anchor for your wall can feel overwhelming, but it's the most critical decision you'll make in this process. To simplify things, I've put together a quick guide comparing the most common options.
| Anchor Type | Best For Wall Type | How It Works | Holding Strength |
|---|---|---|---|
| Expansion Anchor (Plastic) | Drywall (light duty) | Expands inside the hole as a screw is driven in. | Low to Medium |
| Toggle Bolt | Drywall, Plaster | A spring-loaded "wing" opens behind the wall for a wide grip. | High |
| Snap-Toggle | Drywall, Plaster | A modern, easier-to-use version of a toggle bolt. | Very High |
| Sleeve Anchor | Concrete, Brick, Block | The sleeve expands against the masonry as the bolt is tightened. | Very High |
This table should give you a clear picture of what will work best for your home. Taking a moment to match the anchor to the wall is what separates a truly secure dresser from one that just looks secure.
For masonry, you might hear pros talk about chemical anchors, which use an industrial-grade resin to create an unbreakable bond. These are typically overkill for a dresser but are so effective that they hold a 45.4% share of the specialized anchor market. If you're curious, you can read more about their applications and market strength on Market Data Forecast. It really shows how vital a powerful bond is for safety.
For our purposes, though, a quality mechanical anchor is all you need. A quick wall check and the right hardware choice will ensure your dresser stays put, giving you priceless peace of mind.
Like any good project, this one starts with getting all your ducks in a row. Taking a few minutes to gather your tools now means you won't be scrambling for something mid-task. It's not just about having a drill; it’s about having the right gear to create a rock-solid, professional-looking finish.
A quality stud finder is your best friend here. Sure, you can knock on the wall and listen for the sound change, but an electronic stud finder takes out all the guesswork. It ensures you’re drilling straight into a solid wood stud, which is exactly what you want for maximum holding power. Honestly, it’s the best insurance policy for this kind of job.
Before you even think about moving the dresser into place, make sure you have these items handy:
A little tip from experience: Keep a small handheld vacuum or just a dustpan and brush nearby. Drilling into drywall kicks up a surprising amount of dust, and cleaning as you go keeps the mess contained.
Most new furniture, especially the flat-pack kind, will come with its own anti-tip kit. If you're working with a new piece, our guide to https://assemblysmart.com/ikea-furniture-assembly/ can give you some great context on the hardware you'll find. These kits usually contain everything for a basic install, including brackets, straps, and screws.
Alright, you've got your tools laid out, and you're ready to get this done. This is the part where we move from planning to action, making sure that dresser stays put for good. Taking your time here is key—a careful, steady hand now means you can have total confidence in a rock-solid installation later.
The absolute first thing you need to do is find the wall studs. Grab your electronic stud finder and glide it along the wall right where your dresser will live. When it beeps, mark the edges of the stud with a pencil. If you have a wide dresser, finding and marking two studs is even better. This is the non-negotiable part; screwing directly into the solid wood frame of your wall is what gives the anchor its strength. Drywall alone won't cut it.
Now that you know where your stud is, it's time to mark your anchor points. I've seen people make the mistake of placing the anchor too low, which reduces its effectiveness. For the best leverage against any tipping, you want to install the wall bracket just below the top edge of the dresser. This keeps it strong and completely out of sight.
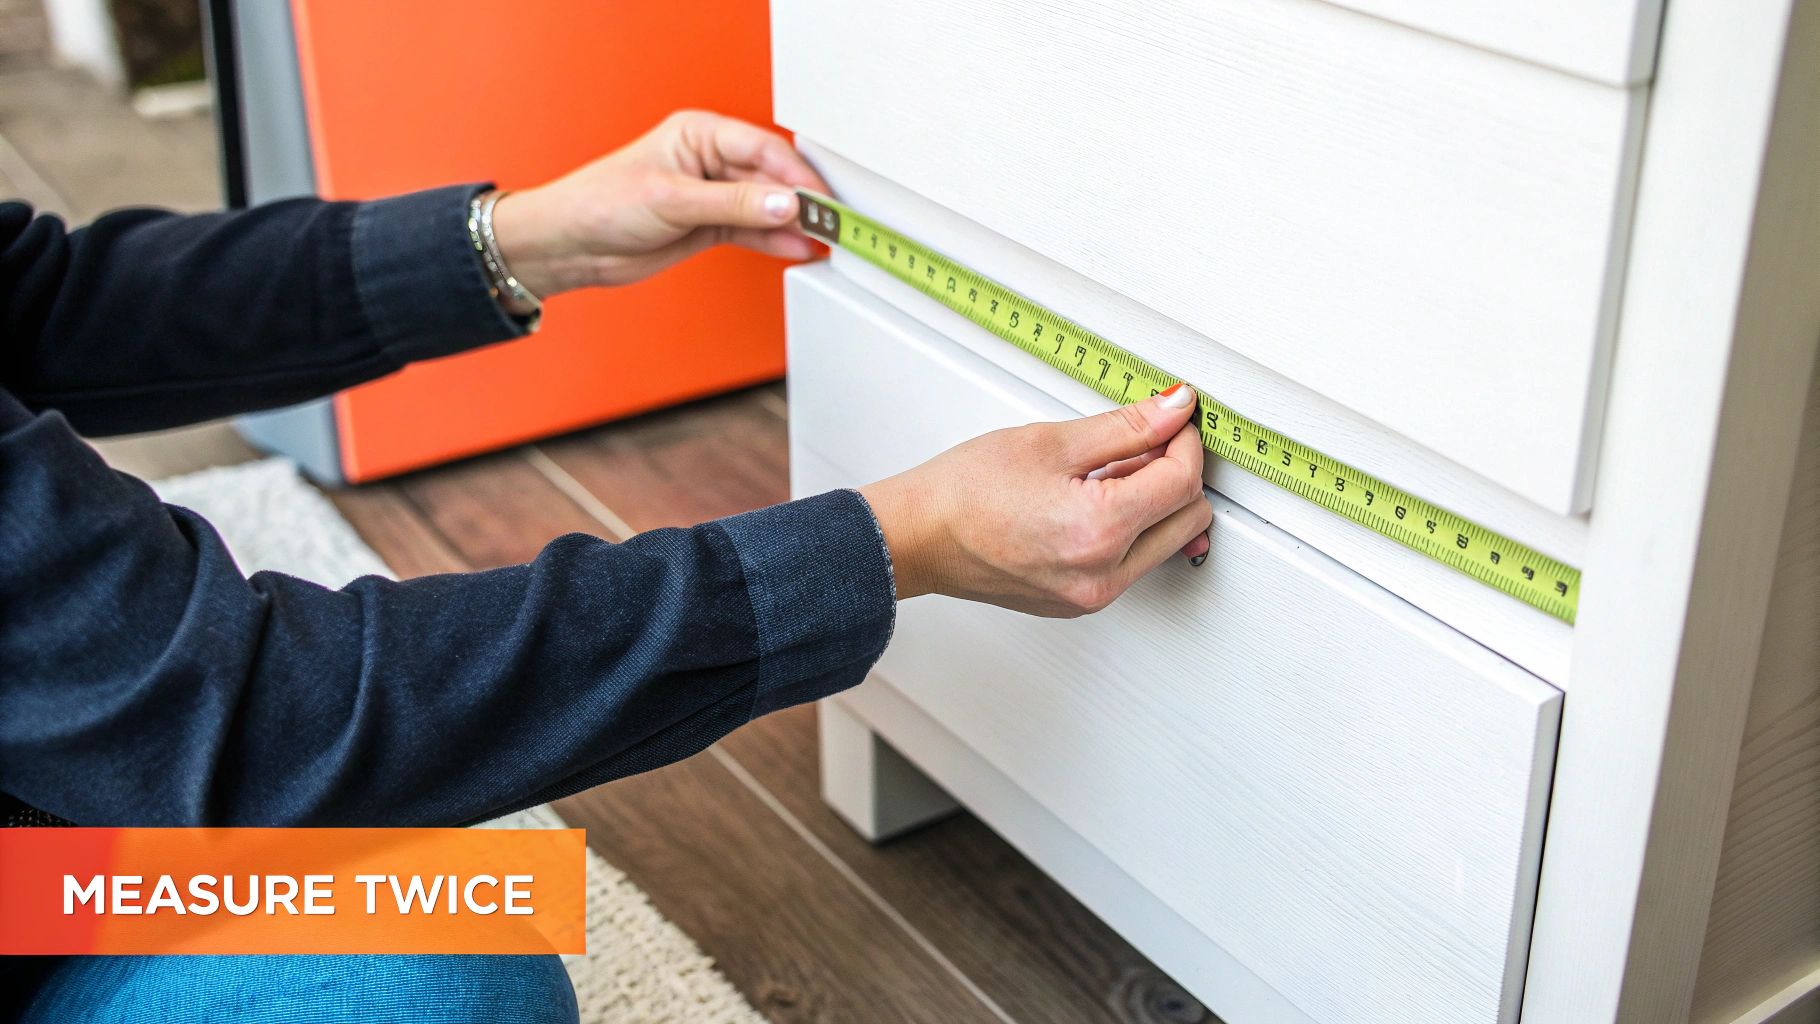
Hold one of the brackets against the wall, centered over your stud mark, and use your pencil to mark the screw hole. Next, pull out your tape measure and get the distance from the floor up to that pencil mark. Now, go to the back of your dresser and transfer that exact measurement, making a mark where the other bracket will go. The idea is to get the strap that connects them as level as possible.
My Two Cents: Always double-check your measurements before you drill. It's a heck of a lot easier to erase a pencil mark than it is to patch and paint a misplaced hole. Using a level to confirm your marks on both the wall and the dresser are aligned is a great pro-move.
Once you're confident in your marks, drill pilot holes. You'll need one in the wall stud and one on the back panel of the dresser. A pilot hole should be just a bit smaller than the diameter of your screw. This little step makes a huge difference—it keeps the wood from splitting and lets the screw drive in smoothly and securely.
Here’s a great visual that breaks down the process.
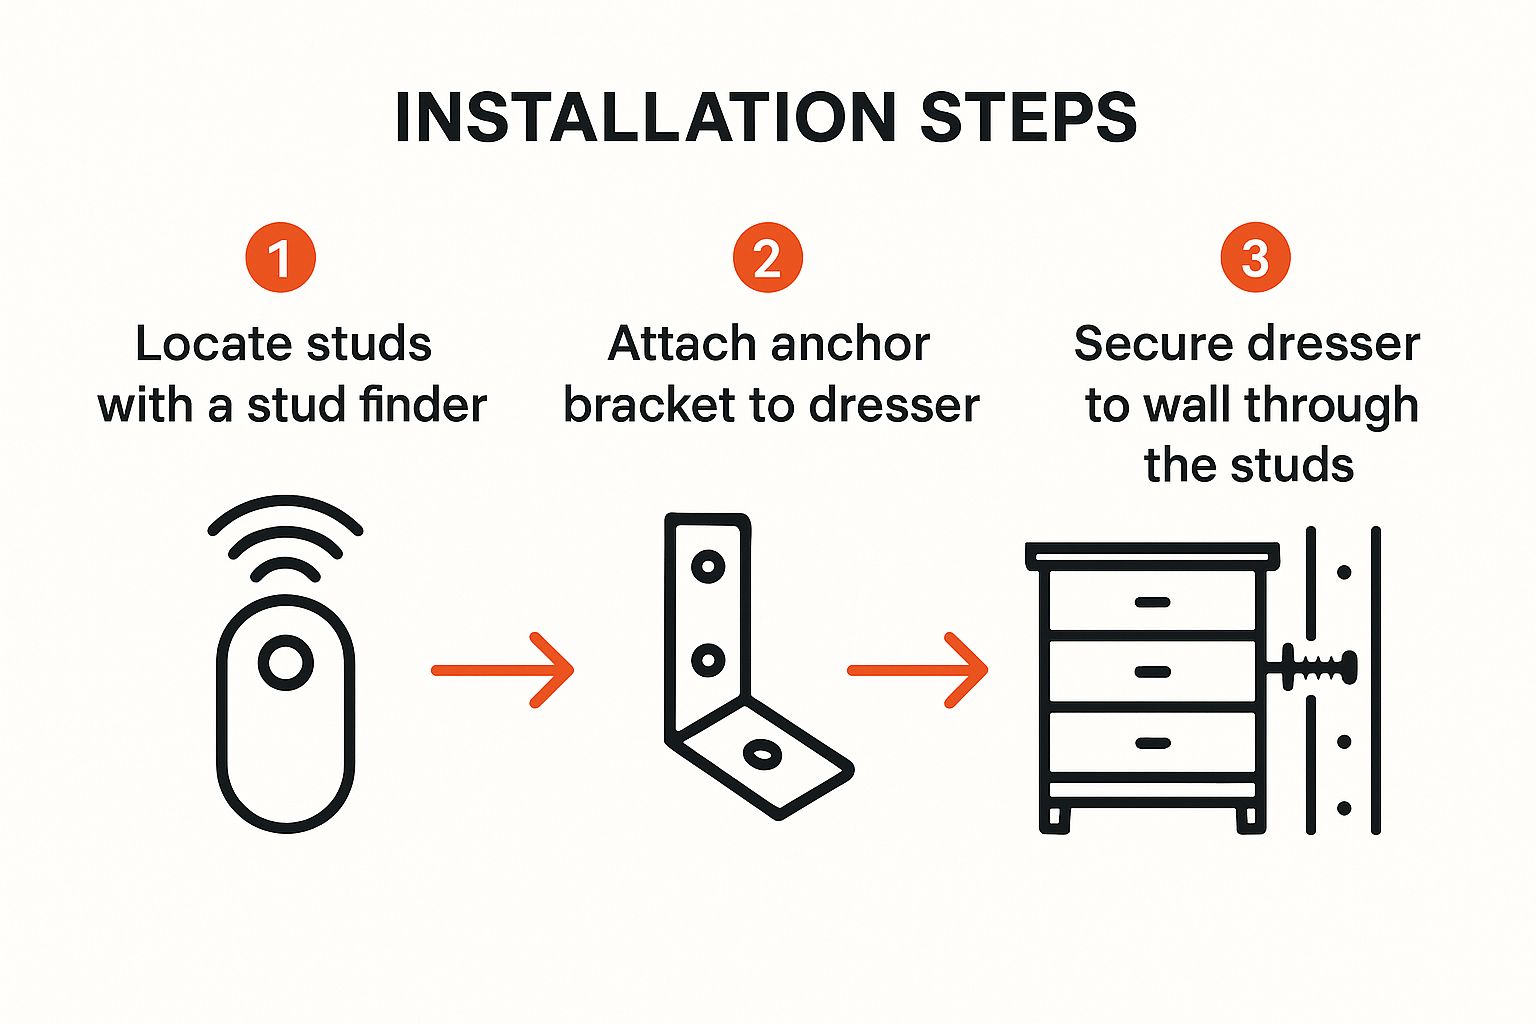
As you can see, the real security comes from that direct connection between the furniture and the wall's internal frame.
With your pilot holes drilled, it's time to attach the brackets. Go ahead and screw one bracket firmly onto the back of the dresser and the other right into the wall stud.
Now, thread the security strap or zip-tie through both brackets. Pull it as tight as you can. You want to get rid of almost all the slack. If the strap is loose, the dresser could still tilt and build up momentum, which completely defeats the purpose of anchoring it in the first place.
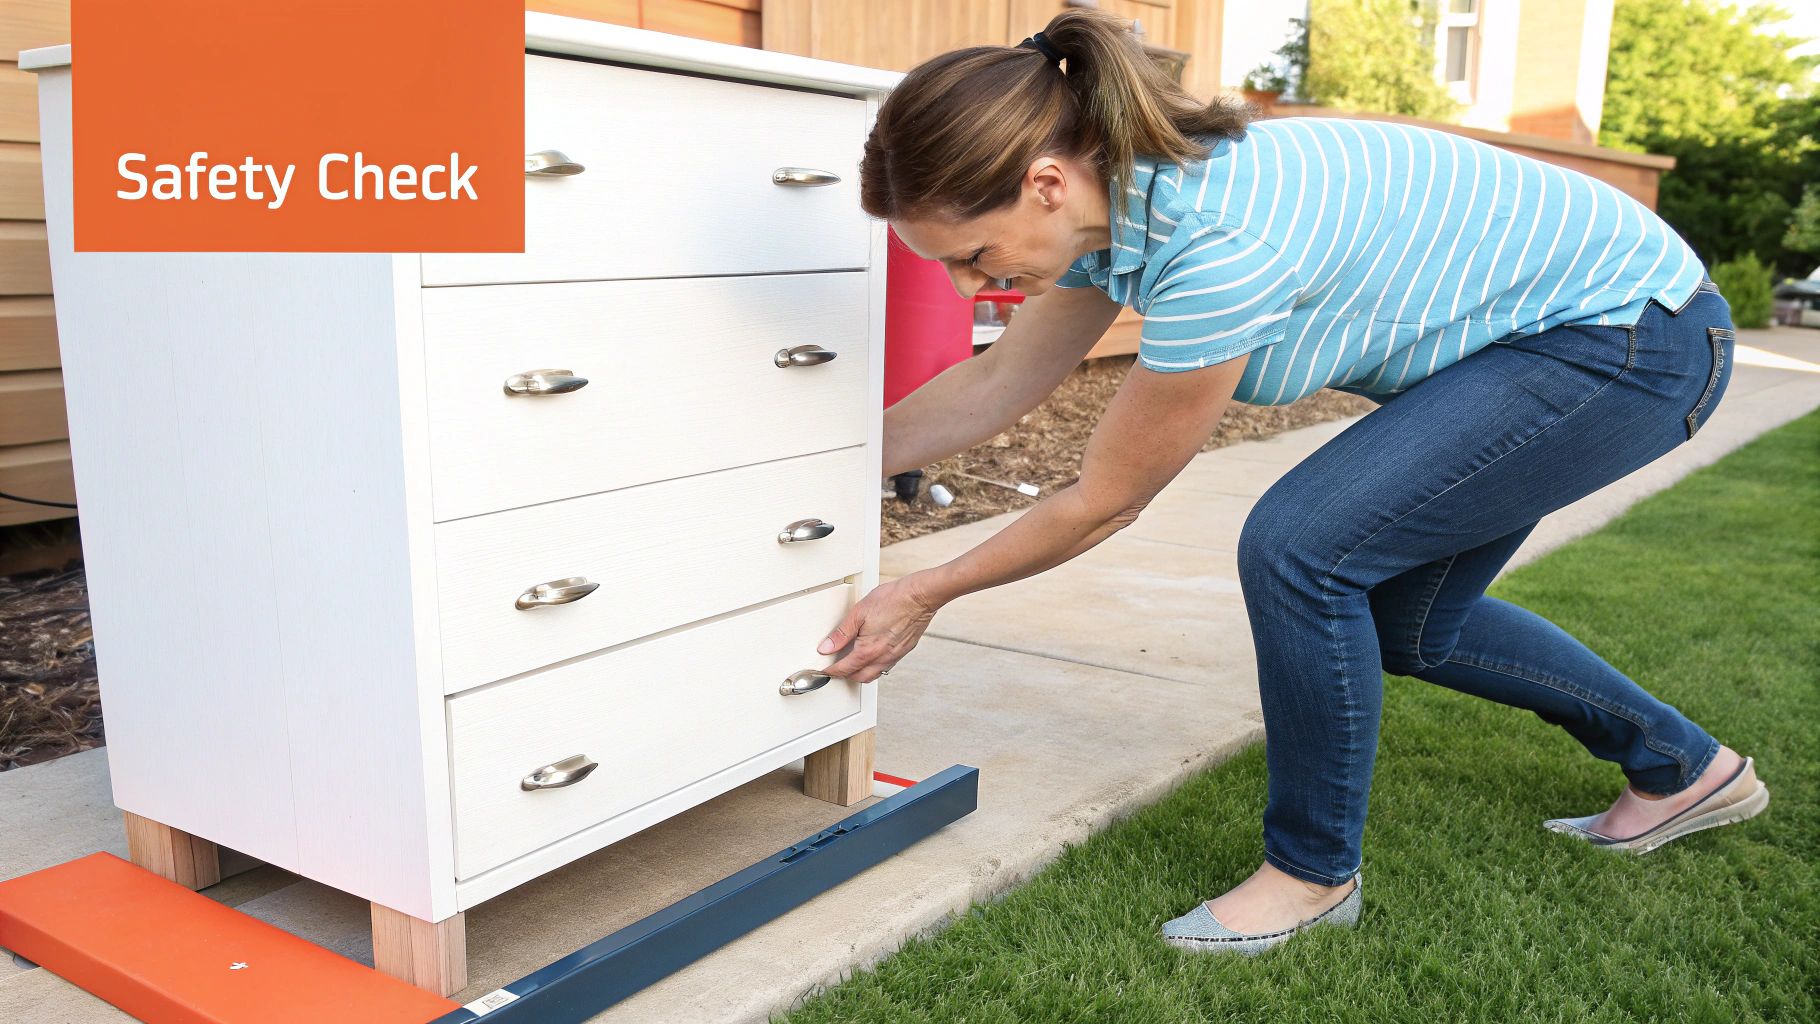
After everything is tightened up, give the dresser a solid tug. Try to rock it back and forth. It shouldn't move at all. If it feels solid, you're officially done.
If this all feels like a bit much or you're just not the DIY type, there's no shame in calling in a pro. You can get https://assemblysmart.com/furniture-assembly-help/ to make sure the job is done perfectly. And if this project has you inspired for more, check out these DIY tips for installing building hardware for other home projects.
When you anchor a dresser to a wall, getting the small details right is what gives you real security, not just a false sense of it. Over the years, I've seen a few common missteps that can unfortunately compromise the entire setup. Let's make sure your hard work actually keeps your family safe.
The most frequent error I see? Using screws that are too short. The screw that comes in the kit has a big job to do. It needs to go through the bracket, punch through the drywall, and then sink at least one full inch into the solid wood stud behind it. A screw that just grabs the drywall is giving you practically zero protection.
Another easy mistake is leaving too much slack in the strap or zip-tie. You want the back of the dresser sitting as flush against the wall as you can get it.
The whole point is to stop the dresser from tilting forward. Even an inch of slack can let the furniture gain enough momentum to become a hazard, completely defeating the purpose of the anchor.
Properly securing furniture isn't just a DIY task; it's a critical part of home safety. The market for systems that attach things to walls is massive for a reason. In fact, the global facade anchor systems market, which includes hardware for securing everything from building panels to furniture, was valued at an estimated $156.86 billion in 2023, a number driven by strict safety rules. You can dig into the market insights for these safety systems on EIN Presswire to see just how important this is.
Even with the best hardware, where you place it matters. Attaching the anchor too low on the back of the dresser just doesn't give you enough leverage to stop a tip-over. For the best stability, you want to mount those anchors as high as you can without them peeking over the top.
Finally, never, ever trust drywall alone to hold a heavy piece of furniture. That's a disaster waiting to happen. Here’s a quick rundown of what not to do:
Steering clear of these simple mistakes is the key to ensuring your dresser stays put, giving you true peace of mind.
After walking through the how-to, a few common questions always pop up. I get it—every home is different, and real-world situations rarely match the instruction manual perfectly. Let's tackle some of those lingering "what-if" scenarios so you can get this done right.
One of the biggest hang-ups I see is when there isn't a wall stud right where you need to attach the bracket. Don't be tempted to just drive a screw into the drywall and call it a day. It won't hold.
Instead, you'll want to use a heavy-duty hollow-wall anchor. My go-to is a snap-toggle bolt. These are absolute lifesavers because they expand behind the drywall, creating a very secure anchor point that can handle significant force.
Another classic problem is baseboard molding. It creates a gap between your dresser and the wall, preventing the safety bracket from sitting flush. The solution is surprisingly simple: use a small block of wood as a spacer. Just cut a piece to fit the gap, place it behind the bracket, and screw through both the bracket and the block into the wall. This ensures a solid connection.
So, how many anchors are enough for a really long dresser?
My rule of thumb is to install one anti-tip kit for every 30 inches of your dresser’s width. For bigger pieces, you really need to distribute that stability across multiple points.
A final thought: even if you don't have kids, anchoring your furniture is still a smart move. An unexpected earthquake, a clumsy bump while cleaning, or even just uneven floors can lead to a dangerous tip-over. It's a simple precaution for any household. For more answers to common concerns, check out the detailed information in our frequently asked questions section.
Don't have the time or tools for the job? Let Assembly Smart handle it for you. We provide professional, reliable furniture assembly and anchoring to ensure your home is safe and secure. Get your free estimate today.
