-
CALL US:
- (866) 952-3456
Tackling a gutter installation yourself is a big but totally manageable project. I've seen countless homeowners do it successfully. The whole process really boils down to four key stages: getting your tools and materials together, carefully plotting the slope, cutting and putting the gutter system together, and finally, attaching the downspouts. If you plan it out right and have the right gear, you'll end up with a professional-looking system that'll protect your home for years to come.

A good gutter job starts well before you ever step on a ladder. Getting all your tools and components lined up first is the secret to avoiding those annoying mid-project runs to the hardware store. Trust me, it makes the whole process smoother and safer. It’s all about setting yourself up for success from the get-go.
You’ve probably got some of the basics in your garage, but gutter work has its own set of must-haves. Before you start, make sure you have these tools ready to go:
The material you select for your gutters has a big impact on everything from the upfront cost and long-term durability to the overall look of your home. It’s worth spending a little time thinking about the best fit for your needs.
Here's a breakdown of the most common options to help you decide.
| Material | Average Cost (Per Foot) | Lifespan | Pros | Cons |
|---|---|---|---|---|
| Vinyl | $3 – $6 | 20+ years | Inexpensive, DIY-friendly, won't rust or corrode. | Can become brittle in extreme cold, limited color options. |
| Aluminum | $6 – $12 | 20-30 years | Lightweight, rust-proof, comes in many colors. | Can be dented by ladders or hail. |
| Steel | $9 – $20 | 20+ years | Very strong, holds up well in harsh weather. | Can rust if scratched, very heavy. |
| Copper | $25 – $40+ | 50+ years | Extremely durable, develops a beautiful patina, very high-end look. | Very expensive, requires professional installation. |
While premium materials like copper look fantastic, most homeowners find that aluminum or vinyl offers the best combination of performance, affordability, and ease of installation for a DIY project.
My Two Cents: Before you buy a single piece of gutter, do a thorough check of your fascia boards—that's the long board running right under the edge of your roof. If you find any rot or damage, you absolutely must replace it first. Your new gutters need a solid, sound surface to attach to, or you're just asking for trouble down the road.
It’s no surprise that the global gutter installation market is valued at an estimated USD 4.5 billion in 2024. That number just shows how vital a proper gutter system is for protecting a home from costly water damage.
Well-installed gutters are your first line of defense against foundation problems, landscape erosion, and a wet basement. If you're tackling other home projects that need the same kind of careful assembly, you might find some helpful advice on the Assembly Smart blog.
Your choice of material really matters here. Aluminum is a go-to for a reason: it's light, won't rust, and can easily last 20-30 years when you keep it clean. Vinyl is even friendlier on the wallet and is completely immune to corrosion, which makes it a great pick if you live in a coastal area with salty air.
Getting the slope right is probably the single most important part of any gutter installation. Get it wrong, and you've basically just installed a long, metal planter box that collects leaves and stagnant water. The whole idea is to create a subtle, consistent pitch that lets gravity do all the work, pulling rainwater smoothly toward your downspouts.
This all starts with figuring out the high and low points for each gutter run. Your high point will always be the end furthest from the downspout, and the low point is, naturally, where the water needs to exit. It’s this slight but critical angle that keeps water from pooling, overflowing, and causing all sorts of headaches.
The rule of thumb I’ve always followed is a 1/4-inch drop for every 10 feet of gutter. It’s the industry standard for a reason. So, if you're working with a 40-foot run, the downspout end needs to be a full inch lower than the high end. It might not sound like much, but it's the sweet spot for moving water efficiently without making the gutters look obviously crooked from the ground.
A chalk line is your best friend here. Here's how to mark the slope:
A Pro's Insight: If you're dealing with a really long run—anything over 40 feet—don't try to slope it all in one direction. The best practice is to pitch the gutter down from the middle, with a downspout at each end. Just find the center of the run, mark that as your high point, and then slope both sides down to their respective downspouts.
Thinking about where to put your downspouts is just as crucial as getting the slope right. You’re trying to move a massive amount of water away from the most vulnerable part of your house: the foundation. You have to consider where that water will go once it hits the ground. Make sure you aren't dumping it all onto a walkway, a patio, or right into the flower bed sitting against the foundation wall.
This kind of careful water management is a big reason the gutter installation market is growing so quickly—it's forecasted to hit nearly USD 2.00 billion by 2033. More and more homeowners are realizing that good gutters are cheap insurance against foundation damage and soil erosion.
To really get the most out of your efforts, it helps to think bigger. Your gutters are just one piece of the puzzle. Understanding how they fit into comprehensive storm water management systems can help you create a truly effective drainage plan for your entire property, not just what's happening at the roofline.
Alright, your sloped guideline is snapped and ready on the fascia board. This is where the project shifts from planning to hands-on building. Let's get these gutters cut and connected. Taking your time here is the key to getting those clean, professional lines and, most importantly, leak-proof seams.
The image below gives you a great overview of the measuring and mapping work that got you to this point.
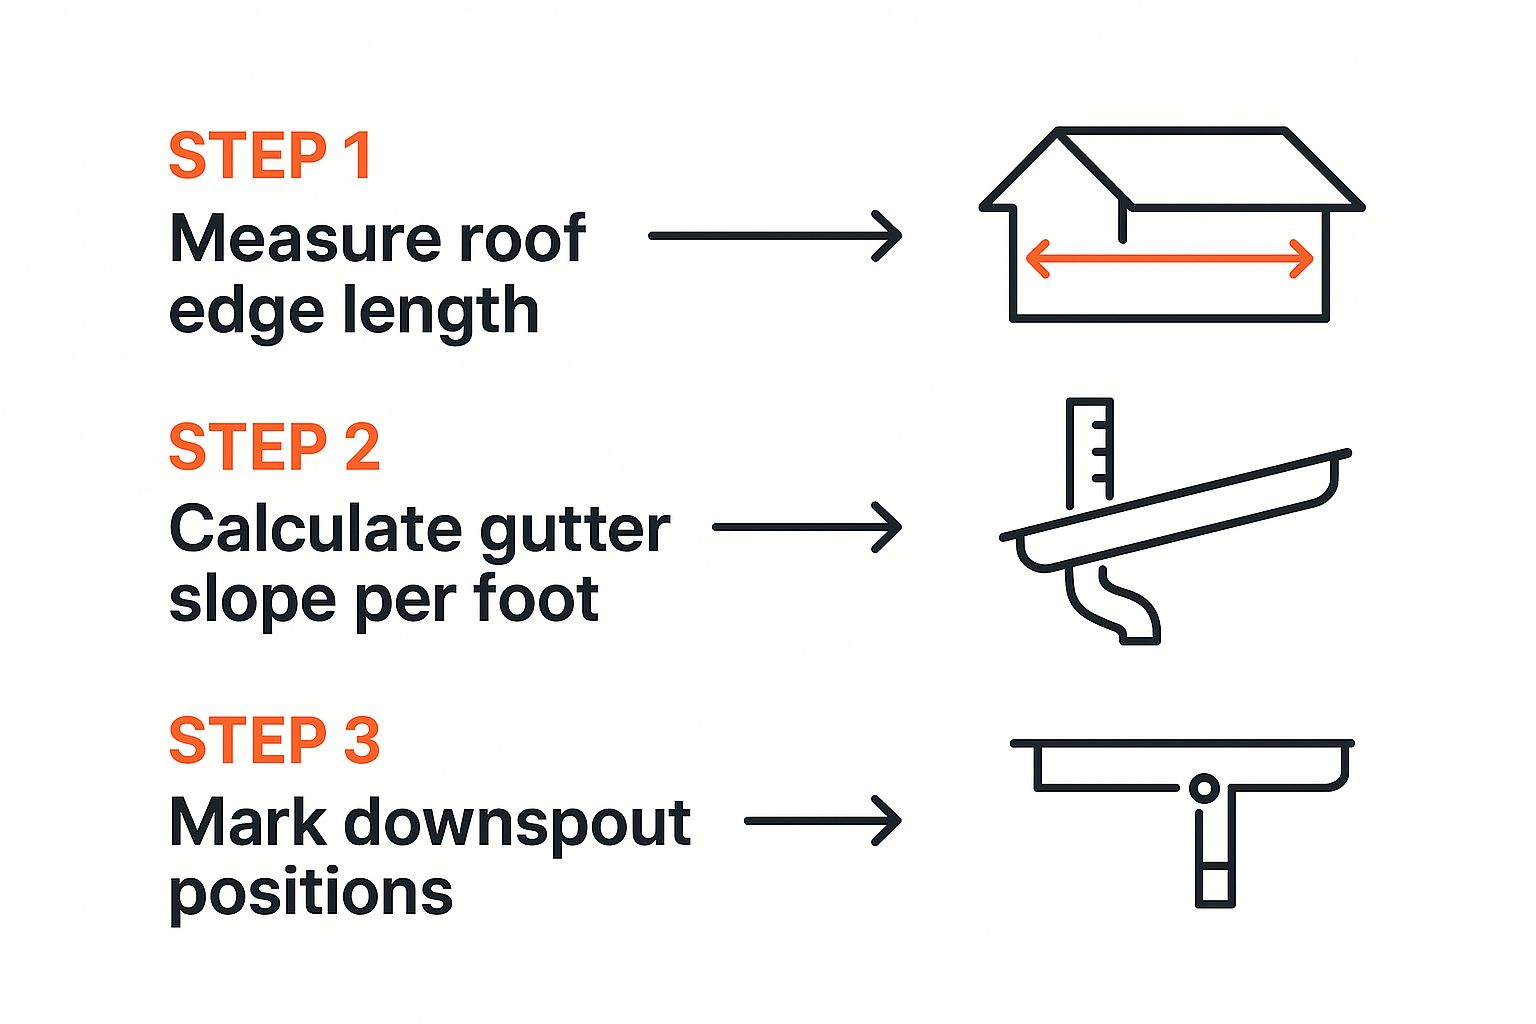
As you can see, getting the measurements and slope right is the foundation of the entire job. It dictates exactly where you'll make every cut and join every section.
First up, you need to cut your gutter sections to length. A good pair of tin snips will do the trick, but I often prefer a hacksaw with a fine-tooth blade. Here’s a little trick I've picked up: for the straightest, cleanest cut with a hacksaw, flip the gutter section upside down and cut through the back side first.
No matter how you cut it, you’ll end up with some small metal burrs on the edge. You absolutely have to file these down until they're smooth. It’s not just about looks; a smooth edge allows the sections to fit together perfectly, giving the sealant a much better surface to grab onto.
Crucial Tip: When joining two gutter sections, overlap them by at least 3 inches. The key is to make sure the "uphill" piece tucks inside the "downhill" piece. This simple detail forces water to flow right over the seam instead of into it.
Once the pieces are overlapped correctly, drill a couple of small pilot holes through both layers and fasten them with pop rivets. This creates a solid mechanical joint that holds everything tight before you even think about sealant.
This is the moment of truth for preventing leaks. You'll need a high-quality, weatherproof gutter sealant designed for this specific job. Apply a generous bead of it along the entire inside of the seam. Don't be shy with it. Then, use a small putty knife or even a gloved finger to smooth the bead out, pushing it firmly into every little gap in the overlap.
Don’t cut corners here. I've seen it a hundred times: the aluminum gutter itself can last for 20-30 years, but the seams fail because the sealant wasn't applied properly. A good, thorough seal is your best insurance policy against drips down the road.
Before you haul anything up the ladder, get your hangers in place. These are the brackets that secure the gutter to the fascia. While older homes might have spikes, most modern systems use hidden hangers that clip neatly inside the gutter for a much cleaner look.
Attach a hanger every 24 to 30 inches along the chalk line you snapped earlier. Drive the screws directly into the solid wood of the fascia board.
This strategy dramatically reduces your time spent balancing on a ladder and is just plain safer. Think of it like putting together furniture—you build the drawers before trying to shove them into the cabinet frame. The same logic applies here, and it's a principle we also emphasize in our guides for things like IKEA furniture assembly.
Now, grab a friend to help you lift the long, assembled section, hoist it up, and simply clip it into the hangers you already installed.

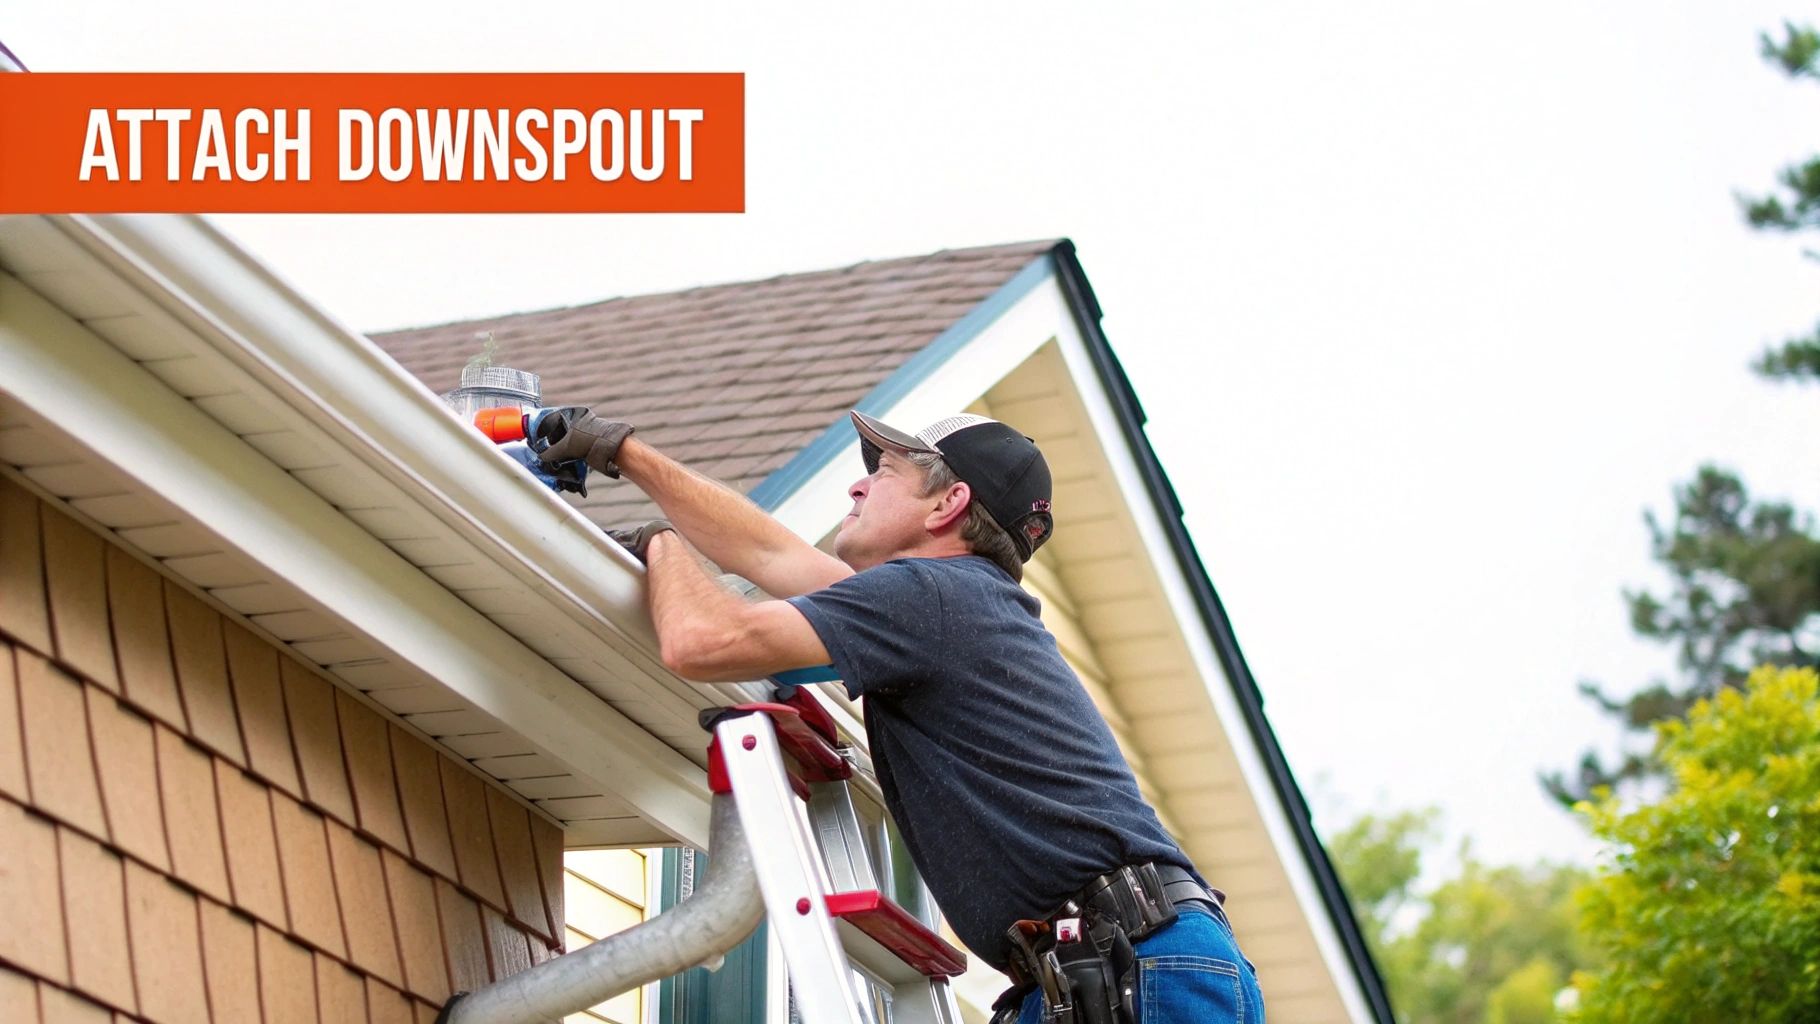
Alright, your main gutter runs are up and looking good. Now for the most important part: giving all that water a safe path away from your house. Your downspouts are the real workhorses of the system, responsible for channeling thousands of gallons away from your foundation every single year. Getting this final step right is what makes the whole project a success.
This part of the job is all about making a few precise cuts and assembling the pieces correctly. I like to think of it as plumbing for the exterior of your home. Every connection needs to be tight, and every angle needs to be just right to keep things flowing smoothly.
First things first, you need to make an opening in the gutter for the water to exit. This is often the cut that makes people nervous, but trust me, it’s not as daunting as it seems. Just place your downspout outlet (sometimes called a drop outlet) on the bottom of the gutter exactly where you plan to install it. Then, trace the inside of it with a marker.
With the outline marked, you can cut the hole using tin snips or a hole-saw bit on your drill. If you're using snips, a handy trick is to drill a small pilot hole right in the center of your traced area. This gives you a perfect starting point for your snips to bite into.
After the hole is cut, lay down a generous bead of gutter sealant around the flange of the outlet. Press it firmly into place from the outside, then pop-rivet or screw it securely through the sides of the gutter. This combination of sealant and fasteners creates a watertight seal that's built to last.
My Personal Tip: Don't rely on sealant alone to do the job. I always use at least four pop rivets to fasten the drop outlet. It creates a solid mechanical bond that won’t get pulled apart by heavy water flow or shifting from hot and cold weather.
Now it’s time to bridge the gap from the gutter to the wall. This almost always involves getting around the soffit and fascia, which is where elbows become your best friend. To make the classic "S" shape, you'll typically need two of them.
Before you join the pieces, use your crimper on the top end of each downspout section. This lets it slide snugly into the piece above it, ensuring water flows inside the connection, not outside. Secure each joint with a couple of pop rivets or short sheet-metal screws.
Once your elbow assembly is built, you can start adding the long, vertical sections of the downspout. Use downspout straps or brackets to anchor it firmly to the siding. I always put one strap near the top and one near the bottom, then space the others every 6 to 8 feet in between for solid support.
The final, crucial detail is where the water ends up. Make sure your downspout terminates at least 4 to 6 feet from your foundation. You can do this by adding another elbow and a horizontal extension at the bottom, or by simply placing a splash block underneath. Skipping this step is a common mistake that can lead to serious soil erosion and a wet basement.
Even the most meticulous DIYer can run into a problem. When you're figuring out how to hang gutters, a few hiccups are just part of the job. The trick isn't to avoid them entirely—it's to know what to do when they pop up so you don't get sidetracked.
One of the first things that can throw a wrench in your plans is a bad fascia board. This is the board your gutters mount to, and if it's warped or rotted, you have to deal with it first. You can't just slap a new gutter on there. For a slight bow, you might get away with slipping some shims behind the gutter hangers to keep things straight. But if you poke the wood and find soft, spongy spots? Stop what you're doing. That section of fascia needs to be replaced. Hanging a gutter full of heavy water on rotten wood is just asking for it to come crashing down.
It’s the moment every DIYer dreads: you make your cut, and the gutter section is just a hair too short. Don't throw the piece away. The simplest solution is a slip joint connector. These little pieces are made specifically to join two sections and cover small gaps. It’s a clean, sealed fix that saves you the cost and frustration of cutting a whole new piece.
Another classic issue is finding a leaky seam after you thought you were done. This usually happens at the corners or where two straight pieces join. The fix requires a bit of prep. You’ll need to thoroughly clean the inside of the gutter around the leak, then rough up the surface with a wire brush so the new sealant can really grab on. Apply a generous bead of a good gutter sealant over the entire seam, making sure you get full coverage.
Here's a pro tip: A quick patch over a failed seam is just a temporary fix. For a repair that will actually last, take the time to scrape out as much of the old, failed sealant as you can before cleaning the area and applying the new stuff. It’s extra work, but it creates a much stronger bond.
What if your house doesn't have a fascia board to mount to? This is pretty common on older homes or certain architectural styles with exposed rafter tails. For this, you’ll need to buy special roof-strap hangers. These brackets screw directly onto your roof deck and then curve down over the edge, giving you a solid anchor point for the gutter.
Navigating tricky inside and outside corners can also feel like a major hurdle. The key here is to measure carefully and use pre-fabricated corner pieces. While a pro might miter-cut their own corners on-site, that requires specialized tools and a lot of practice. Using the manufactured corners from the gutter system gives you a perfect angle and makes getting a watertight seal way easier. For complex jobs, an extra pair of hands can make all the difference, much like when you need furniture assembly help for a big project.
It’s also worth noting that more intense weather patterns are changing how we think about gutters. There are more advanced systems available now, from seamless gutters to smart sensors that help manage drainage and cut down on maintenance. After your installation is complete, don’t pack up your ladder just yet. Always run a water test with a garden hose to check for any hidden leaks and make sure the water is flowing correctly toward the downspout. It’s the final, crucial step to a job well done.
Even with the clearest instructions, you're bound to run into a few questions once you're actually up on the ladder. It happens on every project. Getting a handle on some of these details beforehand can save you a lot of guesswork and prevent those common, frustrating setbacks.
Let's walk through some of the most frequent questions people have when they’re figuring out how to put up their own gutters.
The spacing for your gutter hangers is absolutely critical. This is what keeps your gutters from sagging or pulling away from the house under the immense weight of rainwater or heavy snow. Get this wrong, and you'll be fixing them sooner rather than later.
In most parts of the country, placing a hanger every 24 to 30 inches along the fascia board is the standard. This spacing provides plenty of support for typical rainfall.
However, if you live somewhere with rough winters, you need to adjust your strategy. For climates that see heavy snow and ice, I always advise spacing the hangers closer, about every 18 inches. That extra reinforcement gives the system the backbone it needs to handle the punishing weight of frozen precipitation without failing.
Your choice of sealant is what makes the difference between a leak-proof system and a drippy mess. You can't just grab any tube of caulk off the shelf; you need a product specifically designed to endure years of exposure to the elements.
The most important thing is to use a high-quality, weatherproof gutter sealant that's made for your specific gutter material.
Pro Tip: The best sealant in the world won't work on a dirty surface. Before you apply anything, give the seam area a good wipe with a cloth and some rubbing alcohol. This removes any grease or grime and helps the sealant form a rock-solid, lasting bond.
Technically, yes, but I would strongly advise against it. Gutter sections are long, often 10 feet or more, and they are surprisingly clumsy and flexible. Trying to manage that length while balancing on a ladder is a recipe for trouble.
Having a helper makes the entire job safer and far more efficient. A second set of hands is invaluable for lifting and positioning the long gutter runs, holding them steady while you attach them, and just passing tools back and forth. Going it alone dramatically increases the risk of dropping and damaging your new gutters, or worse, getting injured in a fall.
If the project feels too big to tackle, or if your roofline is particularly complex, calling in a pro is a smart move. In regions like Massachusetts, for example, you can find experienced professional gutter installation contractors to ensure the job is done right.
Have other questions about home projects? You might find the answer on our FAQ page.
Feeling drained after that big gutter project? If the thought of assembling that new patio set or office desk is too much, let Assembly Smart handle it. We provide quick, expert assembly for everything from IKEA furniture to swing sets. Visit us online and get your free estimate today.
