-
CALL US:
- (866) 952-3456
So, you've got the boxes for that brand-new swing set sitting in the garage, and the kids are practically vibrating with excitement. I get it. The temptation is to rip everything open and start building right away.
But trust me on this one—a little bit of prep work now will save you from a massive headache later. Think of it as the foundation of your project. A successful, safe, and frustration-free build starts long before you ever touch a wrench.
The whole reason you're doing this is to create a safe place for your kids to play. That means we have to get the setup right from the very beginning. And you're not alone in this project; the global market for children's outdoor swings hit about USD 5.23 billion in 2024 and it's only going up from there. It shows just how many families are investing in their backyards. You can get more insights on the growing children's outdoor swing market on OpenPR.com.
To make sure your investment pays off in fun, not frustration, let's walk through the prep work.
This is probably the single most important decision you'll make in the entire process. Don't just eyeball an open patch of grass and call it a day. You need to assess the area with a critical eye, focusing completely on safety.
Once you’ve locked in your location, it’s time to prep the ground itself. You’ll want to clear the entire area of any rocks, stumps, or big roots. Anything that could cause a trip or get in the way of anchoring the set has got to go.
This is also the perfect time to plan for your safety surfacing. This isn't an optional step; it's essential for cushioning the inevitable tumbles and falls.
Pro Tip: Never, ever install a swing set directly on top of concrete, asphalt, or even hard-packed dirt. A fall onto a surface like that can lead to serious injuries. You absolutely need to put down a protective material.
Good options include wood mulch (often called engineered wood fiber), rubber mulch, or even rubber mats. They all offer different levels of shock absorption, so pick the one that fits your budget and is rated for the height of your specific playset.
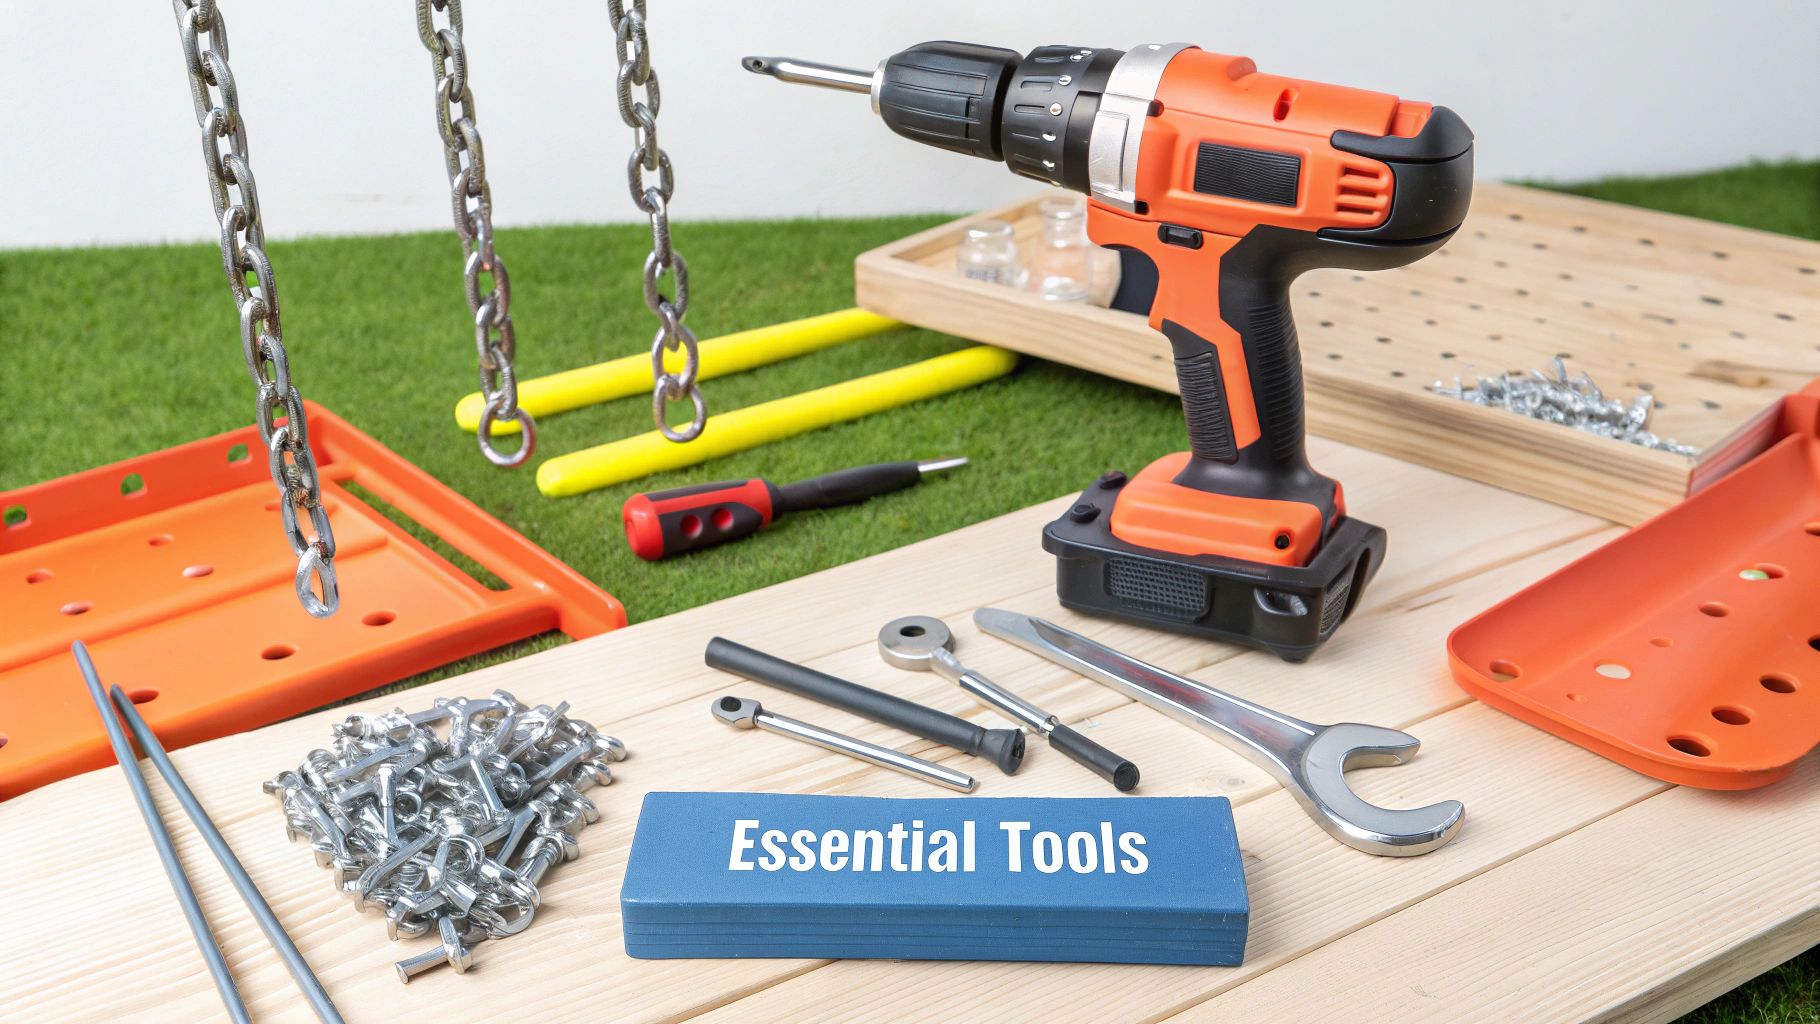
There is nothing worse than getting halfway through a build only to realize you’re missing a critical bracket or a specific type of bolt. It can stop your entire project in its tracks.
Before you start, lay out all the parts from the boxes. Grab the manual and meticulously check every single piece against the inventory list. I like to organize all the bolts, screws, and washers into labeled plastic containers or a muffin tin. It saves a ton of time searching for that one specific screw later on.
While the box might come with a couple of little Allen keys or a tiny wrench, using your own tools will make the whole process go so much smoother. Here’s what I recommend having on hand:
Okay, your site is prepped, the parts are all accounted for, and your tools are ready to go. Now you're truly prepared for a smooth build.
Before you even open the first box, running through a quick checklist can make all the difference. Think of it as your pre-flight inspection.
| Checklist Item | Why It Matters | Insider Tip |
|---|---|---|
| Confirm Level Ground | An unlevel base is the #1 cause of structural instability and safety issues. | Use a long carpenter's level (4ft or more) for an accurate reading. Don't just eyeball it. |
| Measure the Safety Zone | Ensures a 6-foot clearance on all sides, preventing collisions with obstacles. | Use yard flags or spray paint to mark out the perimeter before you start building. |
| Check for Overhead Obstructions | Prevents swings from hitting tree limbs, power lines, or roof eaves. | Look at the area from different angles and at different times of the day to spot potential issues. |
| Clear the Ground Surface | Removes tripping hazards like rocks, roots, or stumps from the play area. | Rake the area thoroughly and fill in any holes to create a smooth surface. |
| Perform a Full Parts Inventory | Catches any missing or damaged parts before you're deep into the assembly. | Sort hardware into labeled containers (old yogurt cups work great!) as you inventory. |
| Gather Proper Tools | The right tools make the job faster, easier, and prevent stripped bolts. | A socket set and a cordless impact driver with the correct bits are game-changers. |
| Review the Instruction Manual | Familiarizes you with the steps and helps you anticipate tricky parts. | Read it cover-to-cover once before you begin. Highlight or circle complex steps. |
Taking just 30-60 minutes to go through this game plan sets you up for a much smoother, safer, and more successful assembly day.

Alright, your site is prepped and the parts are laid out. Now for the real fun: building the heart of your playset. The core frame, which is usually an A-frame design, is the skeleton that has to support everything else. Getting this structure built correctly is absolutely non-negotiable for safety and stability.
I know that instruction manual can look like an engineering schematic, filled with diagrams and a dizzying number of lettered parts. Don't get overwhelmed. Just focus on identifying the main components first: the long top beam and the angled support legs. These are the biggest pieces you'll be dealing with and form the primary structure.
One of the most common mistakes I see is people building sections in the wrong order, which almost always forces you to backtrack and take things apart. It’s a huge waste of time and energy.
Most manuals will have you construct the A-frame leg assemblies first, usually by laying them flat on the ground. This typically involves connecting two of the angled legs with one or more cross braces. Once you have both A-frame ends built, you'll attach the main support beam across the top.
This step is a critical connection point, and I can't stress this enough: it almost always requires a second person. You need someone to lift and hold that heavy beam in place while you secure the hardware. Don't try to be a hero and do this alone. It's a classic recipe for injury or damaging the parts.
Crucial Technique: The Loose-Fit Method
As you attach the bolts, nuts, and washers, only tighten them until they're snug. Do not fully torque them down yet. This leaves a tiny bit of play in the joints, which makes it worlds easier to align all the subsequent pieces. You'll go back and tighten everything completely once the entire frame is assembled.
This small trick makes a massive difference in your swing sets assembly process. Trust me, it prevents that all-too-common frustration of trying to line up holes that are just a millimeter off. Trying to force a bolt through a misaligned hole can strip the threads or damage the wood, and that compromises the whole structure's integrity.
After you have the main frame loosely assembled, it’s time for the most important quality check of the entire build. You have to ensure it's perfectly level and square before you do the final tightening. A wobbly, unsafe swing set is almost always the result of a frame that wasn't leveled properly from the start.
Once your frame is perfectly level and square, you can finally begin the final tightening sequence. Work your way from one joint to another, making sure every single bolt is fully torqued according to the manual's specifications. Just be careful not to overtighten, as this can crack the wood or even damage the metal components.
Getting this foundational step right ensures the rest of your installation goes off without a hitch. Of course, for those who want to guarantee a perfect build without the headache, exploring professional swing set installation services can provide some serious peace of mind and a guaranteed safe setup for the kids.
Alright, the main frame is up, solid, and secure. Now for the best part—transforming that wooden skeleton into an actual playground by adding all the fun stuff. This is where the whole project really comes to life, but it's also where you need to be extra meticulous.
Every single attachment, from the swings to the slide, comes with its own specific hardware and set of rules. You absolutely have to follow the manufacturer's manual to the letter here. Don't even think about swapping a bolt meant for the slide with one for the swing hangers. They look similar, but they’re often engineered for completely different stress loads.
Hanging the swings seems simple enough, but getting the spacing just right is the secret to avoiding mid-air collisions. The manual will tell you the exact distance you need between each swing and from the swings to the support posts.
Nailing these little details is what prevents swings from knocking into each other during a frantic play session, which is a massive safety hazard you can easily avoid.
The slide is usually the heaviest piece you’ll attach, and it needs a rock-solid connection. It typically fastens at two key spots: the playset deck and the ground. That connection to the deck has to be immovable, so be sure to use every single bolt and bracket specified in the instructions.
Down at the bottom, make sure the slide has a level and safe landing zone. The end of the slide should rest flat on your prepared surface—not dug into the dirt or propped up on a block. This ensures a smooth landing and prevents putting weird stress on the plastic. It's no surprise these features are so popular; the global swing set market hit USD 365.34 million in 2023 and just keeps growing. You can actually see more about the economic trends in the swing set market on DataInsightsMarket.com.
A perfectly installed slide will have no side-to-side play at the top. If you can wiggle it, something's not tight enough. Go back and check those bolts. This one simple check is a fantastic indicator of a safe installation.
Other add-ons like rock walls or trapeze bars have their own unique needs. Rock wall holds need specific bolts to keep them from spinning under a child's weight, and trapeze bars require hangers that can handle rotational movement. Take your time here. Getting it right guarantees every part is ready for years of fun. While this is a rewarding part of the job, our comprehensive swing set assembly guide has even more detailed tips to help you master these final, crucial steps.
Let's talk about what I consider the single most overlooked step in building a swing set: anchoring. A lot of people see it as optional, especially when the playset feels heavy and solid after it's built. Trust me, that's a dangerous mistake. An unanchored set, no matter how much it weighs, can easily lift, shift, or even tip right over from the incredible momentum kids generate when they're really swinging high.
Anchoring isn't just a friendly suggestion; it’s the ultimate safeguard that locks your investment to the ground. It ensures the whole thing stays put during even the most energetic play sessions. Skipping this step puts the structure—and more importantly, your kids—at serious risk. Think of it like a seatbelt for your playset. You just don't use it without one.
This quick visual shows you the basic flow of assembly, with anchoring as that final, critical step before you let anyone on it.
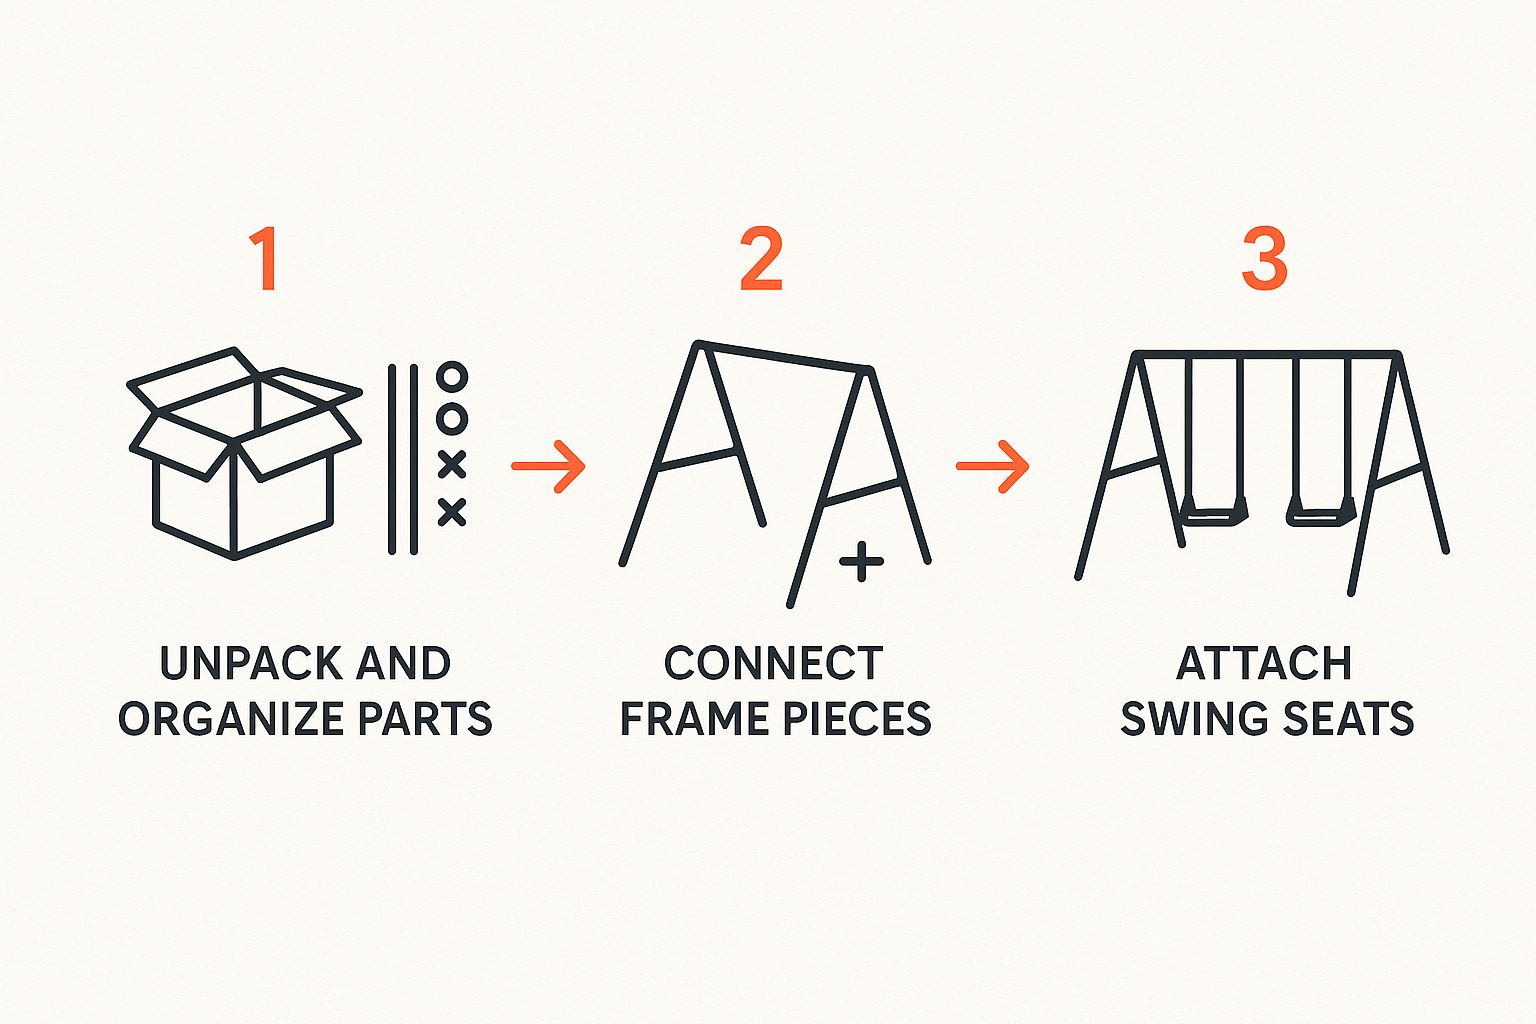
As you can see, assembly is a logical sequence, but that stability isn't truly complete until the structure is firmly secured to the ground.
The right anchor really depends on your ground conditions and the type of playset you're working with. Not all anchor kits are created equal, and I've seen firsthand how choosing the wrong one is nearly as bad as using none at all.
Anchoring is a non-negotiable safety requirement. The force from just two children swinging can be enough to lift the legs of an unanchored playset, creating an immediate tipping hazard.
Once you’ve got the right kit for your yard, proper installation is key. Don't just stick them in the ground anywhere; their exact position is what creates maximum stability.
First, attach the anchor bracket to the base of each playset leg, following the manual's directions. Then, get the leg positioned exactly where it's going to live permanently. When you drive the spiral stake or place the concrete anchor, do it at a slight outward angle, away from the playset. That angle is the secret sauce—it dramatically increases the holding power by working against the natural lifting motion.
For spiral stakes, a good tip is to use a strong bar or even a scrap piece of 2×4 through the anchor's eyelet. This gives you the leverage you need to twist it all the way into the ground. Make sure the top is flush with the ground so you don't create a new trip hazard.
For a deeper dive into all the specifics, our complete guide on swing set ground anchors has detailed instructions for every soil type and anchor style out there. Taking the time to do this right is the final, essential step to finishing the job safely.
Alright, the swing set is up and standing proud in your yard. But before you unleash the kids, hold on. The job isn’t quite finished. Now comes the most important step: one last, thorough safety inspection. This is your final chance to catch any potential hiccups before the real fun begins.
Think of it as your official safety walkthrough. I always tell people to start at one corner and work their way around the entire structure, methodically. Run your hands over every single piece of wood. You’re feeling for splinters or any sharp edges that could catch on clothing or, worse, skin. Give every bolt and screw a firm check to make sure it's tight; even one loose piece of hardware can compromise the whole setup.
This first check-up is the most detailed one you'll do, so take your time with it. You want to pay close attention to all the connection points and, especially, the moving parts.
Getting this done gives you that final peace of mind, knowing your hard work paid off in a safe and secure play area. For an even more detailed breakdown, our complete https://assemblysmart.com/swing-set-safety-guidelines/ covers every base imaginable.
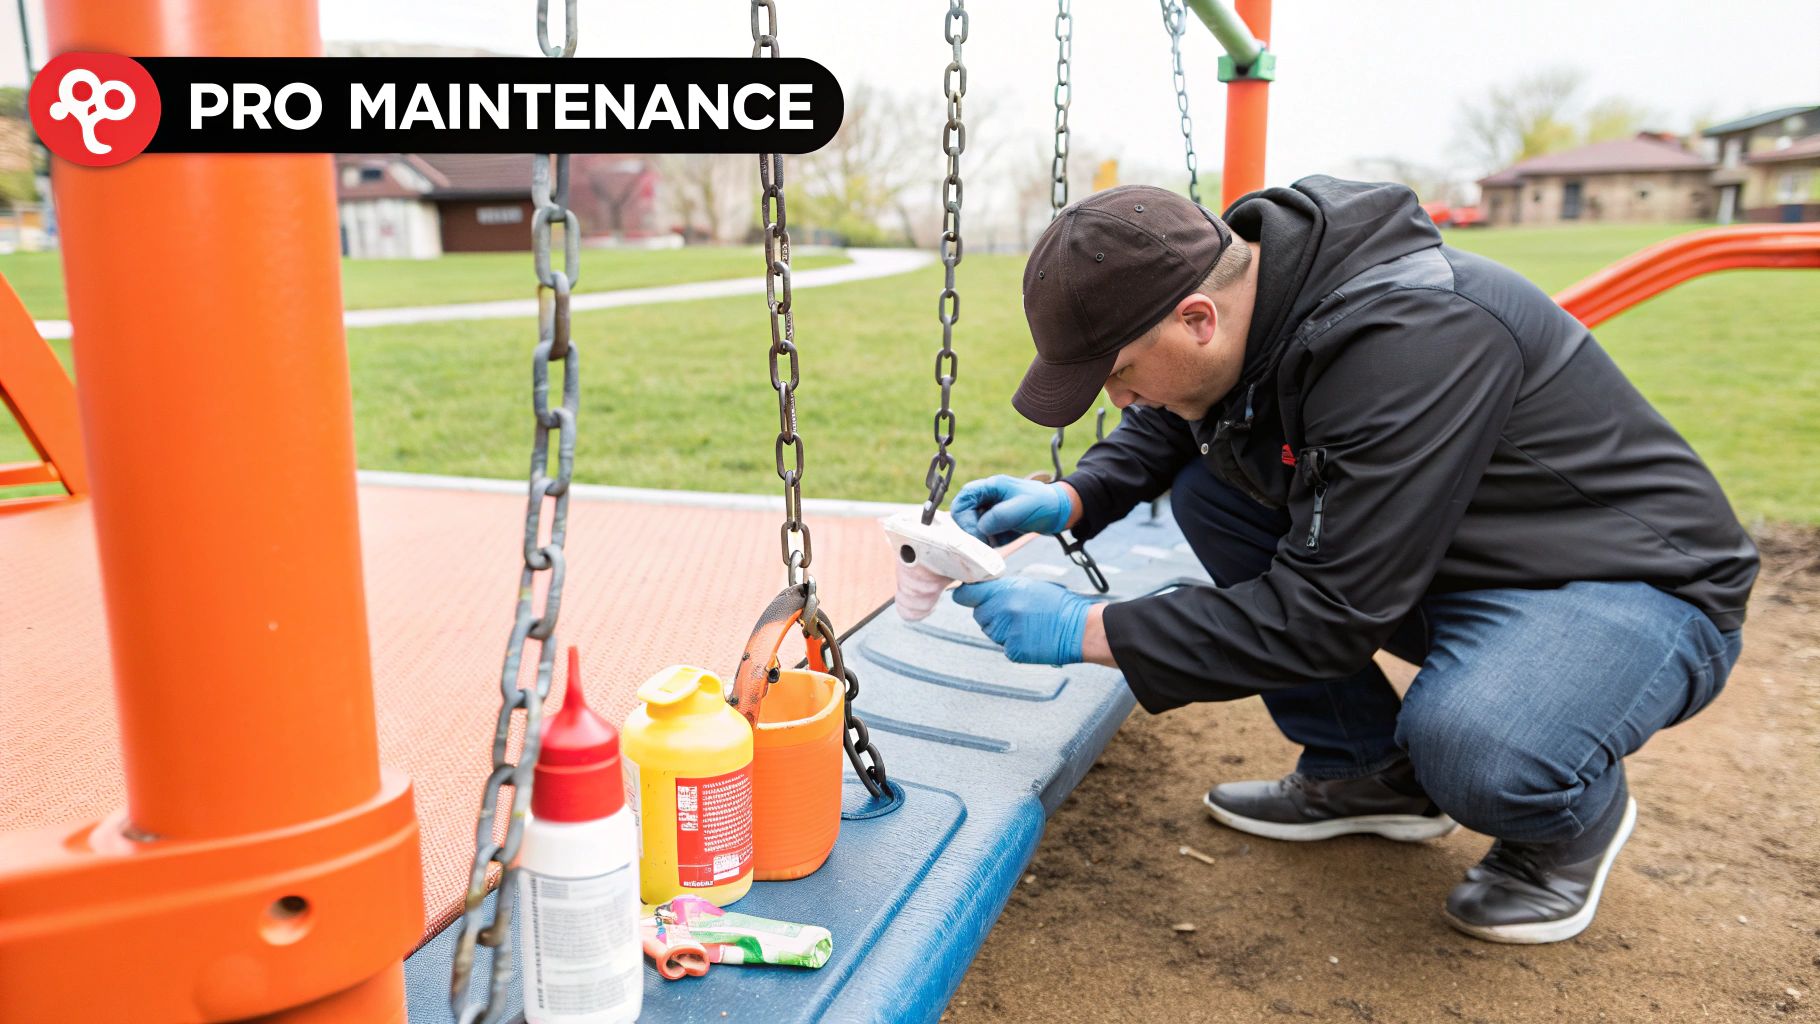
A swing set takes a real beating from weather, wild temperature swings, and of course, constant play. That's why ongoing maintenance isn't just a good idea—it's absolutely essential for keeping it safe and making it last. A little bit of care now prevents small issues from snowballing into big, dangerous problems.
A simple seasonal check can extend the life of your playset by years and prevent the most common safety failures. Mark your calendar for a quick inspection at the start of spring and the end of fall.
Your seasonal checklist doesn't have to be complicated. Just re-tighten all the hardware, look over ropes and chains for any signs of fraying or rust, and check the ground surfacing. Rake your mulch to make sure it’s still deep enough to cushion a fall, and check any rubber mats for cracks. This kind of regular upkeep is crucial. The principles of regular inspection apply to many things around the house, much like the general troubleshooting and maintenance tips for automatic gates show. A simple routine like this ensures your swing set remains a safe place for play, season after season.
Of course, even with the best instructions in hand, you’re bound to have questions when you’re tackling a project this big. It’s totally normal. Hitting a snag and needing a quick answer is part of the process.
Let's run through some of the questions we get all the time. Getting these sorted out now can save you a ton of frustration later on.
This is the big one, and the honest answer is: it really depends. If you’ve got a simple metal A-frame swing set, a couple of people can probably knock it out in 2-4 hours.
But for one of those bigger wooden playsets—the kind with a fort, a slide, and all the bells and whistles—you need to be realistic. You're looking at a full weekend. That’s a solid 10-16 hours of work for two people, easily.
My advice? Whatever time it says on the box, add a buffer. You never know when you'll hit a snag with tricky terrain or a diagram that looks like it was drawn by a toddler.
The single biggest thing that impacts your assembly time is having a helper. Trying to build a large playset by yourself could easily double the time and makes mistakes or injuries way more likely. A second pair of hands isn't just nice to have; it's essential.
Technically, you might manage a few of the smaller sections on your own. But for your own safety—and to make sure the playset is actually sound—we strongly, strongly advise against it. This is a team job, no question.
Think about lifting that massive main support beam or trying to hold a heavy wall panel steady while you line up the bolts. It’s next to impossible and definitely not safe to do alone. Don't risk it. Find at least one other capable adult to help you out.
After building hundreds of these, you start to see the same mistakes pop up again and again. If you can avoid these, you’re already way ahead of the game.
Rushing through the steps or just misreading a diagram also trips a lot of people up. Your best defense is to just take your time and double-check everything as you go.
Yes. 100% necessary. This isn’t a suggestion; it’s a critical safety requirement. A kid going full-throttle on a swing generates an incredible amount of force—more than enough to make an unanchored playset lift, shift, or even tip right over.
It doesn’t matter how big or heavy the set feels. Without being securely fastened to the ground, it’s not truly stable. Anchors are the only thing that guarantees it will stay put when your kids are playing on it.
If this all feels a little overwhelming, or you just want the peace of mind knowing the job was done perfectly, Assembly Smart is here to help. Our pros handle the whole swing set assembly process so you can be sure it's done right the first time. Visit us at https://assemblysmart.com to get your free estimate and schedule a hassle-free installation today.
