-
CALL US:
- (866) 952-3456
Before you start reaching for the heavy-duty tools, sometimes the simplest household items can save the day. For a screw with a stripped head, try placing a rubber band over the head before inserting your screwdriver. This tiny bit of rubber can provide just enough extra grip to get things moving. Another low-effort trick that works surprisingly well is to try a slightly larger screwdriver bit.
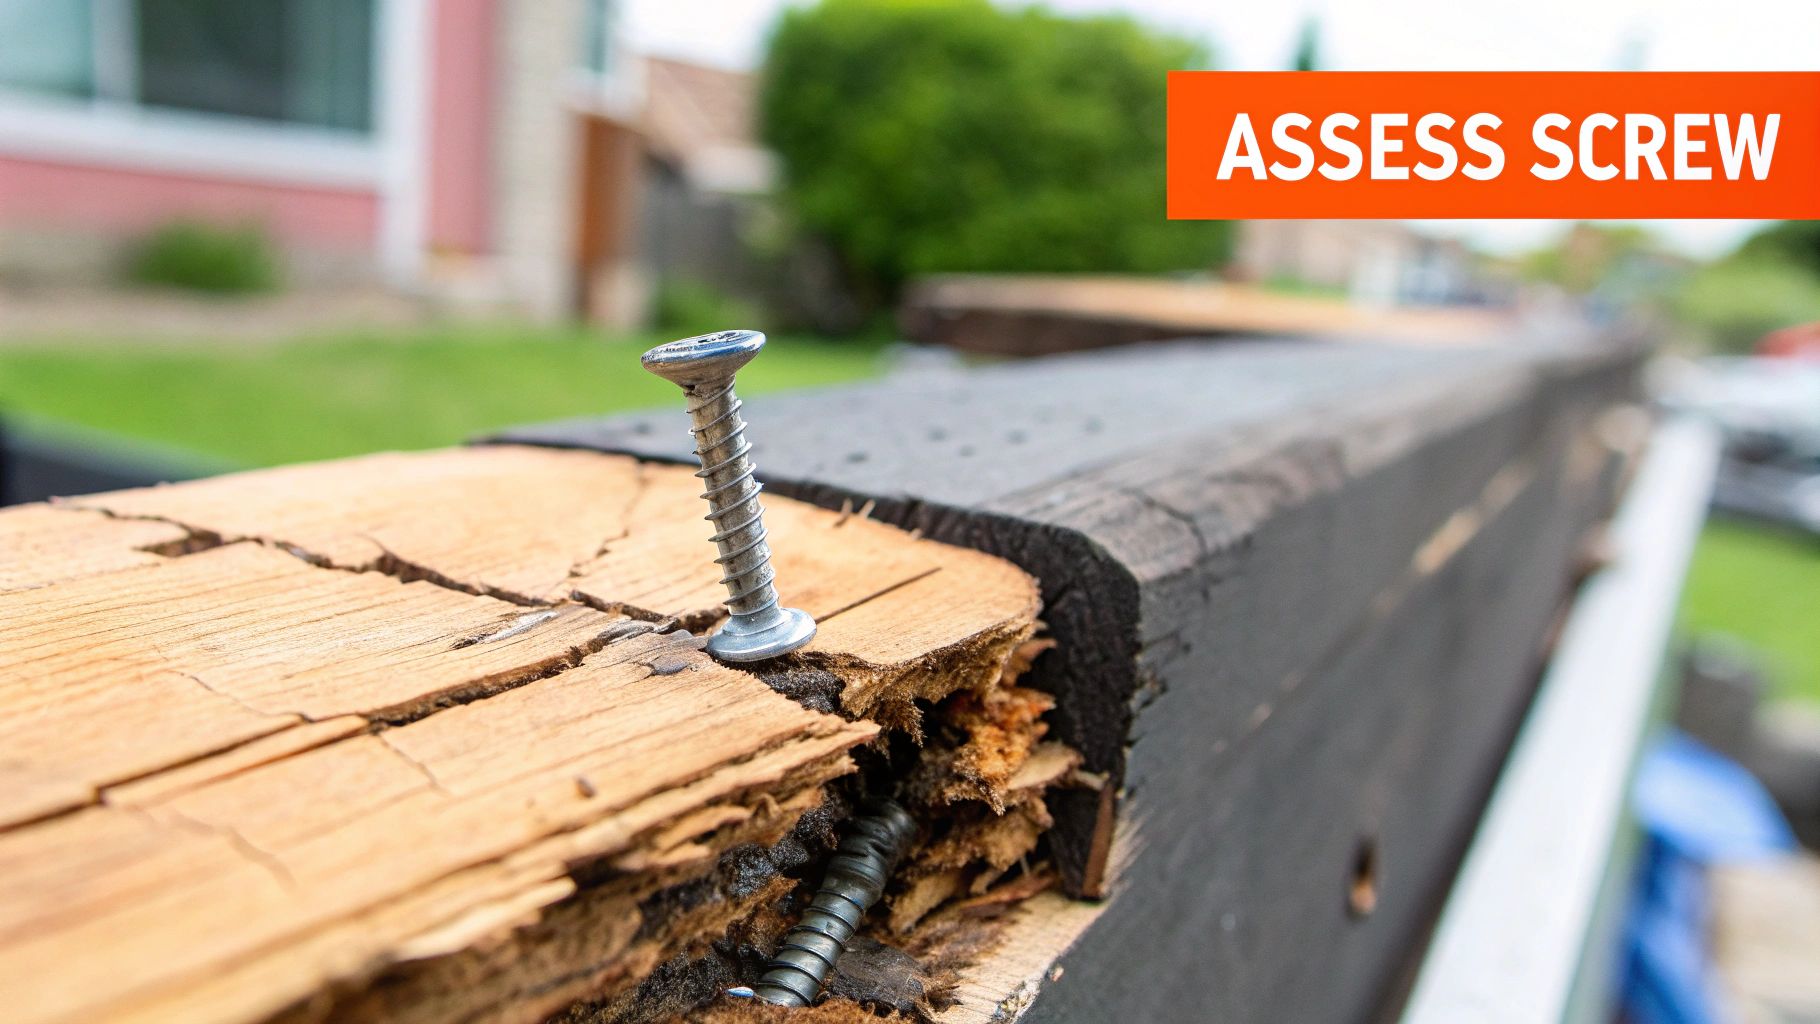
A stuck screw is one of those classic DIY frustrations that can bring a project to a screeching halt. It doesn't matter if you're dealing with a stripped head, a rusted-in-place fastener, or one that's snapped clean off—the first move is always to figure out what you're up against before grabbing a tool. If you rush in with the wrong technique, you can easily turn a small headache into a major repair.
The first priority is always to understand the situation. Is your screwdriver just spinning uselessly in the screw head, or is the screw simply refusing to budge an inch? A spinning driver means you've got a stripped head. A motionless screw, on the other hand, is likely rusted, corroded, or just massively over-tightened. Each problem calls for a different game plan.
This guide will walk you through the solutions, starting with the easiest fixes and working our way up to the more advanced methods. We'll cover everything you need to know to get that screw out without wrecking your project.
Before you escalate, take a moment to diagnose the specific problem:
The most important rule? Patience. Slow, steady pressure is almost always better than brute force. Forcing it is usually what makes the problem ten times worse.
To make things easier, here's a quick reference chart. Find your problem, and see our go-to first method to try before moving on to more aggressive techniques.
| Screw Problem | Recommended First Method | Required Tools |
|---|---|---|
| Stripped Head | Use a wide rubber band for grip | Rubber band, screwdriver |
| Rusted Screw | Apply penetrating oil | Penetrating oil (e.g., WD-40) |
| Broken Screw | Grip with locking pliers | Locking pliers |
This table covers the initial, least destructive options. If these don't work, don't worry—we've got plenty of other tricks up our sleeve in the sections to come.
These kinds of issues pop up all the time, especially during furniture assembly. If you're putting together flat-pack items, knowing these basics can be a real lifesaver. You can learn more from our experts about professional IKEA furniture assembly.
We’ve all been there. That uniquely frustrating moment when your screwdriver just spins and spins, chewing up the screw head with every failed turn. This is a common headache, especially with the softer metal screws often found in flat-pack furniture or electronics.
Before you get frustrated and reach for a drill, remember that some simple physics and a few household items are your best friends here.
Your first move should always be to add friction. A wide rubber band stretched over the screw head can work wonders. Just place it flat over the stripped area, press your screwdriver down firmly into it, and turn slowly. The rubber fills in those worn-out gaps, giving the driver the bite it needs to finally turn the screw. You'd be surprised how often this simple trick saves the day for minor to moderately stripped screws.
If the rubber band doesn't quite give you enough purchase, it's time to try other materials to fill the void. A small piece of steel wool pushed into the stripped head can serve the same purpose. It molds itself perfectly to the damaged slots and your screwdriver tip.
Another fantastic option is a dab of valve grinding compound. It’s a gritty paste you can find at most auto parts stores. Apply a tiny amount to the screw head, and its abrasive particles will lock the screwdriver bit in place, letting you apply torque without any slipping.
The key to these friction-based methods is applying firm, consistent downward pressure while turning. Don't rush it—slow and steady force prevents further stripping and gives you the best chance of success.
For a really stubborn stripped screw, you might need to escalate your approach. A manual impact driver is a fantastic tool that delivers a sharp, downward blow while simultaneously twisting. You simply strike the end with a hammer, and the tool translates that force into a powerful turning motion that can break even the most seized screws free.
Another pro-level technique involves creating a whole new way to turn the screw. Using a rotary tool (like a Dremel) with a cutting disc, you can carefully grind a new, straight slot right across the damaged head. This essentially turns a stripped Phillips screw into a flathead screw, which you can then easily remove with a standard flathead screwdriver. This method requires a steady hand and safety glasses, but it’s a reliable fix when nothing else works.
These hands-on skills are invaluable, especially when you're in the middle of a big assembly project. For more tips on setting up for success and avoiding these issues from the start, check out our guide on how to assemble IKEA furniture.
When the rubber bands and pliers just aren't cutting it, it’s time to stop messing around and grab the tool built for this exact disaster: the screw extractor. This is your go-to method when a screw head is totally mangled or, even worse, snapped clean off. Don't let it intimidate you. Using one is actually pretty straightforward—it’s more about patience than brute force.
A decent extractor set will have two key pieces for each size: a special drill bit (sometimes called a burnishing bit) and the extractor itself. The whole idea is to drill a perfect little pilot hole right into the center of your problem screw. The extractor, with its tapered, reverse-threaded design, can then bite into that hole and back the screw right out.
First thing's first: you have to pick the right size. If the extractor is too small, it won't get a good grip. Go too big, and you risk wrecking the threads inside the hole, creating an even bigger headache.
A good rule of thumb is to choose an extractor bit that’s about half the diameter of the screw shank you’re trying to pull out.
Once you’ve got your size picked out, the process is simple:
This image lays out the key moves for a clean extraction.
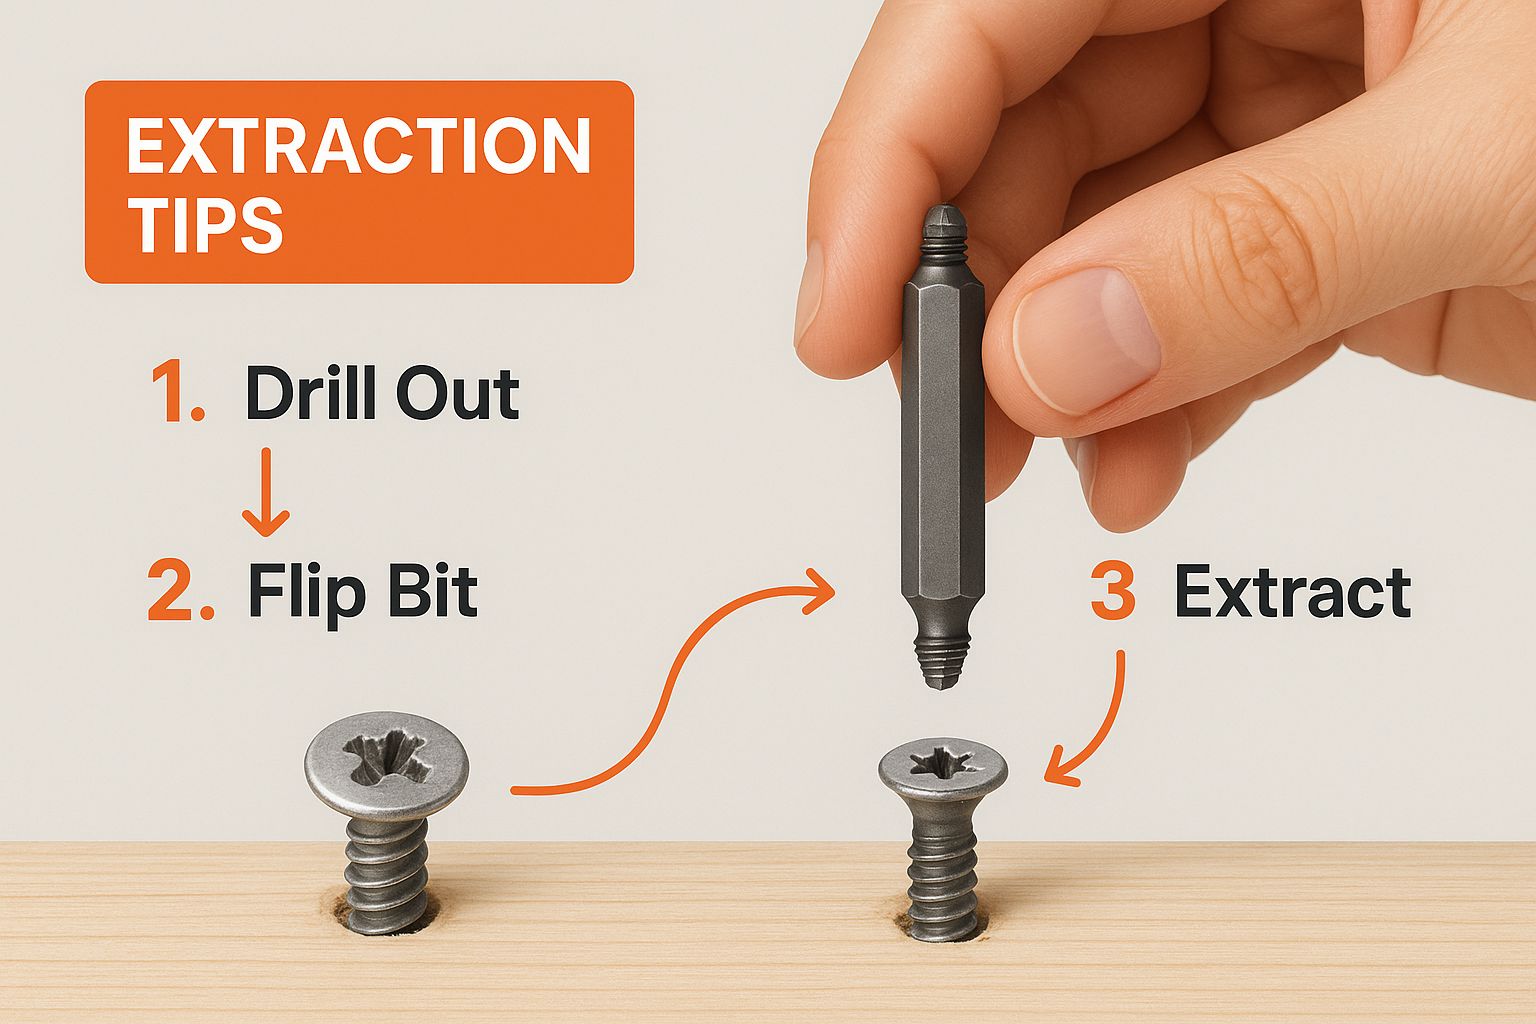
As you can see, it all comes down to a well-centered pilot hole and controlled force. The extractor's reverse threads dig into the screw's metal, and as you keep turning, that force works in your favor, unscrewing the busted fastener.
I’ve seen it happen a hundred times: people get frustrated and try to force it with jerky movements. That’s the fastest way to snap the extractor itself, which turns a tough job into a nightmare. Smooth, consistent torque is what you're after.
It's no surprise these tools have become a must-have in pro shops and home garages alike. The market for them is even expected to hit around USD 400 million by 2033, thanks to industrial work and a booming DIY culture. If you're curious, you can dig into the numbers in this market report.
When you're staring down a screw that's either rusted solid or has snapped clean off, the easy fixes are out the window. Trying to force it will only make things worse. These tough situations call for a bit more muscle and a smarter approach, because you're fighting two very different problems: chemical bonding from rust, or the simple lack of a head to grip.
A screw that’s been rusting for years has essentially fused itself to the metal or wood around it. This is a chemical bond, and your best friend here is patience and a can of good penetrating oil. This stuff isn't like your everyday WD-40; it's engineered with an incredibly low viscosity that lets it sneak into the tightest threads to dissolve rust from the inside out.
Be generous when you apply it. Soak the screw head and the area around it, then walk away. Give it at least 30 minutes, but for a really stubborn screw, letting it sit for a few hours or even overnight can make all the difference.
Once the oil has had time to work its magic, give the top of your screwdriver handle a few sharp taps with a hammer. This little bit of shock and vibration can be just enough to break that final, crusty seal before you try turning it.
What if the head just twisted right off, leaving a little stump of the screw shank behind? Don't panic. If there's anything at all to grab onto, a good pair of locking pliers can be your savior. They provide the kind of bulldog grip you simply can't get with regular pliers.
Clamp the pliers down hard on whatever is left of the screw shank. Get the tightest bite you possibly can. From there, it’s all about slow, steady, and firm pressure, turning counter-clockwise. Don't jerk it. You want smooth, consistent force to avoid snapping off the little bit you have left to work with.
Quick tip from the field: Before you even think about grabbing a tool, clean up the area. Scrape away any dirt, rust, or gunk. A clean workspace gives you a much better view of what you're dealing with and helps your tools get the best possible grip.
Now for the true nightmare scenario: the screw is broken off completely flush with the surface, or even slightly below it. This is where the pros pull out the big guns. The most reliable fix is to simply weld a nut onto what’s left of the screw. It sounds extreme, but it's incredibly effective because it creates a brand-new head for your wrench.
This definitely requires welding gear and a steady hand. You'll place a new nut over the broken stub and carefully weld the inside of the nut to the top of the screw. As a bonus, the intense heat from the welder does a fantastic job of breaking any corrosion bonds. Let it cool down completely, slip a wrench over the nut, and turn it out like it was never a problem. It’s a high-skill repair, for sure, but it can turn an impossible job into a success story.
Before you even think about tackling a stubborn screw, let's talk about gear and safety. This part is non-negotiable. Trying to force a screw out with the wrong tool is the fastest way to turn a minor headache into a major repair, potentially damaging your workpiece or, worse, injuring yourself.
At a bare minimum, you'll need a good screwdriver set with plenty of bit types and sizes. I also keep a can of penetrating oil handy for anything rusted, and a solid pair of locking pliers can be a lifesaver when you’ve got just enough of a screw head to grab onto.
When you're dealing with a completely mangled or broken screw, your basic kit just won't cut it. That's when you need to bring in the specialized tools. A screw extractor set is one of the best investments a DIYer can make. These hardened bits are designed to bite into damaged metal and back out screws when everything else has failed.
Another great tool for your arsenal is a rotary tool with a cutting disc. I've used this trick countless times to carefully cut a brand-new slot into a stripped screw head, giving my flat-head screwdriver a fresh surface to grip. Building out a reliable toolkit is a journey, and for a deeper dive, check out our guide to essential furniture assembly tools.
No matter what tool you're using, safety has to be your top priority. Seriously. Metal fragments can fly off without warning when you start drilling or applying a lot of force.
Always wear safety glasses or goggles. It’s such a simple step, but it’s the one thing that will protect your eyes from a serious, life-altering injury. A good pair of heavy-duty gloves is also a smart move to save your hands from slips and sharp metal.
Finally, make sure whatever you're working on is locked down and stable. Use clamps to secure the piece to a workbench before you start wrenching on it. Trying to apply a ton of torque to something that's wobbling all over the place is a recipe for disaster. A stable base lets you apply force in a controlled, effective, and safe way.
Even when you know all the tricks, you're bound to run into a situation that leaves you scratching your head. A quick answer can be the difference between a five-minute fix and a project-ruining mistake. We've pulled together some of the most common questions that pop up when you're wrestling with a stubborn screw.
Let's start with the nightmare scenario: the screw extractor bit breaks off inside the screw. What now? Extractors are made of incredibly hard steel, so just drilling it out isn't really an option with your standard bits.
Your best bet here is to grab a high-quality cobalt or carbide drill bit. Add a little cutting oil to keep things cool, and then drill at a very slow speed with steady, firm pressure. This is a job that demands patience, so don't try to rush it.
Another frequent question is about using heat. Can it actually help? Absolutely. Applying focused heat from a torch can work wonders, especially on screws that are seized up with rust or a tough thread-locking compound. The heat makes the surrounding metal expand just enough to break the bond.
Just be extremely careful. You want to apply heat in short, controlled bursts. This is especially true when working near flammable materials like wood or plastic.
Of course, the easiest way to deal with a stuck screw is to never have one in the first place. Prevention is always the best strategy. To keep from stripping screw heads, always—and I mean always—use the right size and type of screwdriver bit.
Make sure the bit is seated fully and squarely in the screw head. Apply firm, downward pressure as you turn. This one simple habit prevents the vast majority of stripped screws, especially when you're assembling furniture or securing items to a wall.
When you're taking on bigger projects, like anchoring a bookshelf to prevent it from tipping, using the right hardware from the get-go is non-negotiable. It not only makes the job go smoother but also keeps your home safer. For more on that, check out our guide on how to secure furniture to a wall.
