-
CALL US:
- (866) 952-3456
Installing a pool table is a serious project. It’s not just about assembling parts; it’s about carefully preparing the space, building a sturdy frame, leveling incredibly heavy pieces of slate, and stretching the felt just right. Of all the steps, two are absolutely critical: measuring for proper cue clearance and meticulously leveling the slate. Get these wrong, and you'll sabotage your game before it even starts.
Before you even think about unboxing that table, the real work begins with the room itself. I’ve seen it a hundred times—people get excited and skip the prep, only to end up with a table that's unplayable. This is easily the most common mistake DIYers make, leading to frustrating games where cues are constantly banging into walls. Or worse, an unstable table that could damage your floor.
The first thing you need to check is clearance. And I don't just mean the table's footprint. You have to account for the cue stick. A standard cue is 58 inches long, and you need enough room to pull it all the way back for a shot, especially when the cue ball is right up against a rail. That shot requires the full length of the cue plus several inches for your stroke behind the table's edge.
Pro Tip: Look around the room. It’s not just about the four walls. Do you have a support column? A fireplace that juts out? Bulky furniture? These can all become shot-killers. You need to measure the unobstructed playing area, not just the empty floor space.
To make things easier, I've put together a quick guide that shows the minimum room size you'll need based on your table size and cue length. If you're a little tight on space, don't worry. Switching to a shorter cue can be a great way to make it work without compromising your game too much.
This table will help you figure out if your room is ready for action.
| Pool Table Size | Room Size for 58" Cue (Standard) | Room Size for 52" Cue (Short) | Room Size for 48" Cue (Trouble Shooter) |
|---|---|---|---|
| 7-Foot Table | 13' 6" x 17' | 12' 6" x 16' | 11' 10" x 15' 4" |
| 8-Foot Table | 14' x 18' | 13' x 17' | 12' 4" x 16' 4" |
| 9-Foot Table | 14' 6" x 19' | 13' 6" x 18' | 12' 10" x 17' 4" |
Getting the measurements right for big items is a skill in itself. For more tips on this, you can check out our detailed guide on https://assemblysmart.com/how-to-measure-furniture/ for a perfect fit every time.
Let's talk about weight. A slate pool table is a beast, typically weighing between 700 and 1,000 pounds. All that weight is concentrated on four small legs. Your floor has to be up to the task, or you risk it buckling, cracking, or compressing over time.
If you have any doubts about your subfloor or need to make major changes, it’s always a good idea to bring in professional flooring contractors. They can tell you for sure if your foundation is solid enough. Remember, while you can correct minor dips with shims during setup, a seriously sloped floor will be a never-ending headache.
Last but not least, think about how you're going to get the table into the room. The slate usually arrives in three massive, heavy pieces. You need to measure every doorway, hallway, and staircase on the path from the truck to the game room. Make sure there’s enough room to maneuver these awkward slabs without scuffing up your walls or, worse, getting them stuck. This is a critical step that’s often overlooked until it’s too late.
With the room cleared and ready, it's time to get your hands dirty and build the table's skeleton. This part is all about putting together the main cabinet and getting the legs on. Think of it as building the chassis for a car—everything that comes next relies on this structure being perfectly square and incredibly sturdy. Get this right, and you’ll have a base that can handle the massive weight of the slate without breaking a sweat.
https://www.youtube.com/embed/VwziyjpblOM
Start by carefully unboxing all the frame parts and hardware. I always recommend laying everything out on a soft surface, like a blanket or even just the flattened cardboard box it came in. This saves the finish from getting scratched up right from the start. Grab your manual and identify each piece: the side and end aprons, any cross members, and the leg mounts. Matching everything to the diagram now prevents a lot of frustration later.
The order you assemble things in really matters if you want a square frame. Usually, you'll connect the side aprons to the end aprons, forming a big rectangle. As you insert the bolts and washers, here’s a pro tip: don't tighten anything all the way down yet. Just get them snug enough to hold the frame together. This leaves you a little bit of wiggle room for adjustments.
A carpenter’s square is your best friend here. Pop it into each inside corner to make sure you're getting a true 90-degree angle. If a corner is slightly off, you can gently nudge the frame until it lines up perfectly. Once all four corners are square, you can go back and tighten all the bolts. I like to do this in a star pattern, like you would with lug nuts on a car, to distribute the pressure evenly and keep the frame from pulling out of shape.
One of the most common mistakes I see is over-torquing the bolts. People crank down with all their strength, which can crack the wood or strip the hardware. All you need is a firm, snug fit—anything more is asking for trouble.
Now that the cabinet is assembled and square, it's time for the legs. Most tables have specific mounting blocks or brackets inside the frame where the legs attach. Line up each leg with its mount and thread in the bolts. And just like before, only tighten them partially for now.
This is a two-person job: with a helper, carefully flip the table over onto its feet. It’s heavy and awkward, so make sure you communicate and lift with your legs. Once it's upright, give the table a gentle push from a few different angles to see if it wobbles. This is when you can go around and do your final tightening on all the leg bolts, making sure everything is rock-solid.
Don't worry if the table isn't perfectly level at this point—that comes later. If you've got a really noticeable wobble because your floor isn't flat, that's a common issue. In fact, learning how to level furniture on uneven floors is a great skill to have. For now, your only goal is to make the frame itself as rigid as possible. When you’re done, you'll have a freestanding, stable foundation ready for the most important part of the whole process: the slate.
This is it. This is the moment that separates a decent DIY job from a truly professional installation. Handling the slate is, without a doubt, the most physically demanding and technically precise part of the whole process. It’s where your patience and meticulous attention to detail really pay off, turning a set of heavy rocks into one flawless playing surface. Don't be intimidated; with the right technique and a good helper, you can absolutely achieve a perfectly true roll.
First things first: never, ever try to move a piece of slate by yourself. Each slab can weigh anywhere from 150 to 250 pounds, and they are surprisingly brittle. Dropping one can easily lead to a chip or crack, which basically ruins the entire set. So, grabbing a friend isn't just a suggestion—it's non-negotiable for this part of the job.
Before you even think about lifting, make sure you both have a clear path from where the slate is resting to the table frame. For a quick refresher on avoiding injury, it’s always a good idea to review some basic safe lifting techniques.
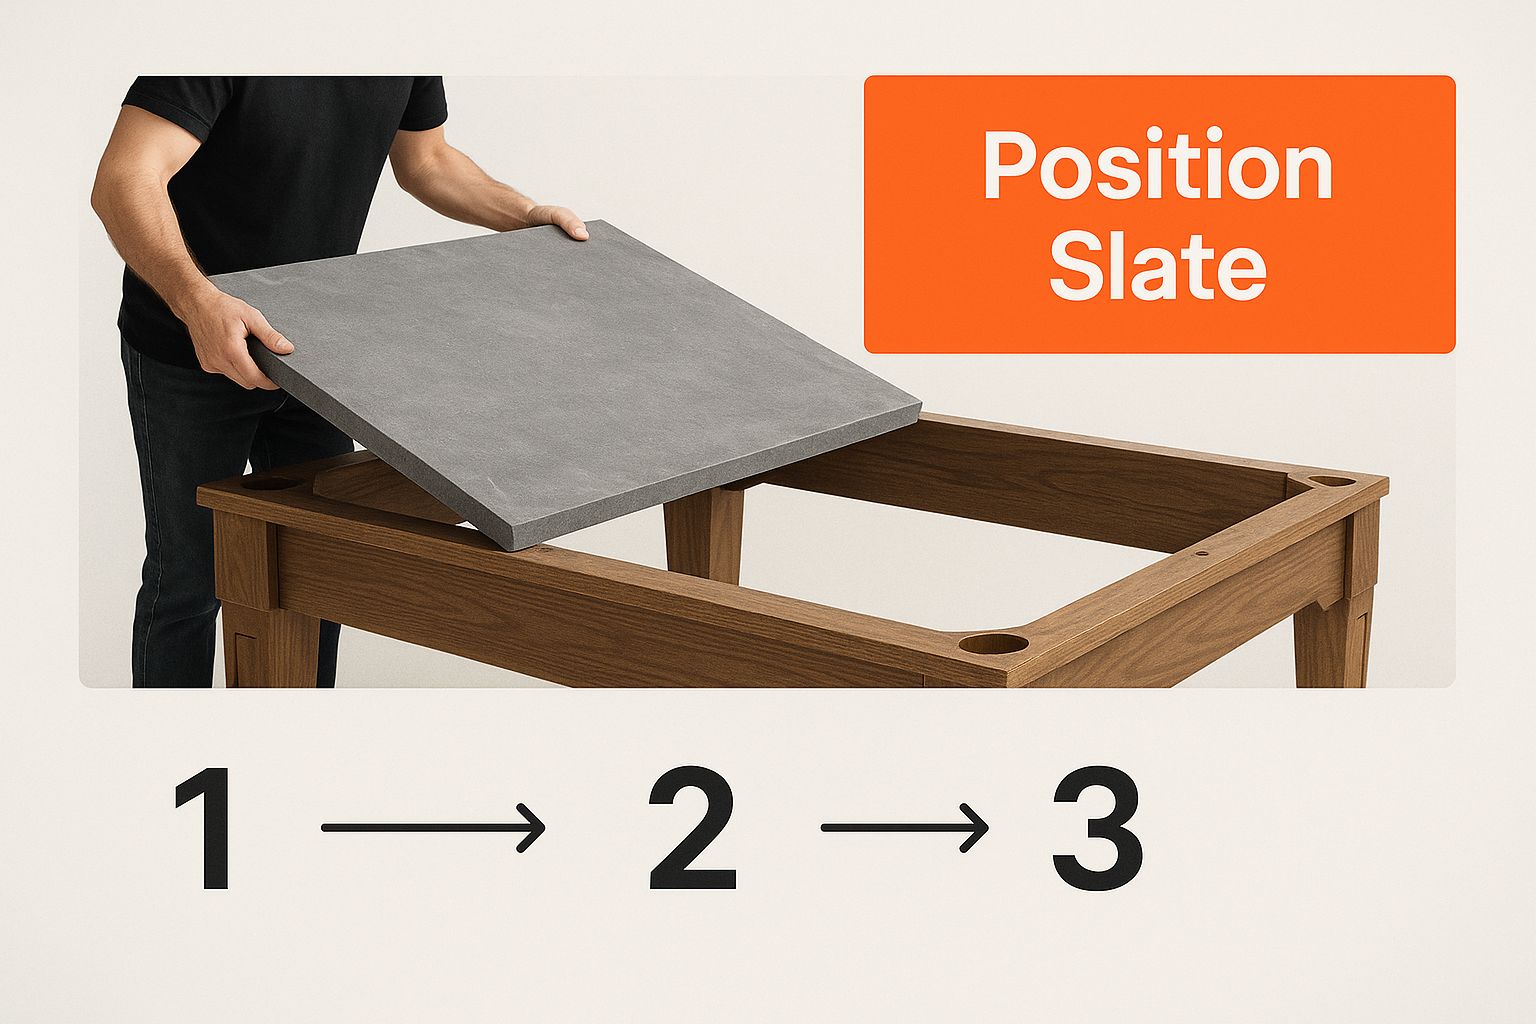
As you can see, this isn't a one-person lift. It requires careful coordination to gently place each heavy panel without damaging it or the frame underneath.
Before you break out any adhesives or start driving screws, you need to "dry-fit" the slate. This just means carefully placing each piece onto the frame to check the alignment. Most three-piece sets have a marked center piece, so start with that one. Gently lay it down, then bring in the two end pieces, sliding them snugly up against the center.
What you're looking for is the tightest possible fit along the seams. These pieces were cut as a matched set, so they should line up beautifully. Check for any manufacturer's marks or numbers that might indicate the correct orientation. Don't hesitate to gently shift and reposition the pieces until the gaps are hair-thin and the entire surface feels as flush as you can get it.
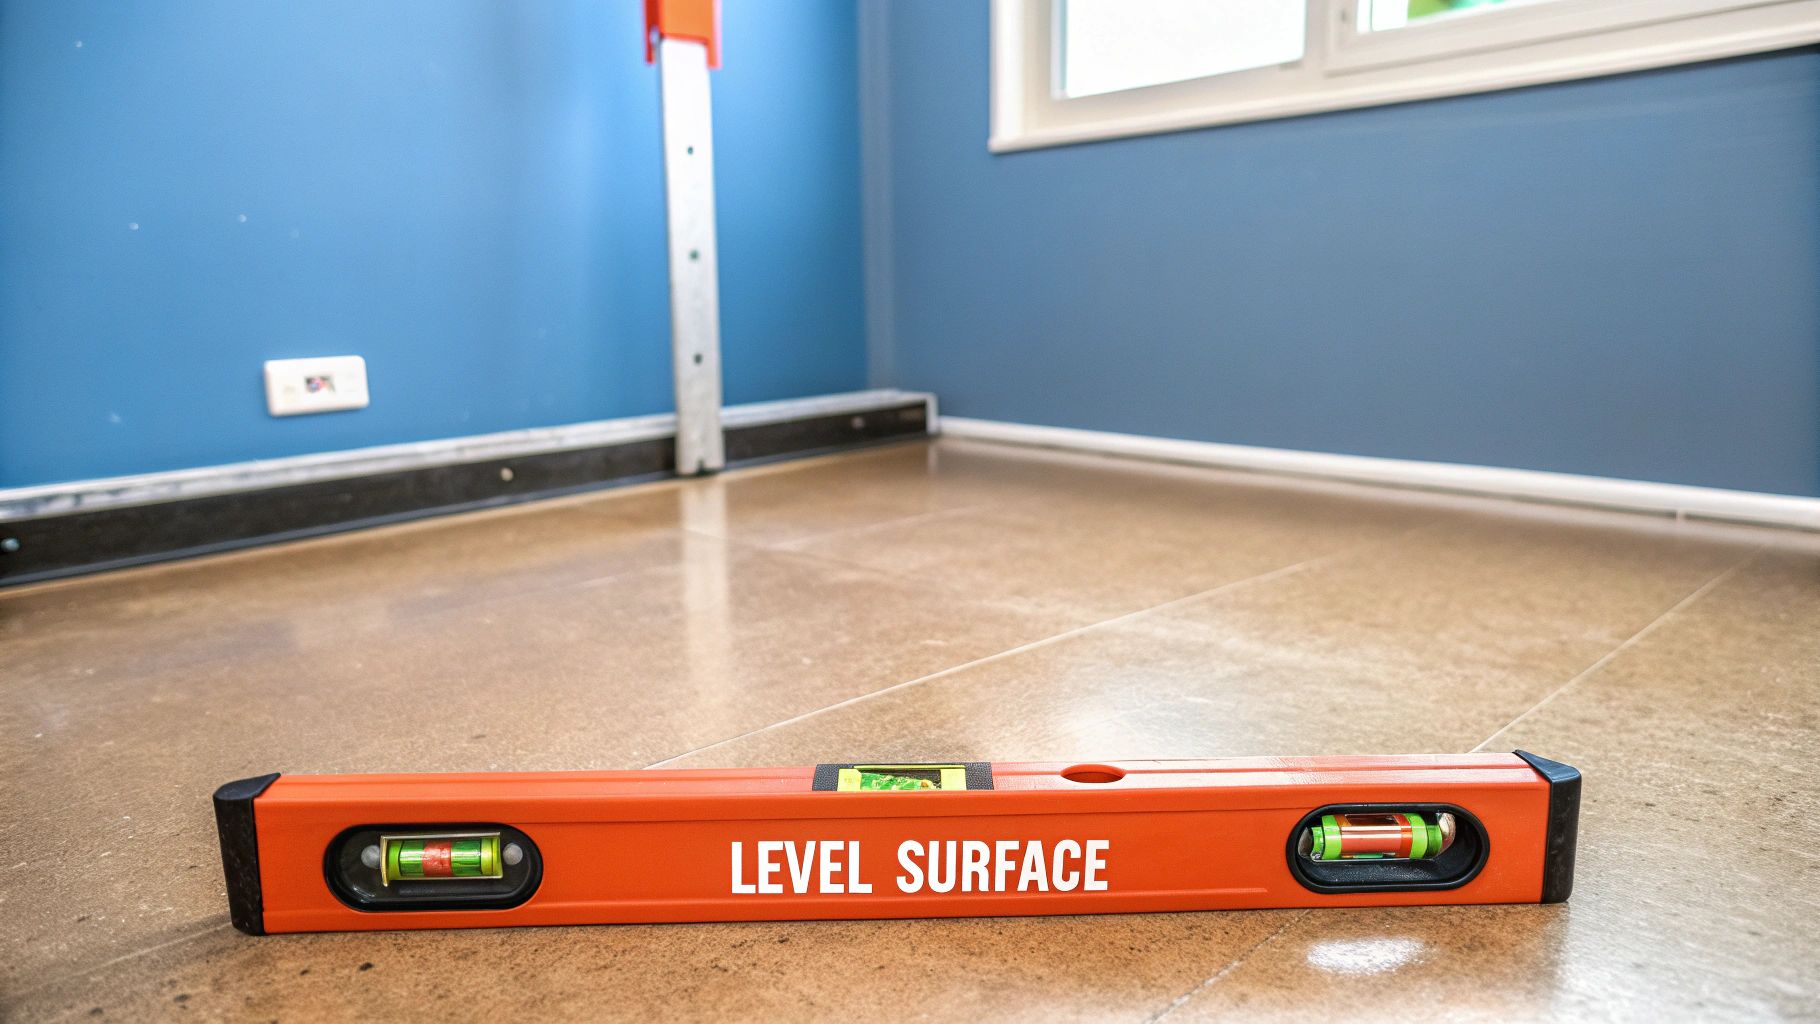
Now we get to the heart of the matter. A ball that drifts even slightly is the tell-tale sign of a bad setup, and this is where you prevent that from ever happening.
Put away your standard carpenter's level—it’s simply not sensitive enough for this job. You absolutely need a machinist's level. It's designed to detect the slightest variations, which is exactly what's required here.
Here's the process I've used on countless installations:
A perfectly level slate is the foundation of a great pool table. Rushing this step is a mistake you will regret with every single shot you take. Be patient, trust your machinist's level, and don't stop until it's perfect.
Once your slate is perfectly level and securely screwed down to the frame, you’ll see the tiny gaps between the pieces. To create that single, seamless playfield, you have to fill them. This is called "seaming," and it’s what tricks the ball into thinking three slabs are one solid piece.
You'll generally use either beeswax or a specialized pool table slate putty for this. I find warming the wax or putty a bit makes it much easier to work with. Using a putty knife, force the filler deep down into the seams, slightly overfilling them to ensure there are no hidden air pockets.
After the seams are filled, take a sharp, flat scraper or a razor blade and hold it almost flat against the table. Carefully shave off the excess filler. You want to scrape gently until the seam is perfectly flush with the slate. Run your hand over it—you shouldn't feel a hint of a bump or a dip. The goal is a completely smooth, invisible transition between the pieces, creating the perfect canvas for the felt.
A perfectly level table is a great start, but it's only half the battle. If the playing cloth—the felt—isn't installed flawlessly, all that hard work leveling the slate goes right out the window. This is the step where your project finally starts to look like a pool table, and getting it right is what guarantees a fast, true roll on every single shot. It definitely takes some patience and a steady hand, but the payoff is huge.
First thing's first: you need a perfectly clean canvas. Before you even think about unrolling the new felt, that slate surface has to be immaculate. Grab a vacuum with a soft brush attachment and go over the entire surface. Pay extra attention to the seams and around the screw holes to suck up any lingering dust or slate debris. After vacuuming, give it a final wipe-down with a clean, dry microfiber cloth. Seriously, even a tiny speck of dirt left behind can create a noticeable bump you'll feel with every shot.
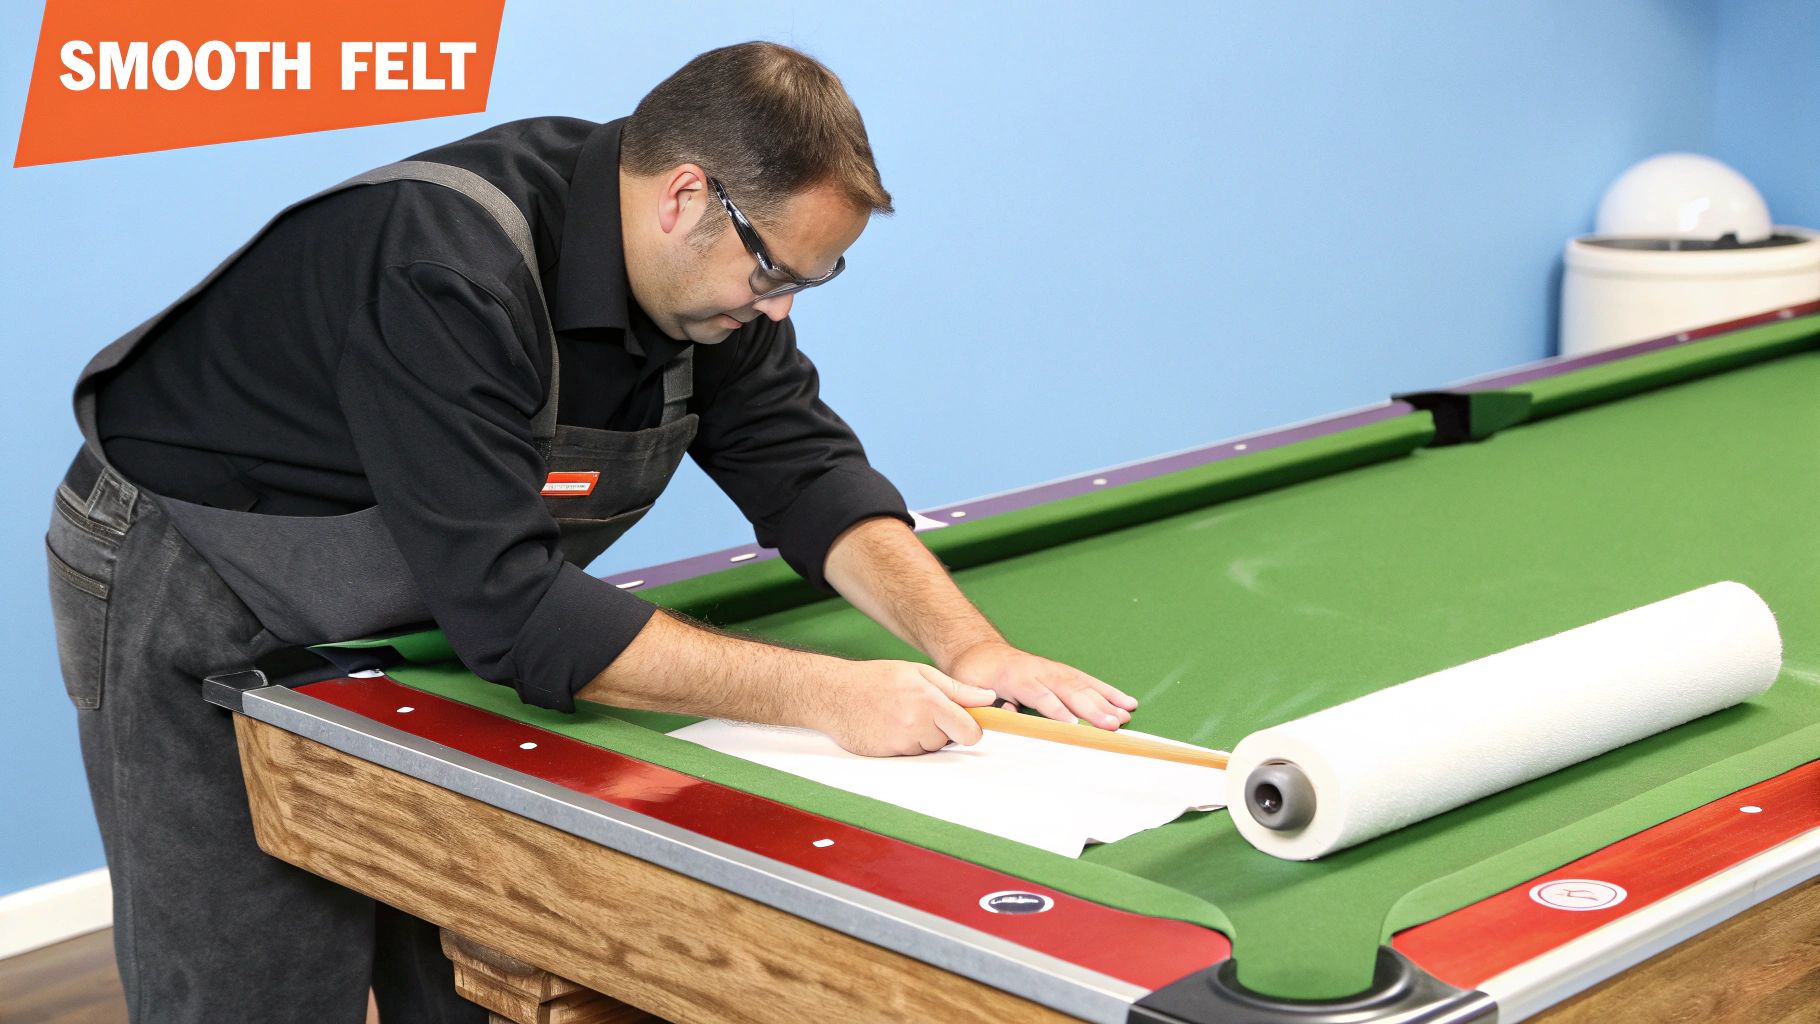
Alright, it's time to lay down the main piece of cloth. Gently unroll the felt over the slate with the "playing side" facing up. You can usually tell the difference easily—one side is smooth, and the other is a bit fuzzy. You want the smooth side up. Make sure you leave plenty of extra material hanging over all sides, at least four to six inches.
The real secret to a professional-grade installation is the stretching and stapling sequence. The goal is to apply even, consistent tension across the whole surface. This eliminates any possibility of wrinkles or loose spots developing later. For this, a heavy-duty staple gun isn't just a suggestion; it's essential. If you're curious about the kind of gear that makes these projects go smoothly, you can check out a solid list of essential furniture assembly tools.
Here’s a tried-and-true method that works every time:
My Favorite Analogy: Think of it like you're applying a giant screen protector to a phone. You always start in the middle and smooth your way to the edges to push out the air bubbles. It’s the same principle here—you’re pushing any potential slack or wrinkles out toward the corners.
With the main surface stapled down, it's time to cut the holes for the pockets. This part requires a very sharp utility knife with a brand-new blade. A dull blade will just snag and tear the felt.
Feel for the edge of the pocket opening under the cloth and make a small starting cut in the very center. From that incision, make a series of cuts out to the edge of the wood, almost like you're slicing a tiny pizza. This will give you several triangular flaps of felt.
Pull each flap down tight under the slate and staple it securely to the wood liner. This technique gives you that clean, smooth roll into the pocket. Once all six pockets are cut and stapled, you can go back and trim the excess felt from around the entire perimeter of the table, cutting it just below your staple line.
The last piece of the puzzle is covering the rails, and honestly, this is where most people get a little intimidated. It’s definitely the most intricate part of the job.
You'll use the pre-cut strips of felt that came in your cloth set. Lay one strip over a rail cushion, making sure the smooth playing side is up. The idea is to wrap the cloth tightly around the cushion rubber and staple it into the wood backing of the rail itself.
Pay close attention to the corners and the ends that meet the pockets. You'll have to make some very precise folds and tucks to get a clean finish without any bunching. This feels more like an art than a science, and it might take you a couple of tries to get a rail looking perfect. Don't sweat it. Once all the rails are wrapped, you can bolt them back onto the table, and your flawless playing surface is officially complete.
You’ve made it through the heavy lifting and the delicate work with the felt. Now for the fun part—the final steps that turn this collection of wood and slate into a real, playable pool table. This is where you'll attach the rails and pockets, bringing the whole thing to life.
The felt-covered rails are the next big pieces to go on. Each rail attaches from underneath the table, with long bolts that go up through the slate and into threaded inserts on the bottom of the rail. Carefully set a rail in place, making sure its bolt holes line up perfectly with the holes in the slate.
Always start the bolts by hand. The last thing you want is to cross-thread one and ruin the rail. Once you have them all started, grab a socket wrench to finish the job. The trick here is to tighten them evenly. Don't crank one bolt all the way down and move to the next. Instead, work your way around the rail, snugging each bolt a little at a time. This approach pulls the rail down flush and flat against the slate, which is critical for getting a consistent and lively bounce from the cushions.
A warped or improperly installed rail can kill a table's playability, creating dead spots where the ball just thuds instead of rebounding. Before you give those bolts their final turn, it's smart to do a quick straightness check.
Pro Tip: Grab a reliable straightedge—a good carpenter's square is perfect, but a dead-straight cue stick can work in a pinch—and lay it against the face of the cushion. Get down at eye level and look for any gaps between the straightedge and the rubber. A small bow can often be corrected by carefully tightening the bolts to pull it straight.
With the rails on, you finally have an enclosed playing surface. This stage is a great reminder of why professional installers always work in pairs. The heavy slate on American-style tables, which make up over 45% of the global market, can easily top 200 kg. Helpers aren't just for lifting; they're essential for applying steady pressure when clamping and securing components. If you want to dive deeper into different table styles, this market research on pool tables is a great resource.
With the rails buttoned down, it's time to install the pocket irons and baskets. These usually attach to the rails and the main frame with simple wood screws. Whether you have classic leather drop pockets or a full ball return system, the goal is the same: make sure they are attached securely enough to take the impact of a fast-moving ball.
Here’s the typical sequence:
The final major pieces are the aprons (sometimes called skirts). These are the decorative wood panels that mount to the outside of the rails, hiding all the hardware and giving the table that finished, furniture-quality look. They're typically attached with screws from the inside, making them fairly easy to align and install.
Once the aprons are on, your table is just about ready for its first break. Before you chalk up, do one last walk-around. Give every single bolt and screw a final check for tightness—from the legs to the rails to the aprons. After all this work, you want to be certain everything is rock-solid and built to last.
Even with the best instructions, you're bound to run into a few head-scratchers when you’re putting together something as massive and precise as a pool table. It's a big project, and things don't always go according to plan.
So, let's tackle some of the most common questions and roadblocks people hit. This is your go-to reference for those moments when you're standing there thinking, "Okay, what now?"
Let’s be direct: no. Thinking you can knock this out solo is a surefire way to get hurt or, worse, damage your brand-new table. Safety and protecting your investment have to come first.
You can probably get the frame and legs put together on your own, but the moment you unbox the slate, it becomes a team sport. Each piece of slate can weigh anywhere from 150 to 250 pounds, and they are incredibly awkward to handle. Trying to lift one alone is just asking for a slipped disc or a cracked slate—a mistake that can total your table. There’s a reason the pros always work in pairs or teams; it’s the only way to manage the weight safely and get everything lined up just right.
You don’t need a full-on professional workshop, but there are a few tools that are absolutely non-negotiable. Trying to get by without them will turn a challenging job into a nearly impossible one and will definitely show in the final result.
Here’s the essential toolkit you'll need:
Ah, the dreaded roll-off. When a ball consistently drifts to one side, it’s the classic sign of an unlevel table. Your first thought might be to blame the floor, but 99% of the time, the real culprit is the slate itself not sitting perfectly flat on the frame.
To fix it, get out your machinist's level and hunt down the low spot on the playing surface. Once you've found it, you and a buddy will need to carefully lift that side of the slate just enough to slide a thin shim between the slate and the frame. This is all about patience and tiny adjustments. Place a shim, gently set the slate back down, and check it with the level again. Repeat until that ball rolls straight and true.
A pro tip: Use proper wood or tapered plastic shims for this. Don't be tempted to use a folded-up piece of cardboard or paper—it will compress under the slate's weight, and you'll be dealing with the same problem in a few months.
Once your table is set up, it needs a little time to settle in. The sheer weight will cause it to sink into the carpet or flooring, and the house itself can shift with the seasons. A good rule of thumb is to check the level every 6 to 12 months for the first couple of years.
After that initial settling-in period, a quick annual check-up should be plenty. You might not need to adjust it every time, but catching a small issue early keeps it from throwing off your game. And remember, if you ever have to move the table—even just shifting it a few inches—you have to start the leveling process all over again from scratch.
Feeling a bit out of your depth with all this talk of shims and machinist's levels? If you’d rather be breaking in your new table than breaking your back building it, Assembly Smart is ready to step in. Our pros handle the entire setup, from assembly to precision leveling, so you get a flawless playing surface without the hassle. Get a free quote today and skip straight to the fun part.
