-
CALL US:
- (866) 952-3456
An IKEA loft bed hack is really just a fancy way of saying you're taking a standard loft bed from IKEA and customizing it to fit your life. It’s a DIY project that adds personality, new features, or just plain old smart functionality. Most of these projects focus on transforming that empty space underneath the bed into something useful, making it the perfect fix for a small room.
If you're staring at a tiny room wondering how you’ll ever fit everything in, you're not alone. An everyday IKEA loft bed can be a total game-changer. By lifting your bed off the ground, you instantly reclaim a huge chunk of floor space. This isn't just about putting furniture together; it's about completely rethinking what your room can do for you.
At its core, every IKEA loft bed hack is about solving a problem. I’ve seen people get incredibly creative, turning that once-empty area into:
Forget the one-size-fits-all approach. This guide is all about giving you the confidence to build something that solves your unique challenges.
This infographic shows just how much functional space you can gain in a compact room.
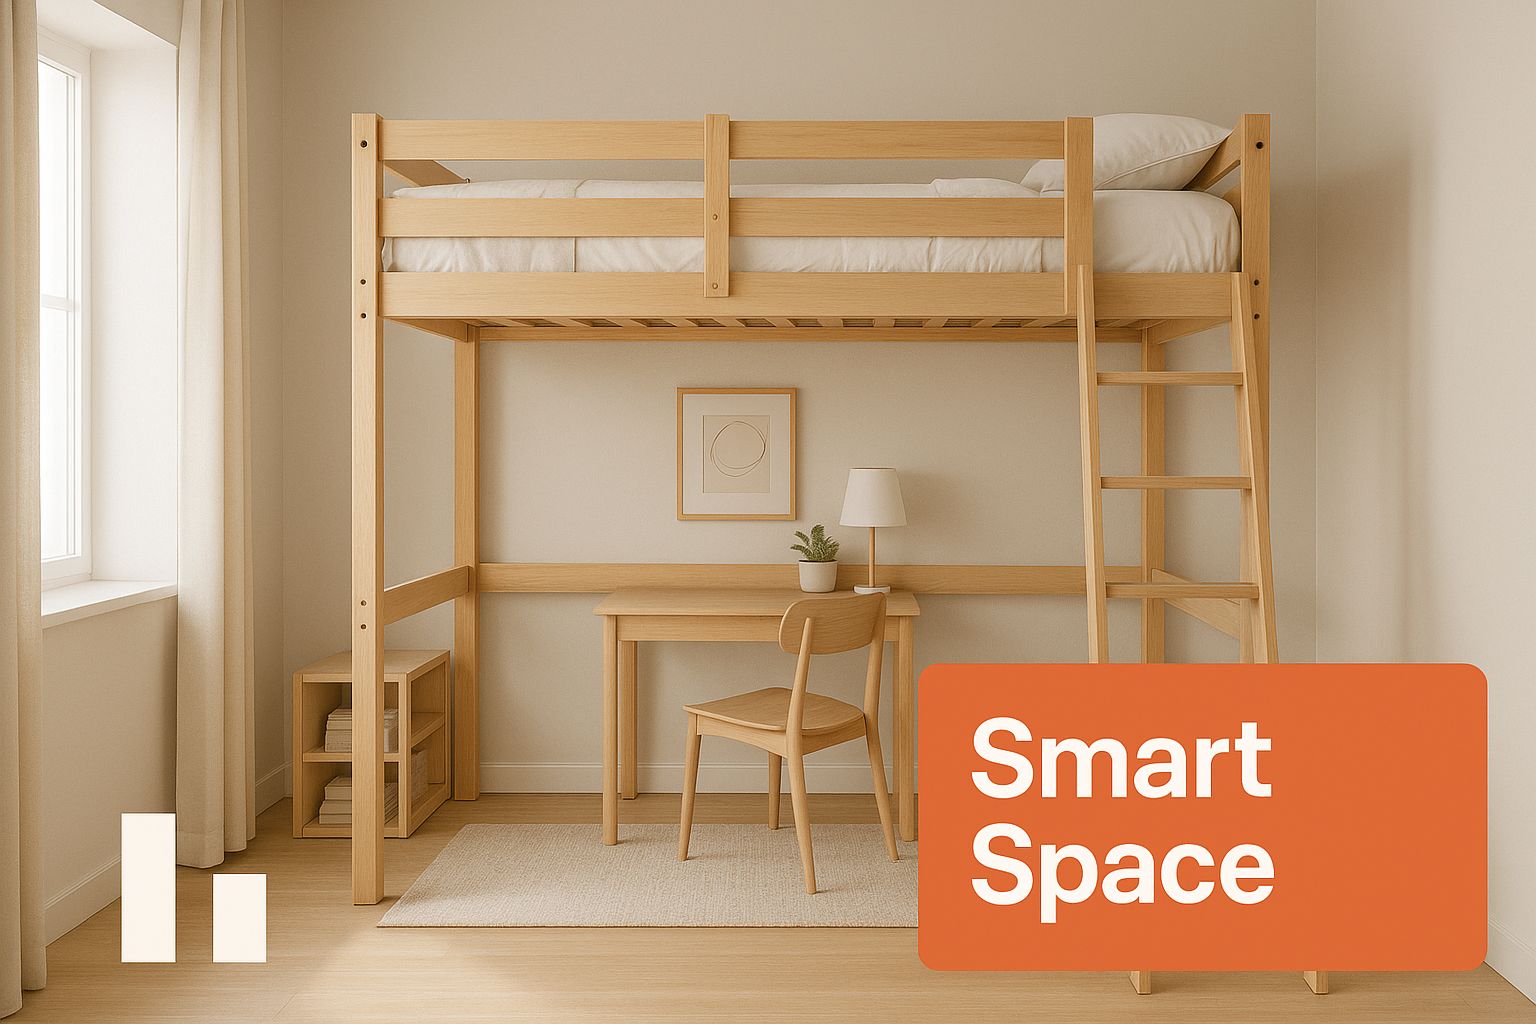
It’s a great visual of the main benefit—turning that unused vertical area into a real, functional zone.
It's no secret that living spaces, especially in cities, are getting smaller. That's why the demand for furniture that does more than one thing is skyrocketing. In fact, the global loft beds market was valued at USD 7.2 billion in 2024 and is expected to climb to USD 12.5 billion by 2033. This boom shows a clear shift toward smarter, more efficient home setups.
The real beauty of a loft bed hack is creating something that is perfectly tailored to your needs. Whether you need more storage or a dedicated workspace, the solution is right under your mattress.
One of the biggest wins of an IKEA loft bed hack is gaining back precious floor space. It's a great starting point to explore other top ways to maximise bedroom storage. For more inspiration, we have a whole guide on creative storage solutions for small spaces.
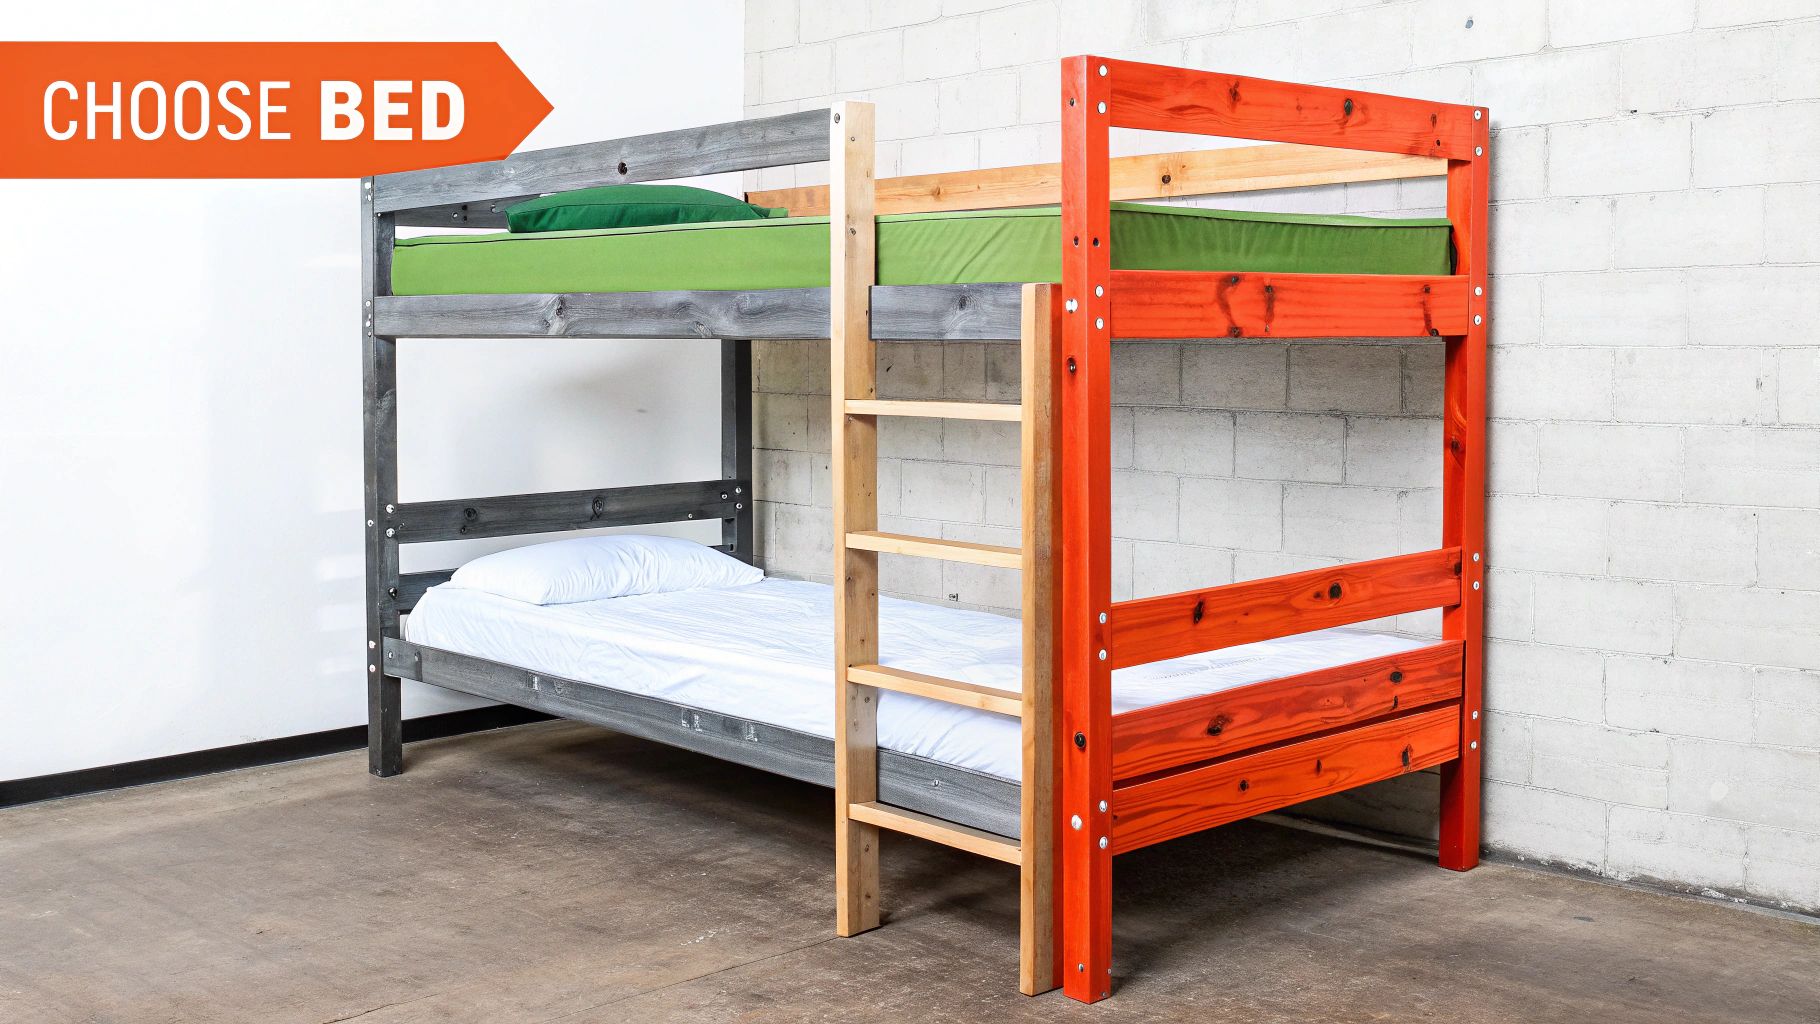
The success of your entire IKEA loft bed hack really hinges on picking the right model from the get-go. Not all loft beds are created equal, and your choice will directly impact how easy—or difficult—your customization is going to be.
Your first big decision is the material.
Before you dive in, it helps to know the key players. Here's a quick rundown of the most popular IKEA loft beds to help you choose the best base for your DIY project.
| Model Name | Material | Typical Price Range | Best For Hacks |
|---|---|---|---|
| SMÅSTAD | Wood (Fibreboard) | $400 – $600 | Beginners. Easy to drill, paint, and attach custom parts like desks or shelves. |
| STUVA | Wood (Fibreboard) | $350 – $550 | Integrated storage hacks. Blends well with other IKEA storage systems. |
| SVÄRTA | Metal (Steel) | $200 – $350 | Industrial looks. Great for minimalist designs, but requires metal drill bits for mods. |
| TUFFING | Metal (Steel) | $150 – $250 | Budget-friendly projects. Simple frame is a blank canvas for creative additions. |
| VITVAL | Metal & Fabric | $250 – $400 | Lighter-duty hacks. Fabric panels can be customized, but the frame has lower weight limits. |
As you can see, your choice really depends on the tools you have and the final look you're aiming for. Wooden frames are generally more forgiving, while metal frames offer a different aesthetic but require a bit more prep work.
Wooden frames, like the incredibly popular SMÅSTAD, are just so versatile. Wood is a dream to work with—you can drill, saw, sand, and paint it with no fuss. This makes it the perfect canvas whether you're a beginner or planning something complex. Want to attach a desktop, add shelves, or even build a small closet underneath? Standard tools are all you need.
On the other hand, metal frames like the SVÄRTA or TUFFING give you that sleek, industrial vibe. They are just as hackable, but you'll need to do a little more prep. Make sure you have drill bits designed specifically for metal and grab a good primer if you plan on painting.
Before you even think about buying, grab a tape measure. This is a non-negotiable step. You need to know your room's exact dimensions, paying close attention to the ceiling height. Nothing's worse than realizing you can't sit up in bed without hitting your head.
A good rule of thumb is to have at least 30 inches of breathing room between the mattress and the ceiling. If you need a refresher, our guide on how to measure furniture can walk you through getting those numbers right.
Your initial sketch doesn't need to be a masterpiece. A simple drawing with key measurements for your desk, shelves, or closet rod acts as a valuable blueprint, preventing guesswork and extra trips to the hardware store.
Always keep the bed's original specs in mind. A model like the VITVAL, for instance, has specific sizing and weight limits—it’s designed for mattresses up to 5 inches thick and can handle a max load of around 220 pounds. This is perfect for kids and teens but might not be ideal for every project. Knowing these details from the start ensures your final creation is both stylish and, more importantly, safe.
Before you even think about making the first cut on your IKEA loft bed hack, you need to get your toolkit in order. Trust me, nothing kills project momentum faster than a last-minute, panicked trip to the hardware store for a single screw. Let's walk through what you absolutely need and what will just make your life a whole lot easier.
The non-negotiables are your basics. You won't get far without a reliable power drill with a decent set of bits, a tape measure, and a level. Without these three, you're just guessing, and a wobbly, crooked loft bed is not a fun surprise.
Think of this list as the core ingredients for your project. You can't really start without them.
Pro Tip: Don’t underestimate the power of a simple sketch. Drawing out your plan with all the measurements will save you from buying too much lumber or, even worse, cutting a critical board too short. It's the cheapest insurance policy you can get for a project like this.
Got the basics covered? A few extra tools can really elevate your project from looking "homemade" to "custom-built." A pocket hole jig, for instance, is a game-changer. It lets you create incredibly strong joints for things like desktops while keeping all the screws completely hidden from view.
If you’re just starting to build out your toolkit, we've put together a complete guide to the essential furniture assembly tools that covers everything you might need for this and future projects.
Also, a quality circular saw will make cutting large pieces of wood for a desktop or custom side panels much cleaner and quicker than struggling with a handsaw. It's a worthy investment if you plan on doing more projects down the line.
Alright, with your plans in hand and tools at the ready, it’s time for the fun part: bringing your custom loft bed to life. This is where your vision for an IKEA loft bed hack starts to take shape. Let's walk through three of the most popular and practical hacks I've seen, with some real-world advice to get them done right.
Before you make a single cut, remember the golden rule of any project like this: measure twice, cut once. It sounds simple, but I promise this little habit will save you a world of frustration and a few trips back to the hardware store.
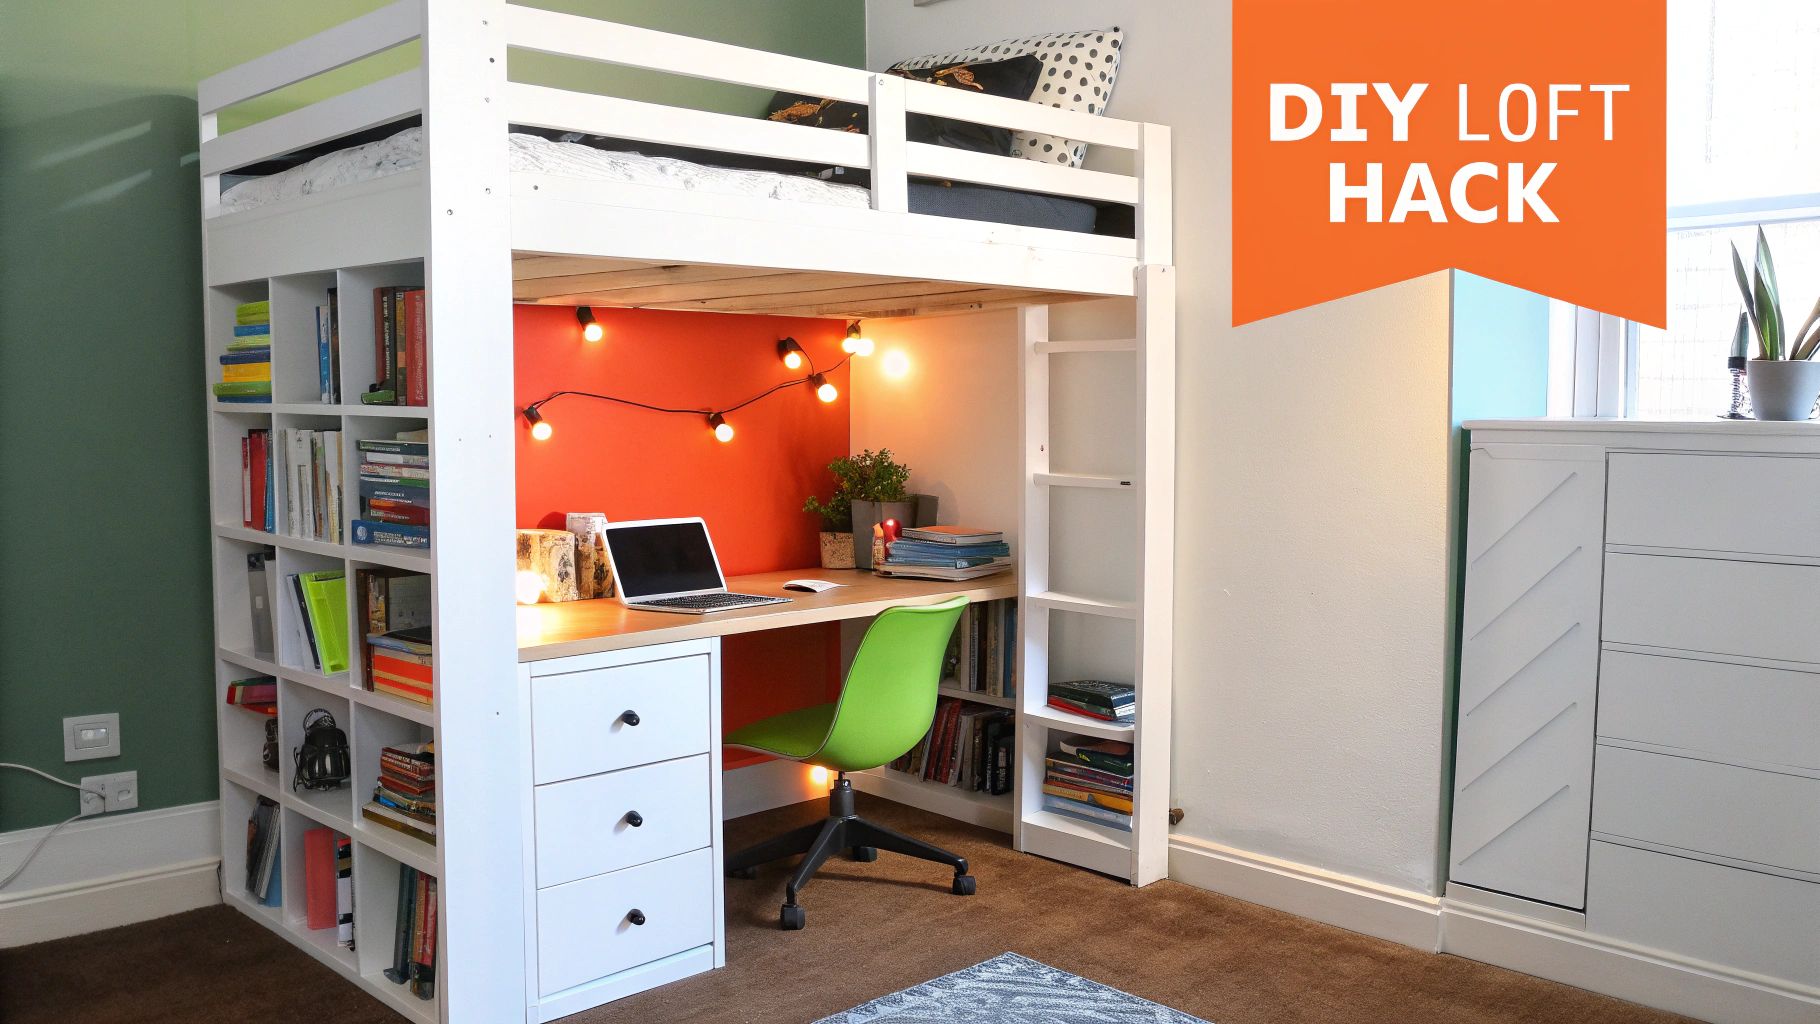
Building a desk under your loft bed is a classic for a reason—it’s just so incredibly efficient. The first step is to measure the exact width between the bed’s legs. Then, subtract about 1/8 inch from that measurement. This gives you a little wiggle room so the desktop slides in smoothly without a fight.
For the desktop itself, you can’t go wrong with a sheet of ¾-inch plywood or a solid pine board. They give you the best mix of strength without breaking the bank. You'll want to secure it to the bed frame from underneath with some sturdy L-brackets. To kill any potential wobble, I always add a support cleat (a simple 1×2 pine board) along the back, screwed right into the wall studs.
If you're short on storage, the space under a loft bed is a goldmine for an open-concept closet. The most critical piece here is a strong closet rod.
This kind of setup can easily hold a week's worth of clothes, which can make a huge difference by freeing up your main closet.
A detail that often gets overlooked is cable management. If you're building a desk or a reading nook, use some adhesive cable clips or a raceway to run wires neatly along the bed legs. It’s a small touch that makes your hack look clean and professional.
This might be the most rewarding hack of all—turning that empty space into a personal retreat. A great way to start is by adding thin plywood or beadboard panels to create two "walls" under the bed, giving it a real sense of enclosure. A coat of a calm, complementary paint color works wonders.
When it comes to lighting, a simple stick-on, battery-powered LED puck light is a super safe and easy choice. If you're comfortable with some light wiring, a low-voltage wall-mounted reading lamp adds a more permanent, sophisticated feel. Just finish it off with some plush pillows and a soft rug, and you’ve got the perfect little escape.
A great DIY project is one that’s both beautiful and built to last. Before you start admiring your handiwork, let's run through the crucial safety checks that will make sure your IKEA loft bed hack is rock-solid for everyday life.
First things first, grab your level. You need to make sure the entire structure is perfectly even, with absolutely no wobble. Any hint of instability now is only going to get worse over time, especially once you add the weight of a desk or some heavy shelves.
Next up is anchoring. If you’ve added a significant amount of weight or have kids who might be tempted to climb, securing the frame to the wall isn't just a suggestion—it's non-negotiable. We've got detailed instructions on how to secure furniture to the wall that make this whole process straightforward and safe.
With the safety checks out of the way, it’s time to add the details that take your project from "DIY" to "custom-designed." It's these little things that make a massive difference in the final look.
Start by filling any visible screw holes with a bit of wood filler. Once it’s dry, a quick pass with fine-grit sandpaper will create a seamless, professional-looking surface. Trust me, this step is key if you want a smooth, even finish when you paint or stain.
Speaking of which, a quality stain or paint not only looks fantastic but also protects the wood from wear and tear. And don't forget the hardware! Swapping out the standard knobs for new drawer pulls or sleek handles is a simple upgrade that can really tie the whole piece together.
For a final touch that feels truly high-end, think about integrated lighting. A simple LED strip light tucked under the loft bed or along a shelf can completely transform the space, making it more functional and giving it a great visual pop.
As you put the finishing touches on your project, you'll want to make sure it's as comfortable as it is functional. It's worth exploring mattress topper solutions for enhanced comfort to get the support just right.
Jumping into your first IKEA loft bed hack is exciting, but it's totally normal for a few questions to pop up. Getting them sorted out before you start can be the difference between a project you love and one that drives you crazy. Let's get into some of the most common things people wonder about.
Pretty much, yeah. But the material of the bed frame will definitely shape your experience.
If you’re just starting out, you can't go wrong with a solid wood or fibreboard frame like the SMÅSTAD (which took the place of the old fan-favorite STUVA). These are a dream to work with because you can cut, drill, and paint them with standard tools you probably already own.
On the other hand, a metal frame like the SVÄRTA is a fantastic choice if you're going for more of an industrial vibe. Just know that it requires a little extra prep work. You'll need to grab some drill bits made specifically for metal and think differently about painting—a good, strong primer is non-negotiable if you want the paint to actually stick.
This is the big one, and you're right to ask. Safety has to be your number one priority.
First things first: build the original bed exactly like the IKEA instructions tell you to. No shortcuts. This makes sure the fundamental structure is as solid as the designers intended before you start adding your own flair.
When you begin adding heavier elements, like a full desktop or some beefy shelves, don't skimp on the hardware. Use strong L-brackets and make sure you're using the right kind of screws for the material you're drilling into.
Look, if you're going to heavily modify your loft bed, the single most important thing you can do for safety is anchor it to the wall. Seriously. Securing that frame to one or two wall studs is the best way to kill any wobble and make the whole thing feel rock-solid for daily use.
Easy: diving in without a plan. The excitement takes over, people skip the measuring phase, and then the headaches begin. You absolutely have to double-check your room's dimensions, especially the ceiling height, before you even think about buying the bed.
There’s nothing worse than building this awesome creation only to realize it doesn't fit, or it's so close to the ceiling you can't even sit up without hitting your head. Do yourself a huge favor and make a simple sketch with all your key measurements written down. It's a small step that prevents the biggest mistakes.
