-
CALL US:
- (866) 952-3456
Before you can properly care for your teak furniture, you have to understand what makes this wood so special in the first place. Teak isn't like other hardwoods; it has its own built-in defense system. We're talking about high levels of natural oils and a super-dense grain, which make it incredibly resistant to weather, rot, and bugs.
Following a good care routine is all about preserving these amazing qualities, ensuring your investment stays beautiful and structurally sound for decades to come.
Unlike pine or oak, which need a lot of help to survive outdoors, teak comes prepared. Its natural oils act as a preservative, repelling water and telling insects like termites to look elsewhere. This is the same reason it’s been the top choice for shipbuilding for centuries and why it’s still the gold standard for outdoor furniture.
This legendary durability is why the global teak furniture market was valued at around $8.5 billion in 2023 and is only expected to climb. People know that when they buy teak, they’re getting longevity. For more on the numbers, you can check out this teak furniture market analysis. Really, caring for teak is less about rescuing it from the elements and more about preserving its classic beauty.
One of the most recognized traits of teak is how it ages. When it's new, teak has that beautiful, warm, golden-honey color. But when left outside and exposed to UV light, it slowly and gracefully transitions to a distinguished, silvery-gray patina.
This color shift is purely cosmetic—it doesn't weaken the wood one bit. The big decision you have to make is whether you want to keep that original honey tone or embrace the silver. Your choice will completely shape your maintenance plan.
This isn't just about looks; it's about committing to a specific care routine. The golden honey color means a yearly sealing project. Going for the silver patina means you still need to clean it periodically so it looks sophisticated and cared for, not just old and neglected.
It's important to know that not all teak is created equal, and its quality has a huge impact on the care it will need. The best stuff, Grade A teak, is cut from the very center (the heartwood) of a fully mature tree. This is where the concentration of natural protective oils is highest and the grain is the densest, giving you maximum durability.
On the other hand, lower grades of teak (Grades B and C) come from the outer layers of the tree. They have fewer oils and a less dense grain, making them more vulnerable to the elements and requiring a lot more upkeep. Investing in high-quality pieces from the get-go usually means less work for you down the road. And when you do invest, make sure it’s put together right; our guide on professional patio furniture assembly can help ensure it starts off on the right foot.
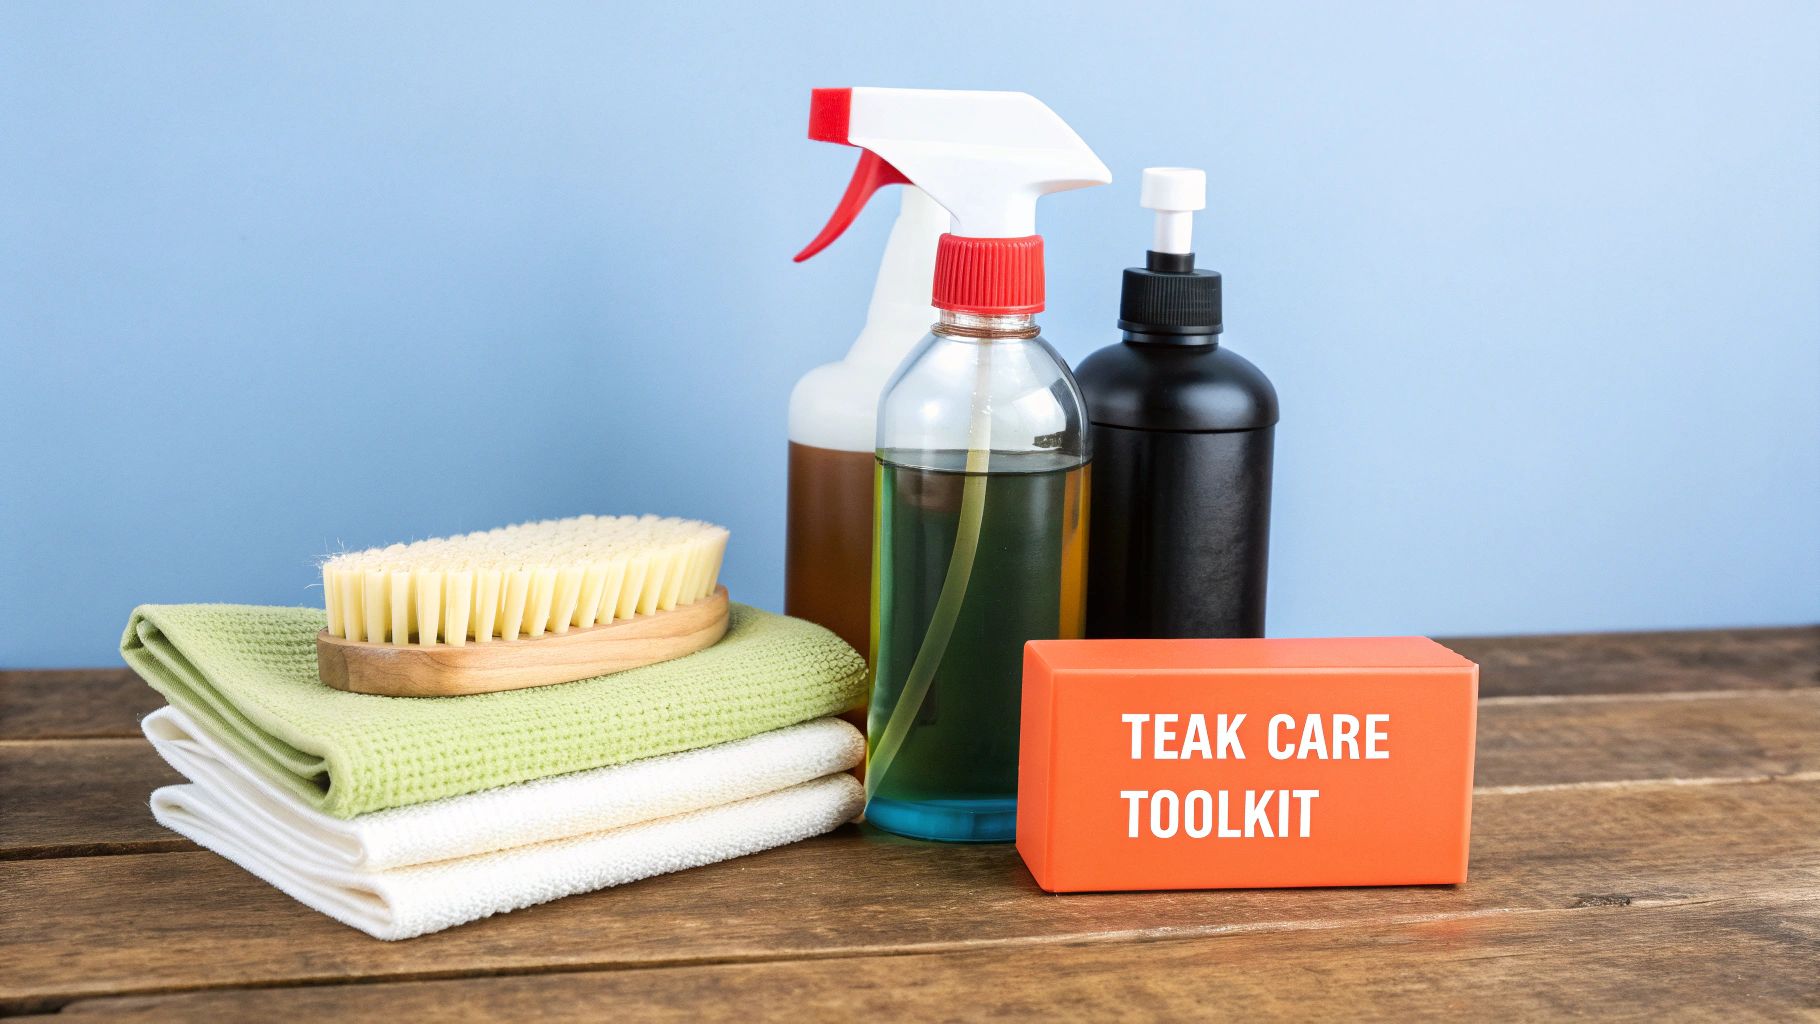
Before you dive into any maintenance project, having the right supplies on hand can turn a chore into a seriously satisfying process. Proper care of teak furniture starts with a well-stocked kit, and trust me, it’s about more than just grabbing some old soap and a sponge.
Using the wrong stuff can actually cause more harm than good, potentially damaging the beautiful wood you're trying to protect. Think of it like this: you wouldn't use a steak knife to peel a potato. For teak, this means gentle yet effective supplies that work with the wood's natural properties, not against them. A little prep now saves you from headaches later.
The foundation of any good teak care routine is cleaning. This is not the time for harsh household detergents or abrasive scouring pads. Those will strip the wood’s precious natural oils and leave scratches on the surface.
Your non-negotiable cleaning items should include:
Here's a common mistake I see all the time: people reach for a pressure washer to speed things up. Don't do it! The high-pressure stream can blast away the soft pulp of the teak, leaving the surface rough, fuzzy, and permanently damaged. A little elbow grease and a gentle brush are all you need.
Once your furniture is clean, the next step is deciding on the final look. Do you love the silvery-gray patina, or are you aiming to keep that warm, golden-honey tone? Your answer will dictate which products you’ll need. For a solid overview of essential gear, our guide on fundamental furniture assembly tools shares the same core principle: always use the right tool for the job.
The product aisle can be confusing, but it really boils down to just a few categories.
This table is a quick reference to help you choose the right treatment based on your desired look and your furniture's current condition.
| Product Type | Primary Purpose | Best For | Application Frequency |
|---|---|---|---|
| Teak Cleaner | Removes dirt, mildew, and graying | The first step in any restoration or maintenance routine. | Annually or as needed |
| Teak Brightener | Restores color and removes stains | Used after cleaning to neutralize the cleaner and brighten the wood back to its natural tone. | Annually, after cleaning |
| Teak Sealer | Protects from UV rays and moisture | Preserving the golden-honey color and preventing the natural graying process. | Once per season |
| "Teak Oil" | Provides a temporary rich color | Achieving a short-term deep color, but often requires frequent reapplication. | Multiple times per season |
Think of these products as a system that works together to get you the best results.
From my experience, most modern experts recommend a teak sealer over traditional "teak oils." Why? Sealers provide much longer-lasting UV protection and create a barrier against moisture, which is key to preventing mildew. This ultimately means less work for you and better overall care of teak furniture.
The secret to keeping teak beautiful for the long haul isn't some back-breaking, once-a-year ordeal. It’s all about a simple, consistent cleaning routine. We’re not talking about deep restoration here—just smart, gentle maintenance to keep everyday grime like dust, pollen, and mildew from getting a foothold.
Think of it as a quick check-up for your furniture. Whether your pieces are basking on the patio or holding down the fort in your living room, the goal is the same: clean away the gunk without stripping the wood of its precious natural oils. This is what preserves both its strength and that classic, sophisticated look.
This infographic breaks down the basic flow of a routine cleaning session, keeping it simple and effective.
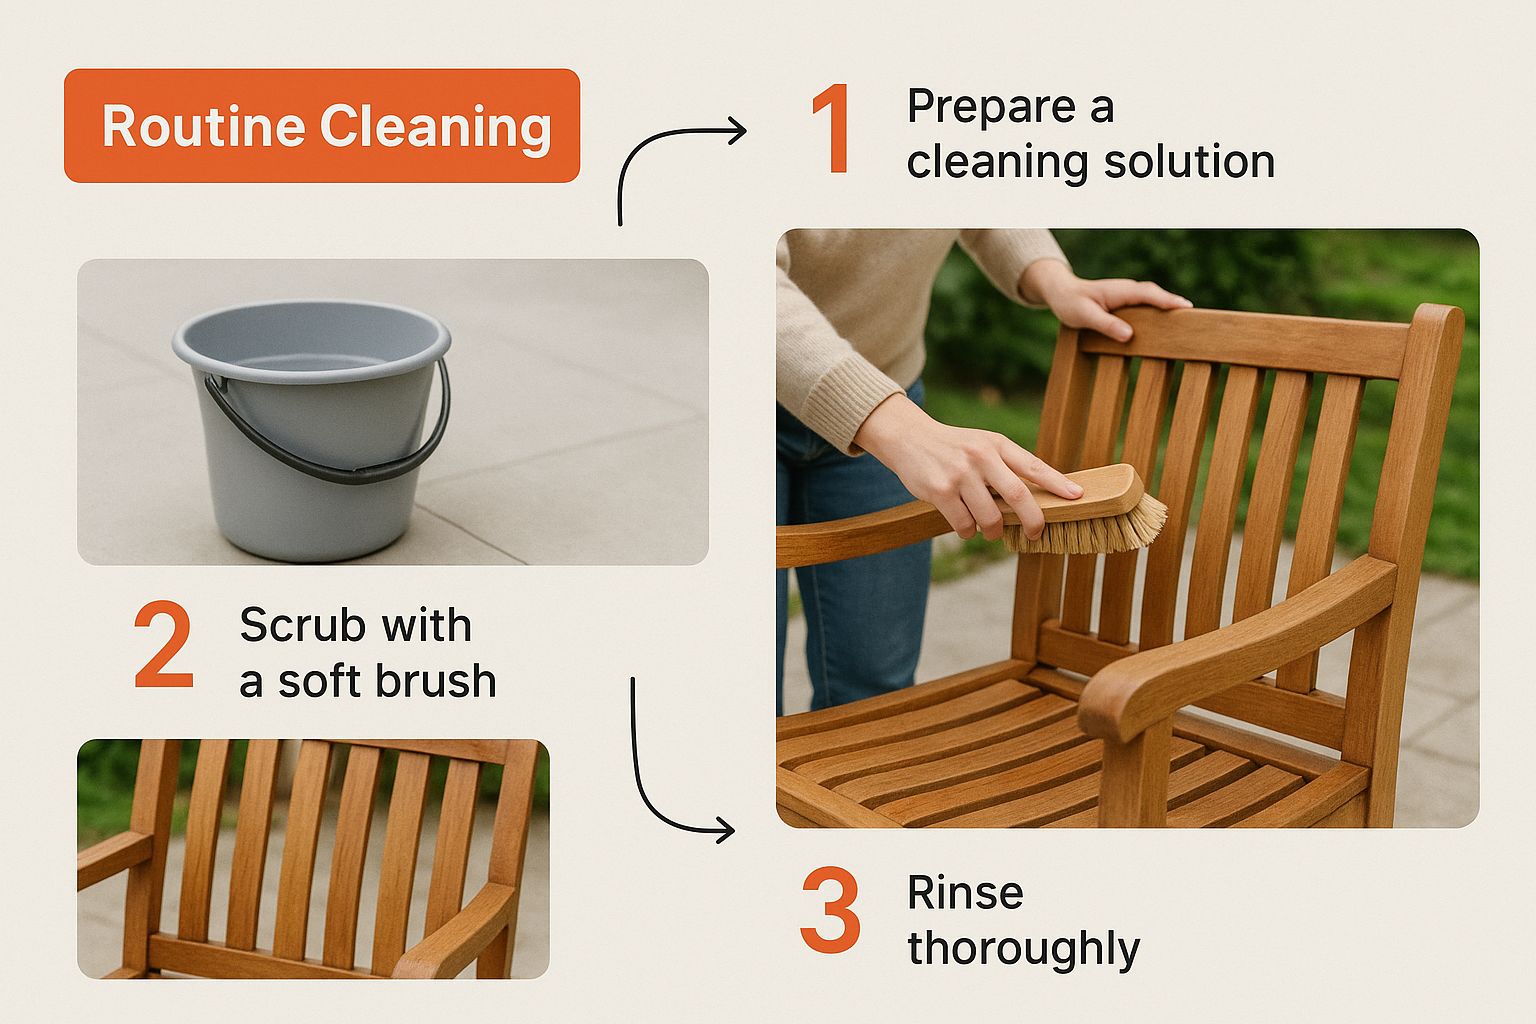
As you can see, the name of the game is a gentle touch. A soft brush and a simple cleaning solution are your best friends here.
Step away from the harsh chemical cleaners. Seriously. Most of them are far too aggressive for teak and will strip away its protective oils, doing more harm than good. For routine upkeep, a simple homemade solution is your safest and most effective bet.
Here’s a tried-and-true recipe that costs next to nothing:
Just mix these in a bucket. The soap does a great job of lifting dirt, while the vinegar (if you need it) makes the surface slightly acidic, which helps fend off mildew—a common headache for outdoor furniture, especially in humid climates. This simple concoction is all the cleaning power you need.
If there's one thing to avoid, it's chlorine bleach. It might seem like a quick fix for stubborn mildew, but it’s a killer for teak. It breaks down the wood fibers and can leave you with a blotchy, uneven mess over time. Just don't do it.
Outdoor furniture is constantly battling the elements, so it needs a bit more attention, usually once or twice a year. Try to pick a mild, overcast day for this task. Cleaning in direct, hot sunlight can cause your solution to dry too quickly, leaving a soapy film.
Indoor teak has it pretty easy. It’s not dealing with rain, intense UV rays, or bird droppings. A quick dusting once a week with a microfiber cloth is usually plenty. When you do encounter sticky spots or a bit of buildup, that same gentle DIY solution is perfect.
While teak has its own unique character, the basic principles of caring for it are universal to quality wood. For a broader look at wood care, these expert tips for cleaning antique wooden furniture safely are a great resource. The focus on gentle methods and avoiding harsh chemicals is a lesson that applies to any piece you want to preserve. Proper care of teak furniture is simply an investment that pays you back with years of beauty and use.
Every teak owner eventually gets to this crossroads. It's a decision that really defines how you'll care for your furniture and what kind of vibe it gives off. Do you want to keep that warm, just-out-of-the-showroom golden look? Or do you let it age gracefully into that distinguished, silvery-gray patina?
Honestly, there’s no wrong answer here. It all comes down to personal style and, frankly, how much work you want to put in.
This one choice sets the stage for your entire maintenance routine. Going for the classic golden look means you're signing up for regular sealing. Embracing the silver is a more hands-off approach, but that doesn't mean you can just forget about it. Let's break down both paths so you can figure out what works for you and your outdoor space.
If you're in love with that rich, warm color of new teak, your main job is to protect it from the sun's ultraviolet (UV) light. That’s what causes it to change color. Your best friend in this fight is a high-quality teak sealer.
There's a common myth that "teak oil" is the way to go. Most of what's sold as teak oil is actually a mix of linseed or tung oil with solvents. Sure, it makes the wood look rich for a little while, but you have to reapply it constantly. Worse, it can sometimes trap moisture and encourage mildew growth. A modern teak sealer is a much, much better choice.
A good sealer forms a protective, breathable barrier over the wood. It’s loaded with UV inhibitors that block the sun's rays, basically hitting the pause button on the graying process. It also repels water, which is a huge help in keeping mildew from setting up shop.
To keep that golden look, here’s the game plan:
The commitment to the golden hue is an active one. It’s a yearly ritual of cleaning and sealing. But for those who adore that classic, warm look, the result is well worth the effort, keeping your furniture looking pristine and vibrant season after season.
Letting your teak weather naturally is an equally beautiful—and very popular—option. This is how you get that signature silvery-gray patina, a look that just screams coastal elegance and timeless, well-loved outdoor style.
Going gray is definitely the low-maintenance route, but it's important to remember that "low-maintenance" isn't "no-maintenance." You get to skip the annual sealing, but you still need to do some basic cleaning to keep the furniture healthy.
Without it, that lovely silver can turn dark and blotchy with dirt, mildew, and whatever else is in the air. A simple annual wash with a soft brush and some mild soap is all it takes to keep the silver looking clean and sophisticated instead of just neglected.
Experience and research both show that untreated teak will weather to its silver-gray patina within about 6 to 12 months of being outside. While this choice means less work, it's worth noting that sealing can extend the furniture's lifespan from a typical 10-15 years for untreated pieces to 20 years or more.
Ultimately, your decision should come down to your personal taste and the design of your outdoor area. The golden hue looks fantastic in vibrant, lush gardens and pairs great with colorful cushions. It creates a really warm, inviting atmosphere.
On the other hand, the silver patina has a cool, neutral tone that fits perfectly with modern, minimalist designs or more rustic, natural landscapes.
Think about how your furniture layout will feature your chosen look. Some clever patio furniture arrangement ideas can make either the golden or silver finish the star of your outdoor living area.
And here’s the best part about teak: you can always change your mind. If you let it go gray and decide you miss the golden color, a good cleaning and restoration process will bring it right back. The most important thing is simply keeping the wood clean and healthy, no matter which color you're enjoying.
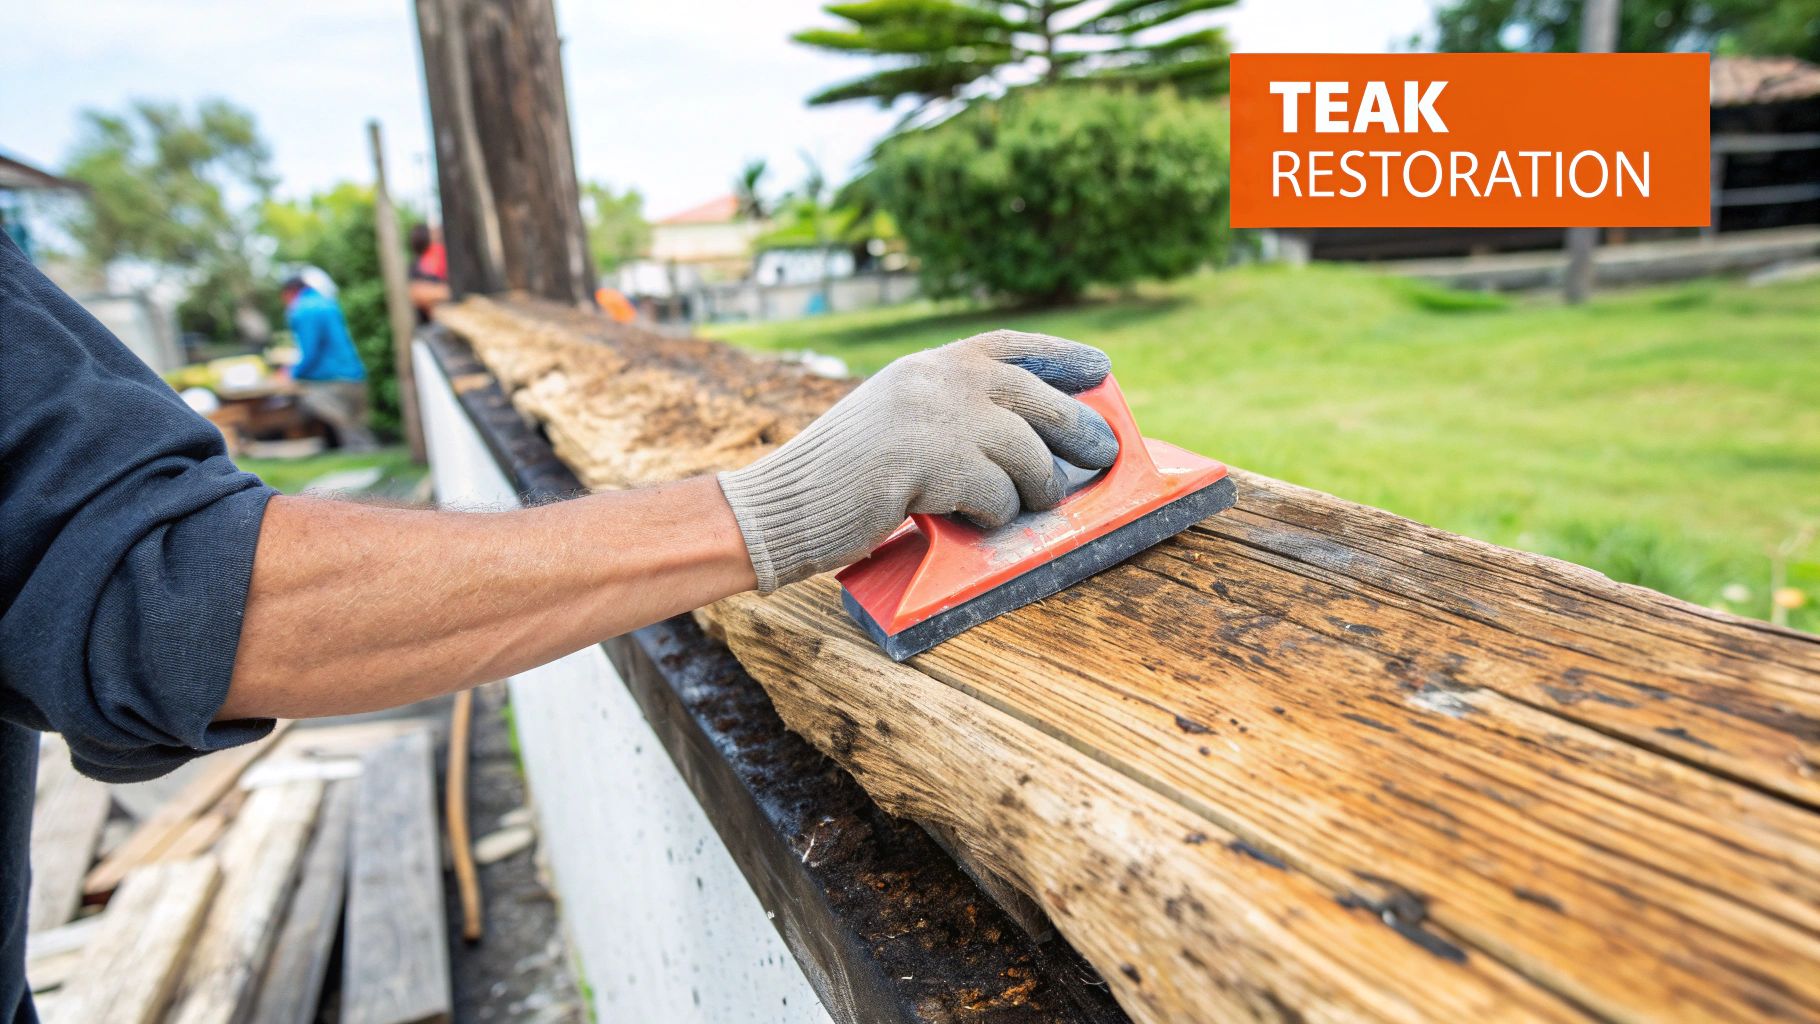
If you've inherited a teak set that's turned a blotchy, dark gray—or maybe just neglected your own for a few too many seasons—it can feel like a lost cause. But the amazing thing about teak is its incredible resilience. That beautiful golden wood is still hiding right under the weathered surface, just waiting to be revealed.
This isn't a quick wipe-down; this is a full restoration. And honestly, it’s one of the most rewarding DIY projects you can tackle. We'll walk through a proven method involving a deep, two-part cleaning, a crucial light sanding, and finally, sealing the wood to lock in that stunning, like-new finish. With a little elbow grease, you can completely transform your furniture.
The first and most critical stage of any restoration is an aggressive cleaning. Forget the gentle soap and water from your routine maintenance. For this job, you need a specialized two-part teak cleaner and brightener system. These products are designed to work together to chemically strip away years of built-up grime, mildew, old sealer, and the oxidized, gray top layer of wood fibers.
The process is straightforward but does require some muscle:
This isn't just cleaning; it's a chemical peel for your furniture. The cleaner does the heavy lifting to remove the gray, and the brightener is the finishing touch that prevents the wood from looking bleached out, revealing its true golden tones.
After your furniture is completely dry, you'll probably notice the grain feels a bit rough or "fuzzy." This is perfectly normal. The deep cleaning process raises the soft wood fibers, and sanding is the non-negotiable step to smooth them back down for a professional, silky finish.
Use 120-grit or 220-grit sandpaper for this. You’re not trying to remove layers of wood, just knock down that raised grain. A light, gentle touch is all you need. Always sand in the direction of the grain to avoid creating cross-grain scratches, which can be very noticeable.
Once you’re done, wipe away all the dust with a microfiber cloth. This step is key to ensuring your sealer will go on smoothly and adhere perfectly. If you run into stubborn stains like marker that the cleaner didn't lift, this is your chance to address them. You can find helpful guidance in our article on how to remove marker pen from wood, which offers techniques that work well here.
With the wood clean, smooth, and dust-free, you're ready for the final, transformative step: applying a teak sealer. This is what locks in that beautiful golden color you've worked so hard to uncover and protects it from the elements.
Using a lint-free cloth, apply a thin, even coat of a quality teak sealer, again, always wiping with the grain. Let the first coat soak in for about 30 minutes, then apply a second light coat. This two-coat system provides a durable barrier against UV rays and moisture, which is the key to proper care of teak furniture after restoration.
This protection is especially important in certain climates. In zones with extreme weather, failing to seal can lead to surface degradation that could cost 20–30% of the furniture's replacement value over a decade. If your teak is severely damaged, understanding broader wood restoration techniques can offer valuable guidance for bringing it back to life.
When you're dealing with beautiful teak furniture, questions are bound to come up. It's one thing to read a guide, but it's another to be standing there, hose in hand, wondering if you're about to make a huge mistake. Don't worry, we've heard them all.
This is your go-to spot for those little uncertainties. Think of it as having an expert on call. Getting these details right is what keeps your teak looking incredible year after year, instead of showing its age too soon. Let's clear up a few of the most common head-scratchers.
For most people, a good, deep clean once a year is the sweet spot. A spring refresh is usually perfect for washing away the winter grime and getting your set ready for sunny days.
But—and this is a big but—your local environment is the real boss here. If your patio is under a messy oak tree or you live in a humid, mildew-prone area, you might need to do a lighter wash every few months. The best advice? Just look at it. If it’s starting to look grimy or you see dark spots forming, it's time for a gentle scrub.
I'm going to make this one easy for you: absolutely not. This is probably the single most destructive thing you can do to your teak furniture. That high-pressure jet of water is way too aggressive for wood.
It literally blasts away the soft wood pulp between the harder grain, leaving the surface rough, splintered, and fuzzy. This "raising the grain" effect also strips the wood of its natural protective oils—the very stuff that makes teak so famously durable. Stick to a soft-bristle brush and a bit of elbow grease. It’s the only way to do it right.
Teak's legendary durability comes from its dense grain and high oil content. A pressure washer destroys both, effectively undoing everything that makes the wood so special. It's a tempting shortcut that will ruin your investment and dramatically shorten its life.
This one trips up everyone. The names sound similar, but they couldn't be more different in what they do for your furniture. It's a critical distinction to understand.
"Teak Oil": Let's be clear, most products sold as "teak oil" aren't pure oil from the teak tree. They're usually a blend of linseed or tung oil mixed with solvents. While they give a temporary dark, wet look, they require constant reapplication. Worse, they can trap moisture against the wood, which is an open invitation for mildew.
Teak Sealer: A modern sealer is the smarter choice for protection. It creates a breathable barrier on the surface that blocks the sun's rays with UV inhibitors, which is what stops the wood from turning gray. Sealers also repel water and last a whole season, giving you far better protection with a lot less work.
For true, long-term care of teak furniture, a quality sealer is almost always the superior option.
Ever unboxed a brand-new piece of teak and noticed some waxy or oily patches? Don't panic—that's a good thing! In fact, it's a great sign.
Those spots are the wood's natural, protective oils rising to the surface. It’s proof you've got a high-quality, Grade A piece of teak that's packed with the very oils that give it that famous, weather-beating resilience.
You don't need to do anything special. Just wipe the spots away with a clean, dry cloth. After a couple of weeks out in the elements, the surface will acclimate and this will stop happening on its own.
Don't let furniture assembly add stress to your life. From complex patio sets to indoor shelving, the experts at Assembly Smart are here to build it right the first time, ensuring your pieces are safe, sturdy, and ready to enjoy. Get your free estimate and book your hassle-free appointment today at https://assemblysmart.com.
