-
CALL US:
- (866) 952-3456
So, you're thinking about adding a trampoline to your backyard. Great choice! But before the fun begins, you've got to get it set up. The big question is: how much is this going to cost?
On average, you can expect to pay anywhere from $325 to $848 for a professional to install a standard, above-ground trampoline. This range covers the labor for a typical assembly, but keep in mind that things like leveling the ground or dealing with a tricky location can add to the final bill.
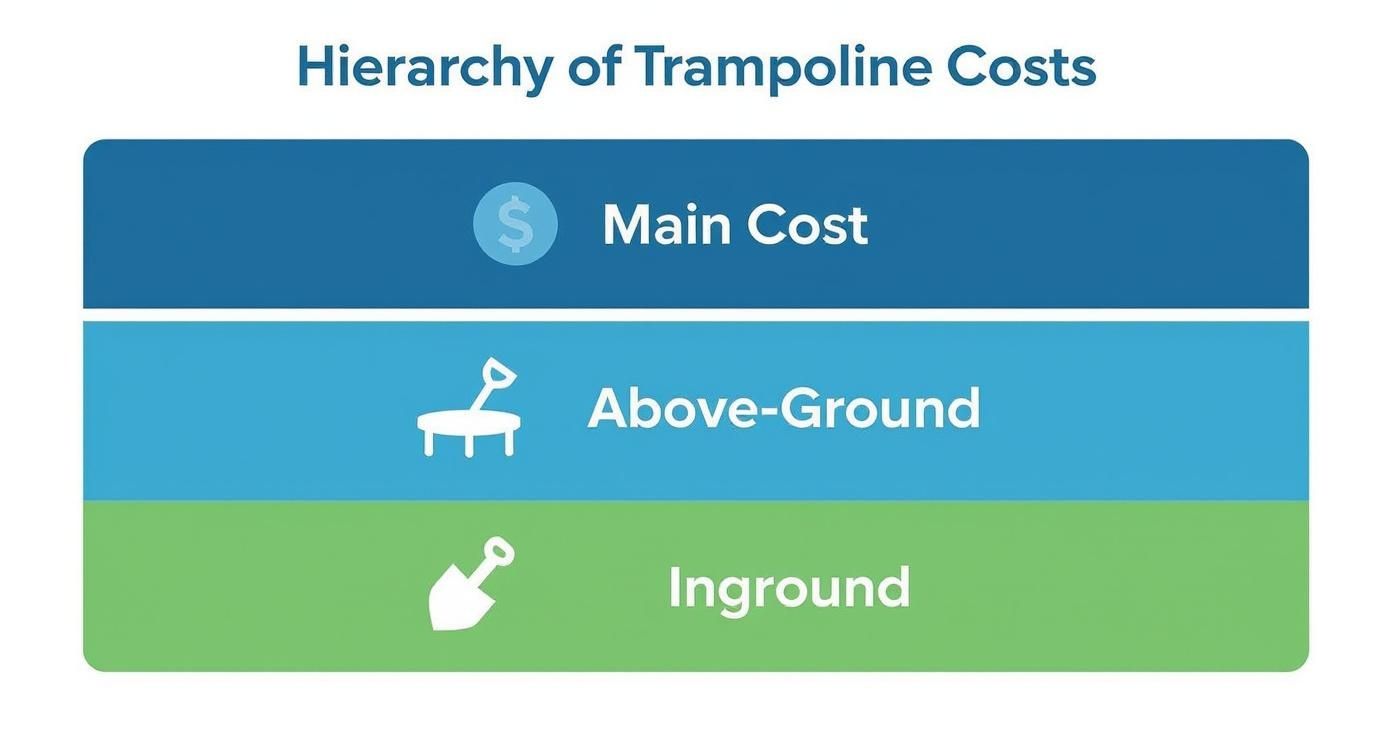
Before we get into the nitty-gritty, it helps to have a general idea of what to budget. The price for trampoline installation isn't a single, flat number. It's more of a spectrum, and the biggest factors are the type of trampoline you buy—above-ground or inground—and how big it is. Think of this as your starting point before we factor in the other details.
Putting together an above-ground trampoline is a lot like assembling a large piece of outdoor furniture. An inground model, on the other hand, is a mini-construction project that involves digging, drainage, and landscaping. As you can probably guess, their installation costs are worlds apart.
To give you a clearer picture, we've broken down the typical costs you can expect for professional installation based on the trampoline's type and size.
| Trampoline Type | Size | Average Professional Installation Cost Range |
|---|---|---|
| Above-Ground | Small Round (8-10 ft) | $200 – $400 |
| Above-Ground | Medium/Large Round (12-15 ft) | $350 – $600 |
| Above-Ground | Rectangle/Oval | $400 – $750+ |
| Inground | All Sizes (Excluding Kit) | $1,500 – $5,000+ |
Just remember, these numbers are mostly for the labor involved in the assembly itself.
For an inground trampoline, the total investment will be much higher once you add in the cost of excavation, building retaining walls, and setting up a proper drainage system. We'll dig into those details a bit later.
It's no secret that trampolines have become a backyard staple, fueling a huge market for both the trampolines themselves and the pros who install them. In fact, the global trampoline market is expected to hit a whopping $1.08 billion by 2029, showing just how much families are investing in home recreation.
Here in the U.S., the cost to have a standard above-ground trampoline professionally assembled lands somewhere between $325 and $848, with the final price tag depending mostly on labor rates and the condition of your yard.
Having these initial figures gives you a solid, realistic starting point. As we continue, we’ll break down all the little things that can nudge your final price up or down, from ground leveling to safety net installation. For an even more detailed look at the expenses, check out our complete guide on trampoline assembly cost.
The price on the trampoline box is just the first chapter of your cost story. That final number on the installation invoice? It often includes several behind-the-scenes factors that can seriously inflate the total. It’s a lot like buying a car—the base model price looks great, but it's the optional features and destination fees that shape what you actually pay.
The same thing happens with trampoline installation. A perfectly flat, clear patch of grass is the dream scenario for an installer, but let's be honest, reality is often more complicated. Knowing what these potential variables are ahead of time will help you build a realistic budget and sidestep any nasty surprises.
The infographic below breaks down the main cost drivers, splitting them between the two worlds of above-ground and in-ground setups.
As you can see, in-ground trampolines bring a whole different set of expenses to the table, mostly tied to digging and site work, which we’ll jump into a little later.
Your backyard’s landscape is easily the biggest wild card influencing your final trampoline installation cost. A pro installer’s quote is usually based on a standard, straightforward setup. If your yard needs extra work to get it ready, the clock starts ticking, and the price goes up.
The basic trampoline is just the beginning. Most families go for accessories that make it safer and more fun, and each one adds to the total project price. While some are included in the box, many are sold separately, and every single one needs to be assembled and attached correctly.
Common add-ons include:
A common mistake is underestimating how long these "small" additions take. A complex safety enclosure with a ton of components can easily add a full hour to the job, which directly hits your labor cost.
Beyond the trampoline and its fun accessories, a few other costs have a knack for popping up unexpectedly. These are easy to forget when you're budgeting but are important to get the full picture.
Delivery and Haul-Away
Trampolines show up in massive, heavy boxes. If you don't own a truck, delivery fees can run anywhere from $50 to over $100, depending on the store and where you live. After the installation, you're left with a mountain of cardboard and plastic. Many installers offer to haul away and dispose of it all for an extra fee, usually $25 to $75.
Permits and Regulations
In some areas, especially neighborhoods with strict homeowners' associations (HOAs), you might actually need permission or even a permit to install a trampoline. This is particularly true for in-ground models. While it's rare for standard above-ground units, it’s always smart to check your local rules to avoid potential fines down the road.
Understanding these factors is key to figuring out what you'll really spend. For a deeper dive into general cost estimation principles, you might find the microestimates website helpful. By taking your specific yard and chosen accessories into account, you'll get a much clearer picture of the true trampoline installation cost.
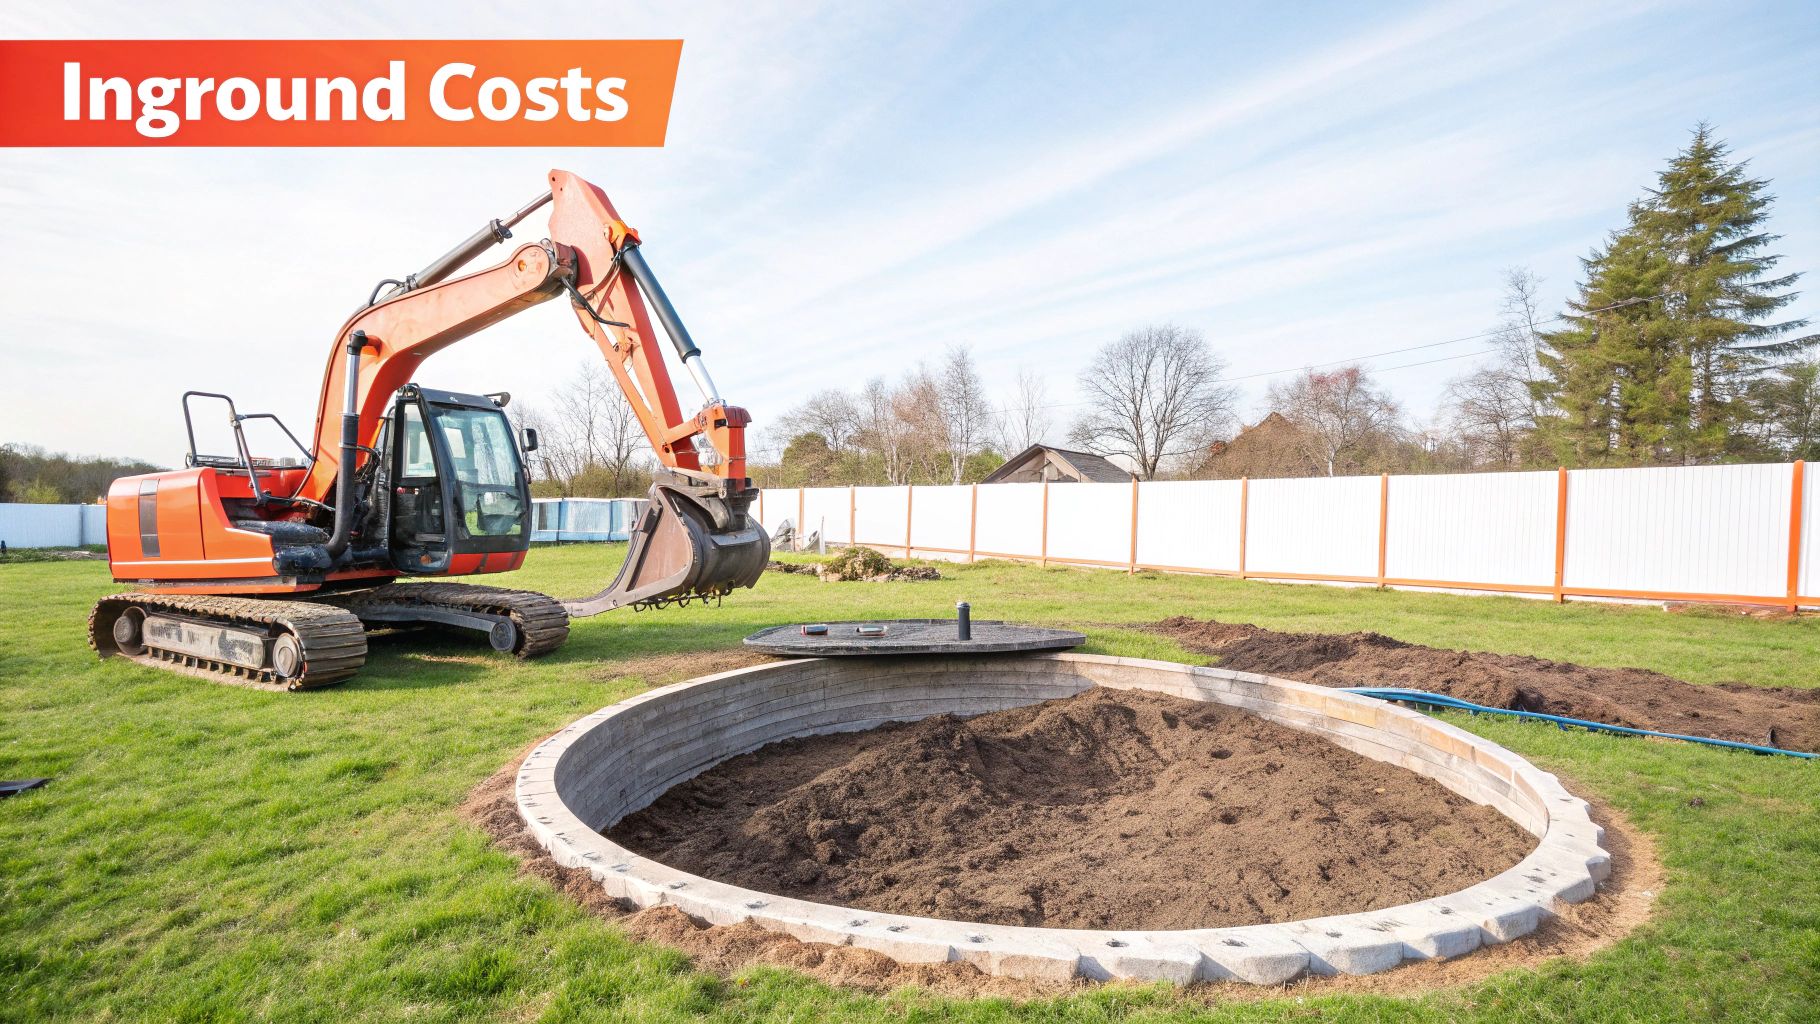
Choosing an inground trampoline isn't like assembling a product—it's more like kicking off a small landscaping project. That sleek, ground-level finish looks fantastic and can feel a lot safer, but getting there involves a completely different set of tasks and costs than your typical above-ground model.
Think of it like building a custom stone patio. The final price is shaped by earthwork, structural support, and water management, not just snapping a few pieces together. This higher investment comes from a huge shift in labor and materials.
While an above-ground trampoline might take a few hours to put together, an inground installation is a multi-day process involving heavy machinery, dirt removal, and some real construction know-how. This complexity is exactly why the trampoline installation cost for inground models is so much higher.
The biggest and most unavoidable cost is the excavation. You can't just dig a hole and drop the trampoline in; it needs to be the perfect depth and diameter to allow for proper airflow and a safe bounce. Professionals use equipment like mini-excavators to get the job done right, especially in yards with rocky or hard-packed clay soil.
The cost for this step alone can range from $500 to over $1,500, depending on a few key factors:
This initial digging phase is the foundation for the entire project. Getting it right is non-negotiable for both safety and performance. It’s a lot like preparing a perfectly flat base for other backyard structures; our guide on how to level ground for a swing set touches on similar site prep principles.
Once the pit is dug, it needs to be secured. The earth around the hole can easily collapse over time from rain and soil erosion, turning your fun investment into a dangerous sinkhole. To stop this, a retaining wall system is absolutely essential.
Most inground trampoline kits come with a steel or heavy-duty plastic frame that does this job, but the cost of the kit reflects this critical component.
On top of that, you have to think about what happens when it rains. A trampoline pit without proper drainage can quickly become a muddy pond, inviting mosquitoes and potentially damaging the trampoline’s frame and mat.
An effective drainage system is non-negotiable for an inground trampoline. Installers typically create a sump at the bottom of the pit filled with gravel. In some cases, they might even install a French drain or an electric sump pump to actively move water away.
These systems add another layer of cost, usually running from $200 to $600 for materials and labor. This is a vital step to protect your investment and make sure it lasts.
The price of installing an inground trampoline has steadily risen, reflecting these necessary, labor-intensive steps. A decade ago, installations were in the $1,200 to $3,000 range. By 2020, that figure climbed to between $1,500 and $5,000 for a complete, professional job. A high-quality 12-foot trampoline kit might cost $2,235 on its own, with the specialized installation pushing the final price much, much higher. You can discover more insights about these installation cost trends on bostonlandscapeco.com.
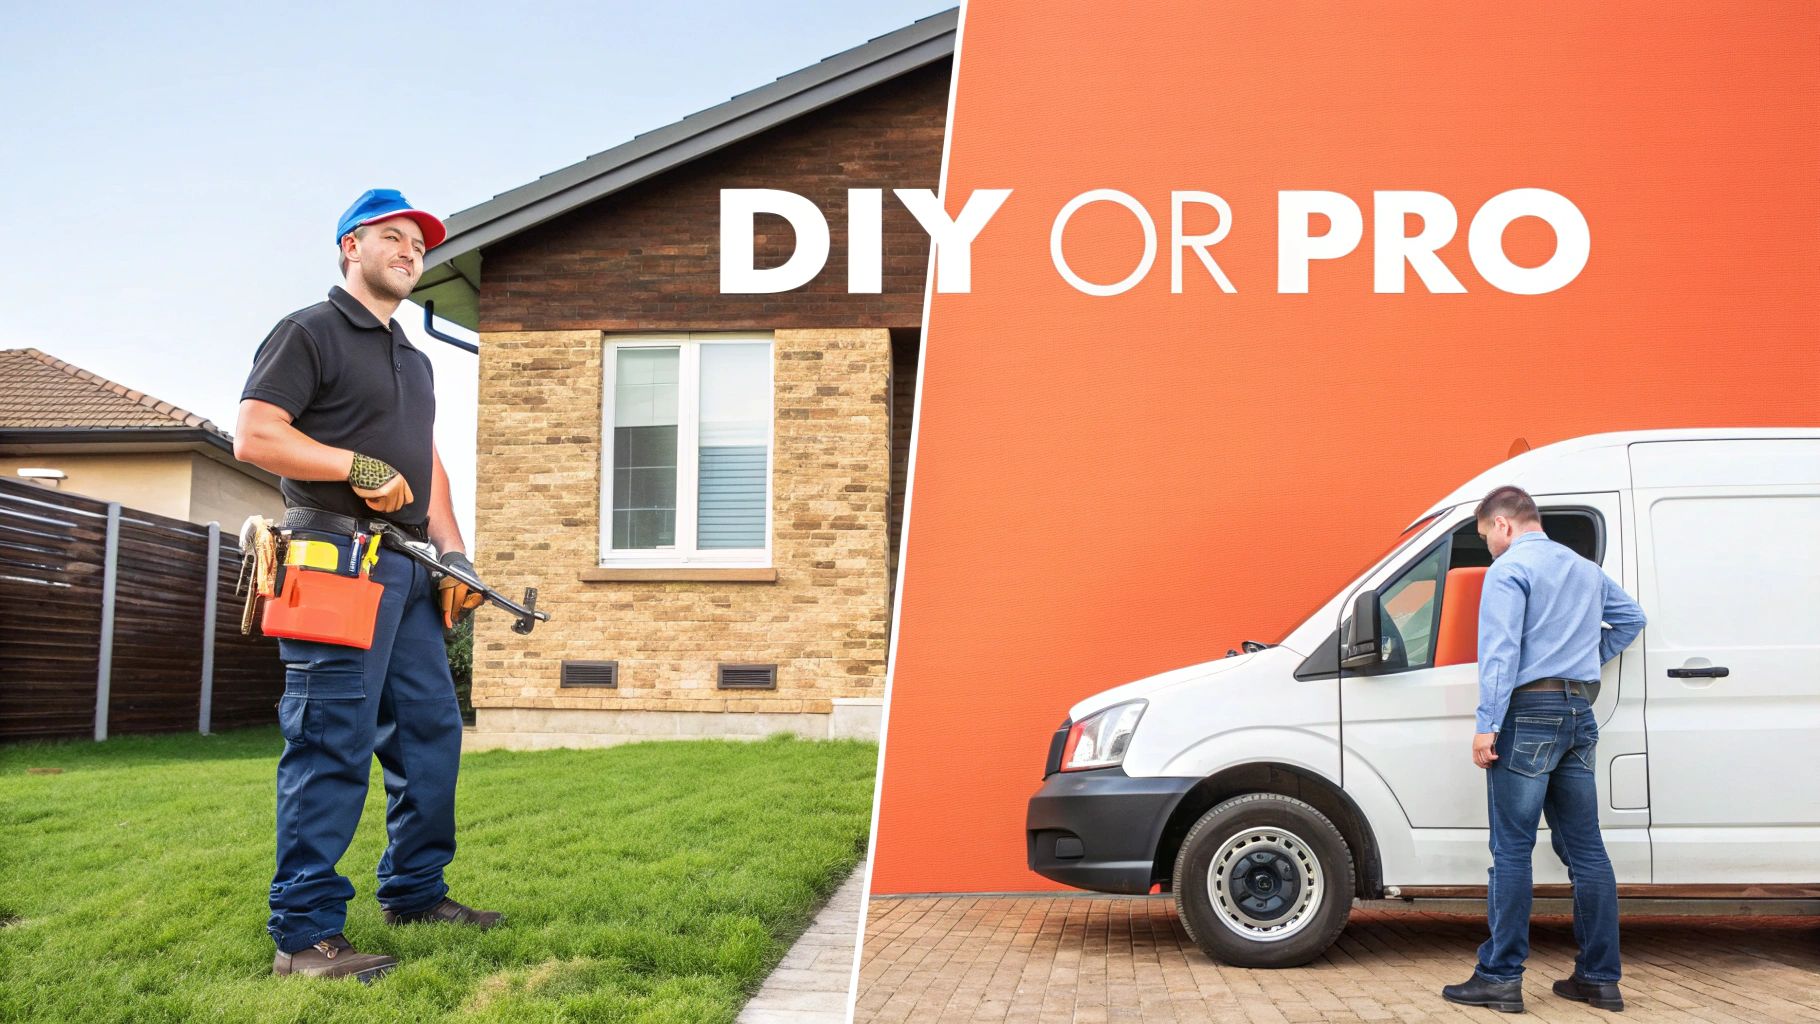
So, you've picked out the perfect trampoline. Now you're standing at a classic fork in the road. Do you roll up your sleeves, stare down that mountain of parts, and build it yourself? Or do you make a call and have a pro handle it for you?
This decision is all about balancing upfront savings with the value of expertise, safety, and your own sanity. Let’s break it down.
Going the DIY route seems like a no-brainer for saving money. You’re only paying for the trampoline, right? But the real "cost" isn't just on the price tag—it’s measured in your time, your frustration, and the real risk of getting something wrong.
Assembling a big trampoline isn't a quick job. It’s an afternoon-eater, and you’ll almost certainly need a second person to help wrangle the parts. For a standard 12-foot trampoline, you should budget at least 3 to 6 hours, and that's if things go perfectly. Confusing instructions or a misplaced part can easily turn it into an all-day affair.
Before you commit to building it yourself, ask these questions:
The most common mistake we see with DIY jobs is an unlevel frame. Even a tiny tilt puts uneven stress on the springs and structure, which leads to busted parts and a dangerously unpredictable bounce.
Hiring a service like Assembly Smart completely changes the game. It turns a weekend-long headache into a simple, scheduled appointment. You're not just paying for a pair of hands; you’re paying for experience, speed, and accountability.
A pro has built dozens, maybe hundreds, of trampolines. They know the tricks, the common snags for different brands, and can get the job done in a fraction of the time.
A professional installer can typically get a standard trampoline built in just 2 to 3 hours. They show up with all the right tools and the know-how to solve problems on the spot. This kind of efficiency comes from specialization, and it’s why the average handyman hourly rate reflects a certain level of expertise. You can see a full breakdown in our guide on the average handyman hourly rate.
Here's another big perk: your warranty. Some trampoline brands will void their warranty unless the unit is assembled by a certified professional. One wrong move during a DIY build could leave you on the hook for pricey replacement parts. It’s also helpful to understand the factors that go into the real cost of a general contractor, as many of the same principles around labor, insurance, and expertise apply here.
To make the choice crystal clear, let's put it all in a simple table. This side-by-side look should help you figure out which route makes the most sense for your budget, skills, and priorities.
| Consideration | DIY Installation | Professional Installation |
|---|---|---|
| Upfront Cost | Low (just the trampoline and maybe a few new tools) | Higher (trampoline cost + labor, usually $325-$848) |
| Time Investment | High (3-6+ hours of your personal time) | Low (a quick 2-3 hour appointment) |
| Safety & Risk | Higher risk of assembly errors that could cause injury | Low risk, as it's built to manufacturer safety standards |
| Tools & Equipment | You have to supply everything | The installer arrives with all the specialized tools |
| Warranty | Could be voided if assembled incorrectly | Often required to keep the manufacturer's warranty valid |
| Convenience | Low (it’s a major physical effort) | High (a totally hands-off, stress-free process for you) |
| Peace of Mind | Depends on how well the final build turns out | High, knowing it was done right by an experienced expert |
Ultimately, paying for a professional isn't just about avoiding a chore. It's an investment in safety, a guarantee of a job done right, and a way to get your weekend back.
Choosing the right person to install your trampoline is a pretty big deal. You’re not just paying someone to get a job done; you’re trusting them with your family’s safety. It’s like picking a mechanic to fix your car's brakes—you want someone with a proven track record, not just the cheapest guy on Craigslist. The right installer gives you peace of mind. The wrong one can turn your big investment into a major safety hazard.
Finding a reputable pro is your best defense against a shoddy or unsafe setup. Your goal here is to find a business that’s transparent, experienced, and stands by its work. This takes a little homework, but the payoff in safety and quality is absolutely worth it.
Before you even think about picking up the phone, a little online digging can quickly separate the seasoned professionals from the questionable operators. Start by making a shortlist of local services, then dive into their credentials. A trustworthy installer will make this information easy to find.
Here are the key things to look for:
Once you’ve got a few promising candidates, the next step is to ask for a quote. A vague, one-line estimate is another warning sign. A professional quote should be a clear, itemized document that leaves no room for confusion about the final trampoline installation cost.
A trustworthy installer will always provide a detailed, written estimate before starting any work. This document should explicitly list all charges, including labor, site prep, add-on assembly, and any potential fees for unforeseen issues.
Demand that your quote includes:
This level of detail prevents sticker shock and makes sure you and the installer are on the same page from the start.
To simplify your search, you can explore resources that list pre-vetted trampoline installation companies in your area. This can be a great way to find reliable pros who already meet these criteria. Hiring with confidence means knowing exactly what you’re paying for before the work even begins.
Getting a safe, professional trampoline setup doesn't have to break the bank. With a little strategic planning, you can bring that trampoline installation cost way down without ever cutting corners on quality. It’s all about making smart choices before the installer even pulls into your driveway.
One of the best tricks in the book is to think like a landscaper and schedule your installation during the off-season. Demand for putting together outdoor equipment naturally skyrockets in the late spring and early summer. If you book your install in the fall or even early spring, you’ll often find installers are offering more competitive rates just to keep their schedules full.
Another great way to save a few bucks is to handle the simple site prep yourself. When professionals give you a quote, they’re budgeting time for the whole job—and that includes clearing and prepping the area. You can trim down their billable hours by knocking out these tasks beforehand.
These small efforts translate directly into a lower final invoice. You're paying the pro for their specialized assembly skills, not for basic yard work.
Here’s another savvy financial move: invest in a higher-quality trampoline from the get-go. A cheaper model might save you money today, but you'll likely pay far more in the long run with frequent repairs and a shorter lifespan. A durable, well-made trampoline is always the smarter long-term investment.
Finally, always keep an eye out for bundled deals. Some retailers will actually include professional installation as part of a package when you buy a trampoline from them. The upfront price might look a little higher, but it's often cheaper than buying the trampoline and hiring an installer separately.
Installation prices have changed a lot over the years. Back in the early 2000s, a basic setup might have cost less than $200. Fast forward to 2025, and a premium inground trampoline kit alone could hit $2,795, pushing the total cost well over $3,500 with installation. You can learn more about how these costs have evolved at springfreetrampoline.com. This trend really shows why it's so important to find savings wherever you can.
This really comes down to the type of trampoline you’ve picked out. For a classic, above-ground model, a pro can usually get the whole thing done in 2 to 4 hours. That timeframe typically includes everything from unboxing all the parts to the final assembly and getting accessories like the safety net properly attached.
Inground trampolines, on the other hand, are a whole different ballgame. Since the job involves digging, putting in a retaining wall, and sorting out drainage, it's not a quick afternoon project. You should plan for it to be a 2 to 3 day process from the moment the shovel hits the dirt to when it’s finally ready for its first bounce.
This is a big one, and the short answer is: almost certainly. Insurance companies often classify trampolines as an "attractive nuisance," which is their way of saying it increases the chances of someone getting hurt on your property. Naturally, that can impact your policy.
Your very first step, even before you buy the trampoline, should be a call to your insurance agent. Some policies won't cover trampolines at all, while others will require you to install a safety enclosure and bump up your liability coverage to stay protected. Skipping this call could mean a denied claim if an accident happens.
You can put in a trampoline any time the ground isn't a frozen block of ice, but if you’re trying to manage your trampoline installation cost, timing can make a difference.
Ready to skip the headache and make sure your trampoline is put together right? The experts at Assembly Smart are here to help. Get your free, transparent quote today and enjoy a stress-free installation experience.
