-
CALL US:
- (866) 952-3456
When we talk about “aging in place home modifications,” it’s easy to get lost in the jargon. Really, all it means is making smart, forward-thinking changes to your house so you can keep living there safely and comfortably, no matter your age or physical ability. This could be as simple as installing a few grab bars or as involved as remodeling for a walk-in shower. The goal is the same: to make your home a supportive partner for the long haul.

The choice to age in place is a personal one. It’s about holding onto your independence and staying in the place you know and love, not about giving up control. By thinking ahead, you’re turning your house into a place that will support your well-being for years to come.
Making these changes isn’t just for convenience; it’s a serious investment in your safety and quality of life. Let’s face it, most houses weren’t designed with long-term accessibility in mind. Tackling potential hazards now can prevent accidents, reduce physical strain, and give you and your family some much-needed peace of mind.
There’s a powerful emotional pull to a home filled with memories. Staying in a neighborhood where you know your neighbors and have a community is something you just can’t replicate in an institutional setting. That stability is incredibly important for your mental and emotional health as you get older.
Beyond the feel-good stuff, the numbers don't lie. Research shows that a staggering 87% of adults aged 65 and older want to stay right where they are. It also just makes financial sense. The average cost for in-home care is around $21,600 a year, which is a world away from the $54,000 for assisted living or the eye-watering $116,000 for a private nursing home room.
By investing in your home now, you are effectively pre-paying for your future independence at a fraction of the cost of institutional care. It shifts the focus from reactive crisis management to proactive, long-term planning.
Thinking about aging in place home modifications isn't about doom and gloom. It's about setting yourself up to live your best life, right where you are. These updates are all about removing the physical barriers and little frustrations that can get in the way of an active, engaged lifestyle.
Planning ahead has some major upsides:
Consider this guide your roadmap. We'll walk you through how to assess your home, figure out what changes to make first, and create a space that doesn’t just keep you safe but helps you thrive for many years to come.
Alright, let's get practical. Moving from the why of aging in place to the what can feel like a huge leap. This is where we roll up our sleeves and walk through your home, area by area, to find the aging in place home modifications that will make the biggest impact.
Forget a generic to-do list. Think of this as a guided tour of your home’s potential, focused squarely on safety, mobility, and everyday comfort. We’ll start in the highest-risk zones and work our way through the spaces you use every single day.
If you're only going to start in one room, make it the bathroom. The combination of hard surfaces, water, and constant movement—like stepping into a shower or sitting down—makes it ground zero for accidents.
Falls are the leading cause of injury for adults over 65, racking up $50 billion in medical costs in the U.S. each year. The good news? Simple changes like installing grab bars can slash fall risk by an incredible 38%. This makes bathroom mods a non-negotiable starting point.
Here's what to tackle first:
A well-placed grab bar isn’t just a piece of metal on the wall; it’s the difference between a minor slip and a life-altering fall. Prioritizing these bathroom safety updates is the single most impactful step you can take.
The kitchen is the heart of the home, but all that reaching, bending, and chopping can become a challenge. The goal here is to create a space that’s both safe and frustration-free, so you can keep enjoying the simple pleasure of making a meal.
Most kitchen modifications are about two things: bringing items within easy reach and improving visibility. These changes reduce the need for risky step stools or awkward bending, which can lead to strains and falls.
Reaching into the back of a deep cabinet or hoisting a heavy pot from a low shelf is an accident waiting to happen. Smart storage is a game-changer.
You can't have a safe kitchen without good lighting. It's critical for preventing accidents with knives or hot surfaces, especially for aging eyes.
As you map out these changes, it helps to think about the bigger picture of creating a safe and comfortable home care environment to ensure all the pieces fit together.
The bedroom should be a sanctuary. Modifications here are all about ensuring safe movement, especially at night, and making the whole space easy to get around in. These ideas apply just as well to the living room or den.
Clear, wide pathways are non-negotiable. A surprising 36% of falls among older adults happen right in the bedroom or living room, usually because of clutter or rugs.
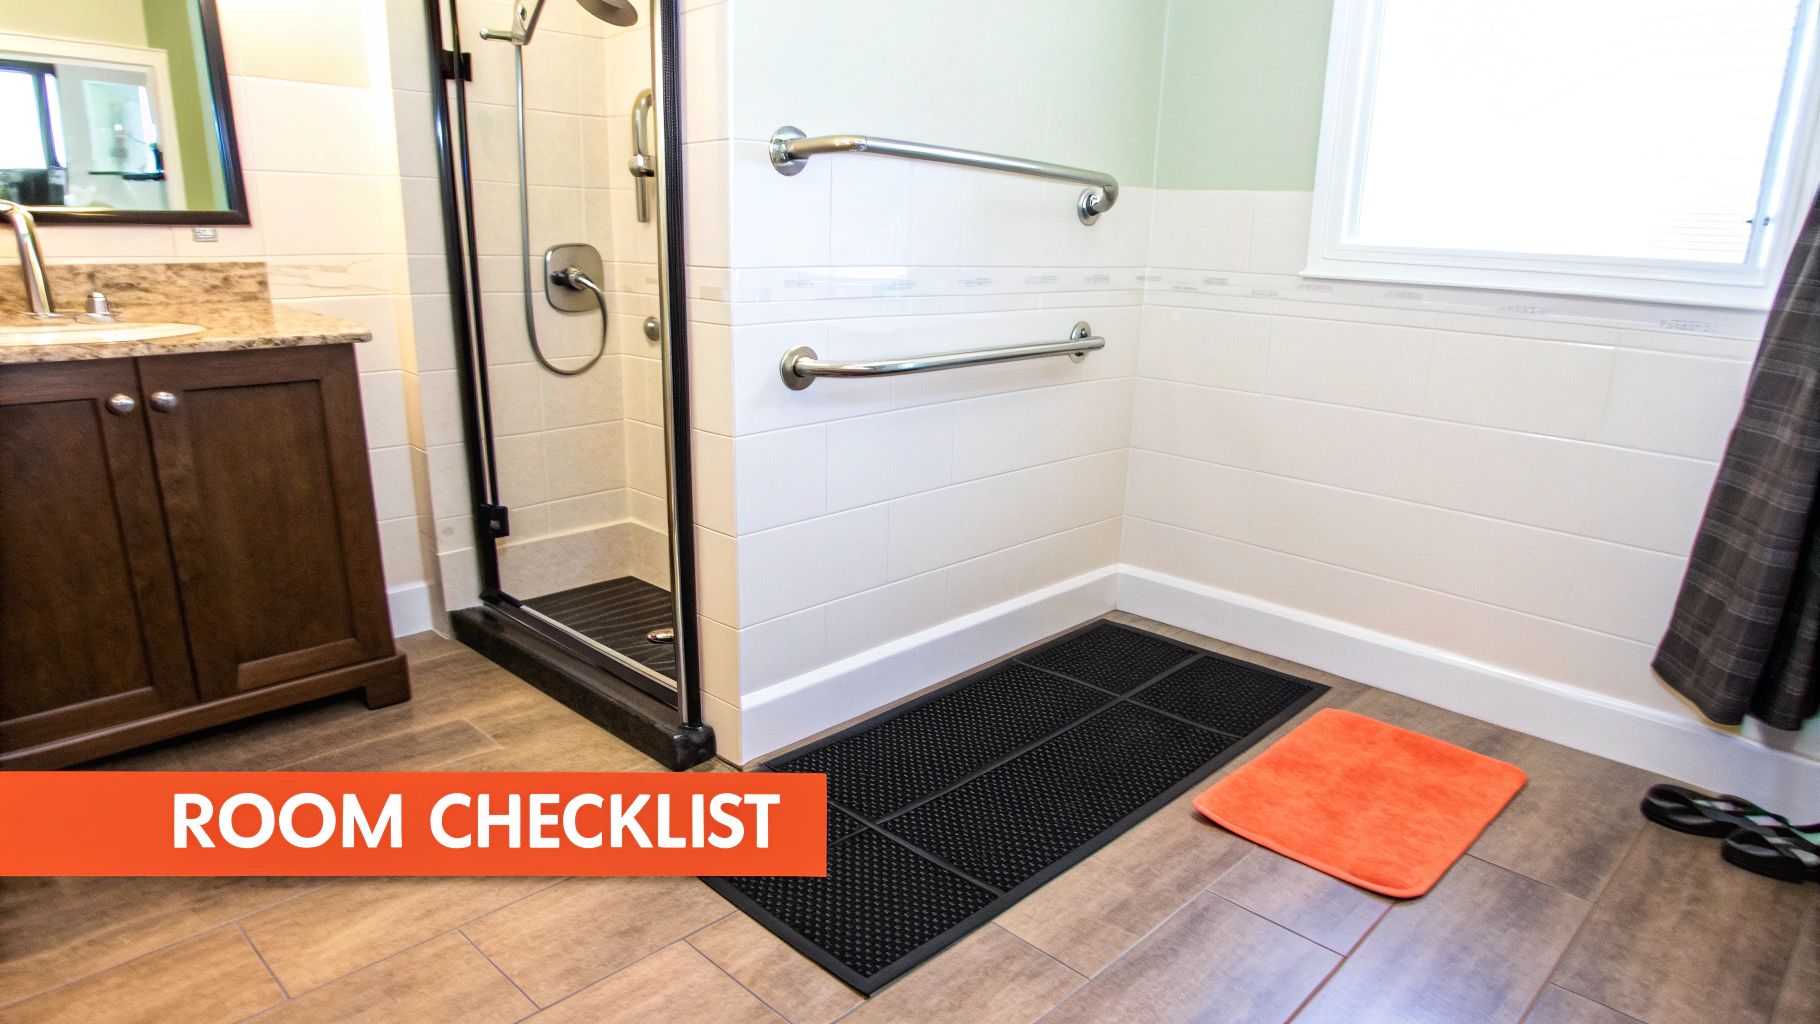
To help you visualize this process, here's a simple checklist that breaks down priorities by room.
This table provides a quick, scannable guide to help you decide what to tackle first, based on what will provide the biggest safety boost right away.
| Room | Modification | Primary Benefit | Priority Level |
|---|---|---|---|
| Bathroom | Install Grab Bars | Fall Prevention | High |
| Bathroom | Walk-In/Low-Threshold Shower | Fall Prevention | High |
| Bathroom | Comfort-Height Toilet | Mobility | Medium |
| Entrances | Zero-Step Entry/Ramp | Accessibility | High |
| Hallways | Handrails on Stairs/Halls | Fall Prevention | High |
| Kitchen | Under-Cabinet Lighting | Safety | High |
| Kitchen | Pull-Out Shelves | Accessibility | Medium |
| Bedroom | Motion-Activated Nightlights | Fall Prevention | High |
| Bedroom | Clear Pathways (36" min) | Fall Prevention | Medium |
| Living Room | Remove Throw Rugs | Fall Prevention | Medium |
| General | Lever-Style Door Handles | Accessibility | Low |
| General | Widen Doorways (32-36") | Accessibility | Low |
Focusing on the "High" priority items first will give you the most significant return on your investment in terms of immediate safety and peace of mind.
Finally, don't forget the transition zones. Safe entryways and hallways are the glue that holds a well-modified home together. They need to be well-lit, clear, and easy to move through.
By tackling your home room by room, you can build a comprehensive plan that feels manageable. For an even deeper dive, check out our complete home safety checklist for the elderly. This thoughtful approach turns the big idea of "aging in place" into a series of clear, doable actions that create a home that’s truly ready for the future.
Let's talk about the elephant in the room: money. It's impossible to discuss aging in place home modifications without getting into the cost. For most people, this is the biggest hurdle, but it helps to reframe how you think about it. This isn't just an expense; it's a direct investment in your safety, independence, and long-term quality of life.
It's completely normal to feel a bit of sticker shock at first. In fact, surveys show that nearly half of homeowners think it would cost over $20,000 to get their home ready, with some guessing it’s a $100,000+ project. While some large-scale remodels can climb that high, many of the most critical changes are surprisingly affordable—especially when you stack them up against the alternative.
Consider that the average annual cost for a private room in a nursing home is a staggering $116,000. Suddenly, a smart, one-time investment in your home makes a whole lot of financial sense. You can dig into the survey findings on aging in place priorities to see what other homeowners are thinking.
Figuring out what these projects might cost is the first step toward making a real, actionable plan. Prices can swing wildly depending on where you live, the finishes you pick, and whether you're tackling it yourself or bringing in a professional.
Here are some rough estimates to help you start mapping out a budget:
A big piece of this puzzle is labor. To get a feel for what professionals charge in your neck of the woods, it's worth taking a look at the average handyman hourly rate.
You absolutely do not have to do everything at once. A phased approach is not only smarter for your wallet, but it’s also way less disruptive to your life. The key is to prioritize what will keep you safest, right now.
Start with the highest-risk areas of your home. For nearly everyone, that’s the bathroom. It’s where a huge percentage of falls happen, so putting your money into grab bars and a safe, walk-in shower delivers an immediate and massive return on investment. Once the most critical safety issues are handled, you can move on to changes that improve mobility, and finally, things that just make life more comfortable.
Here’s a way to think about it: A single trip to the ER after a bad fall can easily run into thousands of dollars, never mind the pain and recovery time. When you look at it that way, a $300 professionally installed set of grab bars isn't an expense—it's an incredibly cheap insurance policy.
Before you assume you're on your own for the full cost, do a little digging. There are a surprising number of resources out there that can help lighten the financial load.
By breaking it down, tackling safety first, and exploring your funding options, what seems like an overwhelming project can become a clear, manageable plan for a safer future at home.
Knowing when to roll up your sleeves and when to call in a pro is one of the biggest decisions you'll make when it comes to aging in place home modifications. It’s a choice that goes way beyond your budget—it’s about safety. A poorly installed grab bar or a wobbly ramp is often more dangerous than doing nothing at all.
The good news? Plenty of modifications are perfect for a weekend project. But others demand specific tools, skills, and a deep understanding of building codes that only a professional brings to the table. Striking the right balance is the key to making your home safer without breaking the bank.
If you have a basic toolkit and a little bit of confidence, you can knock out quite a few high-impact projects yourself. These are the kinds of tasks that don’t involve touching electrical wiring, messing with plumbing, or making structural changes, so the risk is low.
These are great starting points that pay off in safety dividends immediately:
Feeling a bit more ambitious? There’s another level of modifications that are well within reach for an experienced DIYer. These jobs might require a few more tools and a bit more precision, but you can definitely handle them if you know what you’re doing.
Consider taking these on if you've got the skills:
Then there’s the hard line you just don't cross. Certain jobs carry serious risks if you get them wrong, from structural failure and electrical fires to major water damage and personal injury. For these critical aging in place home modifications, you always, always hire a licensed and insured professional.
A perfectly installed grab bar can support hundreds of pounds of force, preventing a devastating fall. A poorly installed one—attached only to drywall—will rip out of the wall at the exact moment it's needed most, causing the very accident it was meant to prevent. This is where professional expertise is non-negotiable.
If you’re venturing into complex upgrades like smart home tech and want to see what's possible on your own, a great resource like this Do-It-Yourself Home Automation Guide can give you a solid overview.
But when it comes to modifications that directly impact physical safety—like grab bars, ramps, or walk-in showers—professional installation is the only way to go. Teams that specialize in home repair and handyman services ensure every piece of critical equipment is installed to code and anchored correctly, giving you real peace of mind.
Always call a pro for:
Still on the fence about a specific task? This table breaks down some common modifications to help you decide whether to tackle it yourself or bring in an expert.
| Modification Task | Recommended Approach | Key Considerations (Safety, Tools, Cost) |
|---|---|---|
| Install Lever Door Handles | DIY | Safety: Low risk. Tools: Screwdriver. Cost: Low. |
| Add Non-Slip Mats/Treads | DIY | Safety: Low risk. Tools: None. Cost: Very Low. |
| Assemble Furniture | DIY/Professional | Safety: Moderate risk if assembled incorrectly. Tools: Basic hand tools. Cost: DIY is cheaper, but pro ensures stability. |
| Install a Taller Toilet | DIY (with experience) | Safety: Risk of leaks/water damage if done wrong. Tools: Wrenches, may need help lifting. Cost: Moderate. |
| Install Grab Bars | Professional | Safety: High risk. Must be anchored to studs to support weight. Tools: Stud finder, drill, specific anchors. Cost: Worth the investment. |
| Widen Doorways | Professional | Safety: High risk. Involves structural changes to the home's frame. Tools: Specialized saws, construction knowledge. Cost: High. |
| Build a Wheelchair Ramp | Professional | Safety: High risk. Must meet specific slope/width requirements (ADA guidelines). Tools: Requires carpentry expertise. Cost: High. |
| Modify Electrical Outlets | Professional | Safety: Very high risk of fire or shock. Requires a licensed electrician. Tools: Specialized electrical tools. Cost: Varies, but essential for safety. |
Choosing the right approach is all about honestly assessing your own skills and recognizing when a job is too important to leave to chance. For the simpler stuff, save some money and enjoy the satisfaction of doing it yourself. For everything else, a trusted professional is your best bet for a safe and secure home.
Feeling a bit overwhelmed by the sheer number of options? That’s perfectly normal. The key is to turn that long wish list of aging in place home modifications into a clear, manageable plan you can actually get started on. This isn't about remodeling your entire house overnight; it's about making a series of smart, targeted changes.
The best way to start is with a simple home safety audit. Walk through your home with a fresh pair of eyes—or even better, with the person who will be living there—and take honest notes. Where have near-misses happened? What daily tasks cause frustration or strain? This personal assessment is the real foundation of your entire plan.
Once you have a list of problem areas, the next step is to get organized. This approach turns a massive project into a sequence of achievable steps, focusing your time and budget where they’ll make the biggest impact.
I always suggest breaking it down into three distinct phases.
This three-tier system gives you a clear roadmap. You'll know exactly what to tackle first to get the biggest safety boost for your investment.
Trying to do everything at once is a recipe for burnout and budget overruns. Trust me, a phased approach is far more effective. Look at your "Immediate Safety Risks" list and aim to complete those tasks within the next one to three months.
For example, your Phase One might look something like this:
Breaking the work into smaller, time-bound chunks makes the whole process feel less daunting. It also helps you manage costs much more effectively. You can plan for the bigger projects, like a walk-in shower conversion, as a completely separate, future phase.
A well-structured action plan is your best defense against feeling overwhelmed. It provides a clear direction, turning the abstract goal of "making the home safer" into a series of concrete, actionable steps you can start checking off today.
This infographic does a great job of illustrating the typical flow for home modifications, helping you visualize the journey from simple DIY tasks to more involved professional installations.

As the visual guide shows, many homeowners start with small, manageable DIY projects before moving on to larger renovations that require professional expertise—like the furniture and equipment services provided by Assembly Smart. By following this logical progression, you build momentum and confidence as you create a safer, more comfortable home.
Of course. Here is the rewritten section, crafted to sound like an experienced human expert while adhering to all your requirements.
Making the decision to modify a home for aging in place is a big one, and it naturally comes with a lot of questions. I hear them all the time. Let's walk through some of the most common ones so you can move forward with confidence.
This is always the first question, and it's the most important one. The gold standard is to get a professional assessment from an occupational therapist (OT) or a Certified Aging-in-Place Specialist (CAPS). These pros are trained to see things you might miss, matching specific physical needs to the unique layout of a home.
But you can absolutely start on your own. Just walk through the house and think about the high-risk spots.
Absolutely. We're long past the days of cold, clinical-looking safety equipment. The whole concept of "Universal Design" is about creating spaces that are functional, beautiful, and work for everyone, regardless of age or ability.
Today, you can find gorgeous grab bars that seamlessly double as towel racks or toilet paper holders. You can install an elegant, zero-threshold walk-in shower with sleek glass doors. Even something as simple as swapping doorknobs for lever handles comes in countless modern finishes. The trick is to find products that blend right into your home's existing style, not clash with it.
Yes, and it's always worth looking into. You might be surprised at what's available to help offset the costs.
For starters, Medicaid sometimes offers Home and Community-Based Services (HCBS) waivers that can cover certain modifications. If you're a veteran, the Department of Veterans Affairs (VA) has grants specifically for this purpose.
Don't stop there. Many non-profits and local Area Agencies on Aging have their own grant programs or can connect you with low-interest loans. A little bit of research into federal, state, and local options can go a long way.
If there’s one piece of advice I give everyone, it’s this: start with the bathroom. The combination of wet surfaces, hard tile, and tight spaces makes it the most common site for serious falls in the home. Getting this one room right is a massive win for safety.
The bathroom. No question. If your budget or timeline is tight, focus all your energy here first.
Installing a few strategically placed grab bars in the shower and next to the toilet is a game-changer. Add a sturdy shower seat and some quality non-slip flooring or mats, and you’ve drastically cut the risk of a life-altering fall. These simple changes offer the biggest and most immediate safety payoff for your investment.
Planning and installing all these modifications can feel overwhelming, especially when it comes to the nitty-gritty of assembling new furniture or mounting safety equipment perfectly. For professional, reliable installation of everything from grab bars to accessible furniture, trust Assembly Smart to get the job done right. Visit https://assemblysmart.com to get a free estimate and ensure your home modifications are safe and secure.
