-
CALL US:
- (866) 952-3456
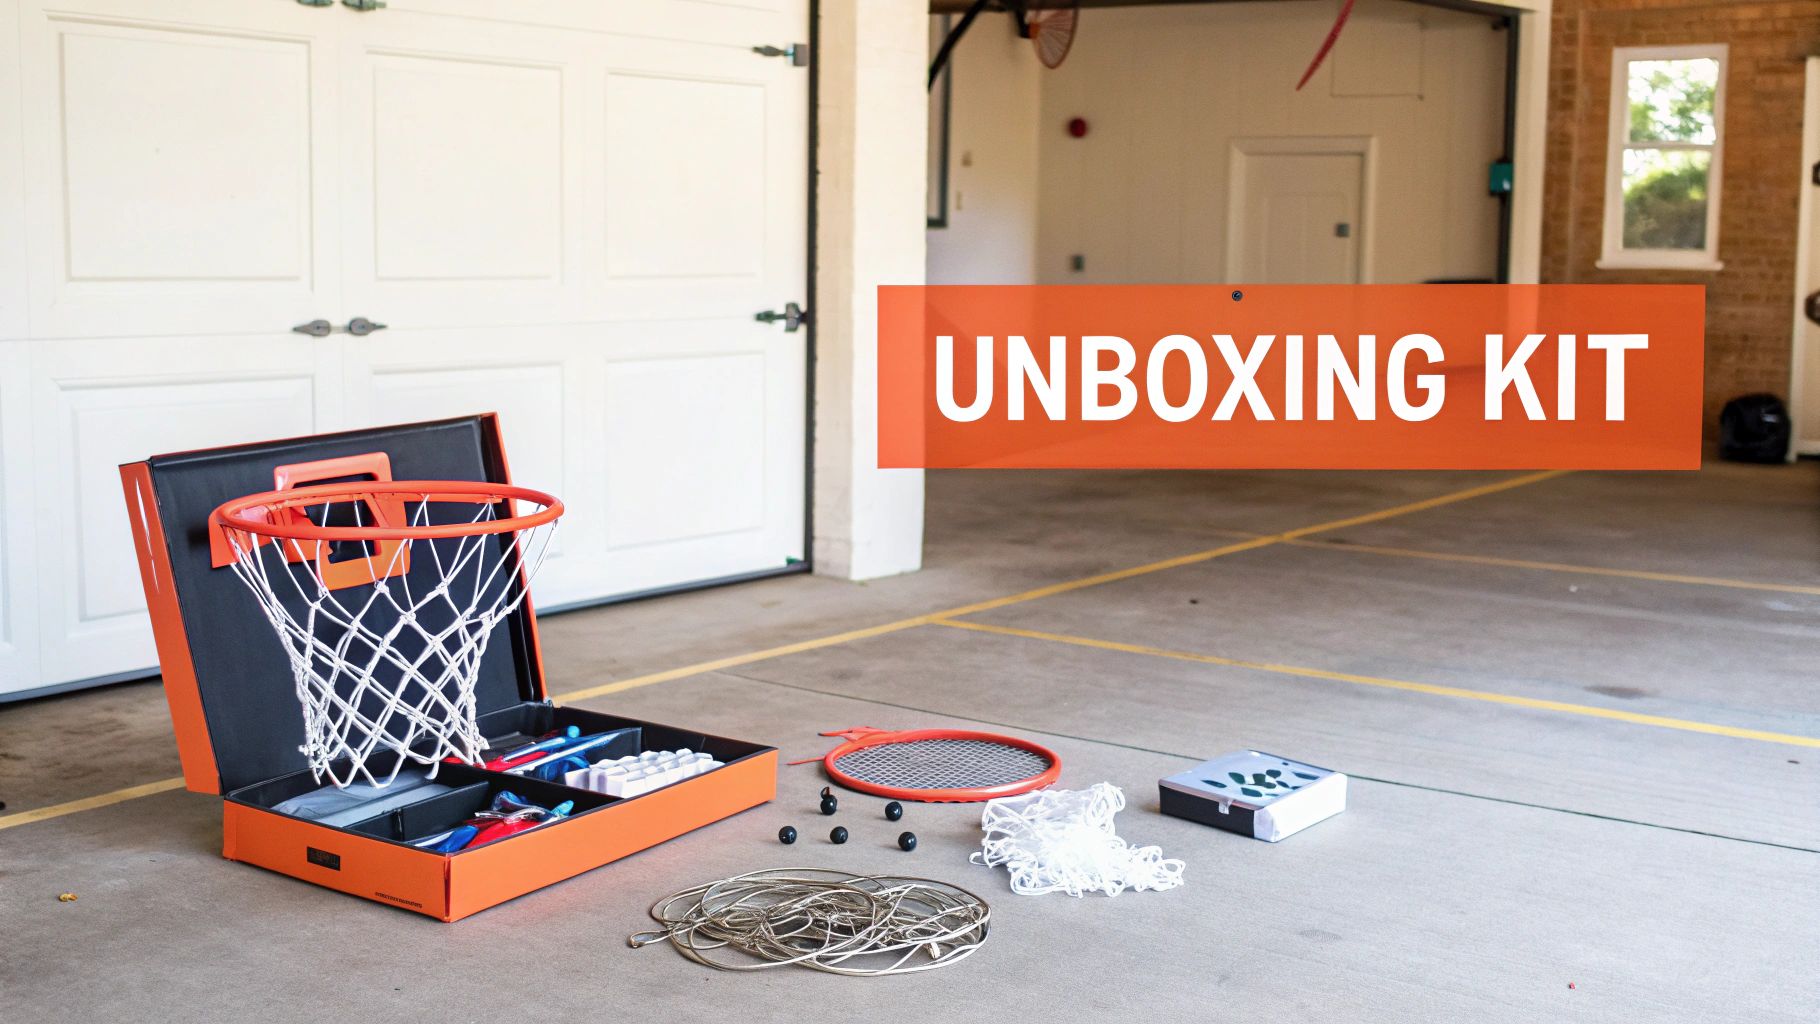
Having the right tools before assembling your basketball hoop is essential. Just like a skilled carpenter needs the right tools, assembling a basketball hoop requires a specific set to ensure a smooth and successful installation. Proper preparation can make the difference between a quick, satisfying build and hours of frustration. If you're looking for tips on preparing for assembly projects, you might find this article helpful: How to prepare for your furniture assembly project.
These are the fundamental tools you'll need regardless of your hoop type:
Depending on your hoop type, you might also need these:
Having the right tools is just one piece of the puzzle. Properly preparing your workspace is equally important.
Professional installers understand the value of an organized workspace. Laying out all the parts on a flat, sturdy surface like a driveway or garage floor is essential. Compare them against the instruction manual’s parts list to confirm you have everything and catch any missing pieces early. This meticulous preparation significantly reduces assembly time and minimizes potential errors.
Before we delve further into workspace organization, let's take a look at the tools you'll need. The following table outlines essential tools for different basketball hoop installations:
| Tool Type | In-Ground Hoops | Portable Hoops | Wall-Mounted Hoops | Priority Level |
|---|---|---|---|---|
| Cordless Drill/Driver | X | X | X | High |
| Adjustable Wrench Set | X | X | X | High |
| Level | X | X | X | High |
| Tape Measure | X | X | X | High |
| Safety Gear | X | X | X | High |
| Concrete Anchors | X | Medium (If applicable) | ||
| Post Hole Digger | X | Medium (If applicable) | ||
| Stud Finder | X | Medium (If applicable) |
This table summarizes the tools you'll need for each type of hoop installation, allowing you to gather everything necessary before beginning.
Speaking of DIY projects, if you're considering installing the basketball hoop yourself, check out these DIY tips for Australians. This emphasizes the importance of proper planning and execution in any home improvement endeavor. Interestingly, the global basketball hoop market has seen significant growth, reaching USD 2.0 billion in 2024, with projections of USD 3.5 billion by 2032. Find more detailed statistics here. The ability to assemble these hoops yourself plays a key role in this market expansion, providing flexibility and customization for consumers. This growth underscores the importance of understanding how to assemble these increasingly popular recreational products.
Having the correct tools and a well-organized workspace are the foundations of a smooth assembly experience. This methodical approach empowers you to approach the project with confidence, ensuring a professionally assembled hoop that's ready for years of enjoyment.
Transforming a pile of parts into a court-ready basketball hoop might seem daunting, but a structured approach makes the process much easier. We'll guide you through each phase, sharing insights from experienced installers. You’ll discover the best assembly sequence to avoid costly mistakes, plus troubleshooting tips for when the instructions aren't clear.
Before tightening a single bolt, proper site preparation is essential. This crucial first step ensures the stability and longevity of your basketball system. The infographic below visualizes the three key steps: measuring the area, marking anchor points, and digging the foundation holes.
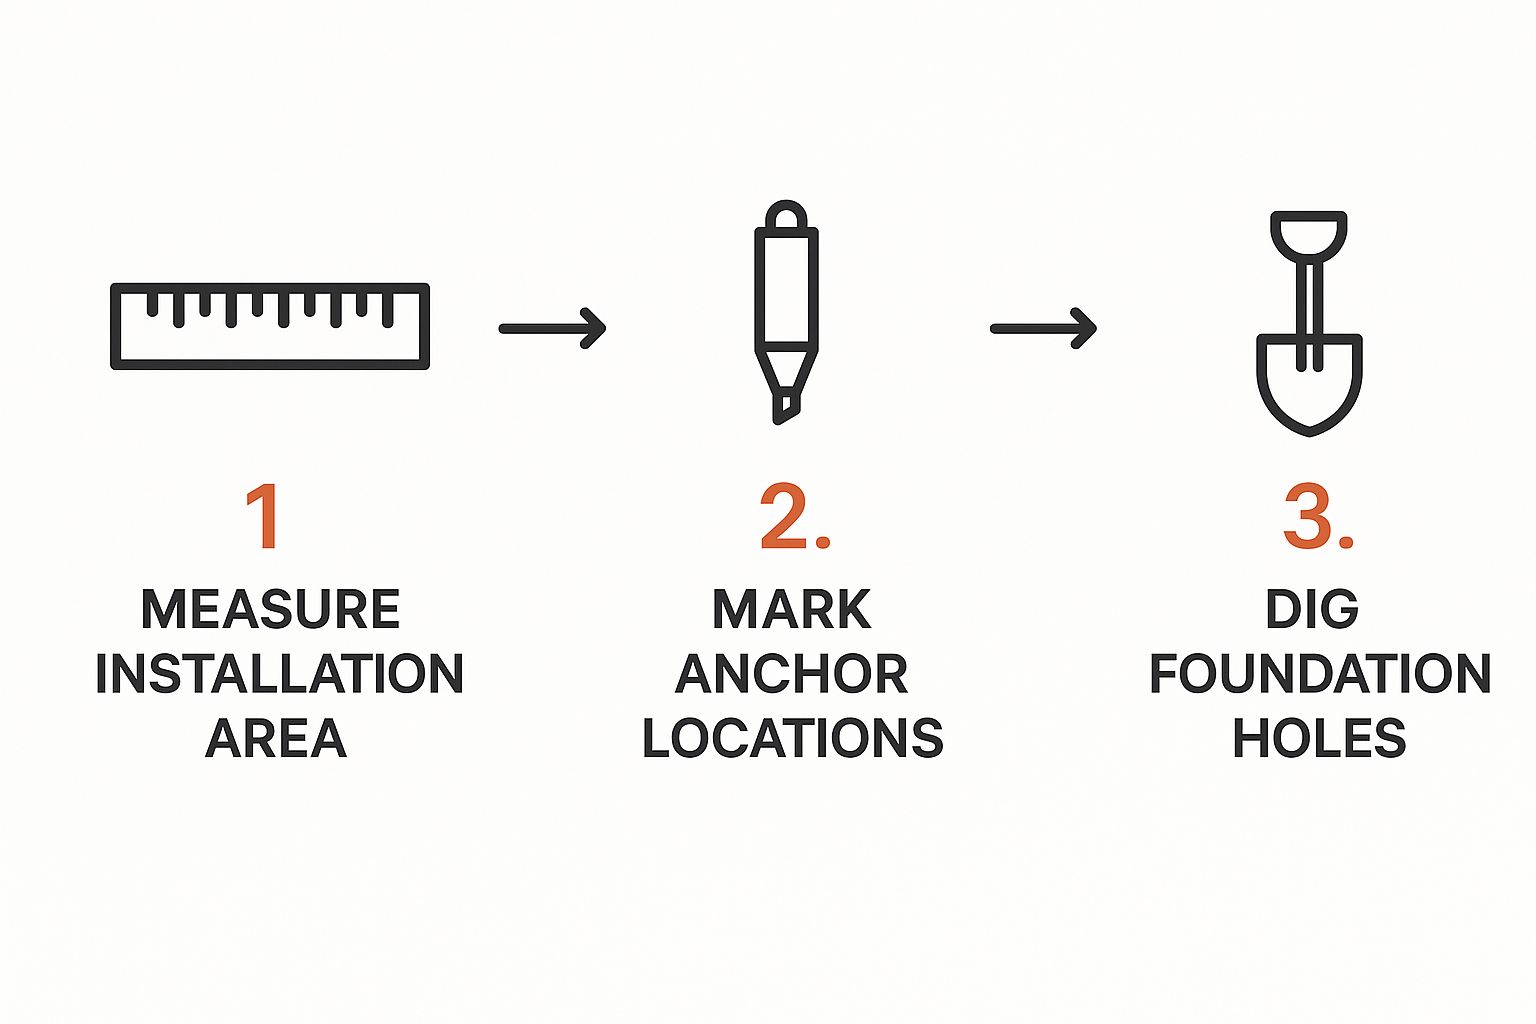
This sequential approach guarantees accurate placement and a secure base for your hoop. Carefully following these steps will prevent issues like uneven surfaces and weak anchoring.
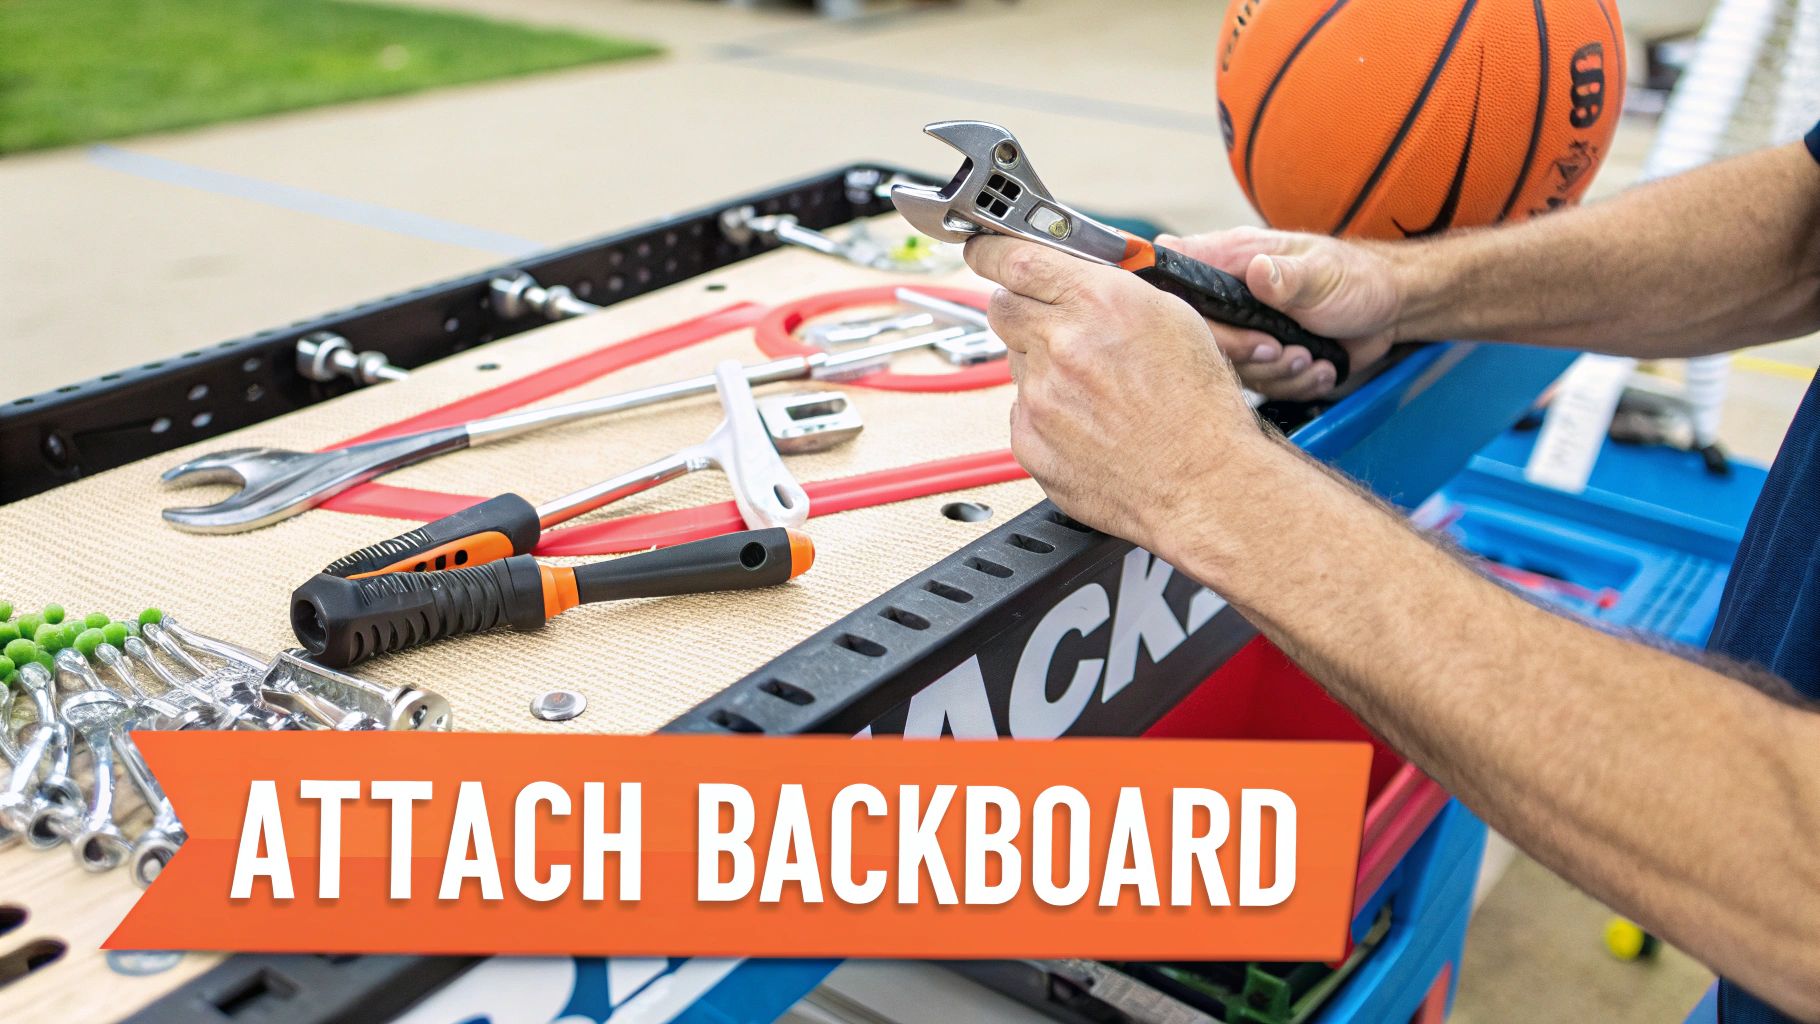
With the site prepped, the next phase involves assembling the main components. This requires attention to detail and a systematic process.
This methodical approach ensures each piece is assembled correctly before moving to the next, minimizing errors and the need to redo steps. For further guidance, see this helpful resource: How to master basketball goal assembly.
How you secure your basketball hoop depends on whether it’s in-ground, portable, or wall-mounted. This step is critical for safety and performance.
Choosing the correct anchoring method guarantees a stable and safe basketball setup, preventing tipping and damage.
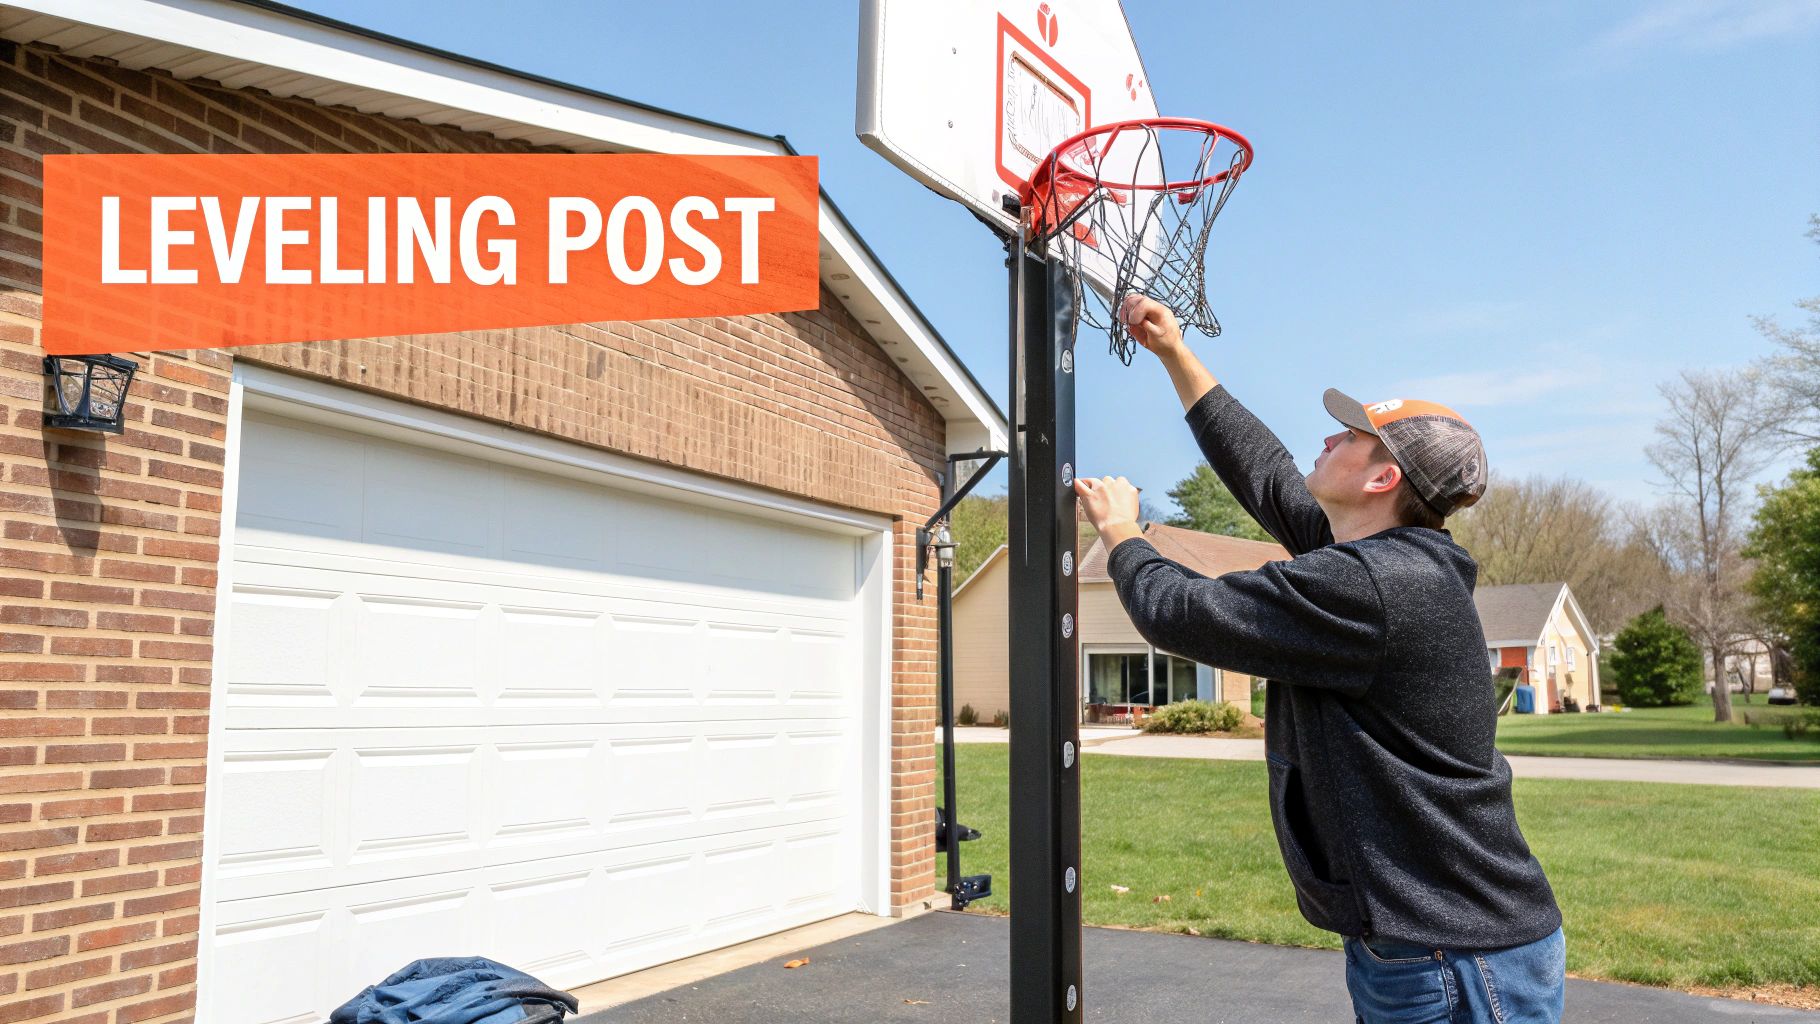
After securing the main structure, focus on final adjustments and verifying the installation. This ensures your hoop is truly game-ready.
This final check ensures your basketball hoop is assembled correctly, safe, and ready for use. Attention to these details ensures years of enjoyment.
The following table provides a general overview of assembly timelines for different basketball hoop types and experience levels. Remember that these are estimates, and the actual time may vary depending on specific model and individual circumstances.
Estimated time required for each assembly stage based on hoop type and experience level
| Assembly Stage | Beginner Time | Experienced Time | Common Challenges |
|---|---|---|---|
| Site Preparation | 2-3 hours | 1-2 hours | Ensuring level ground, accurate anchor placement |
| Component Assembly | 3-4 hours | 1-2 hours | Understanding instructions, proper bolt tightening |
| Securing the System | 2-4 hours | 1-3 hours | Concrete mixing (in-ground), base filling (portable) |
| Final Touches and Verification | 1-2 hours | 0.5-1 hour | Height adjustment, ensuring stability |
This table highlights the potential time savings gained with experience. While beginners may require more time for each stage, particularly site preparation and component assembly, experienced individuals can often complete the process more quickly. However, regardless of experience, focusing on each step is crucial for a successful and safe installation.
The type of basketball hoop you select—in-ground, portable, or wall-mounted—directly affects how you'll put it together. Each type presents its own set of challenges and requires specific considerations. Understanding these differences before you start will ensure a smoother installation and more enjoyment down the line. Once your tools are gathered and your plan is in place, a step-by-step guide can offer more detailed instructions. You can even check out a cabinet installation guide for inspiration.
In-ground basketball hoops provide excellent stability, making them a popular choice for serious players. However, they also require the most demanding assembly process. It all begins with digging a foundation and setting the anchor system. This crucial first step, often skimmed over in manuals, demands precise measurements and careful concrete work. This ensures the pole stays put, even during intense games.
Correctly positioning the anchor bolts is also essential for proper pole alignment and overall system stability. While it takes effort upfront, the reward is a sturdy and secure hoop that can handle years of use.
Portable basketball hoops offer the convenience of mobility. Assembling them typically involves filling the base with water or sand and then connecting the pole and backboard. While seemingly simpler than in-ground installation, strategic decisions are still key.
The base must be filled to the recommended capacity, often over 50 gallons, to prevent tipping during play. Setting the hoop on a perfectly level surface also ensures consistent performance and prevents stress on the system. Overlooking these details can result in an unstable and frustrating experience.
Wall-mounted hoops are a space-saving solution. However, their assembly depends heavily on the structural integrity of the mounting surface. Accurately finding wall studs is critical for secure installation. Depending on your wall material, you might need specialized anchors.
Aligning the backboard perfectly level requires precision and patience. Mounting on brick or concrete, for example, requires different techniques and hardware compared to mounting on wood framing. Understanding these structural nuances and using the correct mounting methods ensures a safe and stable backboard setup.
Interestingly, the global basketball hoop market displays strong regional variations. Europe currently leads, generating over 30% of global revenue in 2024, totaling USD 795.36 million. The Asia Pacific region holds approximately 23% of the market share. Discover more insights about basketball hoop market trends here. Efficient assembly is crucial for these growing markets.
By carefully considering the specific needs of each hoop type, you can approach your assembly project with confidence. This informed approach not only simplifies the process but also guarantees a durable and enjoyable basketball setup that will last for years.
Even with detailed instructions, some assembly missteps happen surprisingly often. By speaking with warranty service technicians and customer support specialists, we’ve identified the most common errors that lead to unstable hoops, early breakdowns, and safety risks. You’ll learn how seemingly small shortcuts can necessitate complete reinstallation and why rushing, however tempting, can be detrimental.
One frequent mistake is overtightening bolts, especially when assembling the backboard and pole. This can strip the threads, crack the backboard, or even weaken the entire structure. Imagine tuning a guitar string too tightly – eventually, it snaps. Similarly, overtightening components on your basketball hoop can cause cascading structural problems that may not be immediately obvious but will shorten its lifespan.
Another common error is skipping steps in the instructions, particularly during site preparation. Rushing through measuring and leveling the ground, for example, can create an unstable base, making the entire hoop unsafe. This means even minor shortcuts can compromise the whole system and ultimately require a complete reinstallation. This is especially critical with in-ground hoops, where the foundation's stability is paramount.
For in-ground hoops, rushing the concrete curing process is a major pitfall. Concrete needs sufficient time to reach its full strength, typically around 7 days. Using the hoop before the concrete is fully cured can shift the pole and compromise the structure’s integrity. Think of it like building a house on a weak foundation—it's a recipe for disaster.
There are psychological reasons why people skip steps. Sometimes, it’s overconfidence, or perhaps a desire to finish quickly. However, taking shortcuts often backfires, leading to more work and frustration in the long run. You might be interested in: How to master moving heavy furniture.
To avoid these common errors, implement accountability measures:
Double-Check Each Step: Before moving to the next step, verify the current step is completed correctly according to the instructions.
Use a Checklist: Create a checklist of each assembly step and mark them off as you complete them. This provides a visual guide of your progress and helps prevent omissions.
Take Breaks: Assembly can be tiring. Taking breaks helps maintain focus and prevents rushed decisions that can lead to mistakes.
Enlist a Helper: Having someone else assist not only simplifies the process but also provides an extra set of eyes to catch potential errors.
By understanding these common mistakes and implementing preventive measures, you’ll achieve a professional-quality installation. Learning from others' experiences helps you avoid a frustrating learning curve and enjoy a stable, safe, and long-lasting basketball hoop. The payoff is a hoop ready for years of enjoyment.
Building your basketball hoop is a big win. But keeping it safe and in top shape takes more than just putting it together. Just like your car, your hoop needs regular TLC to perform its best. A little preventative maintenance can save you money and keep your hoop playing strong for years to come.
Professional installers don't just bolt and go. They do a full inspection to ensure everything is secure and stable. This proactive approach can prevent future problems. Here’s what they look for:
Seasonal care is key, especially if you live in an area with extreme weather. This preventative maintenance keeps rust and damage at bay. Here’s a seasonal guide:
Weatherproofing protects your hoop inside and out. It’s like adding a shield against the elements, preserving both its looks and how well it works.
Regular safety checks are especially important if kids are using the hoop. Prioritizing safety helps prevent injuries. Focus on these areas:
These regular maintenance and safety checks will help keep your basketball hoop in great shape for years of fun. By following these professional tips, your hoop will be a source of entertainment and fitness for seasons to come.
Deciding whether to assemble your basketball hoop yourself or hire professionals involves more than just cost. It's about value, long-term satisfaction, and avoiding potential headaches. This section helps you weigh the pros and cons of each approach, so you can make the best choice for your situation.
Assembling your basketball hoop yourself can certainly save money on professional installation fees. But, there are hidden costs to keep in mind. Time investment is a big one. Depending on the hoop type and your experience, assembly can take several hours, or even an entire weekend. DIY also requires physical effort, including lifting heavy components and possibly digging a foundation for in-ground hoops. Finally, there’s the risk of errors. Mistakes during assembly, like overtightening bolts or misaligning components, can lead to expensive repairs later, or even void your warranty.
Hiring professionals for basketball hoop installation offers significant advantages. Experienced installers have the expertise to efficiently handle every step, from site preparation to final adjustments. They have the right tools and understand the best techniques for a safe and stable setup. This expertise minimizes the risk of errors and often leads to faster completion compared to DIY. Professional installation also brings peace of mind, knowing the job is done correctly and often backed by a warranty. This is especially valuable for complex in-ground installations or if you lack the time, tools, or physical capacity to handle the assembly yourself.
Another key consideration is how assembly affects your warranty. Some manufacturers require professional installation to maintain warranty coverage. Check out our guide on professional furniture assembly. Trying a complex DIY installation on a premium hoop, for example, could void your warranty if something goes wrong. This is a crucial detail to verify before you decide.
| Feature | DIY | Professional |
|---|---|---|
| Initial Cost | Lower (cost of tools and materials) | Higher (installation fee) |
| Time Investment | Significant | Minimal |
| Physical Effort | Required | Minimal |
| Risk of Errors | Higher | Lower |
| Warranty | Potential for voiding | Usually maintains or extends warranty |
Think about these questions to help you decide:
If you choose professional installation, these tips will ensure a smooth process:
By carefully considering these factors and making informed choices, you can ensure your basketball hoop installation is a success, whether you choose DIY or professional assembly.
