-
CALL US:
- (866) 952-3456
Let's be honest, a gazebo isn't just a random structure; it's the potential heart of your backyard oasis. The difference between sipping coffee surrounded by nature and regretting that impulse buy lies in the details of the assembly. I've chatted with tons of homeowners about their gazebo journeys, and their stories highlight just how important getting it right is. One friend, for example, painstakingly designed her garden around her soon-to-be gazebo, only to discover the pre-built panels wouldn't fit through her side gate! Talk about a facepalm moment.
This isn't just about avoiding frustration; it's about tapping into a growing movement: maximizing outdoor living. More and more, backyards are becoming true extensions of our homes—spaces for dining, relaxing, and entertaining. And guess what often takes center stage? A well-assembled gazebo. This trend is so big that the outdoor living structures market (including gazebos) is expected to hit USD 3.35 billion by 2030, with a CAGR of 6.2% between 2025 and 2030. It's all driven by that desire for awesome outdoor spaces, especially in North America and Europe. Check out more on this trend here.
Unfortunately, DIY gazebo projects can quickly become more headache than haven. Common assembly mistakes can lead to anything from a wobbly structure to serious safety hazards. Think improperly secured roofing panels turning into airborne projectiles during a storm. I actually saw a neighbor's gazebo nearly collapse because the base wasn't anchored properly. Yikes!
Before even thinking about picking up a wrench, have a solid plan. This includes scheduling time for each part of the process. Even if you're a gazebo assembly pro, you'll want to consider the admin side of things, like scheduling your time effectively. Proper prep work is just as important as the physical assembly. Picking the perfect spot, prepping the site, and having all the right tools ready can make all the difference. These steps form the foundation of a successful gazebo project, paving the way for a smooth and stress-free build. Trust me, putting in the effort upfront is an investment in future backyard bliss.
Picking the right spot and prepping the ground is where so many gazebo dreams go south before you even open a box. You might think any flat-ish area will do, but believe me, I've learned the hard way that there's a lot more to it. I’ve seen gazebos turn into swimming pools after a heavy rain, and I’ve even seen one take flight in a strong wind – not a pretty sight!
Think about drainage. Where does the water go when you get a downpour? You definitely don't want your new gazebo to become a breeding ground for mosquitos. Wind is a huge factor too. A gazebo can act like a giant sail if it's in a wind tunnel. Finally, and this is important, think about your future landscaping. That little tree you planted last year could be towering over your gazebo in a few years, blocking all that lovely sunshine.
Prepping the ground is just as crucial as the actual assembly. Leveling the area isn't just for looks; it’s about making sure your gazebo is stable and won't wobble in a breeze. There are some easy DIY ways to level the ground without spending a fortune on fancy surveying equipment. A long, straight board and a level can do wonders, for instance. You might find this helpful: how-to-prepare-for-your-furniture-assembly-project. And don't forget about permits! Local regulations vary, so check your city or county website to avoid any nasty surprises down the line.
Timing is everything. Building a gazebo in a hurricane? Probably not the best idea. Wait for calm weather, and consider the temperature too. Extreme heat or freezing cold makes working with tools and materials a real pain. And finally, organize your workspace! Lay down tarps or cardboard to protect your lawn and lay out all your parts and tools neatly. This will save you tons of time and frustration when you’re actually putting the gazebo together. Trust me, those "Where's that darn bolt?" moments can really kill your gazebo-building vibe.
Before we dive into the building process, let's talk about foundation options. Choosing the right foundation is crucial for stability and longevity. The following table compares several popular options, considering cost, difficulty, durability, and ideal use cases.
This table outlines the pros, cons, and best uses for different gazebo foundation types, including concrete pads, gravel bases, and ground-level installations. Understanding these options will help you choose the best foundation for your specific needs and budget.
| Foundation Type | Cost Range | Difficulty Level | Durability | Best For |
|---|---|---|---|---|
| Concrete Pad | $500 – $1500+ | High | Excellent | Permanent installations, heavy gazebos |
| Gravel Base | $100 – $300 | Medium | Good | Moderate stability, easier installation |
| Ground-Level (with pavers) | $50 – $200 | Low | Fair | Temporary gazebos, light structures |
Choosing the right foundation will depend on your budget, the size and weight of your gazebo, and whether you plan to move it in the future. A concrete pad offers the best durability but is the most expensive and difficult to install, while a gravel base is a good compromise between cost and stability. Ground-level installations are the easiest and cheapest but offer less durability.
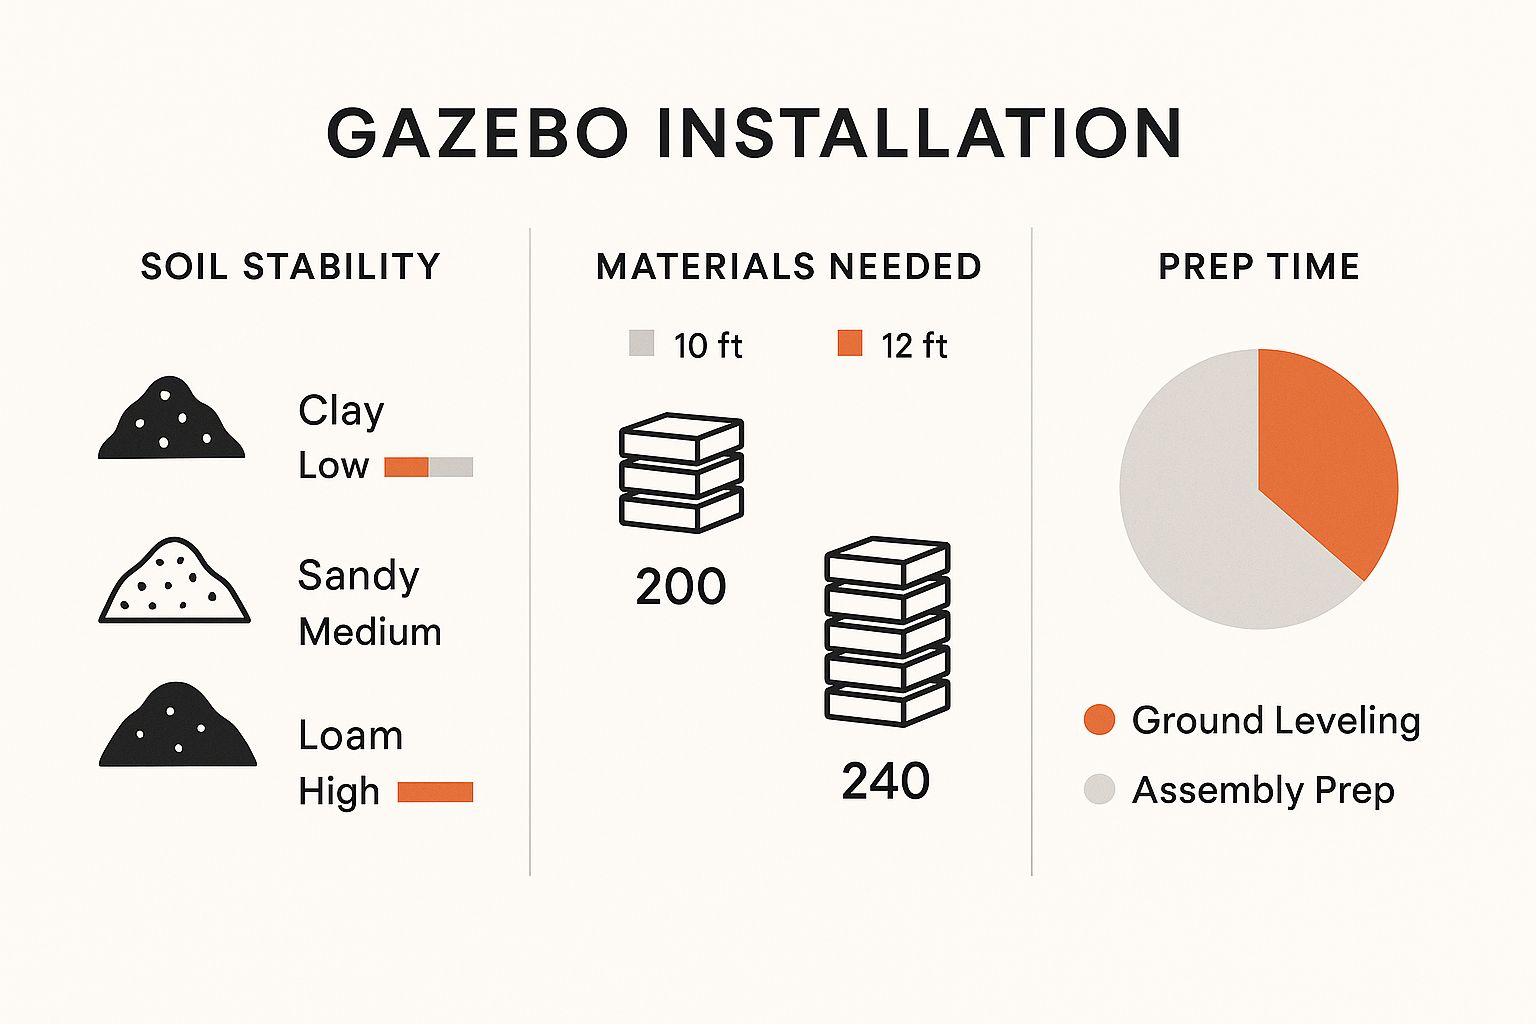
This infographic gives you a quick snapshot of some key gazebo assembly info, like soil stability ratings, materials based on gazebo size, and how long you'll spend prepping the ground versus actually putting the thing together. Loam soil, as you can see, is a good, stable choice. Notice how the number of pavers needed jumps up as the gazebo size increases. Prepping the ground can take way longer than the actual assembly, so picking the right spot from the get-go is crucial.
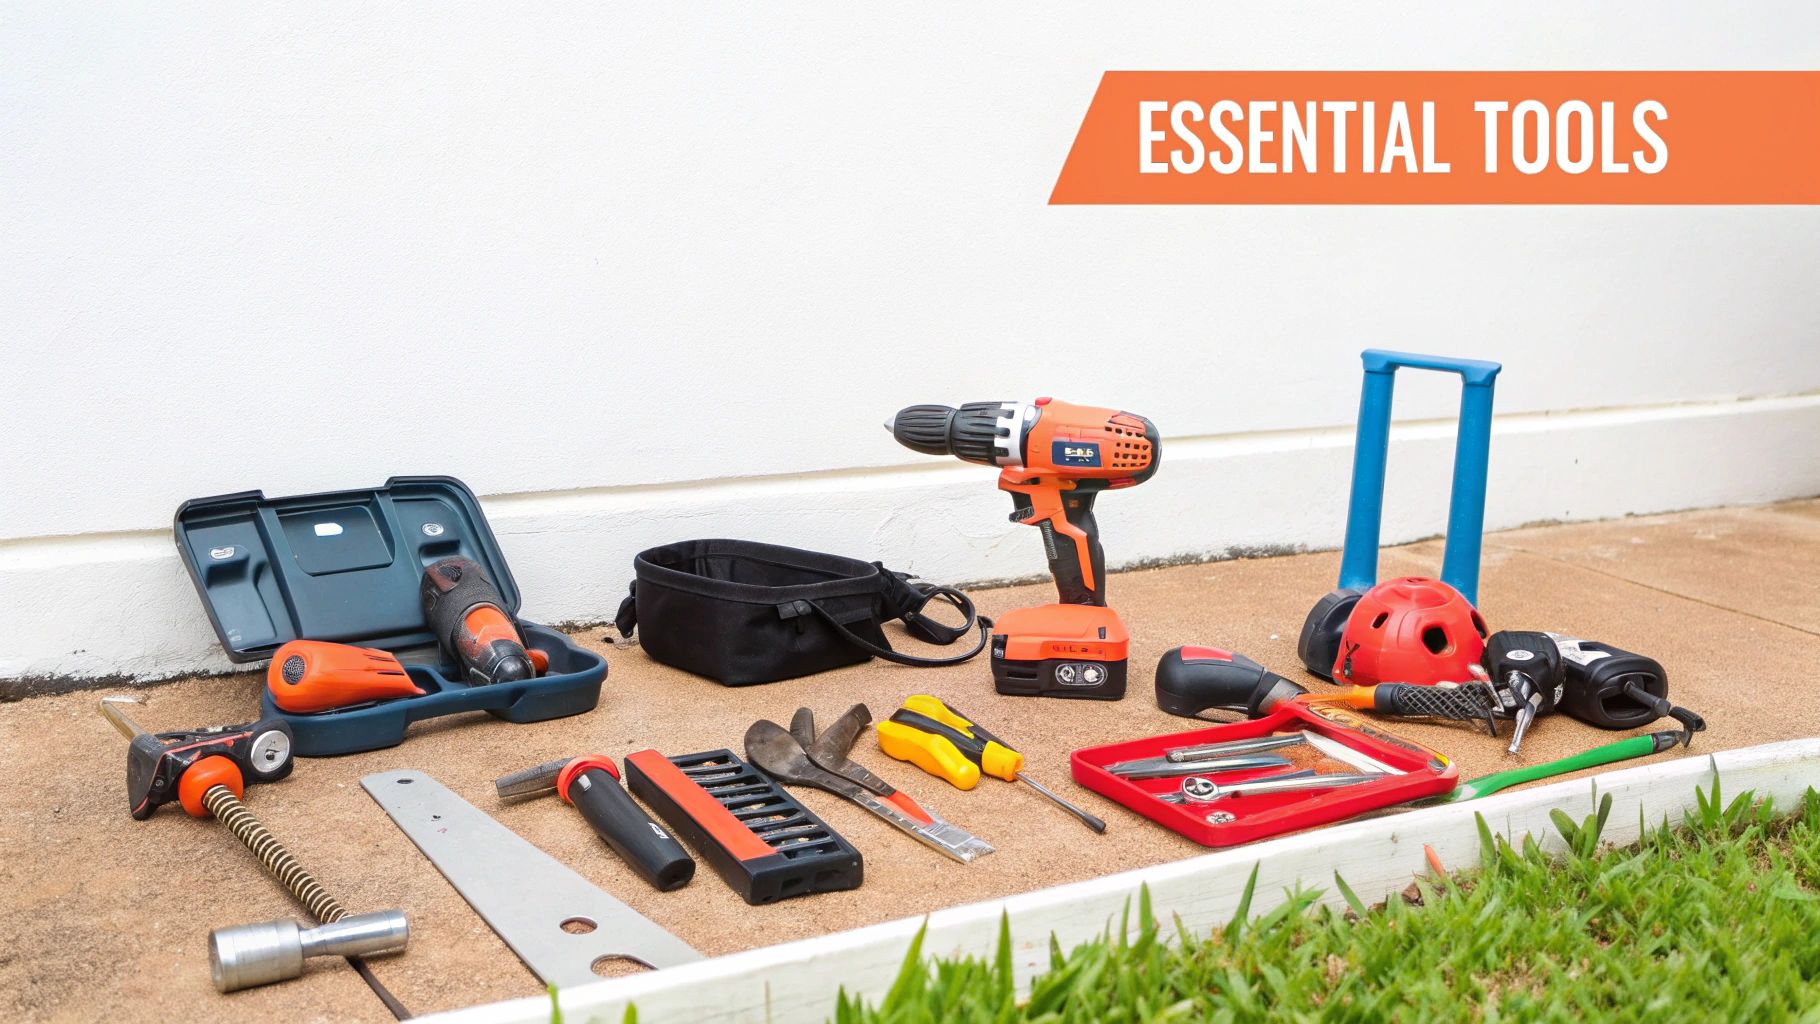
Forget those massive, generic tool lists you see online. Efficient gazebo assembly isn't about having every tool, but the right ones. I've built enough of these things to know which tools are essential and which just clutter up your toolbox. Take drill bits, for example: using the wrong one, especially on pre-drilled holes, can split the wood and turn a quick screw into a repair job. A decent level is also non-negotiable. Don't rely on that tiny bubble level on your drill – a longer level (like a 4-foot) will give you a much more accurate reading, especially if your ground is even slightly uneven.
Let's talk tools. Some are worth the investment, while others are perfectly fine to borrow or rent. It's worth noting that this whole outdoor living market is exploding. The pop-up gazebo market alone was worth about $2.5 billion in 2023 and is expected to hit $4.3 billion by 2032. You can see more about that growth here. This just shows how much people are into outdoor structures these days. But back to the tools…
To help you figure out what you’ll need, I put together a handy table summarizing the must-haves versus the nice-to-haves, along with estimated costs and whether renting or borrowing is an option.
| Tool | Necessity Level | Estimated Cost | Can Rent/Borrow | Why You Need It |
|---|---|---|---|---|
| Cordless Drill | Essential | $50 – $200 | Yes | Driving screws quickly and efficiently |
| Impact Driver | Highly Recommended | $75 – $250 | Yes | Securing bolts and lag screws tightly without stripping |
| Ratchet Set | Essential | $30 – $100 | Yes | Tightening nuts and bolts in tight spaces |
| Level (4-foot) | Essential | $20 – $50 | Yes | Ensuring a level foundation and frame |
| Safety Glasses | Essential | $5 – $20 | No | Protecting your eyes from flying debris |
| Work Gloves | Essential | $10 – $30 | No | Protecting your hands and improving grip |
Having the right tools really does make assembly so much smoother. A basic cordless drill usually gets the job done, but an impact driver is a lifesaver, especially for larger gazebos with heavier hardware. Plus, it’s much easier on your wrists when you're driving in a lot of lag screws.
Before you even think about picking up a wrench, take some time to organize your materials. This will save you from that "where's that darn bolt?!" panic later on. I like to use labeled containers or zip-top bags for all the hardware. Another pro tip: a light coat of lubricant on your screws and bolts makes them go in easier and helps prevent rust down the road. These little things make a big difference.
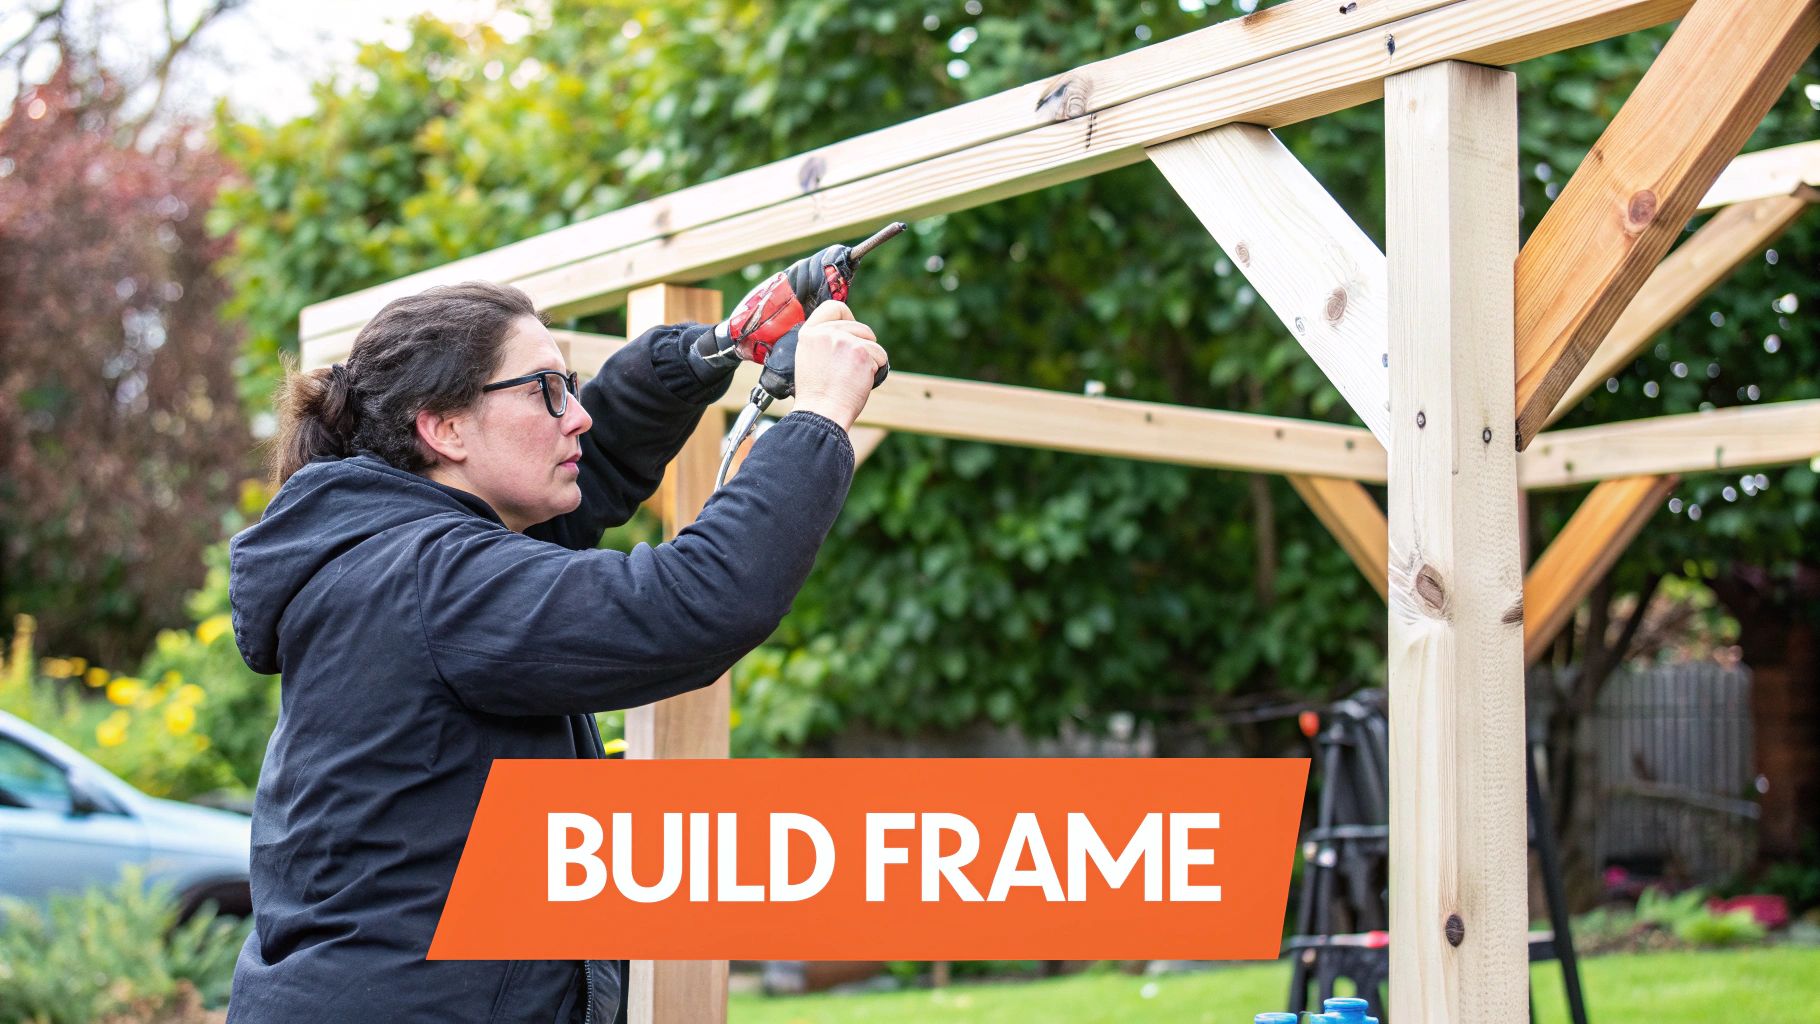
Forget those picture-perfect instruction manuals. Let's talk real-world gazebo assembly – dealing with unpredictable wind, uneven ground, and maybe only one extra set of hands (or none!). Anyone who's built a gazebo knows those large panels can be a challenge. I remember assembling my first one with a friend. A sudden gust of wind nearly sent a roof panel sailing into the neighbor's yard! That's when we learned the value of bracing the frame with temporary supports.
If you're short on help, creative support is essential. Think sawhorses, adjustable clamps, or even strategically placed ropes and weights. The goal is to secure those panels before attaching them, preventing any unexpected shifts or falls. You might even find some helpful tips from the world of IKEA furniture assembly – some of those principles apply perfectly to large gazebo components.
The assembly order in the manual? It's a suggestion, not a commandment. Adapt the sequence to your specific gazebo and environment. With a hardtop gazebo, assembling the roof sections on the ground first can be much easier, then carefully hoisting them onto the frame. This approach offers better control, especially in windy conditions. For soft-top gazebos, securing the frame before attaching the canopy prevents the fabric from turning into a giant sail. Interestingly, the global outdoor gazebo tents market is projected for significant growth between 2025 and 2033, showing just how popular outdoor living and versatile shelter solutions are becoming. Want to know more about this trend? Discover more here.
Let's be honest – misaligned holes, slightly warped lumber, or a missing bolt are practically gazebo assembly traditions. They don't have to be deal-breakers, though. A bit of resourcefulness can work wonders. A rubber mallet can gently coax misaligned parts into place. A wood clamp can temporarily straighten slightly bowed pieces while you secure them. And that missing bolt? A quick trip to the hardware store is far less frustrating than forcing parts together. Effective time management is key. Rushing leads to mistakes. Break the project into smaller, manageable tasks, and set realistic deadlines. Having the right digital tools to track progress and adjust your approach can be helpful; you might find some insights from Digital Marketing for Handyman Services useful for this. Finally, remember the importance of small adjustments. Even if your initial measurements seem perfect, double-check everything before tightening it all down. A minor tweak here and there can prevent major headaches later. These little tactics can be the difference between a successful DIY project and a weekend of frustration.
Let's talk gazebo assembly fails. You know, those moments where your backyard dreams turn into expensive lessons. I've chatted with homeowners, contractors, even customer service reps, and they've seen it all: collapsed roofs, wonky frames, the works. One homeowner recounted rushing the foundation in the rain, only to have the whole thing sink a few inches after the first storm. Not fun.
Rushing any project, especially something like a gazebo, almost always backfires. I get it. Sometimes you're up against a deadline or the weather's turning. But trust me, shortcuts usually lead to more work, and more importantly, more expense, in the long run.
Skipping steps in the instructions, not fully tightening bolts, or “eyeballing” measurements instead of using a level are all recipes for disaster. These seemingly minor oversights can snowball into major structural issues and even create safety hazards down the line. You might find some helpful parallels in our guide on IKEA furniture assembly, which highlights some common assembly pitfalls relevant to all kinds of projects.
Catching mistakes early is key. A slightly crooked beam might seem minor, but those small misalignments add up as you build, resulting in a wonky finished product. Pay close attention to the hardware, too. Stripped screws, bolts that don't quite tighten, or holes that don't line up are all red flags. Addressing these little issues early can prevent major headaches later.
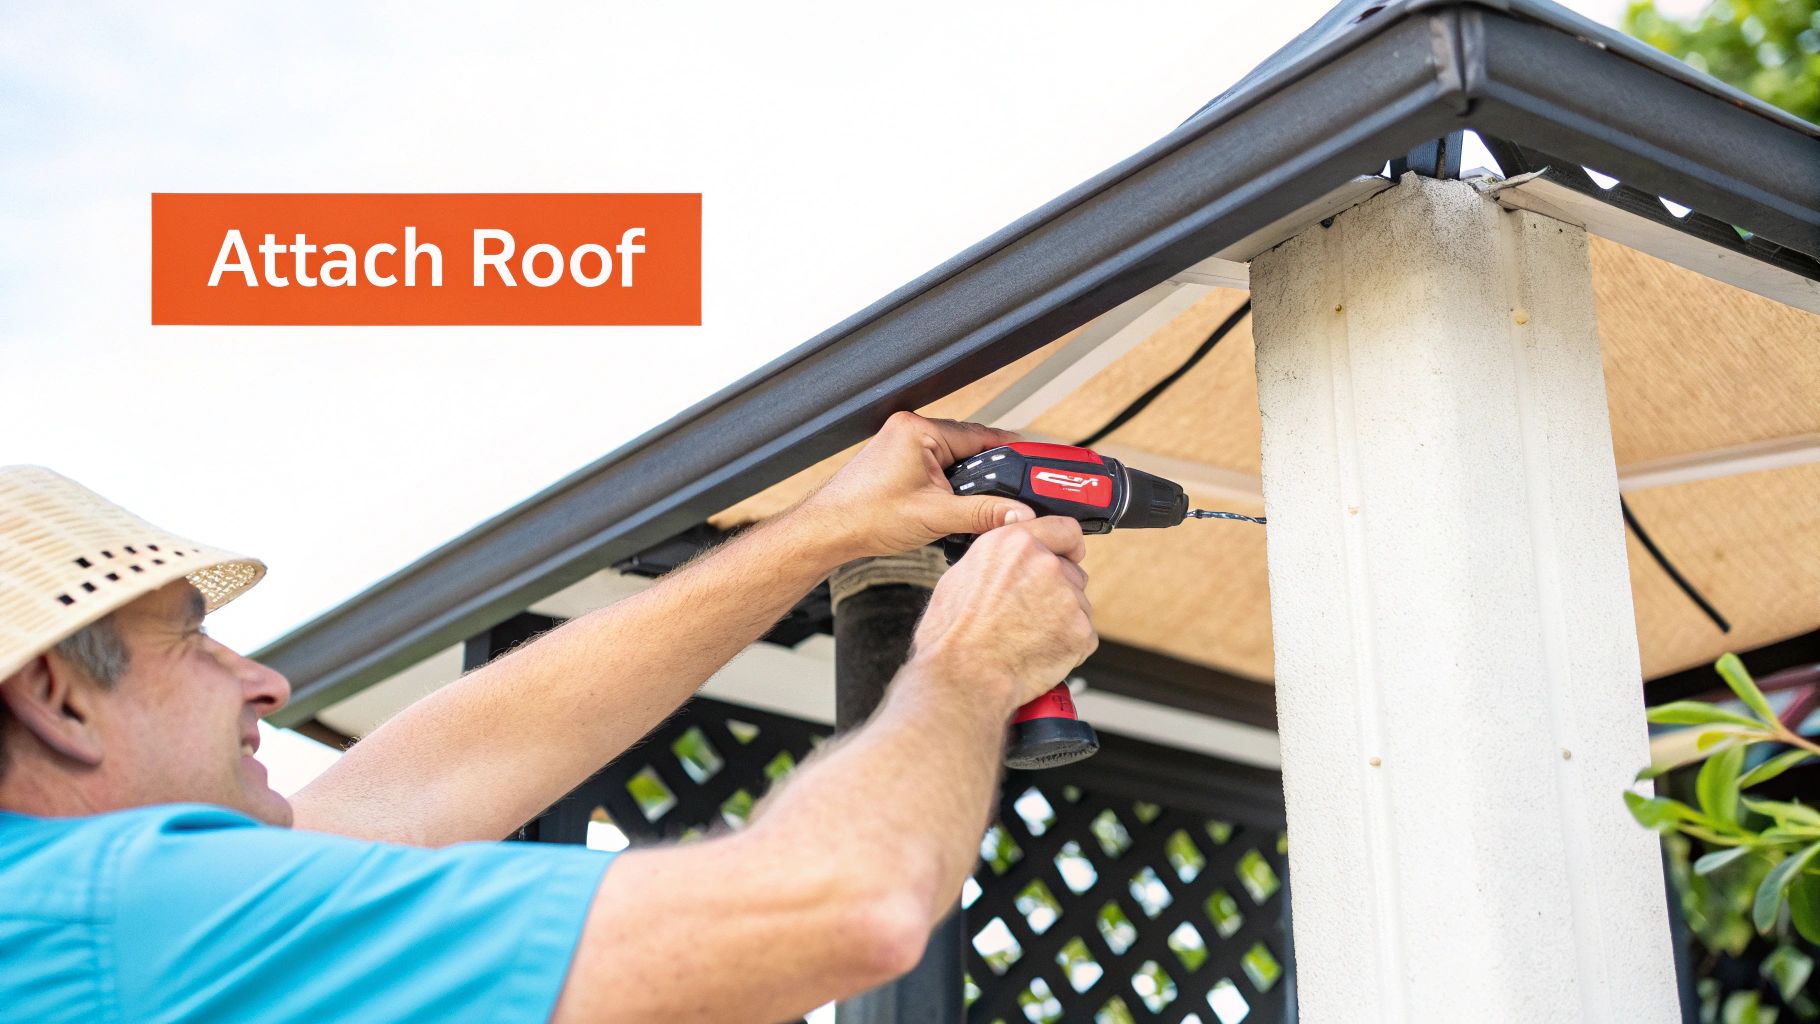
Another common mistake? Not properly securing the roof panels. I've heard stories of panels flapping in the wind or even flying off during storms. This not only damages the gazebo but can also be incredibly dangerous.
One homeowner shared their experience of assuming their ground was level enough "just by looking." They skipped leveling entirely, resulting in a gazebo that leaned precariously. Another DIYer, eager to finish before dark, rushed the bolting process, only to find loose connections a week later, causing the whole structure to creak ominously in the wind.
These aren't just hypotheticals; these are real-world scenarios with real consequences. Some mistakes are easily fixable—a simple tightening or adjustment. But others, like a severely uneven foundation, can require a complete rebuild. Think of the wasted time and materials!
Safety isn't just about wearing gloves and safety glasses (though those are essential!). It's about building a structurally sound gazebo that can withstand the elements. Incorrectly assembled frames, poorly anchored foundations, or unsecured roof panels create hazardous situations, particularly during strong winds or heavy snow.
Consider the long-term stability and make sure your gazebo can handle whatever Mother Nature throws at it. A well-built gazebo will not only provide years of enjoyment but also give you peace of mind knowing it’s safe and secure.
Putting the finishing touches on your gazebo is really where the project comes alive. It's the difference between a so-so DIY effort and a backyard showpiece that'll have your neighbors green with envy. Building the structure is just the first step; now it's time to dial in the details that truly elevate its look and lifespan. I remember a friend who, after building his gazebo, just slapped the trim on without mitering the corners. Let's just say it wasn't exactly a craftsman-level finish. Learn from his mistakes!
Getting the trim right is crucial. Crisp mitered corners, neatly caulked seams, and a fresh coat of paint or stain can transform the entire look. Think of it like framing a beautiful piece of art – the right frame makes all the difference. And weatherproofing? That's not just about aesthetics, it's about protecting your investment. A good sealant on the wood, rust-proof hardware, and a waterproof canopy will significantly extend the life of your gazebo. For instance, using galvanized screws instead of regular steel screws can prevent those ugly rust stains and add years to your gazebo's life.
Remember, the finishing touches are what truly make the gazebo shine.
A gazebo isn't a "set it and forget it" kind of project. Regular maintenance is key to preventing small issues from becoming major (and costly) headaches down the road. The gazebo owners I know whose structures still look amazing after years? They've all learned this lesson. They're the ones diligently inspecting the frame and roof seasonally for cracks or loose connections, cleaning the canopy regularly, and applying a fresh coat of sealant every year or two. Check out our guide on gazebo assembly for even more helpful tips.
These simple habits can prevent serious problems, like rot or structural damage. Think of it like routine car maintenance – a little preventative care goes a long way in keeping things running smoothly. And don't forget to consider your local climate. In areas with heavy snowfall, reinforcing the roof or regularly removing snow buildup is essential to prevent collapses. Likewise, if you're in a coastal area, using corrosion-resistant materials is a must.
Once you've got the basics down, consider adding features that really make the gazebo your own. Think mosquito netting, privacy screens, or even lighting to create a true outdoor oasis. I know one homeowner who installed a ceiling fan in their gazebo, creating a cool and comfortable space even on the hottest summer days. Just remember, any modifications you make shouldn't compromise the structural integrity of the gazebo.
Even with meticulous planning and execution, little hiccups can happen after assembly. Sometimes the frame might shift slightly due to minor settling. This is usually an easy fix – adjusting the leg levelers or adding shims beneath the base often does the trick. Another common issue is weather-related damage. A torn canopy can usually be patched up with a repair kit, while minor wood damage can be sanded and resealed. Addressing these common problems head-on will keep your gazebo looking its best and functioning smoothly for years to come. These small fixes can save you from bigger expenses later.
So, we've covered a lot of ground. Now, let's map out how to put it all together. Think of this as your personalized gazebo game plan, designed to take you from gazebo newbie to backyard boss. This plan will help you steer clear of those "Why didn't I just hire someone?" moments.
Assembling a gazebo isn't instant. The time it takes really depends on the gazebo itself and your experience level. A simple pop-up gazebo? Maybe an hour or two. A larger, more intricate hardtop gazebo? That could easily eat up a weekend or even more. Be honest with yourself about your available time. Don’t try squeezing a complex assembly into a single afternoon, especially if you're new to this. And, let's not forget Mother Nature. Check the forecast. Avoid battling roof panels in a windstorm or sweating it out in extreme heat. Trust me, I've been there.
Before you even crack open the first box, take a look at this checklist. It covers those easily forgotten details that can throw a wrench in the whole project:
This checklist isn't just about being efficient. It's about preventing headaches. Knowing you have everything you need before starting makes the process so much smoother.
Even with the best preparation, things can go sideways. Here are some quick fixes for common assembly problems:
Most assembly problems are solvable with a little patience and creativity. Don't panic!
Once your gazebo is up, you’ll want to keep it looking its best. Here are some general maintenance tips:
A bit of regular maintenance goes a long way in protecting your investment and keeping your gazebo beautiful and functional for years to come.
