-
CALL US:
- (866) 952-3456
When you start shopping for a changing table, you'll quickly notice some common numbers popping up. Most tables stand somewhere between 36 to 42 inches high, are about 30 to 40 inches wide, and have a depth of 18 to 22 inches. These aren't random numbers; they're the sweet spot for keeping most parents comfortable and giving your baby a safe, roomy surface.
Let's be honest, staring at a dozen different furniture listings can make your head spin. So, this section is your shortcut. Think of it as a cheat sheet for figuring out the right changing table dimensions for your nursery, your back, and your baby's safety.
We’ll focus on the big three: a comfortable height that prevents you from stooping, enough surface area (width and depth) to work with, and the absolute necessity of safety railings. This handy infographic gives you a quick visual.
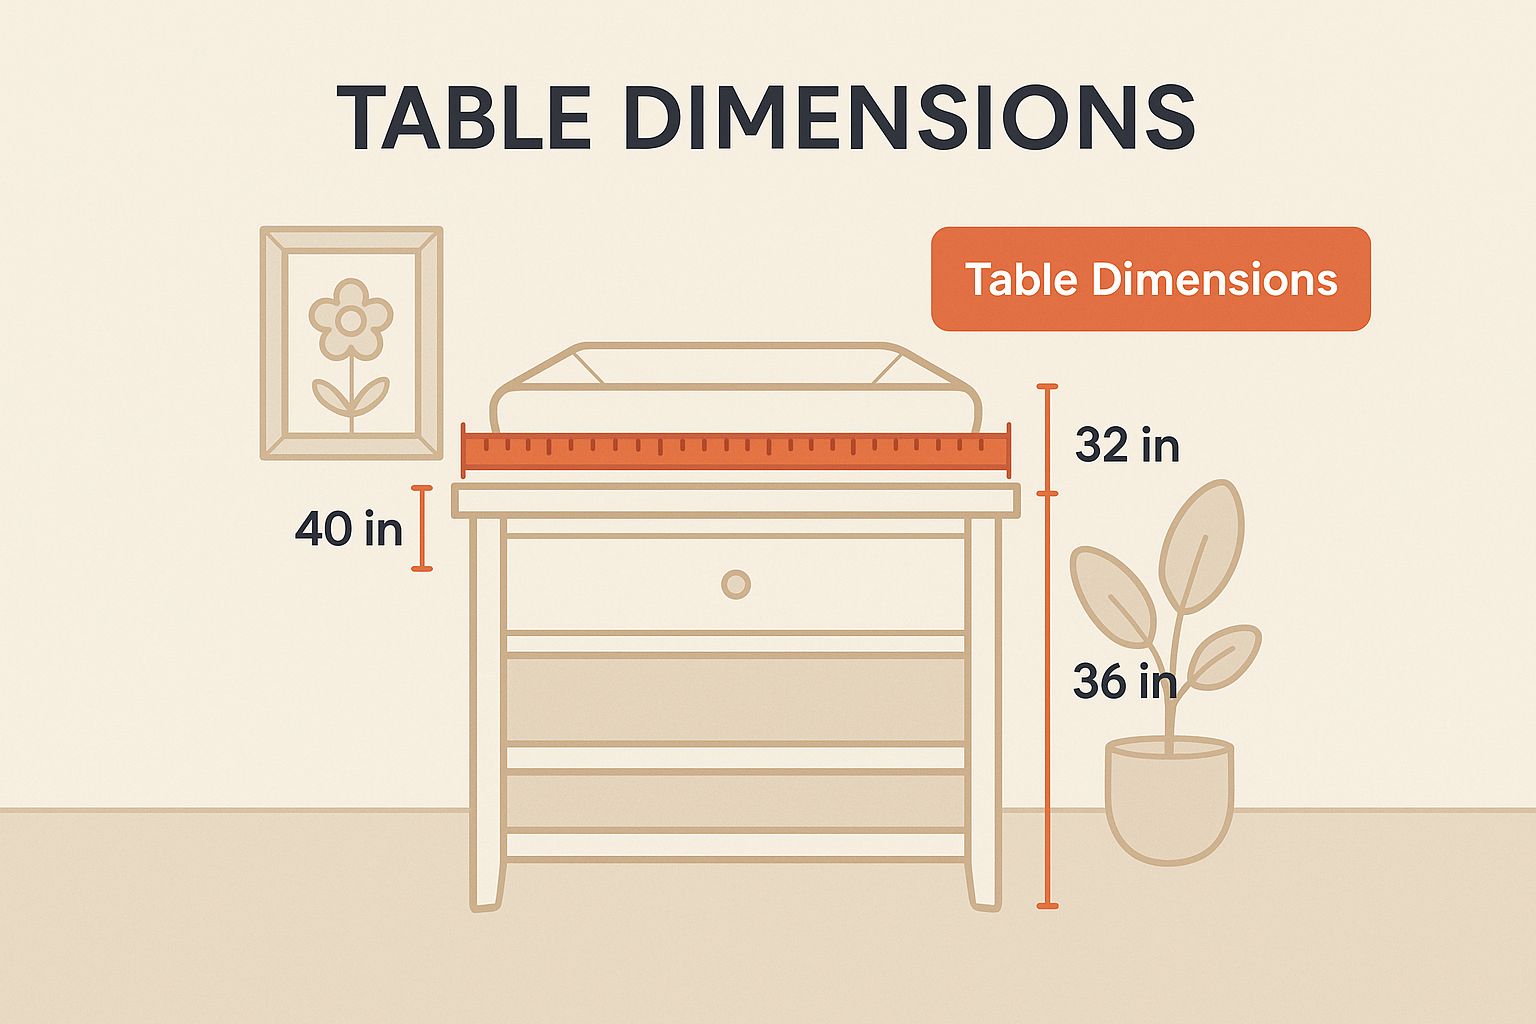
As you can see, the goal is to strike a balance between a table that fits in your room and one that's actually functional. Getting familiar with these standard sizes helps you immediately spot which styles will work for your space before we get into the nitty-gritty of why these dimensions are so important.
A well-chosen changing table isn't just about fitting your nursery's layout—it's about creating a safe, comfortable, and efficient station for one of the most frequent tasks of early parenthood.
To make things even easier, here's a quick comparison of what you can expect from different types of changing tables.
This table breaks down the usual measurements for the most common styles, helping you see right away which type might be the best fit for your nursery and needs.
| Table Type | Average Width | Average Depth | Average Height |
|---|---|---|---|
| Standard Table | 32-42 inches | 18-22 inches | 36-42 inches |
| Dresser Combo | 35-50+ inches | 19-23 inches | 34-40 inches |
| Wall-Mounted | 30-35 inches | 15-18 inches (open) | N/A |
| Portable/Foldable | 25-30 inches | 18-20 inches | 34-38 inches |
Seeing the numbers side-by-side like this makes it much simpler to narrow down your options based on how much room you have to work with.
Of all the dimensions you'll consider, the height of your changing table is the one that will make or break your day-to-day comfort. Think of it like adjusting your office chair for the perfect posture; you set it once to avoid hours of aches and pains. The right table height does the exact same thing, saving you from hunching over dozens of times a day.
This isn’t just about feeling a little more comfortable—it’s about preventing some serious, long-term back strain. Most changing tables are designed to hit right around the average adult's waist or hip level. This simple detail creates a natural, easy posture where your arms can reach your baby without forcing you to bend or stoop.
So what's the magic number? The ideal height is one that lets you stand up straight with a neutral spine, your arms bent at about a 90-degree angle while you're taking care of your little one. This alignment is the difference between a quick, painless diaper change and a nagging ache in your lower back that just won't quit.
Choosing a changing table at the correct ergonomic height is one of the most proactive steps you can take to protect your physical well-being during your baby’s first years.
Safety standards also have a lot to say about these measurements. For example, you'll find that many guidelines recommend the table's work surface be between 700mm and 800mm (that's roughly 27.5 to 31.5 inches) from the floor. Some designs, especially those that need to meet ADA requirements, ensure the surface doesn't go above 34 inches (863mm) high, which strikes a great balance between accessibility and caregiver comfort. You can dig deeper into these standards over at Dolphin Solutions.
When it comes down to it, putting height at the top of your list when comparing baby changing table dimensions is a direct investment in your own long-term comfort. Making this call thoughtfully will make the daily routine of diaper changes a whole lot safer and more pleasant for both of you.
While the table's height is mostly about saving your back, its width and depth are all about keeping your baby safe and secure. Think of the changing surface as a "safe landing zone." A good amount of width gives a squirmy baby room to move without getting too close to the edge, while plenty of depth keeps them comfortably in the center of the action.
You'll find that most standard baby changing table dimensions hover around 32 inches wide by 16 inches deep. This isn't just a random number; it's perfectly designed to fit a standard changing pad of roughly the same size. This ensures a snug fit, leaving no dangerous gaps where tiny arms or legs could get stuck.
A wider and deeper surface really just gives you a crucial buffer zone. As your little one grows and masters the art of rolling over at the most inconvenient times, that extra space becomes a real lifesaver.
The biggest trick is balancing that generous surface area with the reality of your nursery's square footage. A huge changing table might seem like the safest bet, but it can easily swallow up a small room, making the space feel cramped and tough to move around in.
To find that sweet spot, start by actually measuring your available space. A great little trick is to use painter's tape on the floor to outline the footprint of a table you're considering. This helps you see exactly how much real estate it will take up.
Don’t just measure the table's footprint; measure the functional space around it. You'll need enough clearance to stand comfortably, open drawers, and grab supplies without feeling boxed in.
As you compare baby changing table dimensions, keep these key points in mind:
Ultimately, you're trying to create a changing station that's both safe for your baby and genuinely functional for you. Thinking through the width and depth is a huge piece of the nursery safety puzzle, and it’s an essential step in a much broader strategy for comprehensive home childproofing. By carefully considering these measurements, you can build a changing station that is truly a secure and practical space for you and your little one.
When you're looking at the height, width, and depth of a changing table, there's one other critical dimension people often forget: the safety railing. Think of these as the bumpers in a bowling lane—they’re there to keep your little one centered and safe, especially once they start wiggling and rolling.
This small feature is a huge deal for safety. A raised edge acts as a simple physical barrier, and it dramatically cuts down the risk of a fall. The industry standard for these railings is a height between 2 to 6 inches. That's high enough to be effective but not so high that it gets in your way.
You'll generally see a couple of common designs, and both do a great job of adding a layer of protection. Some changing tables have a four-sided contoured top, which creates a sort of "well" that the changing pad sits inside. Others might just have raised edges on the two long sides. Either style works to keep your baby securely in place.
The point of a safety railing is simply peace of mind. It’s a passive safety feature that’s always working in the background, making every diaper change that much more secure.
No matter the specific design, the presence of a railing is a key part of the overall baby changing table dimensions you should be looking at. It turns a basic flat surface into a dedicated, safer space for your child.
Of course, the stability of the whole unit is just as important as what's on top. Even with the best railings, a wobbly table is a major hazard. For more on preventing tip-over accidents, our guide offers crucial advice on securing furniture to the wall, which is a must-do step for any nursery. Bottom line: don't think of the safety railing as an optional extra. It's an essential piece of a well-designed, secure changing station.
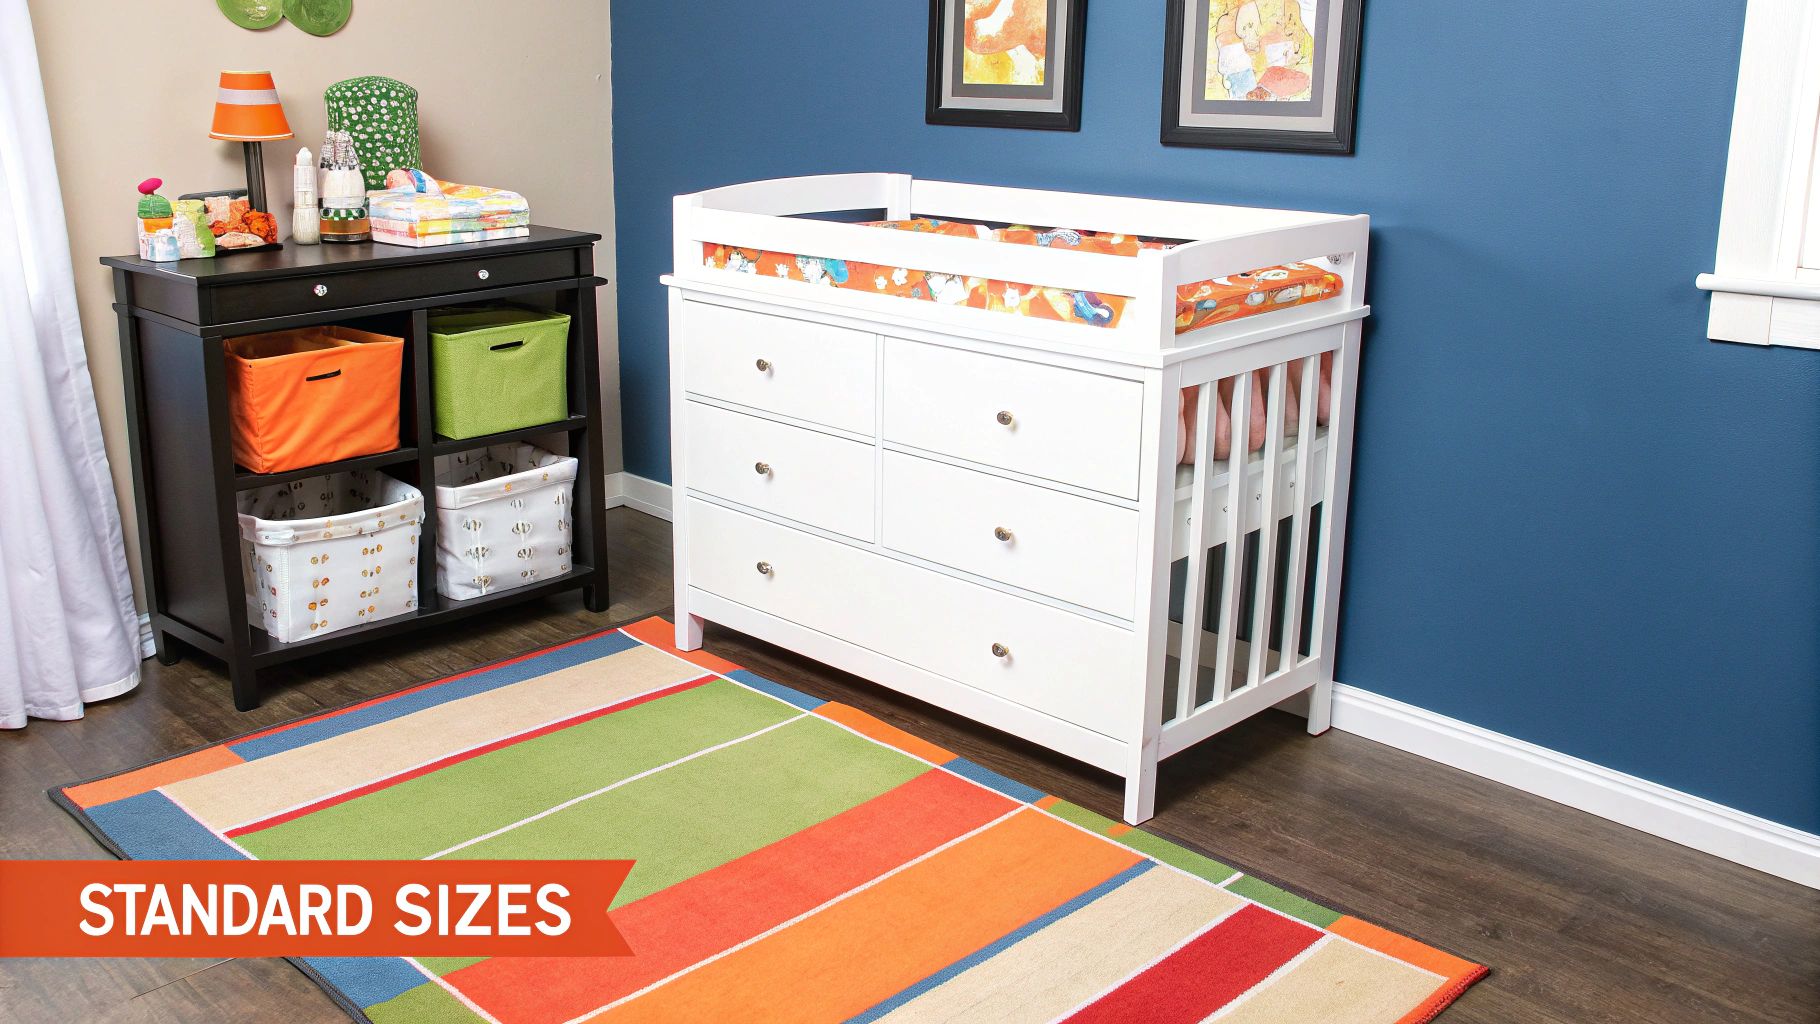
Now that we have the ideal numbers in mind, let's connect them to the actual furniture you'll find in stores. You’ll quickly see that not all changing tables are created equal—their design has a huge impact on their size and how they’ll work in your nursery.
Let's break down how the most common styles stack up.
The baby changing table dimensions that are right for you really boil down to the style you pick and the space you're working with. Each one comes with its own set of pros and cons.
The classic, stand-alone changing table is a dedicated piece of furniture, usually designed with open shelves for easy access to diapers and wipes. These are often lightweight and easier on the wallet, but the trade-off is less storage. Plus, they can become obsolete once your little one is out of diapers.
On the other hand, a dresser with a changing topper is a hugely popular, long-term investment. It gives you tons of storage for clothes, blankets, and all the baby supplies you can imagine. Once you’re done with diaper duty, just remove the topper, and you've got a great piece of furniture that will last for years. The downside? They are much heavier, often wider, and take up more floor space. Our guide to professional changing table assembly can be a lifesaver with these bigger, more complicated pieces.
Think of a dresser combo as a multitasking marvel—it’s your changing station and your baby’s wardrobe all in one. A stand-alone table is more of a single-purpose specialist.
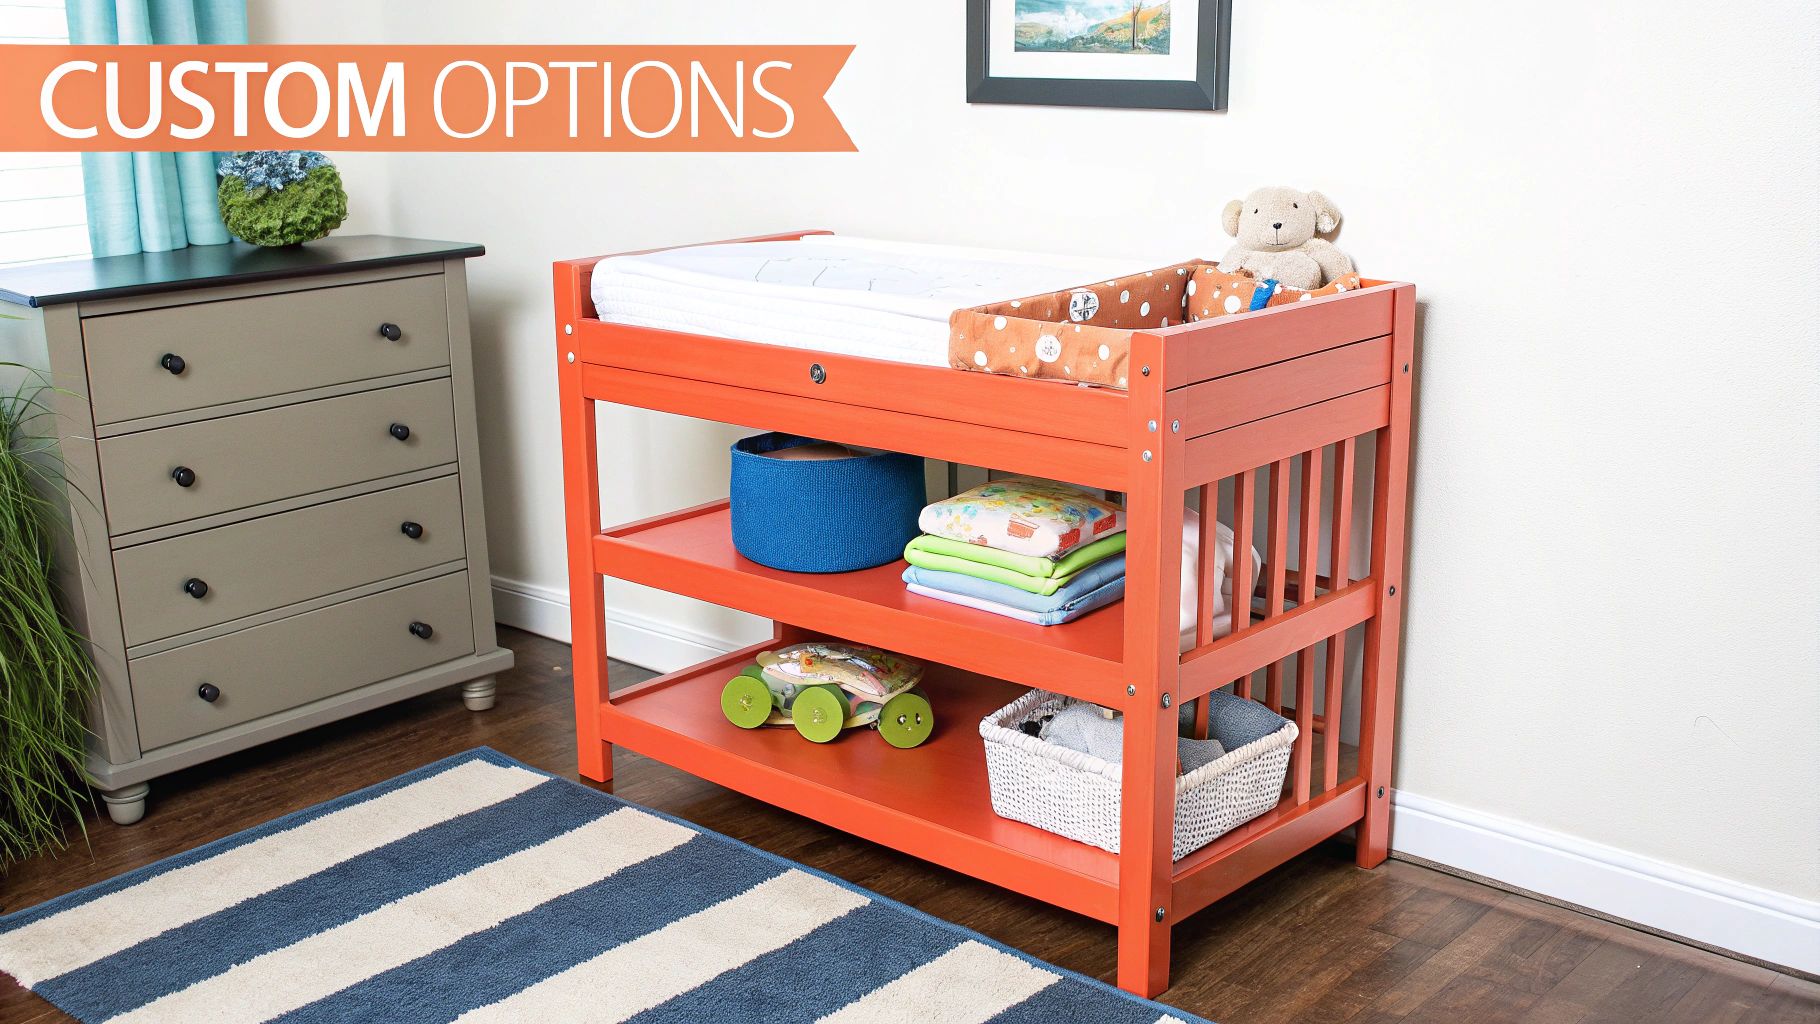
If you're setting up a nursery in a smaller room or an apartment, wall-mounted and portable models are fantastic. A wall-mounted unit folds up neatly against the wall when you're not using it, freeing up precious floor space. Portable tables are light enough to move from room to room, wherever you need them.
These compact designs really show how much dimensions can vary. For instance, some commercial wall-mounted stations are only 4 inches deep when closed, making them incredibly discreet. While our guide focuses on traditional home models, some parents also love the convenience of portable diaper changing mats for ultimate flexibility on the go.
Okay, so you've got the standard dimensions down. Now for the fun part: making sure the changing table actually works in your nursery. This isn't just about whether it will physically squeeze into a spot. It's about creating a functional, safe, and genuinely comfortable workspace for you and your baby.
Think of it like parking a car. Sure, you can cram it into a tight spot, but you won't be able to open the doors. It's the same deal here. You need enough breathing room to move around without feeling boxed in. For a quick refresher on the basics, our guide on how to measure furniture is a great starting point.
Here’s a simple trick I love: grab some painter's tape. Use it to outline the exact width and depth of a table you’re considering right on the nursery floor. This instantly turns those abstract numbers on a website into a tangible layout you can see and feel in your own space.
Once you have the footprint marked out, walk around it. Ask yourself a few key questions:
Don’t just account for the table itself, but for the 'bubble' of space you'll need to use it effectively. This clearance is the key to a truly functional nursery layout.
Getting the dimensions and clearance right is a big deal, even in public spaces. Safety standards like the ADA have very specific requirements for changing stations, which just goes to show how critical precise measurements are for both manufacturers and parents. This expert guide on choosing bedroom furniture also offers some excellent general advice on space planning.
Stepping into the world of baby furniture can feel like learning a new language. To help you sort through the noise, we've put together some quick answers to the most common questions parents ask about changing table dimensions.
Think of this as your cheat sheet for making a confident choice.
If you or your partner are on the taller side—say, over six feet—a standard 36-inch table can still force you to hunch over. That gets old, fast. Look for taller models, something in the 38 to 42-inch range, to save your back.
Another great trick is to place a secured changing topper on a high dresser. This gives you that comfortable height you need and prevents the dreaded "diaper change backache."
You absolutely can, but safety has to be your top priority. First, make sure the dresser height works for you (again, usually 36-42 inches is the sweet spot). More importantly, you have to securely anchor a contoured changing pad to the top. The pad needs a non-skid base and safety straps—no exceptions.
Remember, a dresser lacks the built-in guardrails of a dedicated changing table, so never leave your baby unattended, even for a second. This simple rule is non-negotiable for their safety.
Give yourself some breathing room! Aim for at least two to three feet of clear floor space in front of the changing table. This lets you stand comfortably, bend down, and open drawers without doing a weird shuffle. Creating that functional zone makes diaper changes much safer and less of a hassle.
Finding the perfectly sized changing table is a great start, but a safe assembly is what really matters. For a stress-free and secure setup, you can trust the experts at Assembly Smart. Let us handle the hassle so you can focus on your little one. Get a free estimate online today!
