-
CALL US:
- (866) 952-3456
Alright, before you even think about grabbing a shovel, the first big decision is picking the right hoop. This isn't just a small choice; it sets the stage for the entire project, from your budget to the tools you'll need. It's really the foundation of your new home court.
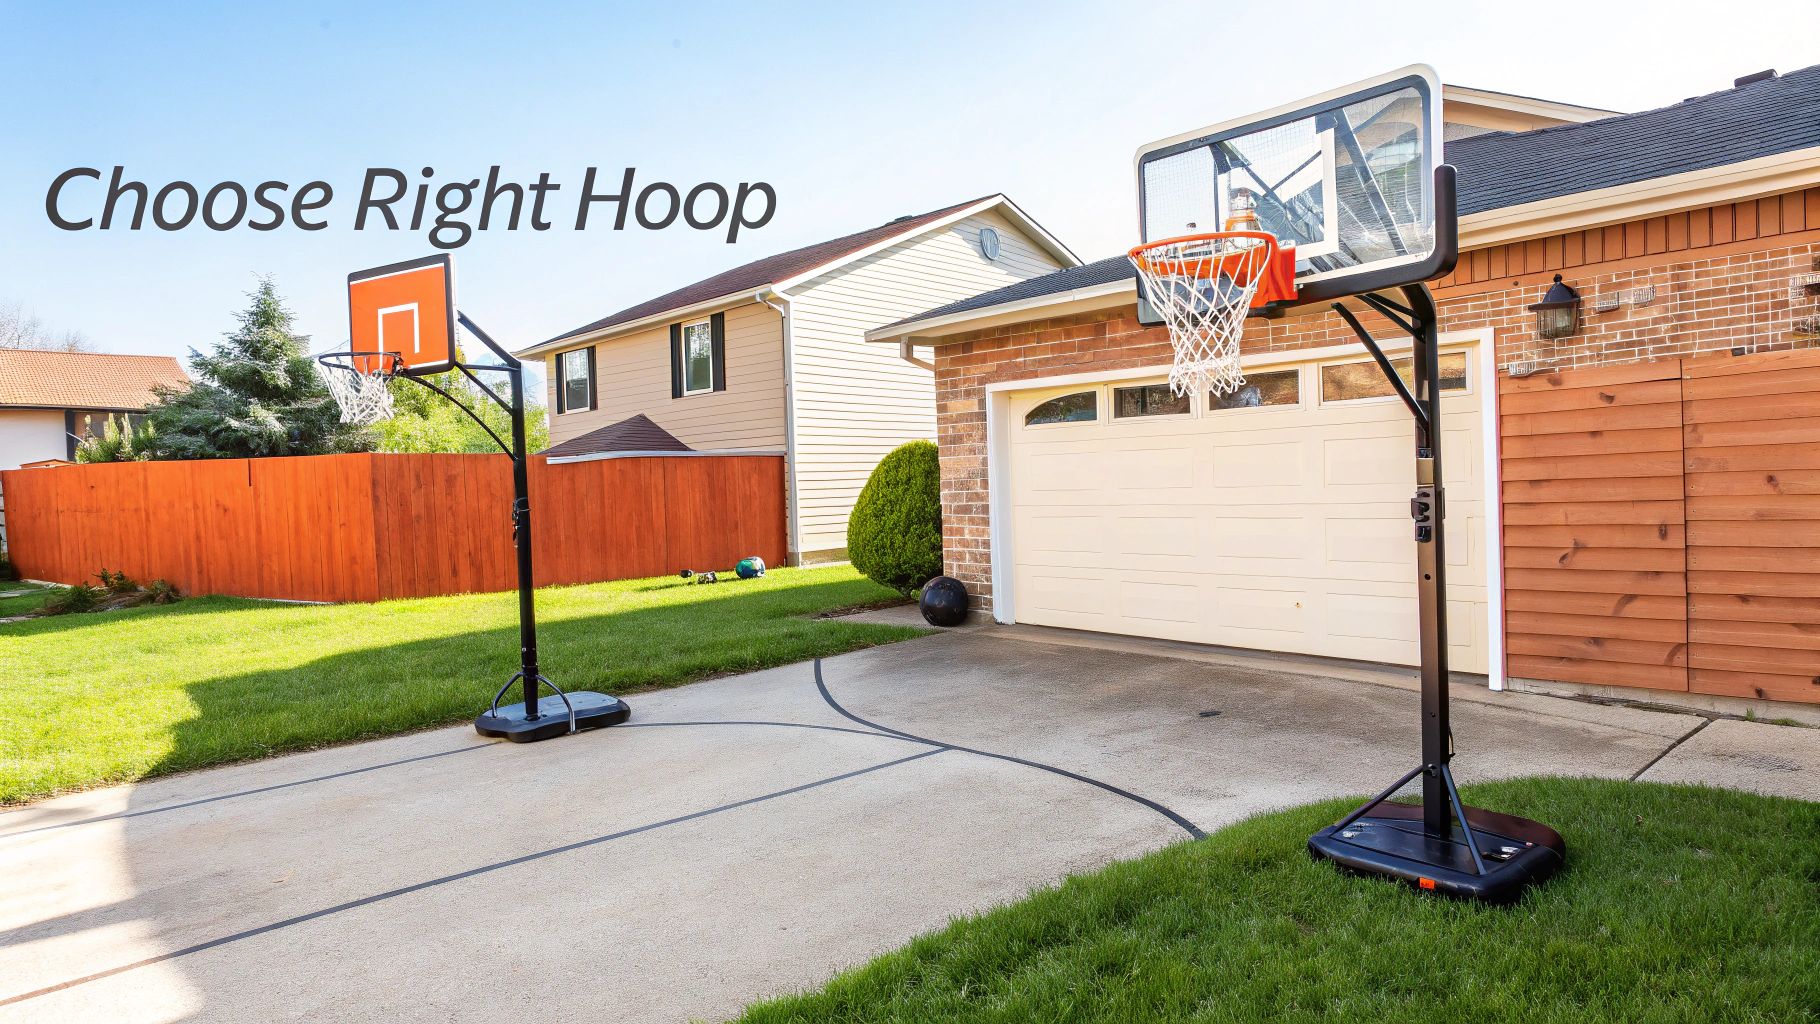
You've got two main players in the residential hoop game: in-ground systems and portable ones. Each comes with its own set of pros and cons that fit different families, spaces, and basketball dreams. It's a bit like planning a home renovation—getting this first step right makes everything that follows a whole lot smoother.
If you've got a serious player in the house or just want that authentic gym feel, an in-ground hoop is the undisputed champ. These are the real deal, anchored right into the ground with a hefty concrete footing.
What does that mean for you? Unbeatable stability. We're talking minimal shake and zero wobble, which gives you that true, predictable rebound you need for bank shots and layups.
Here’s why people go for an in-ground system:
The catch? The installation is a commitment. You’re looking at digging a pretty deep hole, mixing and pouring a good amount of concrete, and then patiently waiting for it to cure. It’s a multi-day job, no way around it.
For more casual games or if you're not ready to commit to a permanent fixture, portable hoops are a fantastic option. They offer a ton of flexibility. Their bases are filled with sand or water for weight, so you can set them up without tearing up your yard.
It's no surprise that North America absolutely dominates the global basketball hoop market, holding over 45% of the total demand. Portable hoops are a massive part of that, making up about 40% of sales here because they're just so accessible.
Pro Tip: When filling the base, always, always use sand instead of water. Sand is way denser, which means more stability. Plus, it won't freeze, expand, and crack the plastic base when the winter chill sets in.
The beauty of a portable hoop is that you can move it around the driveway to make space or even pack it up and take it with you if you move. The trade-off is performance. Even the best ones will have a bit more wobble than their in-ground cousins. If you're on the fence, checking out some solid basketball hoop reviews can really help highlight the top performers in both categories.
Here's a quick breakdown to help you decide.
| Feature | In-Ground Hoop | Portable Hoop |
|---|---|---|
| Stability | Excellent, minimal wobble | Good, but can shake on shots |
| Performance | Professional, authentic rebound | Good for casual play |
| Installation | Complex, requires concrete | Easy, fill base with sand/water |
| Durability | Very high, built to last | Good, but plastic base can wear |
| Portability | Permanent, cannot be moved | Highly portable, can be moved |
| Cost | Generally more expensive | More budget-friendly options |
Ultimately, the best hoop is the one that fits your family's needs and your space.
Okay, before you hit "buy now," take a hard look at where this hoop is going to live. You need a playing surface that’s as flat and level as possible. Look up, too—any low-hanging tree branches or power lines that could get in the way? You might also want to think about where the sun will be during your prime playing time; nobody likes shooting with a glare in their eyes.
Now for the most important part, and this is non-negotiable: check for underground utilities. If you’re even thinking about an in-ground hoop, you have to call 811 before you dig. It’s a free service, and they’ll send someone out to mark any buried lines. Hitting a gas line or electrical cable is a dangerous, expensive mistake you do not want to make. It’s a simple call that keeps your project safe and on track.
A smooth basketball hoop installation all comes down to solid prep work. I've seen it time and time again—rushing this stage is like skipping warmups before a big game. It just sets you up for mistakes and frustration down the road. Before you even think about breaking ground, getting every tool and material ready transforms the job from a chaotic scramble into a straightforward process.
Think of this as your pre-game checklist. You'll obviously need the basics like a shovel and a level, but a couple of specific tools can make a world of difference, especially if you're putting in an in-ground system. A dedicated post-hole digger, for example, is so much more efficient than a standard shovel for digging that deep, uniform hole you need.
Trust me, you don't want to be making last-minute trips to the hardware store covered in dirt. Gather everything you need first. The right gear doesn't just speed things up; it has a huge impact on the quality and safety of your installation. For a good rundown of what to have in your toolbox for all sorts of projects, check out this great guide on essential furniture assembly tools.
Here’s what you'll typically need for an in-ground hoop:
Expert Tip: Whatever you do, don't skimp on the concrete. Always use a high-strength mix that's rated for at least 4,000 PSI. Standard mix just isn't designed to handle the constant stress and leverage of a heavy basketball hoop, especially when the game gets intense.
Once your gear is lined up, it's time to focus on the court itself. This step is all about precision. You're not just digging a hole; you're creating a stable base that will keep your hoop secure for years of play. The principles here are the same for a lot of home projects—careful prep and secure mounting are key, much like the steps for safely hanging a heavy mirror.
Start by precisely marking the spot for your hoop's foundation. Use your tape measure to confirm exactly where it needs to go relative to your driveway or court. Don't forget to account for the backboard's overhang—the pole itself will be set back a bit from the court's boundary line. Use marking paint or some stakes and string to create a clear, square outline for your hole. This visual guide makes sure you dig exactly where you need to.
Next, clear that whole area of grass, weeds, and any other debris. You want to be working on bare, compacted soil. Here’s a little trick: if the ground is rock-hard, soaking it with a garden hose an hour before you dig can make the job a whole lot easier. A clean, well-defined workspace prevents mistakes and just makes the entire process feel more manageable.
With the area marked and cleared, you are officially ready to start digging. This meticulous prep work directly impacts how stable and long-lasting your hoop will be, ensuring it stands tall and straight for countless games to come.
Alright, let's get that foundation rock-solid. This is where your dream home court really starts to take shape, and getting this part right is absolutely critical. Think of it less as digging a hole and more as building a permanent, pro-level anchor for years of dunks, fadeaways, and free throws.
The first, and most labor-intensive, part of the job is digging the footing. Your hoop’s instruction manual is your bible here—it’ll give you the exact depth and diameter you need for the concrete base. Whatever you do, don't fudge these numbers. I’ve seen people try to get away with a shallower hole, and it almost always leads to a wobbly or leaning pole down the road.
This graphic lays out the basic game plan for getting the site prepped before you even think about mixing concrete.

It’s a simple flow: mark the spot, clear it out, and then mix the good stuff. Each step sets you up for the next.
Once your spot is marked, it’s time to break ground. A post-hole digger is your best friend for this task; it’s so much more efficient than a regular shovel for getting a deep, uniform hole. Keep a tape measure handy and check your depth as you go.
For those of us in colder climates, most manufacturers recommend digging down 48 inches. This gets you below the frost line, preventing the ground from heaving in the winter and shifting your whole foundation. It's a crucial detail.
Before you’re done, toss a few inches of gravel into the bottom of the hole. This little trick helps with drainage, keeping water from pooling around the concrete base and weakening it over time.
Field Tip: Before you touch a single bag of concrete, do a dry run. Place your anchor kit in the empty hole to make sure it fits properly and you know exactly how it will sit. Trust me, this quick check can save you a world of panic when the concrete is setting and the clock is ticking.
Now for the main event: mixing and pouring the concrete. The stability of your entire hoop rests on this step. You'll need several bags of high-strength concrete mix—look for something rated at 4,000 PSI or higher. A wheelbarrow or a big mixing tub is a must-have for this job.
Follow the instructions on the bag to the letter, adding water slowly until you get a thick consistency, kind of like oatmeal. If you make the mix too soupy, it'll be weaker when it cures. Pour it into the hole in stages, using a stick or a piece of rebar to poke around and get rid of any air pockets.
Once the hole is full, you'll sink the anchor kit into the wet concrete. This is the moment of truth for getting a perfectly straight pole. The J-bolts go down into the concrete, leaving just the threaded ends sticking out above the surface.
With the anchor kit in place, grab your level—it's now the most important tool you own. Lay it across the anchor plate in every direction: north-south, east-west, and diagonally. You have to be absolutely sure that plate is perfectly level before the concrete starts to set.
If you want a more in-depth look at this critical stage, this guide on how to install an in-ground basketball goal has some great visuals and pro tips.
Now comes the hard part: waiting. The concrete needs to cure completely before it can handle the weight of the hoop. The standard waiting time is 72 hours, but humidity and temperature can affect that. Don't rush it. Bolting the pole on too soon will ruin all your hard work.
But that downtime doesn't have to be wasted. You can start assembling the other parts on the ground, which is way safer and easier than wrestling with heavy components on a ladder later.
Follow your manual to put together the pole sections, the backboard, and the rim. Laying everything out on the grass or a big piece of cardboard will keep it from getting scratched. Tighten the bolts, but plan on giving them one final torque-down once the hoop is standing upright. Having a friend help you with the backboard is a really good idea—it’s heavy and awkward. This ground-level prep makes the final lift go much more smoothly once your foundation is finally ready.
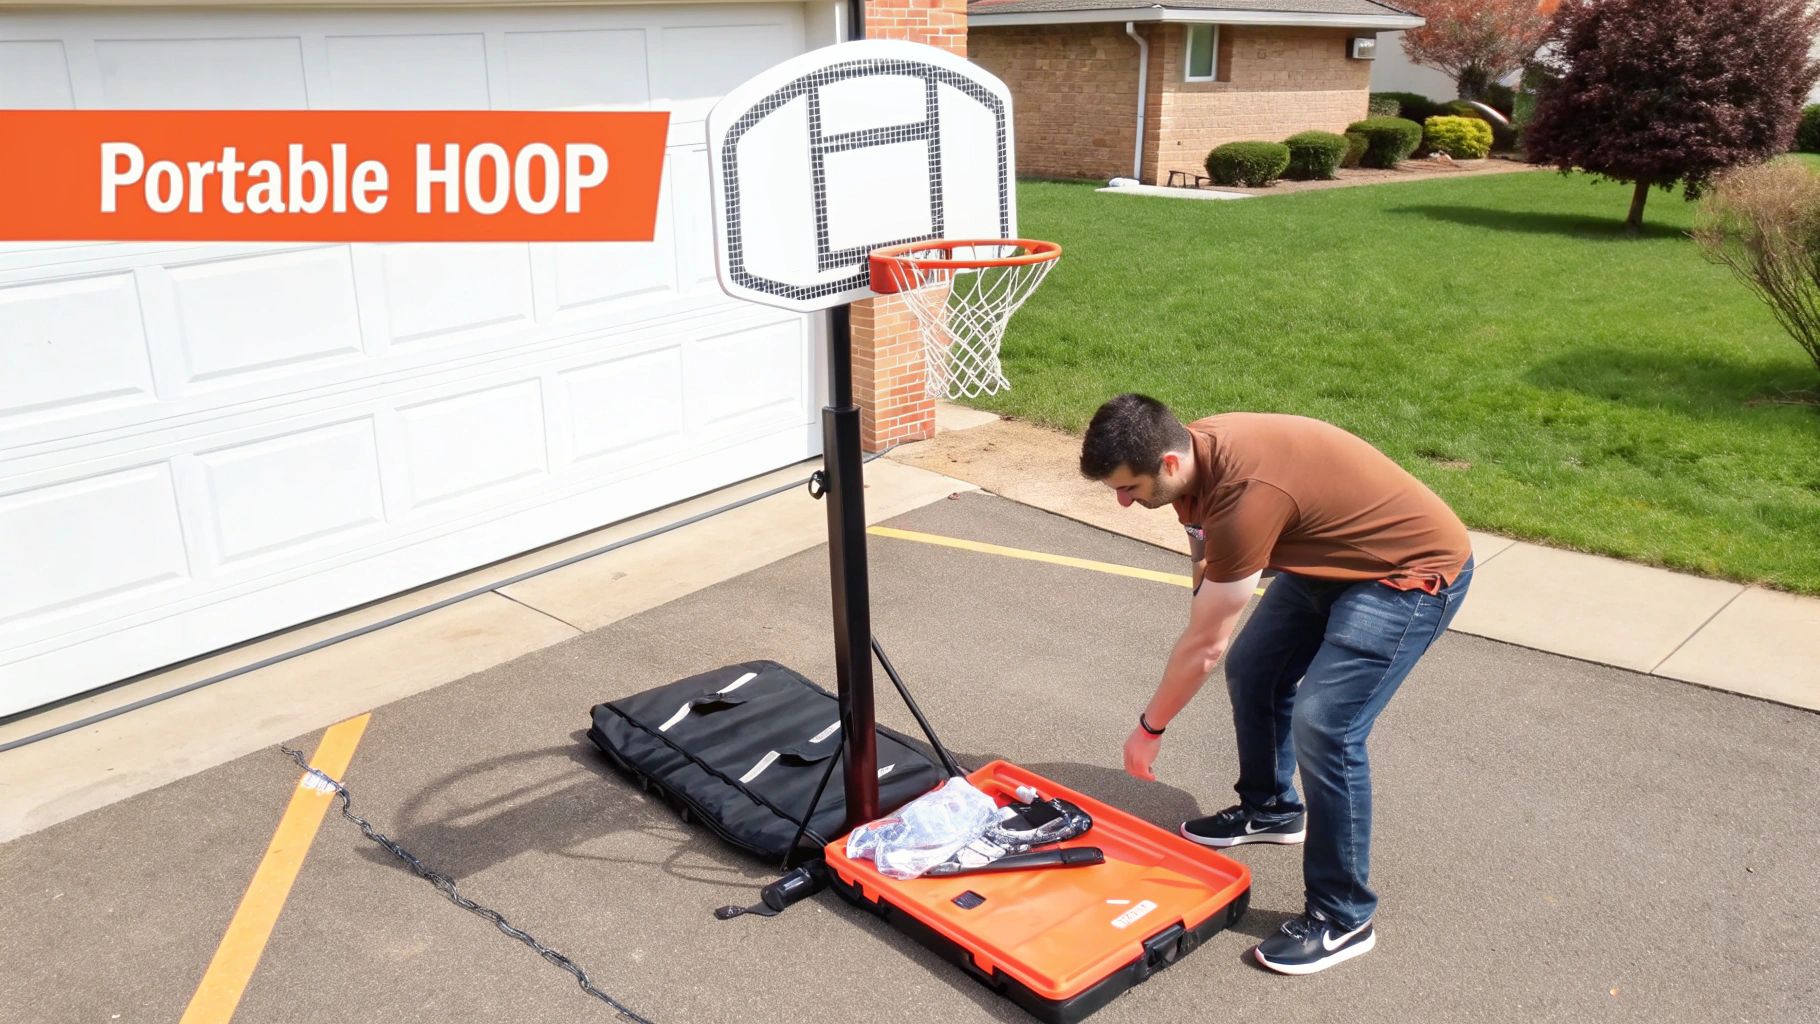
Choosing a portable hoop is a great way to start playing almost immediately, but let's be honest—the assembly can still look like a weekend-long puzzle. A little strategy up front can turn what could be a frustrating afternoon into a smooth, successful build.
The very first thing you should always do is a full parts inventory. Lay everything out on a tarp or a big piece of cardboard to keep things from getting scratched. Group all the nuts, bolts, and washers together and check them off against the manual's parts list. It's a common headache to get halfway through and realize you're missing a critical bolt, and you can sidestep that whole mess with just 15 minutes of prep.
There’s a reason the manual has you assemble things in a specific order—it's all about safety and efficiency. You'll almost always start by putting the main support pole together, which usually involves connecting two or three large sections. Make sure you tighten these connections really well right now, because they’ll be a lot tougher to get to once the backboard is on.
Now for the part that trips most people up: mounting the backboard. This thing is surprisingly heavy and awkward, and trying to handle it alone is a recipe for disaster. I highly recommend grabbing a second person for this step. Lay the backboard face down on your cardboard and attach the support arms and rim while it's safely on the ground. It's much smarter than fumbling with it on a ladder.
Once the backboard is all put together, you'll connect it to the main pole. The easiest way I've found is to lay the pole on the ground and attach the backboard to it horizontally. Then, with your helper, you can carefully walk the entire thing upright and secure it to the base. If you want a great visual guide, you can find a ton of helpful tips on how to properly assemble a basketball hoop that really breaks down each stage.
This is probably the most critical decision you'll make for your portable hoop's stability and lifespan. You’ve got two choices for filling the base—water or sand—and believe me, it makes a massive difference.
The verdict is clear: Always go with sand. The extra time it takes to fill the base is a tiny price to pay for the huge improvement in stability and preventing costly freeze damage. A solid, sand-filled base makes the hoop safer and the game way more fun.
To fill the base without making a mess, grab a large funnel and pour dry play sand in slowly. It’s a bit of a tedious process, but patience really pays off here. A pro tip is to have a friend gently shake the base as you pour; this helps the sand settle into every nook and cranny, ensuring you get it filled to max capacity for a rock-solid setup.
Alright, your basketball hoop is standing tall, but don't grab the ball just yet. This last part of the installation is all about dialing in the details and making sure everything is safe. It’s what turns a collection of parts into a real, game-ready court. Skipping these final checks is like walking off the court before the final buzzer—you're just asking for trouble down the road.
First things first: let's get that rim to the right height. For most people, that means setting it to the official NBA regulation height of 10 feet off the ground. Pretty much every modern hoop has a crank or a handle that makes this part a breeze.
Grab a good tape measure for this. You'll want to measure from the playing surface directly under the front of the rim straight up to the top of that metal ring. Go slow and make tiny adjustments until you nail that 10-foot mark. This one little step makes all the difference for an authentic game and gets any aspiring pros ready for regulation play.
With the height locked in, it’s time to go on a bolt-tightening mission. As you assembled and raised the hoop, some nuts and bolts might have settled or worked themselves a little loose. Now’s the time to grab your socket wrench and give every single connection one final, solid turn.
Be extra picky about these spots:
This final torque-down gets rid of annoying rattles, cuts down on sway, and seriously boosts the strength of the whole setup. It’s a five-minute job that adds years of safe play to your investment.
Before anyone takes a single shot, do one last quick walkthrough. This is just to make sure the area is clear and the hoop is secure, cutting down the risk of an accident during a heated game.
A stable, properly secured basketball hoop is the cornerstone of a safe home court. Taking the time for a final inspection protects your family and your investment, ensuring the only thing you have to worry about is your jump shot.
Here’s a simple checklist I run through every time:
Even with the best-laid plans, things can go sideways during a hoop installation. You're cruising along, then BAM—you hit a snag. The key is not to panic. Most of the usual suspects have pretty simple fixes, and knowing what to expect can turn a project-ending disaster into a minor speed bump.
Let's say you're digging the hole for an in-ground hoop, making great time, and then you hear that awful clank of your shovel on solid rock. Don't throw in the towel just yet.
First, see what you're really dealing with. Grab a smaller trowel or even a pry bar to see if it's a rock you can work around and pop out. If you’ve hit a genuine monster of a rock or a thick layer of clay, you might need to shift your location by a foot or so. Just remember to re-measure everything to make sure your court layout still works.
This one can make your heart sink. The concrete is cured, you step back to admire your work, and you realize the anchor kit isn't perfectly level. Don't grab the sledgehammer—it’s often fixable.
The magic here is in the leveling nuts and washers. Most modern anchor kits are designed to allow for these kinds of minor, post-cure adjustments. You can slide some heavy-duty washers under the low side of the pole’s base plate, then tighten the nuts on the high side to gently pull the pole perfectly vertical. It takes a little finessing, but it absolutely works.
Pro Tip: Even a quarter-inch off at the base can translate to a noticeable lean up at the 10-foot mark. Be obsessive with your level during this process. Check it on all four sides of the pole with every tiny adjustment you make.
With portable hoops, the number one complaint is always the same: wobbling. If your hoop is doing a dance every time the ball hits the backboard, it's more than just annoying—it's a safety issue.
The fix almost always starts with the base. If you filled it with water, it’s time for an upgrade. Drain that water and get some sand. Sand is way denser and provides the heft needed to keep the hoop from rocking. Already using sand? It can settle over time, so you might be able to cram another 20-30 lbs in there to really firm it up.
A few other quick things to check:
It happens to everyone eventually. You give a bolt one turn too many, and suddenly it's just spinning in place. A stripped bolt can stop your assembly cold. Don't try to force it. The best thing to do is take the sad-looking bolt and nut to your local hardware store. They'll find you a perfect replacement—right size, grade, and thread—in minutes.
What about a part that just won't line up with its corresponding hole? Before you get the drill out (which can weaken the metal), stop and double-check the instruction manual. 99% of the time, a part that seems mismatched is because something earlier was put on backward or upside down. Taking a five-minute break to review your previous steps can often solve the mystery and get you moving again.
When an unexpected problem pops up, it can feel like you've hit a wall. If you're stuck and just want the job done right, Assembly Smart is here to help. Our experienced techs have seen it all and can troubleshoot any issue to finish your installation safely and correctly. Get your free estimate from Assembly Smart today!
