-
CALL US:
- (866) 952-3456
Building a DIY backyard play area is more than just a weekend project; it's about carving out a special place for adventure and imagination right in your own yard. It’s your chance to create something truly unique for your kids, a space that will be the backdrop for countless memories for years to come.

The difference between a wobbly, short-lived playset and a durable, well-loved one comes down to planning. Before you even think about buying lumber, taking the time to map out your vision will save you a ton of frustration, time, and money down the road. A good plan ensures the final product is not only fun but also safe and a perfect fit for your yard.
Before you get laser-focused on swings and slides, it helps to step back and apply some general principles for planning an outdoor space. Thinking about things like sun exposure and how the play area connects with the rest of your garden can make a huge difference.
Kids grow fast, and their idea of fun changes just as quickly. A great play area is one that can evolve right along with them.
The real secret is to balance what your kids want now with what they'll love later. A modular approach makes your play area a long-term investment in fun, not something they'll outgrow in a year or two.
With a few ideas sketched out, it's time to talk numbers and timing. Your budget is the most critical tool you have—it dictates your materials, the scale of the project, and what features you can include. A simple A-frame swing set might only set you back a few hundred dollars, but a custom fort with multiple levels can easily run into the thousands.
This isn't just a niche hobby; families everywhere are investing in outdoor play. The global market for playground equipment is actually projected to hit $14.515 billion by 2031. It shows a real shift towards valuing these spaces as a core part of a healthy childhood.
Once your budget is set, grab a pencil and paper and sketch a rough layout of your yard. Pay attention to which spots get sun and which stay shady. Check for any low spots where water collects after it rains. Crucially, make sure you can see the play area clearly from a window inside the house. This simple map can save you from a major headache later.
Finally, break the project into smaller, more manageable chunks: planning, material runs, site preparation, the main build, and finishing touches. A phased approach like this makes the whole process feel much less daunting.
Alright, this is where the real fun begins. The design you dream up and the materials you choose are what will give your DIY backyard play area its unique personality and ensure it's a safe place for years of adventure. Get this part right, and you're building something that will stand up to rambunctious kids and whatever Mother Nature throws at it.
Think of your design as an extension of your home and yard. Are you picturing a classic wooden swing set with a sandbox? Or maybe your little adventurers have been begging for a two-story fort complete with a rock wall and a speedy slide. Whatever the vision, it’s best to nail down a core concept first. If you need a little spark of inspiration, checking out some DIY backyard playground ideas can show you what's possible, from simple weekend projects to more elaborate builds.
Wood is the go-to for a reason, but it's important to know that not all lumber is the same. The type you pick is probably the biggest decision you'll make, directly affecting your budget, how long the structure lasts, and how much upkeep it will need down the road.
Your choice of material really comes down to balancing your budget, the look you want, and how much time you want to spend on maintenance. For many families, cedar hits that perfect sweet spot for a safe, long-lasting DIY backyard play area.
This shift toward quality, sustainable materials isn't just a trend I'm seeing in my own projects. It's happening everywhere. The global market for outdoor play structures is expected to hit a staggering $16.13 billion by 2032, and a big part of that growth is driven by parents demanding safer, eco-friendly options. As you can learn more about these outdoor play structure market trends, you'll see how choosing quality wood fits right in with what modern families value.
To make the decision a bit easier, here’s a quick breakdown of the most common materials. Think about what matters most to you—cost, maintenance, or longevity—and let this guide your choice.
| Material | Average Cost | Maintenance Level | Best For |
|---|---|---|---|
| Pressure-Treated Pine | $ | Medium | Budget-conscious projects where regular maintenance (sealing) is planned. |
| Cedar | $$ | Low to Medium | A balance of natural beauty, durability, and safety with minimal upkeep. |
| Composite | $$$$ | Very Low | Projects where the primary goal is to eliminate maintenance, despite a higher initial cost. |
Ultimately, there's no single "best" material—only the best one for your family, your climate, and your budget.
The nuts, bolts, screws, and brackets are the unsung heroes of your playground. They’re literally what holds the whole thing together, so this is absolutely not the place to try and save a few bucks.
Always, always use hot-dipped galvanized or stainless steel hardware. These are made to withstand the elements and resist rust. If you use standard indoor screws, you'll have ugly rust stains within a season, and even worse, you'll risk dangerous structural weak points.
When you're picking out the fun stuff—slides, swings, and climbing holds—look for accessories made from UV-resistant plastic. This keeps them from getting brittle and cracking after a few years in the sun. For swings, make sure the chains have a plastisol coating. It's a small detail that protects little fingers from getting pinched. Every dollar you spend on quality components is a direct investment in your kids' safety.
You can have the most incredible playset design, but if you build it on the wrong patch of ground, you’re setting yourself up for problems. I can't stress this enough: preparing your site is the invisible foundation of your entire DIY backyard play area. It’s the single most important step for safety, and it happens long before you even think about cutting a piece of wood.
Think of yourself as a location scout for a moment. Walk your yard and really look at it. You’re searching for that "just right" spot. You'll want a clear line of sight from a main window, like the kitchen or living room, so you can easily keep an eye on the kids. Pay attention to the sun, too. A spot that gets some shade in the hot afternoon will get a lot more use in July than one that bakes all day. Steer clear of any low spots where water puddles up after it rains—that’s a recipe for a soggy play area and rotten wood.
Once you've picked your location, it's time to mark it out. I like to use simple stakes and string to create a visual perimeter. Don't just outline the footprint of the playset itself; you need to include a safety use zone. This is a non-negotiable buffer, an open area that needs to extend at least 6 feet in every direction from the equipment.
Before a single shovel hits the dirt, you have to call 811. Seriously. It's a free national service, and they'll send a pro to mark all the underground utility lines. Hitting a gas or electric line isn't just an expensive headache; it's a life-threatening mistake.
With your area marked and clear of utilities, the goal is to get it perfectly flat. If it's just a little uneven, you can probably manage with a good shovel, a sturdy rake, and a long level. For ground with a more noticeable slope, you'll have to put in a bit more work. This usually means digging out the high spots and moving that soil to fill in the low spots, packing it down firmly as you go. A level base is critical; it stops the structure from shifting or rocking, which can loosen joints over time.
This image really breaks down the entire safety process, from the first look at your yard to keeping it safe for years to come.
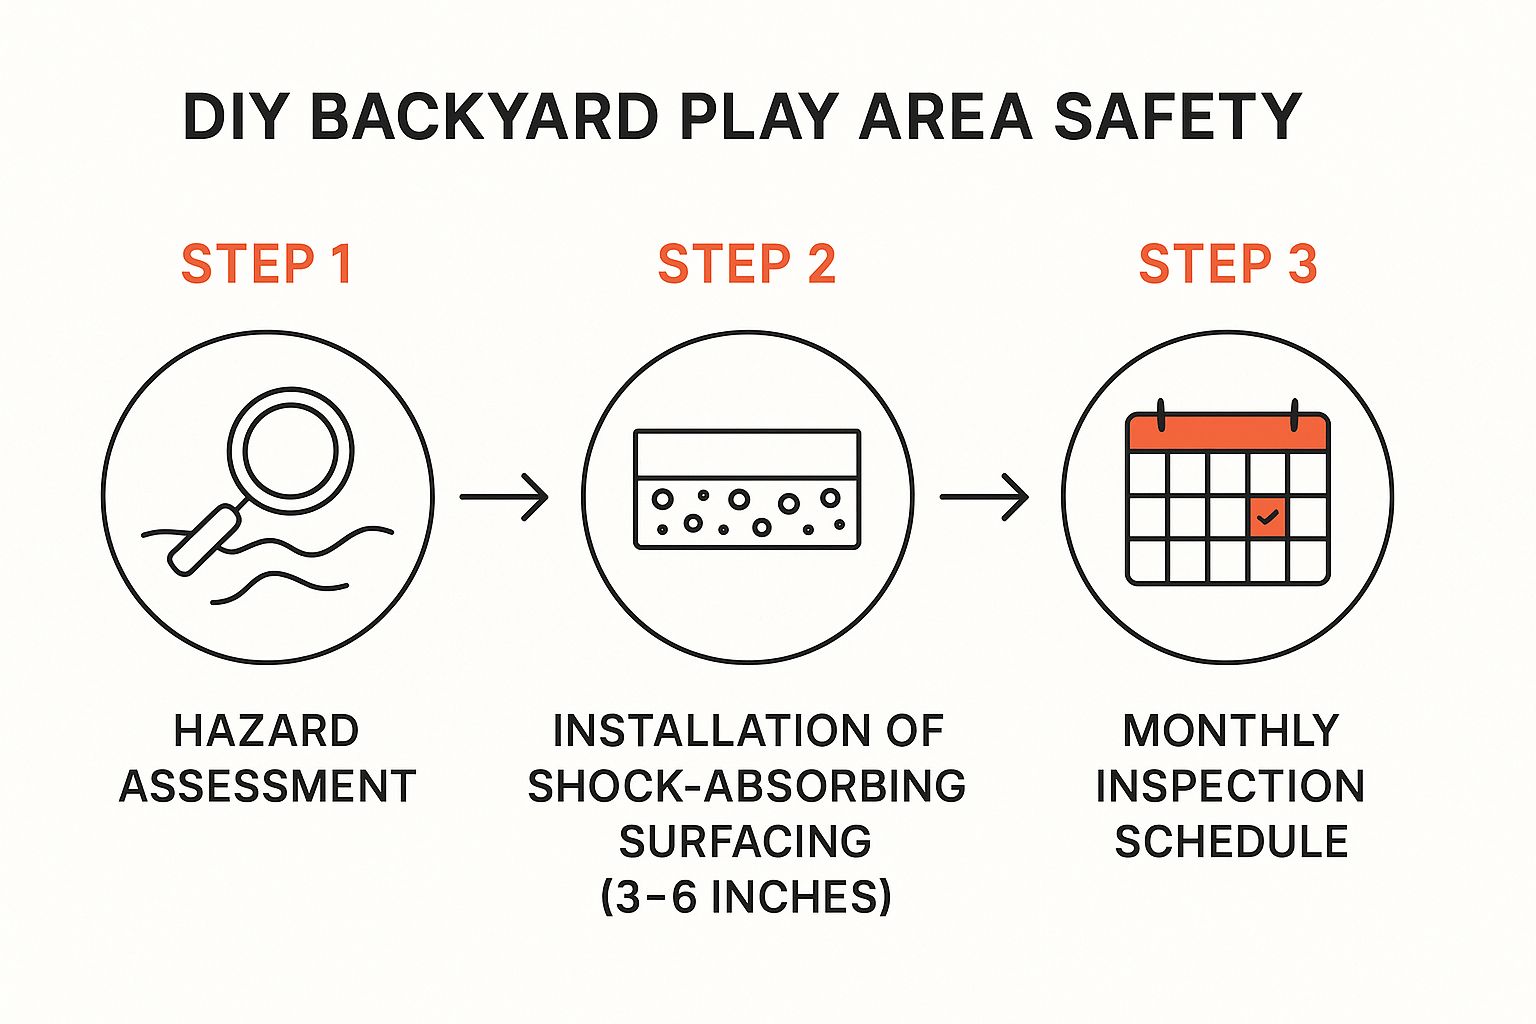
What it shows is that safety isn't something you do once. It's a cycle: you assess for hazards, install everything correctly, and then you have to perform regular check-ups.
The material you put under the playset is arguably the most important safety decision you'll make. Plain old dirt and grass just don't cut it—they offer virtually zero protection from a fall.
Here’s a look at the most common and effective options:
No matter what you choose, depth is key. For most home playsets, you’ll need a minimum loose-fill depth of 9 to 12 inches of whatever surfacing you pick. That depth is what cushions a fall and prevents a bump from becoming a serious injury.
Alright, this is where the fun really begins. Your sketches and that neatly stacked pile of lumber are about to become a real, honest-to-goodness playset. Taking on the construction of a DIY backyard play area is a big project, but don't let it intimidate you. The key is to break it down into manageable chunks, making sure each step is done right before moving to the next.
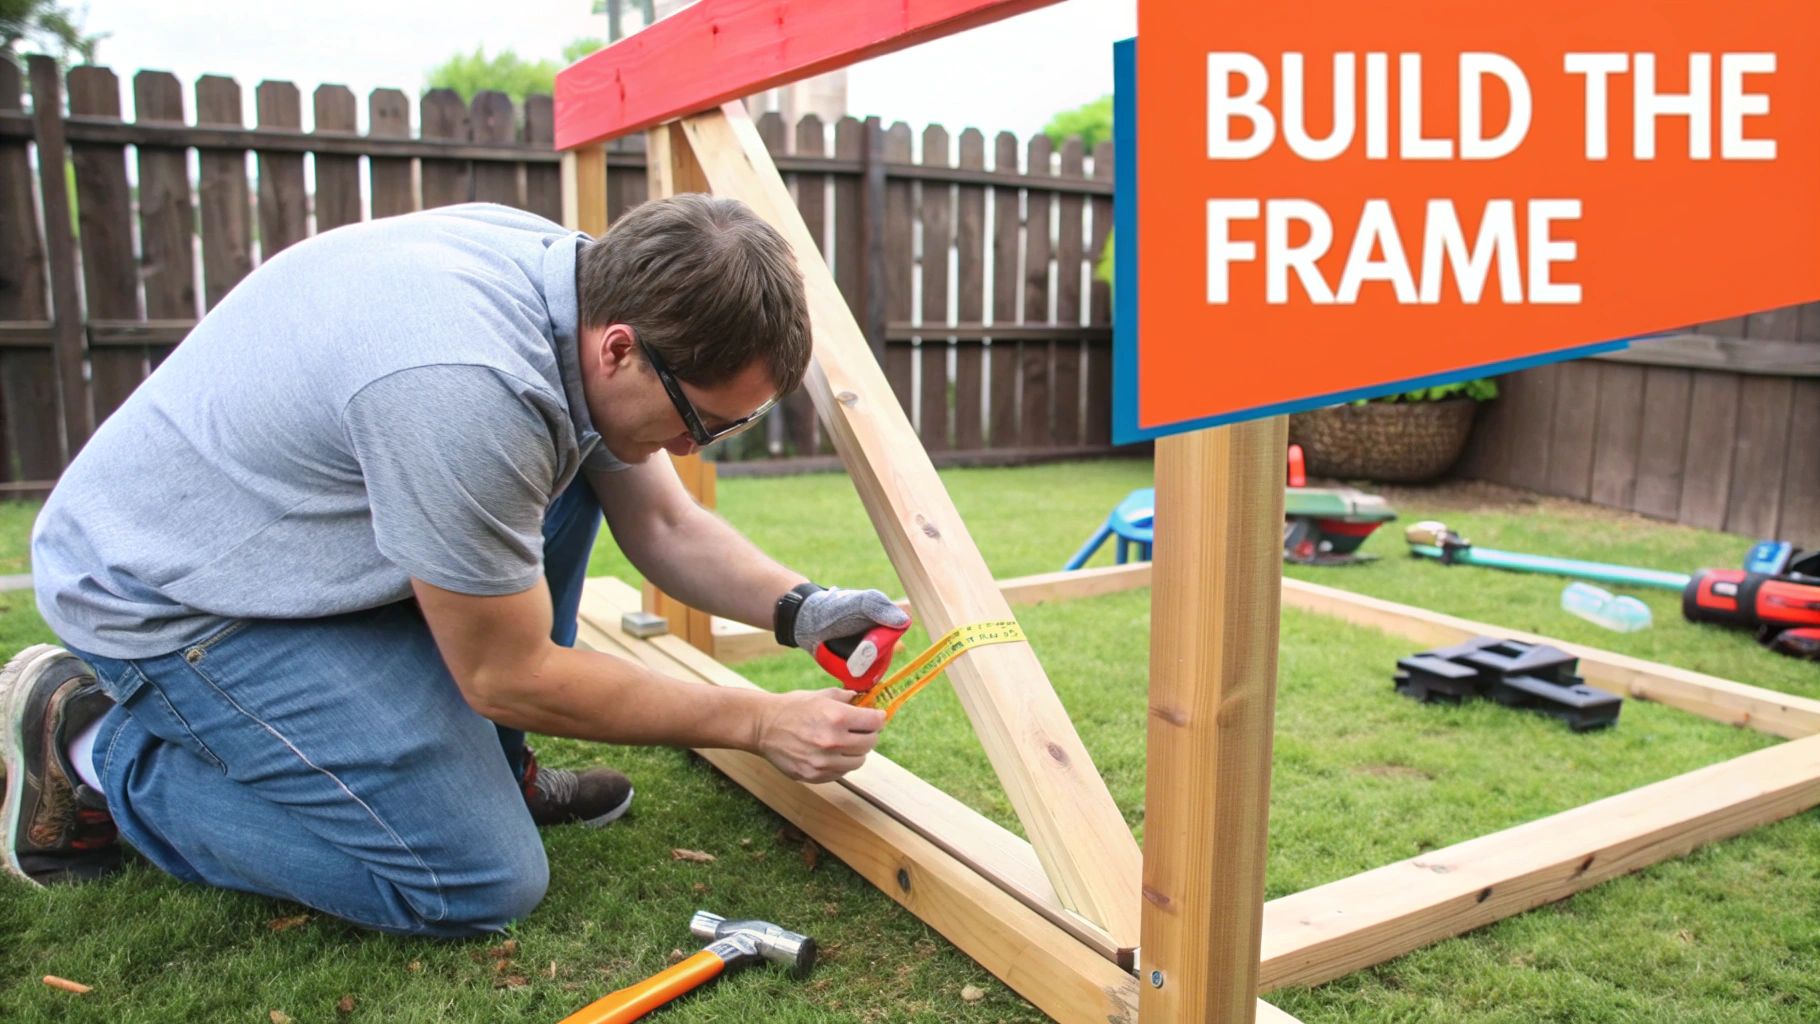
Everything starts with the main frame—the skeleton of your entire structure. Precision here is non-negotiable. If your frame isn't square and level, nothing else will fit together properly, and you’ll be fighting it every step of the way. I always recommend building the frame on a flat surface first, like your driveway or garage floor. Keep a carpenter's square handy and check your corners constantly.
Here's a trick I've used countless times: to guarantee a large frame is perfectly square, measure the diagonals. If the distance from the top-left to the bottom-right corner is identical to the top-right to bottom-left, you've nailed it. Your frame is square.
With a solid, square frame, you can finally start building vertically. This is the exciting part where you'll see your design rapidly come to life. Start by attaching the main support posts, then work on adding the deck or any platforms.
Don't skimp on hardware. Every screw, bolt, and bracket should be high-quality and corrosion-resistant. When you're laying down deck boards, for instance, use at least two screws at each joint to keep the wood from warping or twisting later. For the really critical connections—like the main swing beam—it's best to use through-bolts with washers and nuts. They provide far more strength and security than simple lag screws.
As you build, applying professional outdoor living construction principles will pay dividends in how long your playset lasts and how safe it is for your kids.
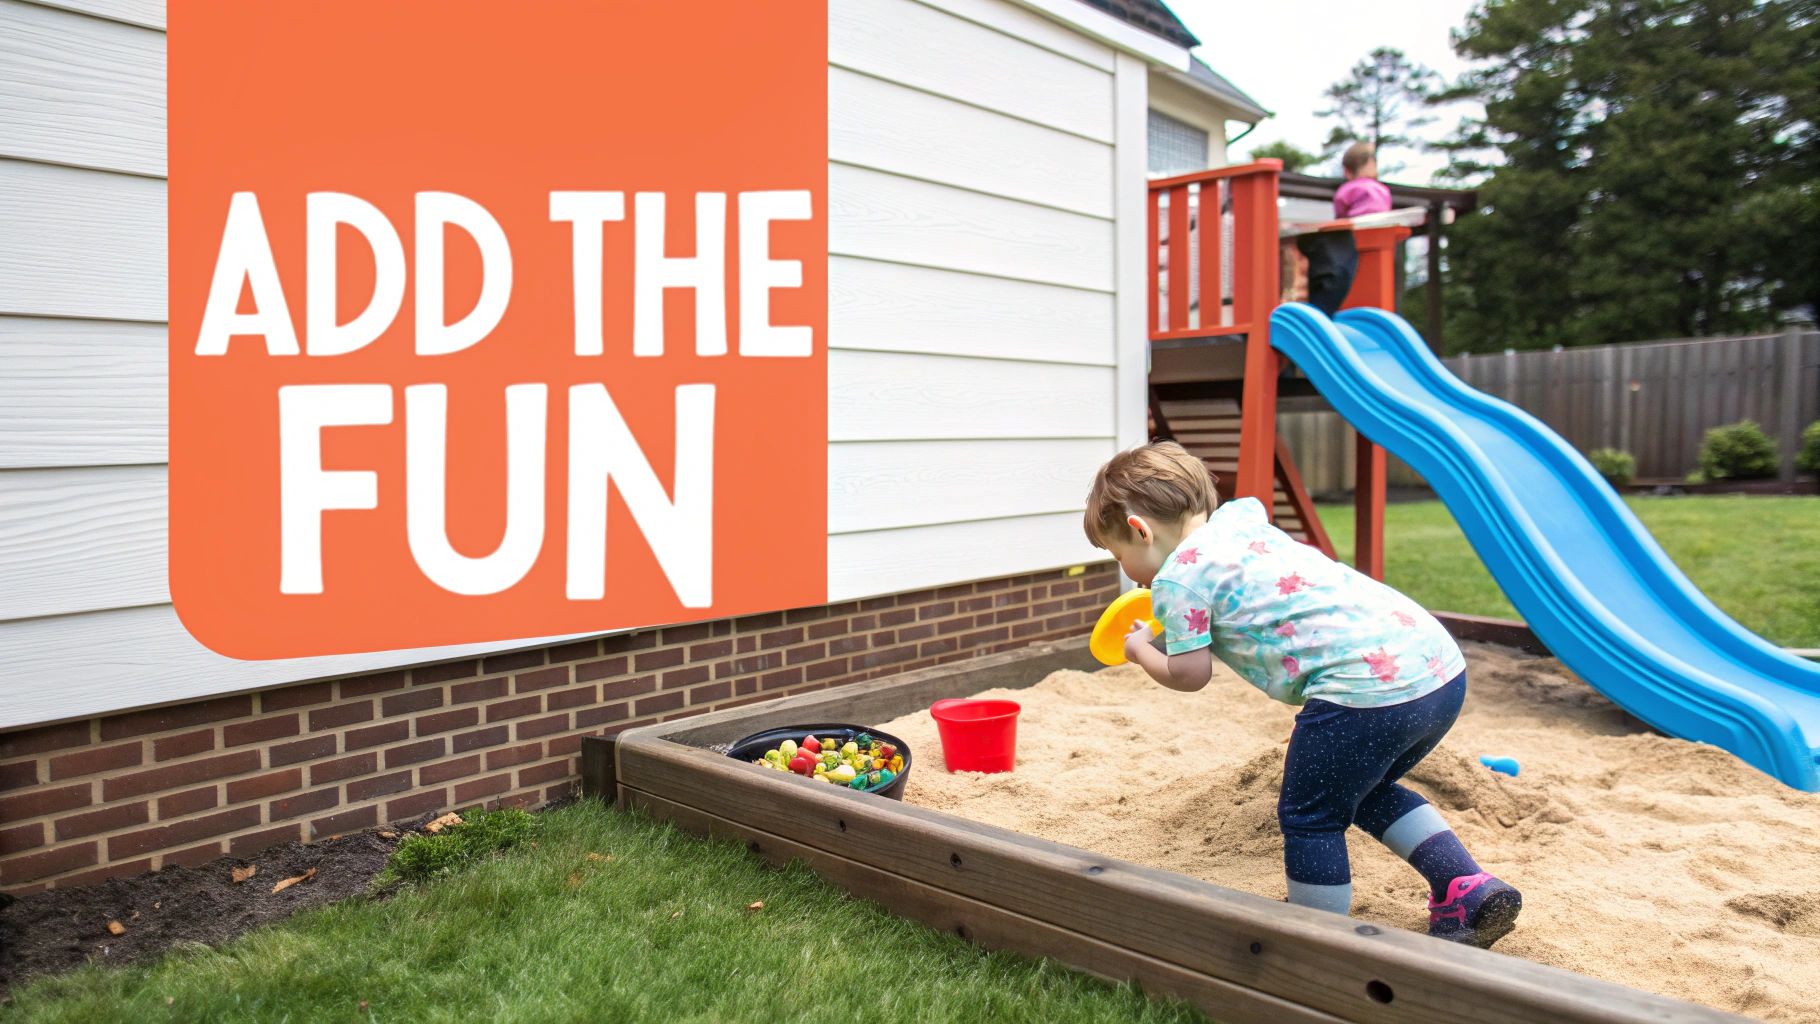
Now for the best part: adding all the fun stuff! Attaching the slide, hanging the swings, and bolting on the climbing holds is what transforms your structure into a proper play area. Safety is absolutely crucial here. Always follow the manufacturer’s instructions for any pre-made accessories, as they will have very specific requirements for spacing and hardware.
When it comes to swings, you need to leave plenty of room:
Remember, the goal is to prevent any possibility of collision or entanglement. This small bit of planning during installation prevents common playground accidents and gives you peace of mind.
If this part feels a little overwhelming, there's no shame in calling in a pro. Sometimes, getting an expert to handle the https://assemblysmart.com/swing-set-installation/ can give you the confidence that it's been done perfectly.
This final step is non-negotiable. You absolutely must anchor the entire structure to the ground. A tall playset can catch the wind like a sail, and it can become dangerously unstable when kids are playing vigorously. Proper anchoring is what prevents tipping, which is one of the most serious hazards you need to avoid.
Most kits come with ground anchors. If you’ve designed your own, you can buy anchor kits separately. For the most secure, bulletproof installation, however, the gold standard is setting the support posts in concrete footings. This makes your DIY backyard play area a truly permanent and immovable fixture—ready for years and years of safe fun.
The last bolt is tight, the swings are hung, and your backyard creation is finally standing tall. But before you unleash the kids, there’s one last, crucial step: a meticulous safety audit. This final inspection, paired with a simple maintenance plan, is what truly turns your hard work into a lasting and safe source of fun.
Your first move is a pre-play walkthrough. I always tell people to get down on their hands and knees to see the structure from a child’s point of view. Run your hands over every single surface. Are there any splinters or rough patches that need a quick sanding? Double-check every bolt, screw, and piece of hardware. Everything should be snug, with no sharp points or protruding heads.
This focus on safety at home reflects a bigger trend. The residential market for outdoor play structures in North America hit $170.4 million in 2022, driven by families who want safe, convenient play options right outside their door. This just underscores how vital it is to get these final details right.
The structure itself is only half the safety equation; the space around it is just as important. You mapped out a safety perimeter during site prep, but now it's time to verify those "use zones," especially for the high-action equipment.
I like to think of these zones as invisible safety nets. Simply keeping them free of toys, bikes, or patio furniture is one of the easiest and most effective ways to prevent accidents.
A well-built DIY backyard play area can provide joy for years, but it needs a little TLC to stay in top condition. Don't worry, this isn't a huge time commitment. A simple checklist makes it a quick and painless process. For a deep dive into the official guidelines, our guide on playground safety standards is a great resource.
A solid maintenance plan shouldn't take more than 30 minutes a few times a year. Here’s a rhythm I’ve found works well:
This small investment of your time ensures your play area remains a safe, inviting, and sturdy centerpiece of your backyard for many seasons to come.
Embarking on a DIY backyard play area is a big undertaking, and it’s natural for questions to pop up along the way. Even the most detailed plans can't anticipate every little snag you might hit. Let’s walk through some of the most common things homeowners ask when they're in the thick of a playset build.
Getting these details sorted out beforehand can save you a lot of headaches later. If you find yourself with more specific questions, diving into a comprehensive FAQ page is a great next step, as it covers a huge range of assembly topics.
This is the big one, isn't it? The honest-to-goodness truth is that the cost can be all over the map. Your budget is really only limited by your imagination and the materials you choose.
For example, a simple, classic sandbox and a basic A-frame swing set might only set you back a few hundred dollars. But if you’re dreaming bigger—think a multi-level wooden fortress with a turbo slide, climbing wall, and all the bells and whistles—you could be looking at anywhere from $1,500 to $5,000, and sometimes even more.
So, what moves the needle on price?
Choosing your ground cover is probably the single most important safety decision you'll make. Please, never, ever build a play structure over plain grass or packed dirt. They offer virtually no shock absorption and that's just not a risk worth taking.
For the best possible fall protection, certified rubber mulch is the industry leader, though it carries a premium price tag. A fantastic and more common choice is engineered wood fiber—which is a fancy term for high-quality wood chips designed for playgrounds. It strikes a great balance between safety and cost. Sand and pea gravel can work, but only for equipment with very low fall heights, and they need constant maintenance to keep the depth even.
Key Takeaway: Whatever material you pick, depth is everything. For any loose-fill surface, you need a minimum of 9-12 inches of material to properly cushion a fall and prevent serious injury.
A wobbly playset is an unsafe playset, period. Creating a stable structure starts with getting the ground perfectly level, but that's just the beginning.
First off, don't cut corners on hardware. Use high-quality, corrosion-resistant bolts and screws, like galvanized steel, for every single structural connection. The most critical part of ensuring stability, however, is anchoring the structure firmly to the ground. You can do this by setting the support posts in concrete footings or by using specialized ground anchors made specifically for playsets.
And one last pro tip: wood breathes. It expands and contracts with humidity and temperature changes. Make it a habit to go around and tighten all the bolts every few months. This little bit of maintenance is absolutely vital for keeping the structure safe and solid for years to come.
Building a backyard play area should be a joy, not a source of stress. If you've got the vision but would rather let an expert handle the construction, Assembly Smart is ready to step in. Our skilled technicians can take care of the entire build, making sure your new playset is assembled safely and correctly. Book your professional assembly service today and go straight to enjoying your new backyard oasis with complete peace of mind.
