-
CALL US:
- (866) 952-3456
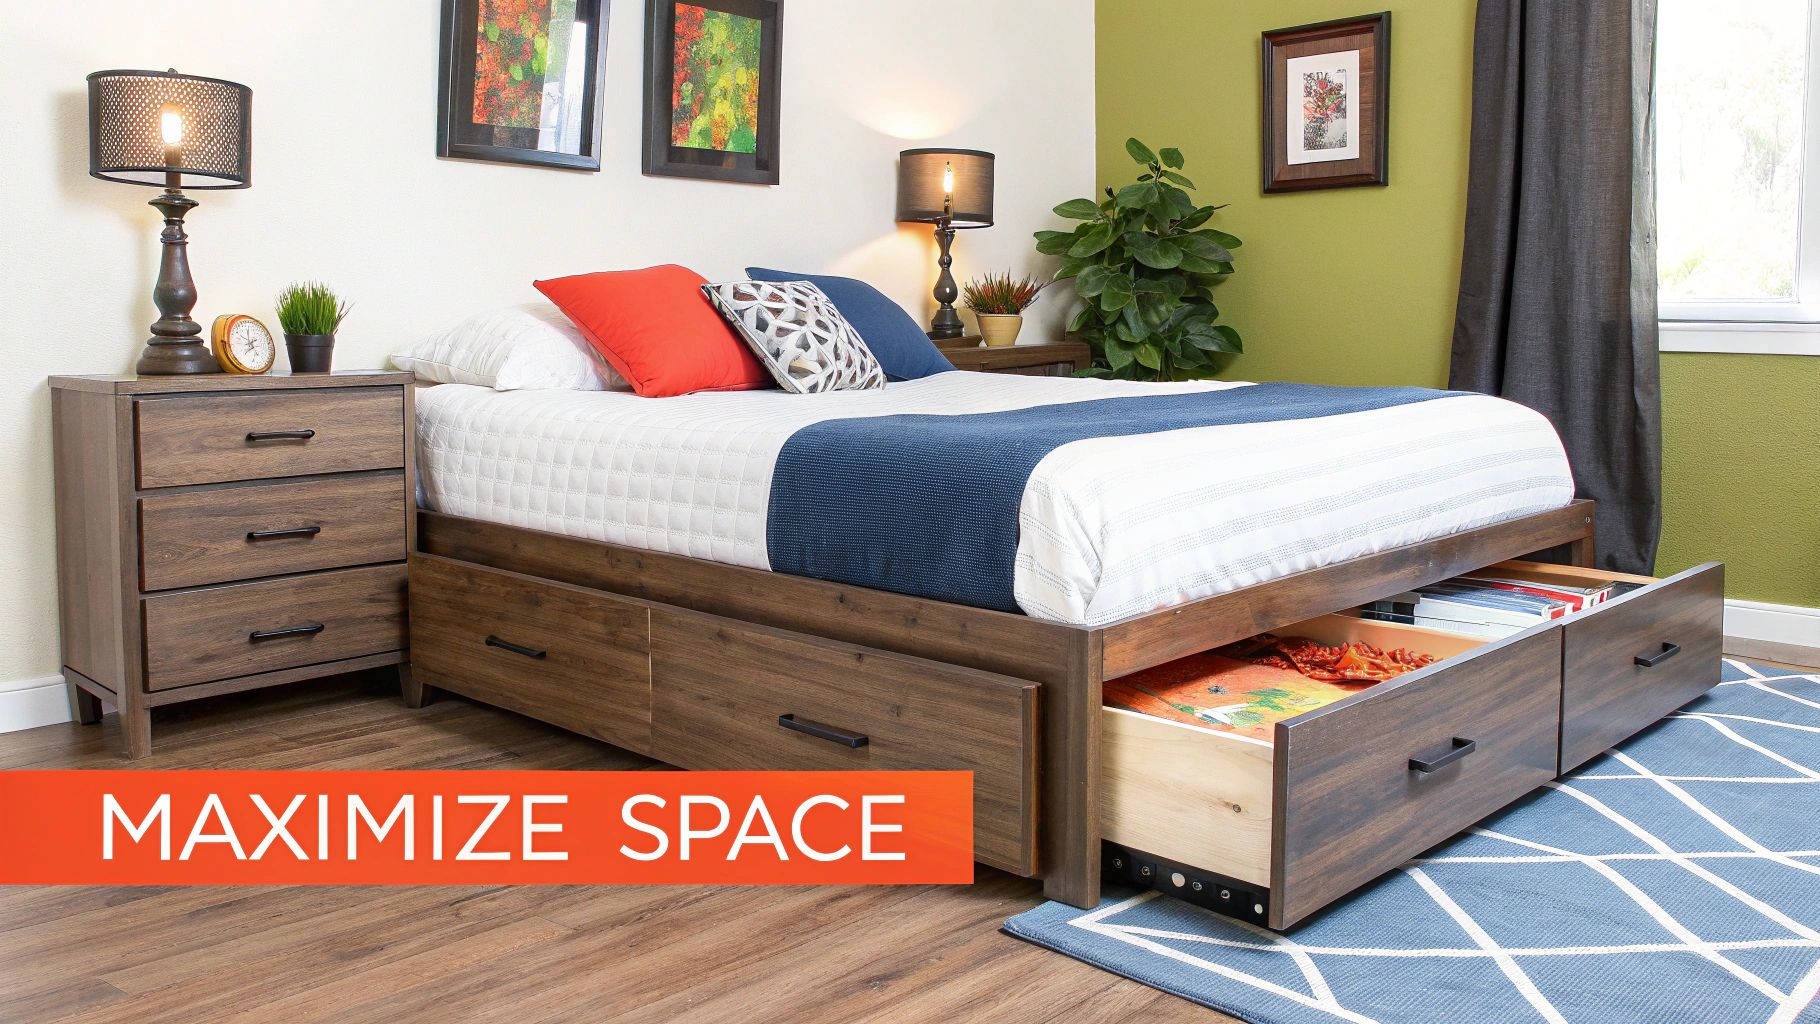
Building your own platform storage bed is one of those fantastic projects that's equal parts custom furniture build and clever home organization. You’re essentially constructing a rock-solid bed frame, usually out of plywood or solid wood, that has drawers or cubbies built right in. This setup completely eliminates the need for a box spring and, more importantly, unlocks a massive amount of storage space in your bedroom. The best part? You get to call all the shots—the size, the style, and just how much storage you want to pack in.
Let's be real. Finding the perfect bed that looks good and solves your storage woes can feel like a lost cause. The stuff you find in stores is often overpriced and never quite fits your room or your actual needs. This is where rolling up your sleeves and building your own DIY platform storage bed completely changes the game. Think of it less as a weekend project and more as a smart investment in your home.
There's a special kind of satisfaction that comes from creating a high-quality piece of furniture with your own two hands. You're in total control of everything, from picking out the wood to choosing the drawer pulls, making sure the final result is exactly what you pictured. That’s a level of personalization you just can't buy off a showroom floor.
Building it yourself is the perfect answer to some of the most common furniture frustrations. Got a room with weird dimensions? No problem, you can build your bed frame to the exact inch. Fed up with flimsy, mass-produced junk? You get to choose durable materials like solid pine or beefy plywood that you know will hold up for years.
And let's not forget the money you'll save. When you handle the labor, you can build a bed of far superior quality for a fraction of what you'd pay at a retail store. Your money goes straight into good materials, not a company's marketing budget or shipping costs. It’s no wonder so many people are embracing this kind of self-sufficient, personalized approach.
The DIY furniture scene is absolutely booming, and it's all driven by people who want custom pieces without the custom price tag. In fact, projections show the global market could hit a staggering $230.9 billion by 2034, with storage and organization furniture leading the charge. You can read more about this trend on Market.us.
The number one reason to build a platform storage bed is, of course, the storage. It’s an absolute lifesaver for anyone dealing with a tiny closet or just too much stuff. Instead of letting all that prime real estate under your bed go to waste, you get a full set of deep, functional drawers.
Imagine having a dedicated spot for things like:
By building storage right into your bed, you make your entire room feel more streamlined and organized. If you're on a mission to declutter, checking out other storage solutions for small spaces can give you even more great ideas. In the end, a DIY platform bed empowers you to create something that’s not just beautiful, but incredibly useful.
Any good project starts long before you make the first cut. Honestly, getting your tools and materials sorted out is probably the most important part of the whole process. It’s what separates a smooth, enjoyable build from a weekend full of frustrating trips back to the hardware store.
Think of this checklist as your game plan. We’ll go beyond just a simple list and get into the why behind each item, helping you make smart choices for your DIY platform storage bed that fit your budget and the final look you're going for.
The wood you pick is literally the foundation of your bed. This decision affects everything: durability, how it looks, and what you’ll end up spending. You really have two main paths to go down here—budget-friendly plywood or timeless solid wood.
When you’re standing in that lumber aisle, don't just grab the first boards off the top. Take a minute to inspect them. Look down the length of each board to check if it's straight—this is called "sighting." You’ll want to leave behind any pieces that are warped, cupped, or have big, loose knots. Trust me, they will cause you nothing but headaches during assembly.
A great project starts with great materials. Don't rush through the lumber aisle. Spending an extra ten minutes picking straight, clean boards will save you hours of frustration later. It’s the best time investment you can make.
I put together this quick table to help you compare some common wood types. It breaks down the durability, cost, and what each one is really good for, so you can pick the perfect material for your project.
| Wood Type | Average Cost (per board foot) | Durability/Hardness | Best For |
|---|---|---|---|
| Pine | $2 – $4 | Low | Budget-friendly builds, easy to work with, great for painting. |
| Poplar | $3 – $6 | Medium-Low | A step up from pine, excellent for painting, less prone to dents. |
| Maple | $5 – $9 | High | Very durable and strong, ideal for a long-lasting piece you plan to stain. |
| Oak | $6 – $10 | Very High | Extremely durable with a prominent grain, perfect for a classic, heavy-duty frame. |
Ultimately, the choice comes down to your personal preference and budget. For a first-time build, you can't go wrong with pine or good-quality plywood.
You don’t need a full-blown professional workshop for this, but a few key power tools will make your life so much easier and your cuts way more accurate. These are the real MVPs of this build.
Beyond the power tools, you’ll need some basic hand tools. Having a solid set of these makes all the difference. For a deeper dive, you can check out a more complete list of essential furniture assembly tools to get more ideas for your toolbox.
The right hardware is the glue—sometimes literally—that holds your masterpiece together. This isn't the place to cut corners. Quality fasteners and slides are what make a bed last for years to come.
Here’s what to add to your shopping list:
Alright, this is where the magic happens. With your boards cut and ready, we're about to turn that pile of wood into the main structure of your DIY platform storage bed. The goal here is to build a rock-solid and perfectly square frame—that’s the secret to a bed that will last for years, not just a few months.
Forget those confusing diagrams that come with flat-pack furniture. We’re going to use straightforward techniques to create strong, clean joints that can handle real-world use. This is easily the most rewarding part of the project, watching individual pieces come together to form something you can actually use.
This is the basic roadmap for any DIY furniture build that's built to last.
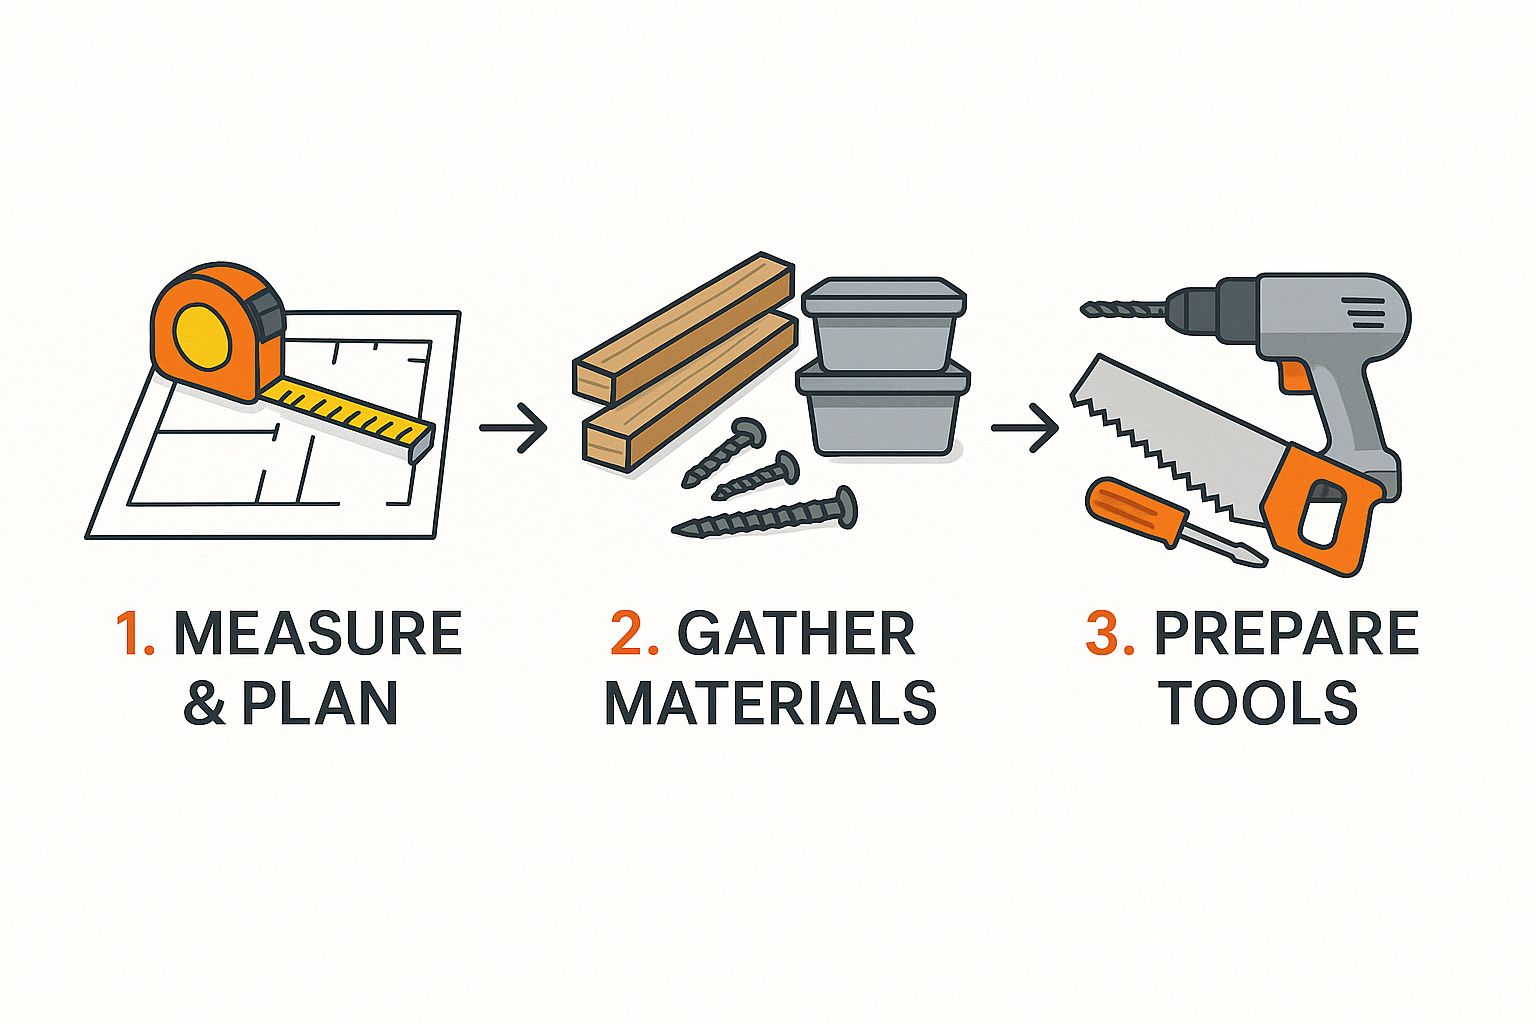
As you can see, a successful project flows logically from one step to the next, from planning all the way to the final assembly.
If you want strong, invisible joints, the pocket hole jig is your best friend. This handy little tool lets you drill angled holes into one board, so you can drive a screw into the adjoining piece. The result is an incredibly sturdy connection without any ugly screw heads showing on the outside of your frame.
You'll start by joining your side rails to the headboard and footboard pieces. Clamp everything down firmly to your workbench before you even think about drilling. This is a non-negotiable step; if the wood shifts even a tiny bit, your joint won't line up right. Go ahead and drill two pocket holes into each end of both side rail boards.
Here's a pro tip: always add a bit of wood glue to the joint before you drive the screws. The screws pull everything tight, but the glue creates a permanent bond that’s often stronger than the wood itself. This simple step seriously boosts the long-term durability of your bed frame.
Once the holes are drilled, it's time to assemble. Line up a side rail flush with the end of the headboard piece, run a thin bead of wood glue along the edge, and clamp them together. Drive in your 1 ¼-inch pocket hole screws to pull the joint tight. Do this for all four corners, and just like that, you'll have a basic rectangular frame.
Having a "square" frame is absolutely critical. If your corners aren't perfect 90-degree angles, nothing else will fit right—the drawers will bind, the slats won't sit flat, and the whole bed might have a frustrating wobble. Luckily, there's a dead-simple trick to check for squareness without any fancy tools.
Grab your tape measure. Measure diagonally from one corner to the opposite one and write down the number. Now, measure the other diagonal. If those two measurements are identical, congratulations, your frame is perfectly square. If they're off, it means your frame is a parallelogram and needs a little nudge.
To fix it, just gently push on the corners of the longer diagonal measurement. This will coax the frame back into a perfect rectangle. Remeasure and adjust until both diagonals match exactly. It’s a small step that makes a huge difference in the final quality. For a closer look at assembly basics, our guide on putting together bed frames has some extra insights that might help.
Your mattress needs a solid foundation to prevent it from sagging. That's where the center support and slats come in. The center support is just a long board (usually a 2×4) that runs from the headboard to the footboard, right down the middle, giving that crucial mid-span support.
Position the center support beam in the exact middle of your frame. You’ll attach it by driving screws through the headboard and footboard directly into the ends of the beam. This is the piece that stops the bed from bowing in the middle after years of use.
With the center support locked in, you can add the slats. These are the boards that run across the frame's width, creating the "platform" for your mattress. Getting the spacing right here is key for two big reasons:
A good rule of thumb is to leave a gap of 2.5 to 3 inches between each slat. This works great for most mattresses, including memory foam and hybrids, giving them plenty of support and airflow. Start at one end and use a scrap piece of wood cut to your desired gap size as a spacer to keep things consistent all the way down.
Secure each slat to the side rails and the center support beam with 1 ¼-inch wood screws. Taking the time to screw each one down—instead of just letting them rest in place—is what prevents annoying shifting or squeaking down the road. Once that last slat is in, your core frame is done! You're ready to start building the storage drawers.

With the main frame of your platform bed standing proud, it's time to shift gears to the feature that makes this project a real game-changer: the drawers. This is where you transform that cavern of dead space under your mattress into some seriously useful, organized storage.
Don't let this part intimidate you. Building solid drawers is more straightforward than it looks. We're going to focus on putting together simple, sturdy drawer boxes first. Then, we’ll tackle the most critical part—getting them to glide in and out like a dream. The real secret to professional-feeling drawers isn't some complex joinery; it's all in how you install the slides.
At its core, a drawer is just a five-sided box. The real strength, however, comes from how you join those sides together. We'll be using a classic combo of wood glue and screws, which creates a joint that's more than tough enough for years of daily use.
For the sides of the drawer box, ¾-inch plywood or any 1x lumber will do the trick nicely. To keep things from getting too heavy, you can use a thinner ¼-inch plywood for the bottom panel.
Start by cutting all the pieces for one drawer—four sides and one bottom. Measure twice, cut once isn't just a catchy phrase here; it's essential. Even a tiny mistake can cause a drawer to bind up later, which is incredibly frustrating.
Apply a thin bead of wood glue along the edges where the sides will meet, then clamp them together into a rectangle. Before you drive in the screws, be sure to drill pilot holes to keep the wood from splitting. Once that's done, secure everything with 1 ¼-inch wood screws.
After the frame is screwed together, check that it's perfectly square using that same diagonal measurement trick we used for the bed frame. If the corners are spot on, go ahead and attach the bottom panel with a bit of glue and some finish nails or staples. This method is surprisingly strong and way faster than fussing with more complicated joinery.
Let's be honest, drawer slides have a reputation for being the trickiest part of any build like this. But they don't have to be a nightmare. All it takes is a little patience and precision.
For this bed, I highly recommend a set of 18-inch ball-bearing drawer slides. They give you that smooth, quiet glide and can handle a pretty hefty load of clothes or whatever else you stuff in there.
Each slide comes in two pieces: the "cabinet member" that screws onto the bed frame and the "drawer member" that attaches to the drawer box itself. The number one rule is to keep the pairs together as they came in the package.
Here’s my go-to method for getting them aligned perfectly:
Getting the drawer slides perfectly level and parallel is 90% of the battle. If a drawer feels stiff, resist the urge to force it. Instead, take it out and double-check your measurements and the alignment of the slides. A small adjustment often makes all the difference.
Even if you're careful, you might hit a snag. It happens to everyone, so don't get discouraged. The good news is that most problems are easy to fix.
Here are a few common issues and how to solve them:
Learning how to build good drawers is a skill that will serve you well in countless other woodworking projects. If you're interested in really mastering these techniques, our detailed guide on building a dresser goes even deeper into tips and tricks you can apply here. A little patience and a methodical approach will pay off with drawers that feel custom-made and work perfectly for years to come.
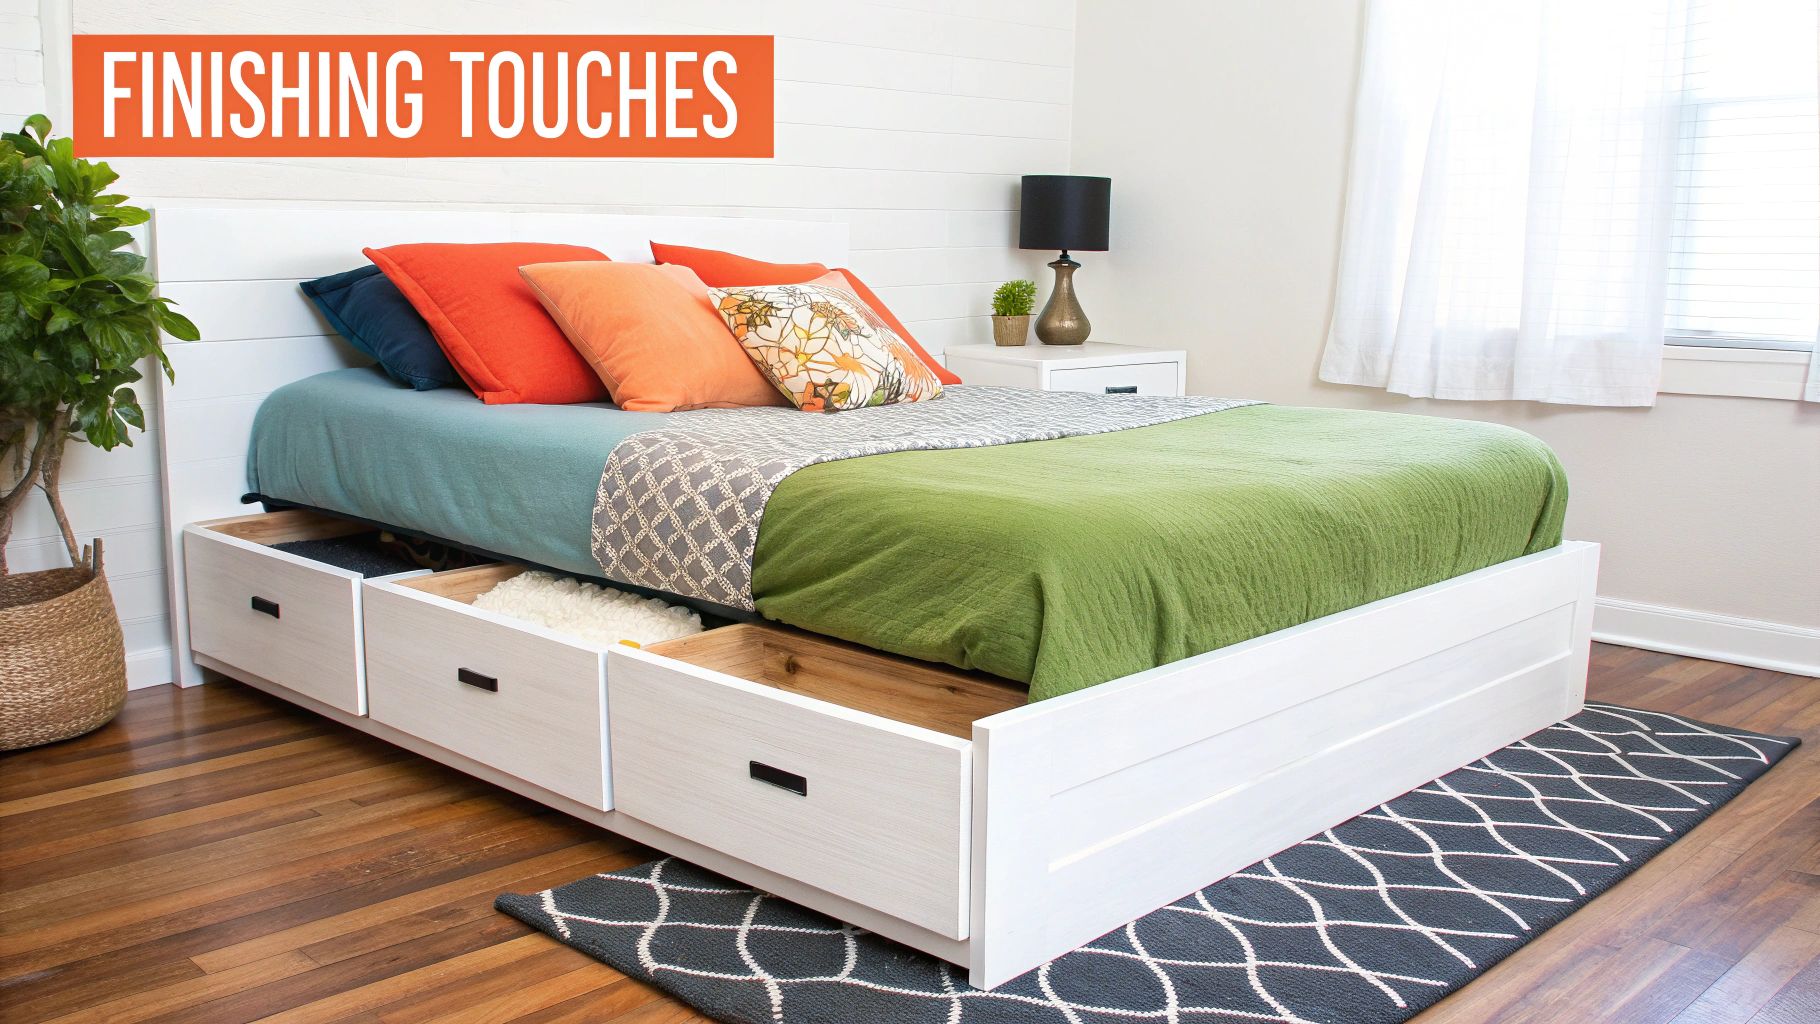
Alright, you’ve wrestled a pile of wood into a solid, functional piece of furniture. That’s a huge accomplishment. But this next part is where the real magic happens—transforming your project from just "homemade" to genuinely "handcrafted."
The right finish doesn't just protect the wood; it gives the bed its personality and turns it into the true centerpiece of your bedroom. This is where your creativity really gets to shine, so let’s get into the details that will make all the difference.
I can’t stress this enough: never, ever skimp on the sanding. It is hands down the most critical step for getting a professional-looking finish, whether you plan to paint or stain. I’ve rushed this part before, and trust me, the blotchy, uneven results are always a letdown.
Start with a medium-grit sandpaper, something like 120-grit, to knock down any rough spots, get rid of any dried glue drips, and just soften all the sharp edges. An orbital sander will make this go a lot faster, but you can absolutely get it done by hand with a little elbow grease. The main goal here is to create a totally uniform surface.
Once that's done, step it down to a finer grit, like 220-grit. This pass is all about erasing the tiny scratches left by the coarser paper, which preps the wood to accept stain beautifully and evenly. Always make sure you're sanding in the same direction as the wood grain—go against it, and you’ll create ugly scratches that the stain will highlight.
With the surface feeling smooth as silk, it’s time to bring on the color and protection. The possibilities are endless, but a classic stain-and-seal approach really lets the natural beauty of the wood shine through.
You're not just building a bed; you're tapping into a massive trend. The global market for platform beds with storage was valued at around $8.2 billion in 2024. It shows just how many people are looking for the exact kind of smart, space-saving solution you're creating. You can find more insights on the storage bed market on Dataintelo.
Now for the really fun part: making it yours. These are the little details that will make you smile every time you walk into the room and see the one-of-a-kind bed you built.
A matching headboard, built from the same wood and finished the same way, is a great place to start. It gives the whole setup a cohesive, high-end look. You can keep it super simple or get fancy with some decorative trim.
Think about upgrading the hardware, too. Instead of basic knobs, you could try something different:
You can even integrate a few modern conveniences. A slick move is to drill a small, discreet hole in the back of a drawer or the side of the bed frame to run charging cables through. Instant hidden charging station for your phone and tablet. It’s these small, thoughtful additions that you'll appreciate for years to come.
Whenever you dive into a project like this, a few last-minute questions are bound to pop up. No matter how solid the plans are, it’s only natural to have some "what ifs." Let's treat this section like a final huddle before you make the first cut, clearing up the most common queries I hear from fellow DIYers.
One of the first things everyone wants to know is the bottom-line cost. Prices are always shifting, but you can safely budget between $250 and $400 for a queen-sized build using quality pine or plywood. That number should cover your lumber, screws, drawer slides, and a decent finish.
Sure, you could spring for premium hardwoods like oak or maple, which will bump up the cost. But even then, you're still coming in way under what a comparable solid wood bed would run you at a retail store.
Next up is the mattress. Do you need a special one for a platform bed? The short answer is no, but there are a few things worth keeping in mind.
Most modern mattresses—we’re talking memory foam, latex, and hybrids—are designed to work perfectly fine on a solid platform with slats. The whole point is that they don't need a box spring. In fact, using a box spring with a memory foam mattress can sometimes even void the warranty.
A good rule of thumb is to space your slats no more than 3 inches apart. This gives the mattress all the support it needs to prevent sagging and also allows for plenty of air circulation, which is key for keeping your mattress fresh and extending its life.
Your choice of mattress is a personal one, but the bed frame's job is to provide a stable, breathable foundation. As long as your slats are sturdy and correctly spaced, your DIY platform storage bed will be a great home for almost any mattress you choose.
It’s so easy to get caught up in the excitement and rush through a few key stages. Believe me, a little patience now pays off big time in the end. Here are a few common pitfalls I've seen and how to sidestep them:
Interestingly, the need for beds like this isn't just a personal preference; it's a global trend. In the Asia-Pacific region, for example, rapid urbanization means smaller living spaces, making multifunctional furniture a necessity. This has led to countries like China and Japan dominating a huge chunk of the bed frame market, all driven by a cultural focus on smart organization.
Finally, remember that a solid wood bed is heavy. Once you’ve put all this effort into building a rock-solid frame, you might eventually need to move it. It's worth learning how to move heavy furniture properly; the right techniques can save your back and your floors.
Feeling a bit overwhelmed by the assembly process? The expert technicians at Assembly Smart are here to help. We specialize in turning your boxed furniture dreams into reality, with stress-free and professional in-home assembly. Get your free estimate today at https://assemblysmart.com and let us handle the hard work for you.
