-
CALL US:
- (866) 952-3456
Let's face it: furniture assembly instructions can be confusing. Those exploded diagrams and minimal text often leave us feeling lost. But understanding the logic behind these instructions can turn a frustrating experience into a satisfying one. This section explores how to interpret these "hieroglyphics" and unlock the secrets to seamless furniture assembly.
Professional assemblers know that instruction manuals use a universal visual language. This language relies heavily on diagrams, where varying line weights often represent different parts or actions. Dashed lines may indicate hidden components, while thick, solid lines show visible pieces. Arrows, numbered steps, and close-up views are crucial, guiding you through the process.
Understanding the reasoning behind the instruction design is also helpful. Manufacturers aim for universal understanding, regardless of language. This explains the emphasis on visuals over lengthy written explanations. Knowing how instructions are written is key. For further insights, check out these SOP Writing Guidelines.
Before even picking up a tool, experienced assemblers mentally map the process. They scan the entire instruction booklet to understand the sequence and identify potential challenges. They look for steps needing specific tools or tricky alignments. This proactive approach avoids surprises mid-assembly.
Pre-assembly planning also allows for a more organized workspace and efficient time management. Think of it like building with LEGOs, sorting pieces beforehand to streamline the build. The global furniture market, including ready-to-assemble (RTA) furniture, is booming. By 2027, it’s projected to reach $651 billion, with RTA furniture playing a significant role due to its affordability and convenience. Learn more about RTA furniture market growth.
Furniture assembly instructions often use standardized symbols. Learning these symbols is like learning the alphabet of assembly. Here's a quick overview:
Overlooking small details is a common mistake. A seemingly minor symbol or brief note can mean the difference between sturdy furniture and a wobbly disaster. Professionals understand that every detail matters. They pay close attention to warning symbols, understanding potential hazards or critical steps needing extra care. This careful approach is crucial for a successful and safe assembly. By adopting these professional strategies, anyone can conquer furniture assembly and enjoy the satisfaction of a job well done.
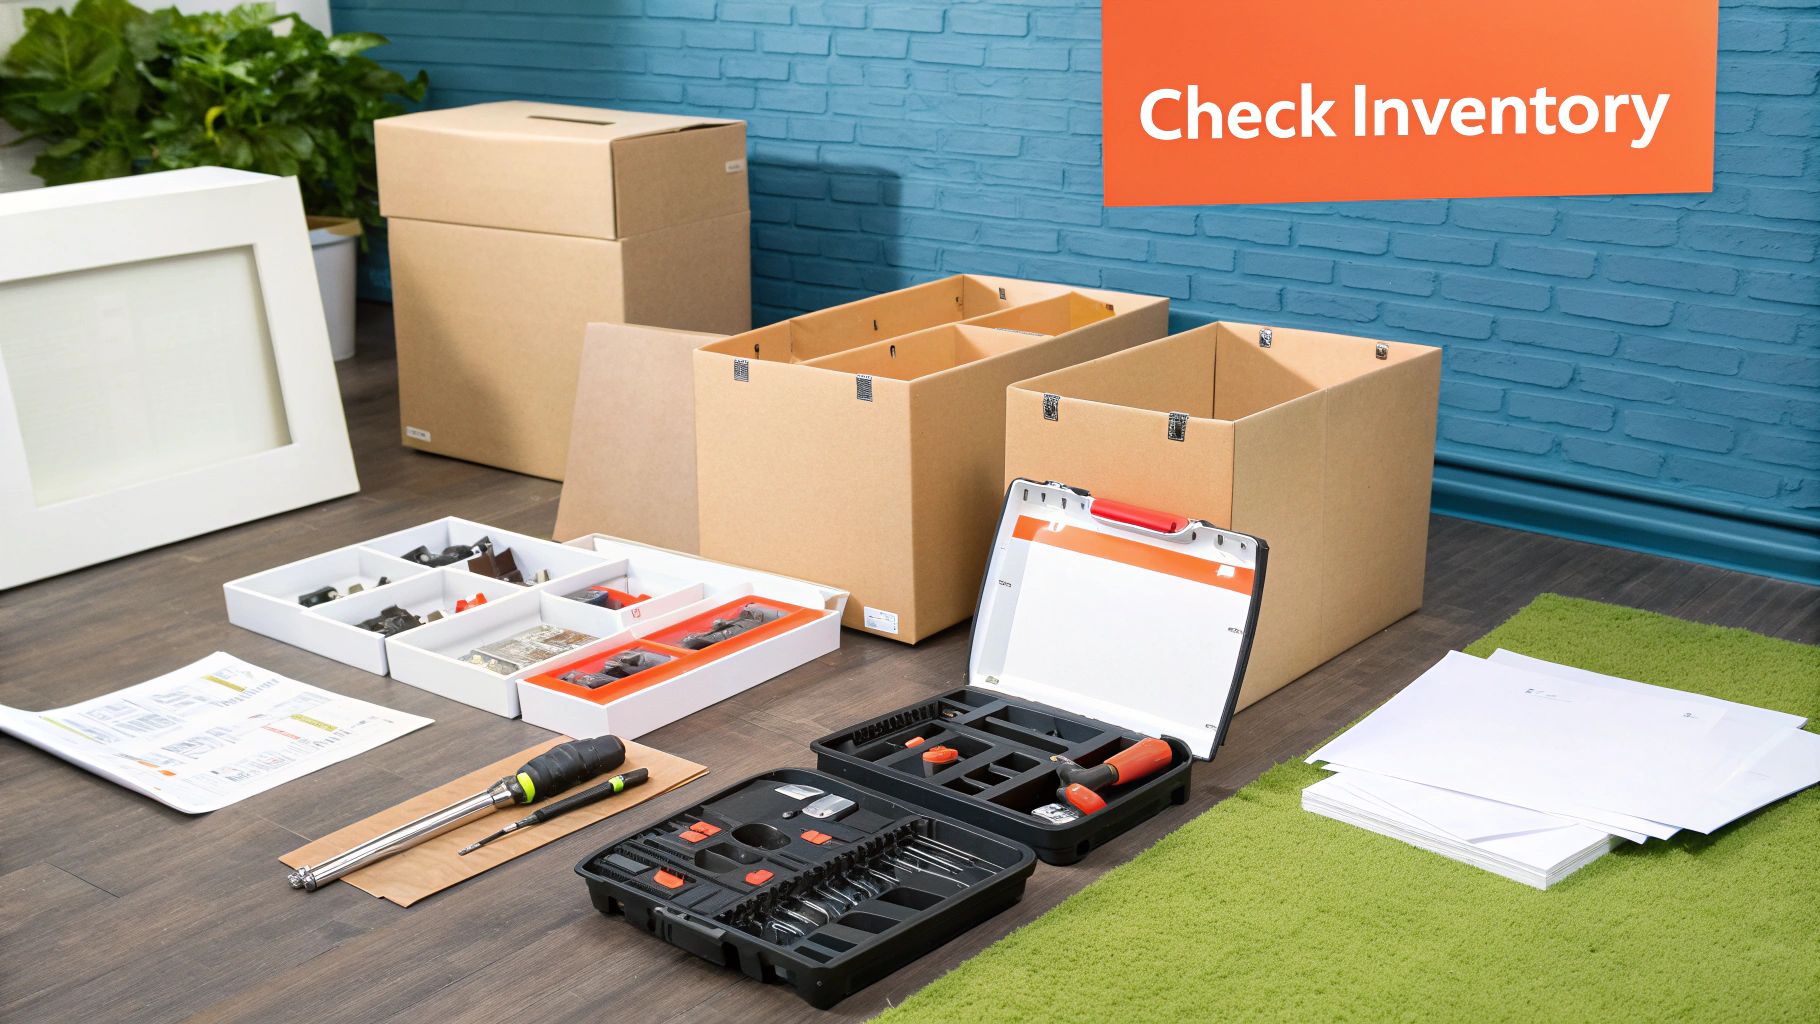
Before diving into your furniture assembly instructions, setting up the right workspace is crucial. This preparation prevents frustration and ensures a smoother, more efficient assembly process. Think of it like prepping ingredients before cooking – a little organization goes a long way.
While some furniture comes with basic tools, a dedicated assembly kit can significantly improve your experience. Here's a list of essentials:
While power tools like a cordless drill can speed things up, they're not always necessary for basic furniture assembly. However, they can be valuable for larger or more complex projects.
To help you choose which tools are right for your next project, take a look at the comparison table below:
Essential Furniture Assembly Tools Comparison: This table compares must-have tools vs. nice-to-have tools for furniture assembly, their approximate costs, and specific benefits.
| Tool Type | Essential or Optional | Average Cost | Primary Benefits | Best For |
|---|---|---|---|---|
| Screwdriver Set | Essential | $10-30 | Driving various screw types | All assembly projects |
| Allen Wrench/Hex Key Set | Essential | $5-20 | Tightening hex screws/bolts | Most RTA furniture |
| Rubber Mallet | Essential | $10-20 | Assembling parts without damage | Furniture with delicate finishes |
| Measuring Tape | Essential | $5-15 | Accurate measurements & alignment | All assembly projects |
| Level | Essential | $10-20 | Ensuring level assembly | All assembly projects |
| Cordless Drill | Optional | $50-150 | Faster screw driving | Larger, complex projects |
This table clearly outlines the essential tools needed for most furniture assembly projects, highlighting the benefits and cost-effectiveness of owning these key items. A cordless drill, while optional, can greatly speed up the process for larger projects.
Choosing the right workspace is key. Select a well-lit area, preferably near a power outlet if using power tools. Lay down a protective covering like a drop cloth or cardboard to prevent scratches. Ample space is also crucial for laying out parts and moving around comfortably.
Small parts are notorious for getting lost. Use small containers or ziplock bags to organize screws, bolts, and other small components. Clearly label each container to prevent mix-ups and frustrating mid-project searches. This is especially important for complex projects. You might be interested in: How to master… for additional tips.
Adequate lighting is vital. Poor lighting leads to mistakes and eye strain. Position your workspace near a window for natural light, or use bright, adjustable lamps. Ensure the light source doesn't create harsh shadows that obscure details.
Preventing damage to your furniture and workspace is important. The protective covering safeguards your furniture. Additionally, use soft cloths or felt pads under furniture legs to avoid damaging floors. This prevents costly repairs.
Furniture assembly can be physically demanding. Create an ergonomic setup to minimize strain. Use a comfortable chair at the appropriate height. Take breaks to stretch and avoid prolonged awkward positions. Prioritize your well-being. By following these tips, you'll create an efficient and enjoyable assembly experience. Now you’re ready to tackle those furniture assembly instructions!
Think of furniture assembly instructions like a treasure map. Knowing how to read them is the key to unlocking a perfectly assembled piece of furniture. This section explores the art of deciphering these instructions, sharing practical tips and tricks from the pros.
Just like maps, furniture assembly instructions come in different styles. Some manufacturers, like IKEA, use visual diagrams, minimizing text for a universal approach. Others include detailed written explanations along with the visuals. Recognizing these differences is the first step to success. Before you begin, a solid understanding of basic cabinet installation can be helpful. Check out this cabinet installation guide.
Professional assemblers quickly scan instructions for potential problems. They look for warning symbols or highlighted notes indicating crucial steps or potential hazards. This proactive approach helps avoid costly mistakes. They also focus on the sequencing of steps, knowing that skipping ahead can compromise structural integrity.
For complex assemblies, marking your progress on the instructions can be invaluable. A checkmark or highlighting completed steps keeps you organized and on track. Understanding the overall furniture structure helps decipher tricky diagrams. Think of it like a puzzle – knowing the final picture helps you place individual pieces.
Sometimes, the instructions don't match reality. A hole might be misaligned, or a part might not fit as shown. In these cases, professional assemblers know when to improvise and when to contact customer service. They also carefully review multi-language instructions, ensuring no key details are lost in translation. The adaptability and efficiency of RTA furniture have driven market growth. Flat-pack designs maximize shipping container space and retail space, reducing logistics costs. This is especially helpful for e-commerce and retail stores. Find more statistics here.
Today, furniture assembly instructions can be paper booklets, digital PDFs, or even interactive 3D models. Each format has pros and cons. Paper instructions are easy to annotate and reference quickly. Digital instructions offer zoom and sometimes even animated demonstrations. Knowing how to use each format is key for a smooth assembly. For more helpful tips, you might be interested in this resource: How to master….

By mastering these techniques, you transform furniture assembly from a dreaded chore into a manageable, and maybe even enjoyable, experience. Remember, the instructions are your guide to creating a functional and stable piece. Embrace them, understand them, and enjoy the satisfaction of a job well done.
Even with perfect furniture assembly instructions, sometimes things don't go as planned. But the difference between a seasoned assembler and a novice is knowing how to troubleshoot effectively. This section explores furniture assembly problem-solving, sharing techniques professionals use to overcome even the most frustrating challenges.
Misaligned holes, stubborn parts, and wobbly structures are common nightmares during furniture assembly. Professionals approach these problems methodically, diagnosing the root cause before attempting a fix. A wobbly table, for instance, might stem from uneven legs, loose screws, or a warped tabletop. Pinpointing the specific problem is the first step toward a stable solution.
Dealing with misaligned holes requires patience and precision. Sometimes, a gentle nudge or repositioning can resolve the issue. Other times, a slightly larger screw or wood filler might be necessary. Parts that refuse to fit might require sanding, filing, or careful persuasion with a rubber mallet. Professionals understand when to apply force and when to exercise caution.
Wobbly furniture is a common complaint. Professionals use various techniques to address it, including shims, adjustable feet, and felt pads. The key is diagnosing the source of the wobble—uneven flooring, a loose joint, or a structural weakness—and applying the appropriate fix.
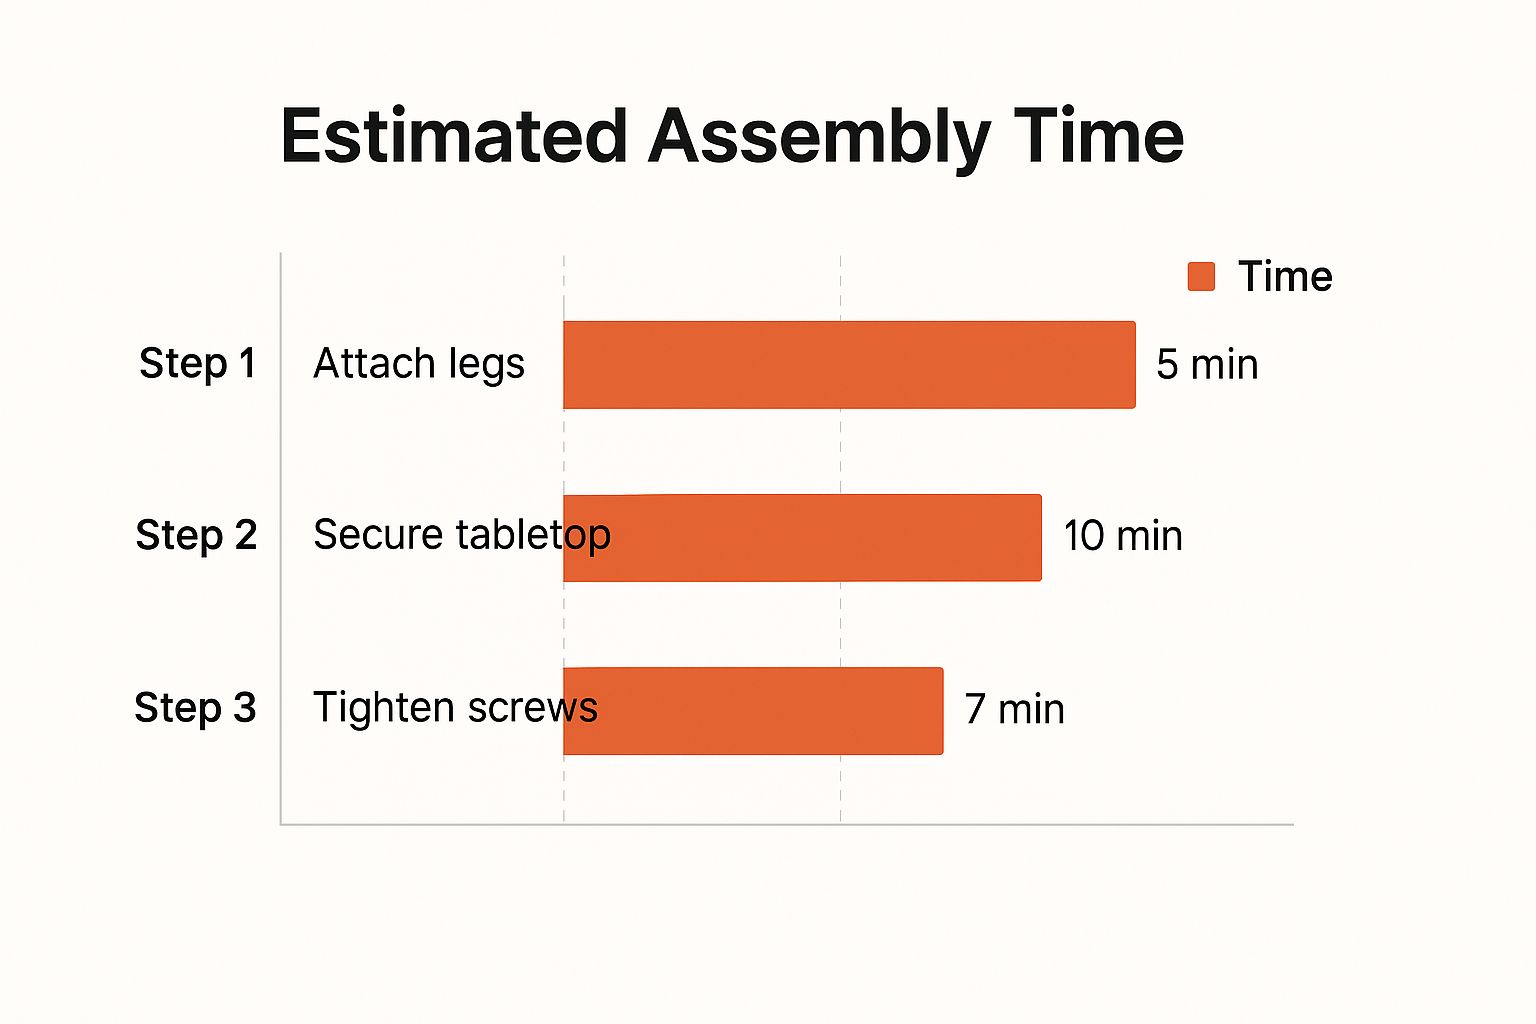
This infographic shows the estimated time for three assembly stages: attaching legs (5 minutes), securing the tabletop (10 minutes), and tightening screws (7 minutes). Securing the tabletop takes the longest, highlighting the importance of careful alignment and proper fastening during this step.
Missing hardware or damaged components can be frustrating. While some minor issues can be resolved with substitutes, significant problems might require contacting customer service. Professionals assess the damage and determine if an improvised solution is feasible or if a replacement part is needed.
The following table provides a helpful guide for navigating common assembly issues:
Common Assembly Problems and Their Solutions: A comprehensive guide to frequent furniture assembly challenges and effective resolution methods
| Problem Type | Common Causes | Quick Fix Solutions | When to Contact Manufacturer |
|---|---|---|---|
| Misaligned Holes | Incorrect markings, warped parts, manufacturing defects | Gently reposition parts, use slightly larger screws, apply wood filler | Holes significantly off, preventing assembly |
| Ill-Fitting Parts | Warped wood, incorrect dimensions, manufacturing errors | Sand or file down excess material, use a rubber mallet for careful adjustments | Part significantly damaged or deformed |
| Wobbly Furniture | Uneven floor, loose joints, structural weakness | Use shims to level furniture, tighten loose screws, add felt pads to feet | Structural damage, missing stabilizing components |
| Missing/Damaged Hardware | Parts lost during shipping, manufacturing defects | Substitute with similar hardware if possible | Specialized hardware, significant damage preventing assembly |
This table summarizes common assembly issues, potential causes, quick fixes, and when contacting the manufacturer is the best course of action. Remember, a methodical approach is key to successful troubleshooting.
Knowing when to improvise and when to seek help is crucial. Professionals use a decision framework that considers the problem's severity, the availability of replacement parts, and the potential for further damage. This prevents costly mistakes and ensures a lasting fix. Read also: How to master… for more advice.
Troubleshooting is essential for any furniture assembler. By developing a keen eye for detail, a methodical approach to problem-solving, and a willingness to seek help when needed, you can conquer any assembly challenge and enjoy a perfectly assembled piece.
Moving beyond basic assembly means adopting the strategies professionals use to minimize assembly time without compromising quality. These techniques, perfected over years of experience, transform furniture assembly from a tedious chore into an efficient, even enjoyable, process.
Imagine starting a jigsaw puzzle without sorting the pieces. Professional assemblers avoid this by organizing all hardware before they begin. This pre-sorting eliminates the mid-project scramble for the right screw or bolt, drastically cutting down assembly time. Many use small containers or ziplock bags, clearly labeled with the corresponding step number from the instructions. This simple act saves precious minutes and reduces frustration.
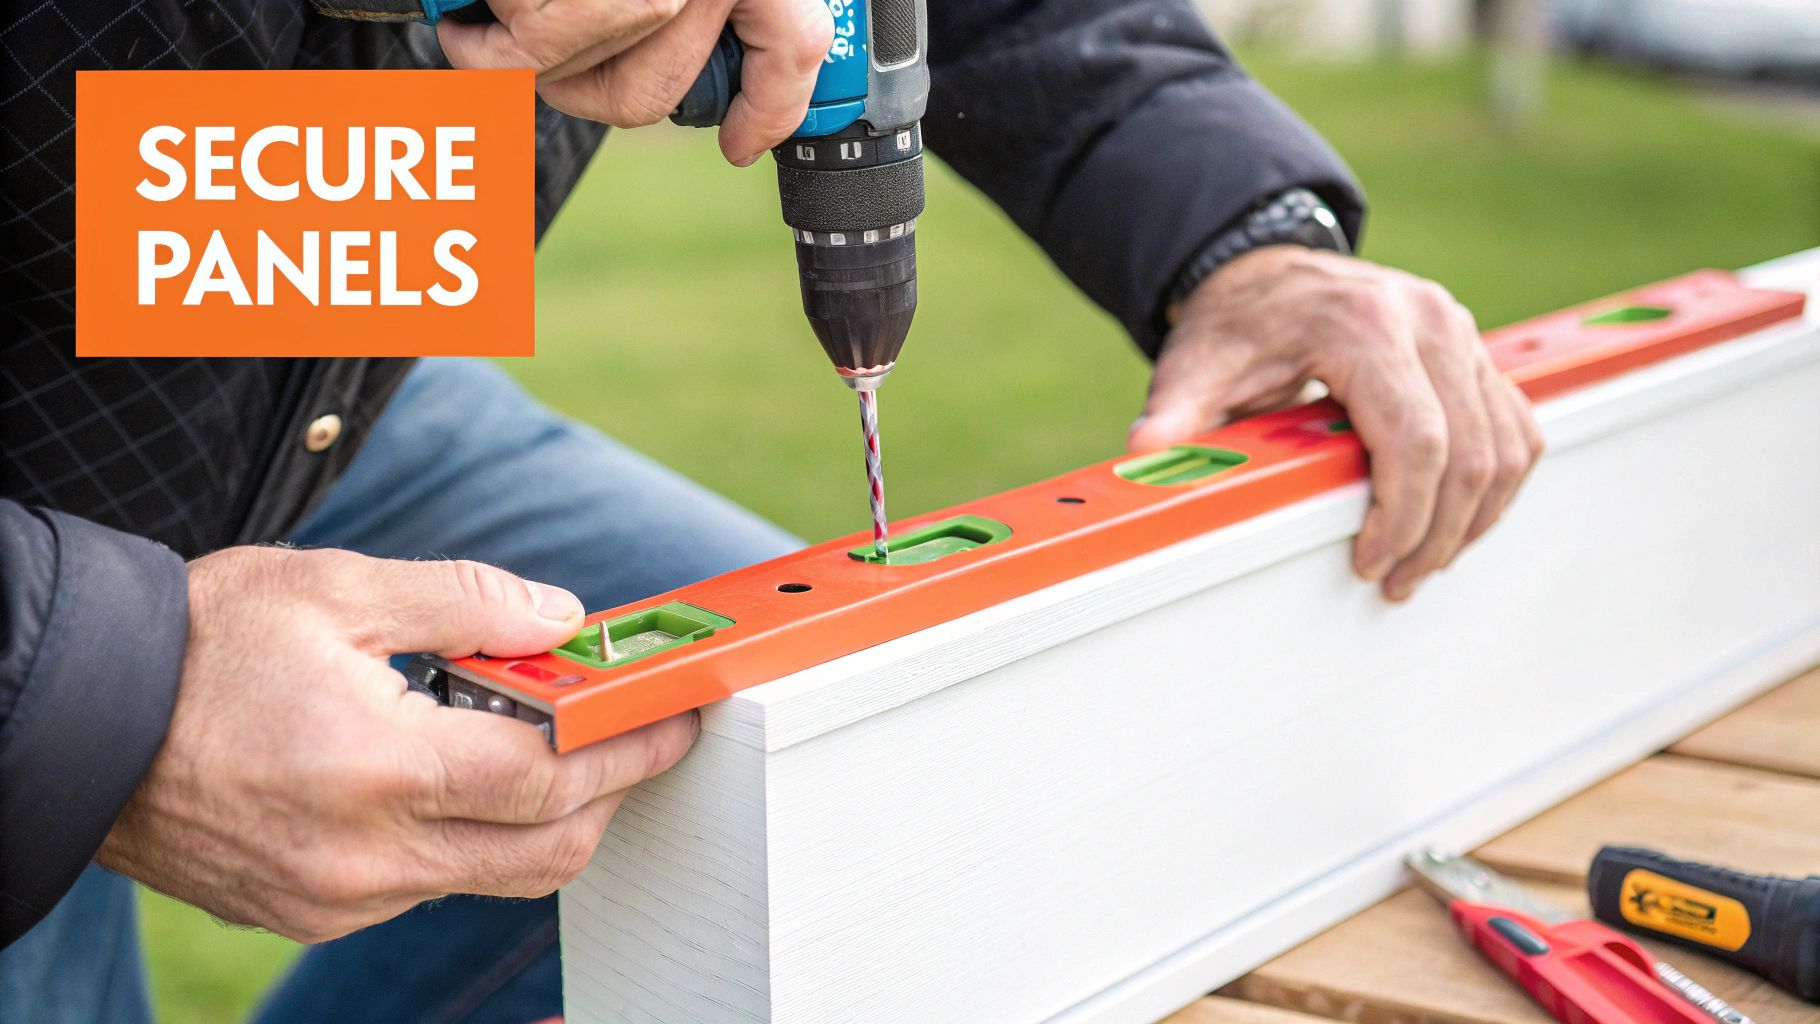
Just like a skilled craftsman, professional furniture assemblers understand the importance of the right tool and its correct usage. They position themselves and their tools for maximum leverage, minimizing strain and maximizing efficiency. For example, when driving a screw, they ensure the screwdriver is perpendicular to the screw head, using steady pressure to avoid stripping it. This mindful approach prevents fatigue and guarantees each component is securely fastened.
Tightening screws in a specific sequence is crucial for proper alignment and structural integrity. Instead of fully tightening each screw one by one, professionals initially tighten all screws loosely. They then return and tighten them fully in the specific order described in the furniture assembly instructions. This method, known as sequential tightening, prevents warping and ensures all parts fit together perfectly. Think of it like constructing a building – a solid foundation is key to long-term stability.
With multi-piece furniture, professionals strategize. They study the instructions, determining which components should be assembled first to establish a stable base for the next steps. This planned approach, much like building a house on a strong foundation, minimizes the risk of wobbling and accelerates the overall assembly process.
When working with a partner, clear communication is essential. Professional assemblers delegate specific tasks and clearly explain each step. This avoids confusion and prevents costly errors. This coordination ensures a smooth workflow and reduces the total assembly time. Teamwork, like a well-coordinated team, significantly speeds up the process. The RTA (Ready-to-Assemble) furniture market is influenced by DIY trends, advancements in technology, and environmentally conscious consumers. The market is projected to reach $21.26 billion by 2029, with a CAGR of 7.2%. This growth is driven by ongoing innovations in design and manufacturing. Find more detailed statistics here.
Rather than waiting until the end, professionals test for stability throughout assembly. They check regularly for wobbles, misalignments, and loose parts, addressing any issues immediately. This proactive approach, similar to regular car maintenance, prevents time-consuming rework and ensures a stable, durable final product. By using these professional techniques, you can streamline your next furniture assembly project and enjoy the satisfaction of a job well done, quickly and efficiently.
Every furniture brand, from the ubiquitous IKEA to online giants like Wayfair and Amazon Basics, has its own assembly quirks. Understanding these nuances can transform a potentially frustrating experience into a smooth and efficient one. This section delves into the brand-specific secrets of major furniture manufacturers, providing you with the insider knowledge to navigate their furniture assembly instructions with confidence.
IKEA furniture is known for its minimalist design and often, equally minimalist instructions. These instructions rely primarily on clear diagrams, minimizing text for near-universal understanding. One key to IKEA assembly is understanding their hardware system. While seemingly simple, small variations in screw and cam lock types exist. Pay close attention to the diagrams to identify the correct hardware for each step.
IKEA often incorporates clever design shortcuts, like pre-drilled holes and snap-together components. Understanding these shortcuts can significantly speed up the assembly process.
Wayfair, as a marketplace for various brands, presents a greater challenge with varying instruction styles. You might encounter highly detailed instructions from one manufacturer and minimalist diagrams from another. The key is to adapt your approach based on the specific brand you are assembling.
However, Wayfair excels in its customer service and replacement parts system. If you encounter issues, don't hesitate to contact their customer service, as they are generally responsive and helpful in resolving problems.
Ashley Furniture, known for its traditional and contemporary styles, provides more detailed written instructions alongside diagrams. Pay close attention to these written descriptions, as they often highlight specific nuances of their furniture construction.
For example, they may provide specific instructions on aligning decorative elements or adjusting mechanisms unique to their designs. Understanding Ashley Furniture’s unique terminology and instruction style is essential for a smooth assembly experience.
Amazon Basics furniture often prioritizes simplicity in both design and instructions. Their furniture assembly instructions tend to be straightforward, featuring clear diagrams and minimal text, similar to IKEA’s approach. However, navigating Amazon's vast marketplace can be challenging if you need replacement parts.
A key tip is to locate the specific manufacturer within the product listing and contact them directly. They are often better equipped to handle part replacements than Amazon's general customer service. You might be interested in: How to master… for more insights.
Each brand may use slightly different terms or symbols in their furniture assembly instructions. For example, one brand might refer to a "cam lock" while another uses "connecting bolt." Familiarize yourself with the specific terminology used by each manufacturer to avoid confusion.
Additionally, some brands, particularly IKEA, incorporate hidden features in their designs, such as adjustable shelves or hidden storage compartments. Explore the instructions carefully to uncover these often-overlooked features.
Understanding common quality control patterns for each brand can help you identify potential issues early on. Some brands might be known for inconsistencies in hole alignment, while others might have issues with hardware quality. Being aware of these patterns can help you take preemptive measures. For instance, check for alignment before fully tightening screws or inspect hardware carefully before starting the assembly process.
Knowing how to navigate each brand's customer service and replacement parts system can save you significant time and frustration. Some brands offer online portals for ordering replacement parts, while others require phone calls or emails. Familiarize yourself with the process for each brand before you start assembling, so you're prepared if you encounter any missing or damaged parts. This proactive approach ensures you have the resources you need for successful assembly.
The satisfying click of the final screw doesn't mean your furniture assembly journey is complete. True success lies in furniture that stands strong and serves its purpose for years to come. This section explores the crucial post-assembly steps professional assemblers take to guarantee furniture longevity, going beyond the basic instructions.
Before filling your newly assembled furniture, professional assemblers conduct tests to ensure its structural soundness. One simple yet effective method is the shake test. Gently shake the furniture from various angles, listening for any wobbling, creaking, or signs of instability. This helps pinpoint loose connections or weak spots requiring attention. It's akin to a mechanic checking for unusual noises after a car repair – a little proactive testing can prevent major issues later.
Just as a car needs regular maintenance, your furniture benefits from routine care. Periodically tightening screws, especially in high-use areas, prevents loosening and maintains stability. For instance, chairs and tables used daily may need screw tightening every few months, while less frequently used furniture might only require annual attention. Furthermore, cleaning and protecting surfaces with appropriate products can prevent damage and prolong your furniture's life.
Different furniture types have varying tightening requirements. Solid wood furniture might need less frequent tightening than particleboard or MDF furniture, which is more vulnerable to moisture and wear. Similarly, furniture with moving parts, like drawers and doors, benefits from regular lubrication to ensure smooth movement and prevent premature wear. Creating a personalized tightening schedule based on materials and construction is key to preventative maintenance.
Moving assembled furniture can be risky without proper care. Disassembling certain parts, such as detachable legs or shelves, before moving reduces stress on the structure and minimizes damage during transit. For larger items, using furniture sliders or dollies distributes weight evenly, preventing strain on joints and connections. This is especially crucial for heavier items like bookshelves or wardrobes.
Small adjustments after assembly can significantly impact furniture life. Leveling furniture using shims or adjustable feet prevents wobbling and ensures even weight distribution. For example, a slightly uneven floor can make a table wobble, but shims under the shorter leg can easily fix this. These minor adjustments significantly extend the life and functionality of your furniture.
Numerous products claim to protect furniture, but not all deliver. While some treatments, like wood sealers or fabric protectors, offer real benefits, others are merely marketing ploys. Researching and selecting effective treatments tailored to your furniture’s materials protects your investment and avoids wasteful spending on ineffective products.
By following these post-assembly steps, your furniture will not only look great but also endure. These professional techniques transform assembled furniture from temporary pieces into lasting investments, providing years of comfort and functionality.
Are you tired of the hassle and stress of furniture assembly? Let Assembly Smart take care of it. We specialize in professional in-home assembly for all furniture types, from IKEA to other major brands. Book your stress-free assembly service with Assembly Smart today!
Article created using Outrank
