-
CALL US:
- (866) 952-3456
That exciting moment when you bring home new furniture can deflate pretty fast once you open the box and find a pile of boards and a sea of screws. If that sounds familiar, you’re not alone. This guide is here to offer real, practical help assembling furniture, whether you decide to build it yourself or call in a professional.

Flat-pack furniture has completely changed the game for home decor. It's stylish, it's affordable, and it shows up right at your door. The only catch? That convenience comes with the dreaded assembly process.
From diagrams that look like they were written in a foreign language to a seemingly endless supply of hardware, putting these pieces together can be a huge source of stress. It’s a near-universal experience that can turn a fun home upgrade into a frustrating puzzle.
There’s a good reason the ready-to-assemble (RTA) furniture market is booming. The industry was valued at over USD 16.93 billion and is on track to hit nearly USD 26.79 billion by 2032. This incredible growth shows just how many of us are now faced with self-assembly. To get a better handle on the basics, you can check out our simple guide on what flat-pack furniture is.
This massive market expansion means a few things for you and me:
The real appeal of RTA furniture is its affordability, which comes from lower shipping and storage costs. But the hidden cost is often your own time, effort, and sometimes, your sanity.
At the end of the day, you just want your new item built correctly and safely, without damaging it—or your walls. This guide is designed to help you figure out the best approach, whether that means finding the confidence to build it yourself or the clarity to hire the right professional. We'll walk you through actionable steps to make the whole experience smoother, from unboxing to final placement.
Before you even open the box, the first decision is whether to tackle this yourself or bring in an expert. There's no single right answer—it all depends on the project, your budget, and how you value your time.
Here's a quick comparison to help you decide which route is best based on your project's complexity, your budget, and how much time you have.
| Factor | DIY Assembly | Hiring a Professional |
|---|---|---|
| Cost | Free (just your time) | An upfront service fee |
| Time | Can be time-consuming; varies by skill | Fast and efficient; frees up your day |
| Tools | You'll need your own basic toolset | They bring all necessary professional tools |
| Complexity | Best for simple items (small tables, chairs) | Ideal for complex items (wardrobes, desks) |
| Risk | You're liable for any damage or mistakes | Pros are insured against damage |
| Stress | Can be high, especially with confusing instructions | Low stress; the job is handled for you |
Ultimately, choosing between DIY and a pro comes down to a trade-off. Building it yourself saves money but costs you time and can be stressful. Hiring a pro costs money but saves you time and guarantees a correctly assembled piece.
A smooth assembly job starts long before you even think about picking up a screwdriver. Believe me, rushing straight into the build is the fastest way to get frustrated. Just a few minutes of prep work can be the difference between a project that feels like a nightmare and one that's actually kind of satisfying.
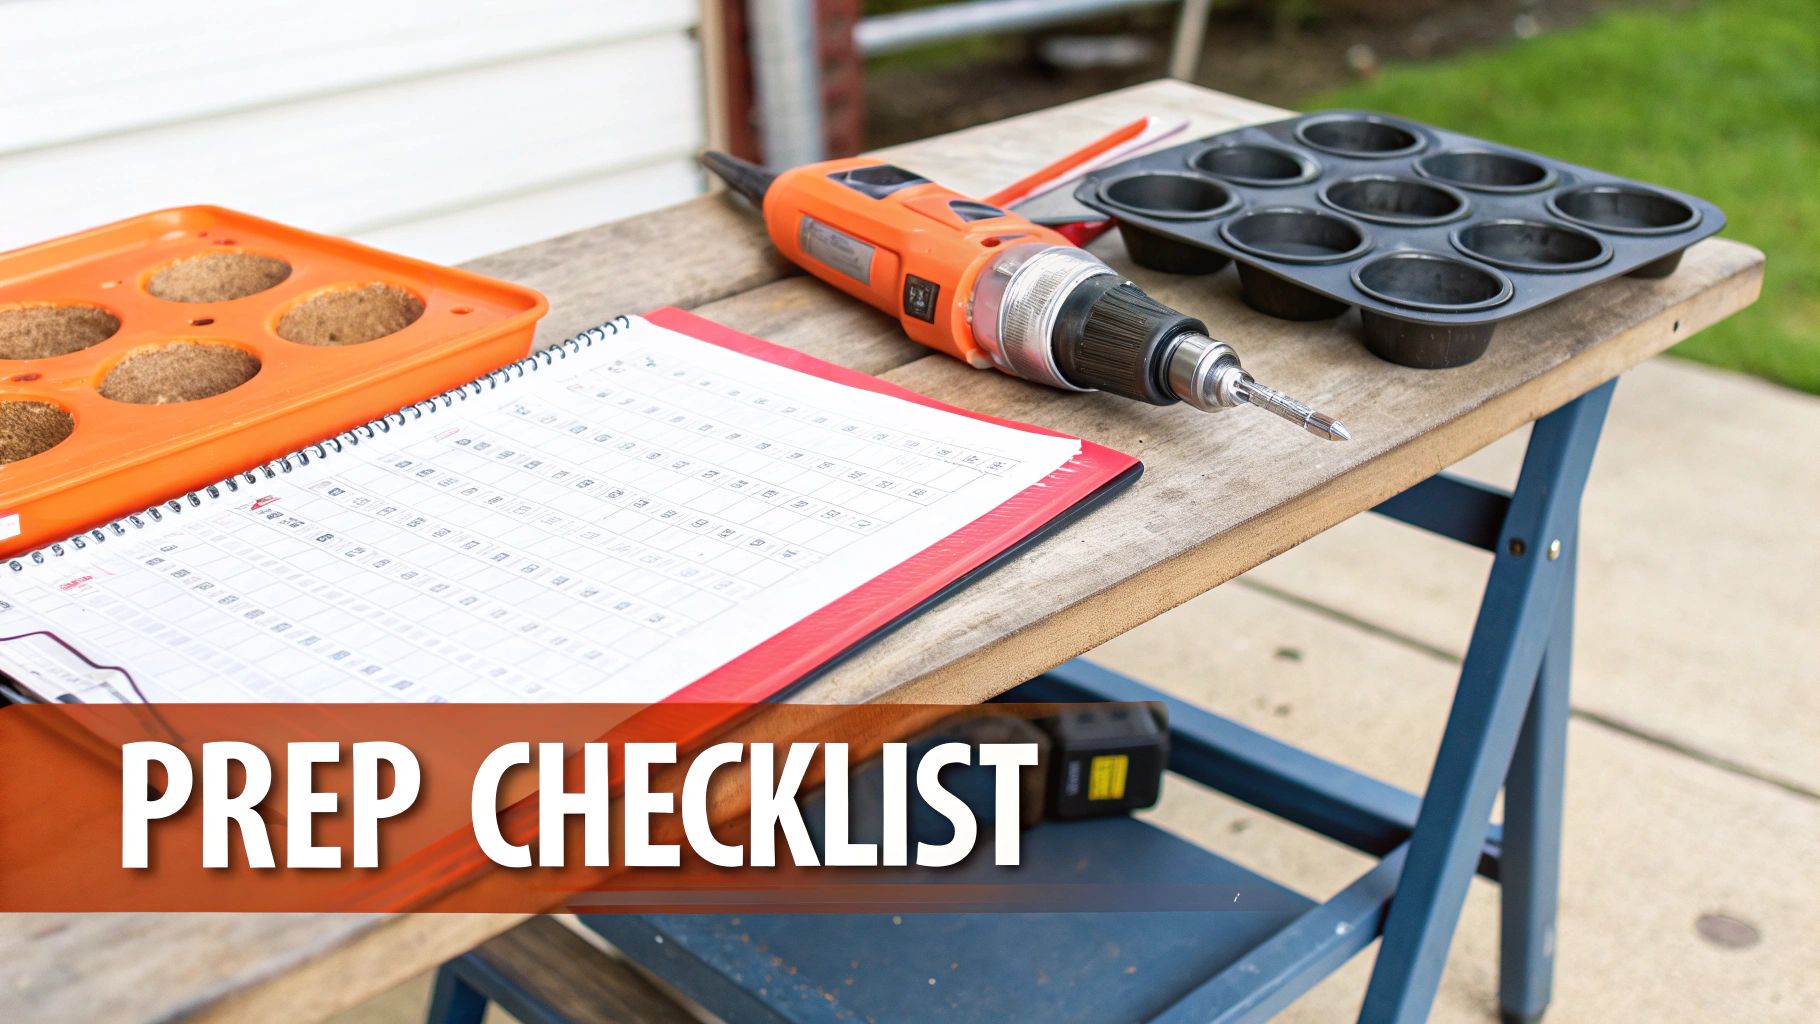
The first move is always a thorough inventory check. Before you do anything else, open the box, carefully lay out every single piece, and check it off against the parts list in the manual. This one simple step can save you from that awful moment when you're halfway done and realize a critical piece is missing.
Your work environment is just as crucial as your tools. You're going to need more space than you think—not just for the furniture itself, but for you to walk around it without tripping over things.
And before you even start, it’s a smart idea to know how to properly measure furniture to be absolutely certain it will fit in its new home.
Once the space is ready, deal with the hardware. Don't leave all those little screws, bolts, and dowels rattling around in their plastic bags. Sorting them out now will save you from frantically searching for that one specific cam lock later on. I've found a muffin tin or a few small bowls are perfect for keeping everything organized and easy to grab.
That tiny Allen key they throw in the box? It’s rarely going to be your best friend. Having a few basic tools on hand will make the whole process faster, easier, and give you a better final result.
Many assembly headaches come from trying to make the wrong tool work. Investing in a basic toolkit not only helps with this project but sets you up for countless other small home repairs down the road.
A good power drill with a torque-limiting clutch is an absolute game-changer. It speeds things up like you wouldn't believe, but that clutch is the key—it stops you from over-tightening screws and stripping the wood. A rubber mallet is also incredibly useful for gently tapping dowels and other parts into place without causing any damage.
For a more detailed breakdown, check out our complete guide on how to prepare for your furniture assembly project. With your space prepped, parts sorted, and tools ready, you’re all set for a much smoother build.
Once you're in the thick of a build, you quickly realize the instruction manual can only take you so far. Real success comes from knowing the unwritten rules and avoiding the common pitfalls that can trip up even the most patient DIY-er.
One of the most frequent blunders is installing panels backward. It sounds almost too simple to get wrong, but it happens all the time. Here’s a pro tip: always look for the unfinished or raw edges on a panel. Those edges are almost always designed to face the back or press up against another piece, completely hidden from view. The nice, finished edges are the ones you're meant to see.
Another classic mistake is over-tightening screws, especially when you're working with particleboard or MDF. The second you hear a faint cracking sound or feel the screw suddenly go loose, you've stripped the wood. This compromises the joint and is a one-way ticket to a wobbly, unsafe piece of furniture.
Folks who build furniture for a living have a few go-to techniques that guarantee a rock-solid result. These small actions make a world of difference in how stable and long-lasting your furniture will be.
A wobbly bookshelf is almost always the result of attaching the back panel while the frame is out of square. Squaring it up before nailing in that flimsy back panel is the single most important step for stability.
Let's say you just finished a new dresser, but one of the drawers sticks or won't close smoothly. Nine times out of ten, the culprit is an overtightened screw on one of the drawer slides, causing it to warp just enough to throw things off. Simply backing that screw off a quarter-turn is often all it takes to fix the alignment.
Of course, even perfectly assembled furniture gets its share of bumps and bruises. If you’re dealing with other common household mishaps, you might find it helpful to learn how to repair a rip in a leather sofa.
The key is to diagnose the problem rather than trying to force a piece into place. If a part doesn't seem to fit, there's always a reason. Go back and re-read the instructions or backtrack a step to see what might have gone wrong. A little patience now will prevent a massive headache later.
And for those who want to be ready for anything an assembly project throws their way, having the right equipment is non-negotiable. You can find a good rundown of the essential furniture assembly tools you should always have on hand.
Sometimes, the smartest DIY move is knowing when to throw in the towel and let an expert take over. Deciding to get professional help assembling furniture isn't giving up; it's a strategic choice to save yourself time, prevent costly damage to your new purchase, and guarantee a safe, sturdy final product.
Think about the sheer scale of some of these pieces. A sprawling multi-door wardrobe or a king-sized storage bed isn't just complex—it can be downright dangerous to assemble alone. These large, heavy items are often unwieldy, and one slip could mean a personal injury or a nasty gouge in your new floor. If the thought of lifting heavy panels over your head gives you pause, that's a pretty clear signal to call in a pro.
Another huge red flag is when the instruction manual looks like it was written in another language. Vague diagrams, missing steps, or horribly translated text can turn a simple job into a weekend-long nightmare. An experienced assembler has seen it all before. They can navigate those confusing instructions with ease and keep you from installing a crucial panel backward.
And then there's anything that needs to be securely mounted to a wall. Floating shelves, heavy media centres, or anti-tip brackets for dressers are all best left to a professional. They have the right tools and know-how to locate studs and ensure the piece is anchored safely—something that's absolutely critical for preventing accidents, especially in homes with kids or pets.
"Hiring a professional isn't a failure—it's an investment in getting the job done right the first time. It buys you peace of mind, a correctly assembled product, and frees up your weekend."
This isn't a niche problem; the demand for assembly services is massive because it's a common headache. This decision tree shows just a few of the common issues that can quickly derail a DIY project.
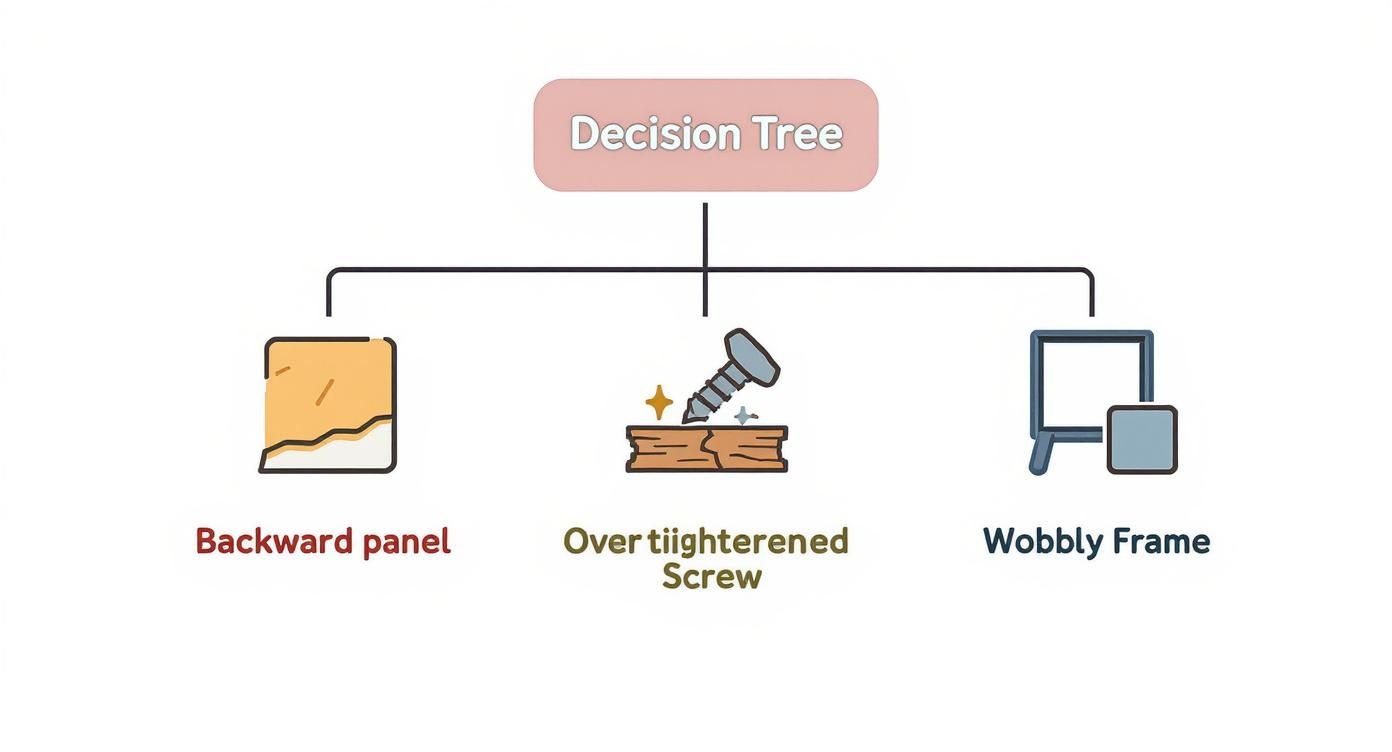
As you can see, even simple mistakes like overtightening a screw can lead to irreversible damage. This is where professional experience really pays off. The global furniture assembly services market was valued at around USD 386.93 million and is only projected to grow, which shows just how many people choose to rely on experts for a guaranteed result.
You can learn more about the furniture assembly market's growth to see how common this choice has become. For a lot of people, the affordable cost is a small price to pay for a perfectly built piece of furniture without any of the hassle.

Okay, you've decided to call in a professional. Smart move. Now comes the hard part: finding a trustworthy pro who will treat your new furniture—and your home—with the respect they deserve. It can feel like a shot in the dark, but a little prep work goes a long way in hiring someone with confidence.
Your search will likely lead you down two main paths: using a modern on-demand app or finding a local, independent handyman. Each has its pros and cons.
Services like TaskRabbit or Handy offer undeniable convenience. You can scroll through profiles, check out verified reviews, and book a qualified assembler in just a few clicks. These platforms also add a layer of security, since they handle the payments and offer customer support if something goes wrong.
On the other hand, an independent local pro, often found through a friend's recommendation or a neighborhood Facebook group, can sometimes be easier on the wallet. They don’t have to pay platform fees, and you can build a relationship for future projects. This route, however, demands more legwork from you to vet their experience and make sure they’re properly insured.
There's a reason these services are booming. Let's be honest, flat-pack furniture can be a nightmare. In fact, studies show that over 60% of people who buy ready-to-assemble furniture get stressed out during the process. No wonder the demand for professional help is so high.
No matter where you find your pro, vetting them is non-negotiable. Don't just glance at the star rating and call it a day. You have to dig into the reviews.
Here’s the single most important question you can ask: "Do you have liability insurance?" A true professional will always have coverage to protect against accidental damage to your property. If they get dodgy or say no, that's a massive red flag. Walk away.
To get a fair and accurate quote, you need to give them all the details upfront. Being vague is the fastest way to get hit with unexpected costs later. Before you even reach out, get this info together:
Giving them this information from the start empowers the pro to give you a solid quote, whether it’s an hourly rate or a flat fee. This kind of transparency is what sets the stage for a smooth, stress-free experience. For a deeper dive, check out our guide on how to hire someone to assemble furniture.
When you’re staring at a flat-pack box (or five), a lot of questions pop into your head. Whether you’re trying to decide between doing it yourself or calling in a pro, getting some straight answers can save you a world of hurt. We’ve been in this business a long time, so we’ve heard it all. Let's tackle some of the most common questions we get.
This is the big one, and the honest answer is: it depends. The cost really swings based on where you live, how complex the piece of furniture is, and the service you end up choosing.
On-demand platforms like TaskRabbit are a popular option, and you'll see assemblers with hourly rates anywhere from $40 to over $100. A simple coffee table might only take an hour, landing you on the lower end of that spectrum. But a huge, multi-door wardrobe? That could easily turn into a three or four-hour job, and the cost will reflect that.
Some services skip the hourly rate and just give you a flat-fee price per item. This can be a great way to avoid surprises. You might see a price of $50 for a small bookcase or $200+ for a complicated bed frame with storage.
Always, always get a quote upfront. Before you agree to anything, ask the provider to spell out whether their price is hourly or a fixed rate for the whole job. No one likes a surprise on the final bill.
It's tempting, right? You're already buying the furniture, and with one more click, you can have someone show up to build it. Adding the assembly service at checkout is undeniably convenient. The main draw is that you don’t have to go hunting for a qualified person yourself—it's all bundled into one clean transaction.
But you often pay for that convenience. We've seen retailer-offered services come in at a higher price than what you'd pay a local professional you found on an app. It's smart to do a little comparison shopping. Before you check that box, do a quick search on a service like Handy or TaskRabbit for the same item. If the prices are pretty close, the convenience might be worth it. If there’s a big gap, you could save a nice chunk of change by booking separately.
The sinking feeling you get when you realize a screw is missing is universal. The moment you suspect a part is gone, just stop. Don't try to force it. First, do a thorough second sweep of all the packaging. Little pieces of hardware absolutely love to hide in styrofoam corners and cardboard folds.
If the part is truly AWOL, your next move is to contact the manufacturer or the store where you bought the furniture.
Whatever you do, resist the urge to rummage through your own toolbox for a substitute. Unless you are 100% certain it won't compromise the furniture's structural integrity, it’s a bad idea. Using the wrong screw might seem harmless, but it could lead to wobbly legs, a collapsed shelf, or worse.
While a tip is never required, it’s a genuinely appreciated gesture for a job well done. Think about it: if your assembler was professional, worked efficiently, and was careful with your home and your new furniture, a tip is a fantastic way to say "thank you."
A good rule of thumb is to tip 15-20% of the total service cost, much like you would in a restaurant. For smaller, flat-fee jobs, a tip of $10-$20 is also a thoughtful amount. Many of the booking apps let you add a tip right through your phone after the job is complete, but having a little cash on hand is always a safe bet.
When you just want it done right without the headache, trust the experts. Assembly Smart offers transparent pricing and next-day appointments to get your furniture, fitness equipment, and playsets built perfectly. Book your stress-free assembly today at https://assemblysmart.com.
