-
CALL US:
- (866) 952-3456
Building your own wardrobe really boils down to four key stages: mapping out your design, gathering your tools and materials, putting the frame and interior components together, and finally, adding those all-important finishing touches. The whole process hinges on a solid plan, whether you’re aiming for a simple freestanding unit or a more complex, built-in system.
Jumping into a DIY wardrobe project is genuinely exciting. It gives you total control to create a piece of furniture that’s a perfect match for your space and your lifestyle. You can finally stop trying to make do with off-the-shelf options that never quite fit or just don't have the features you really need.
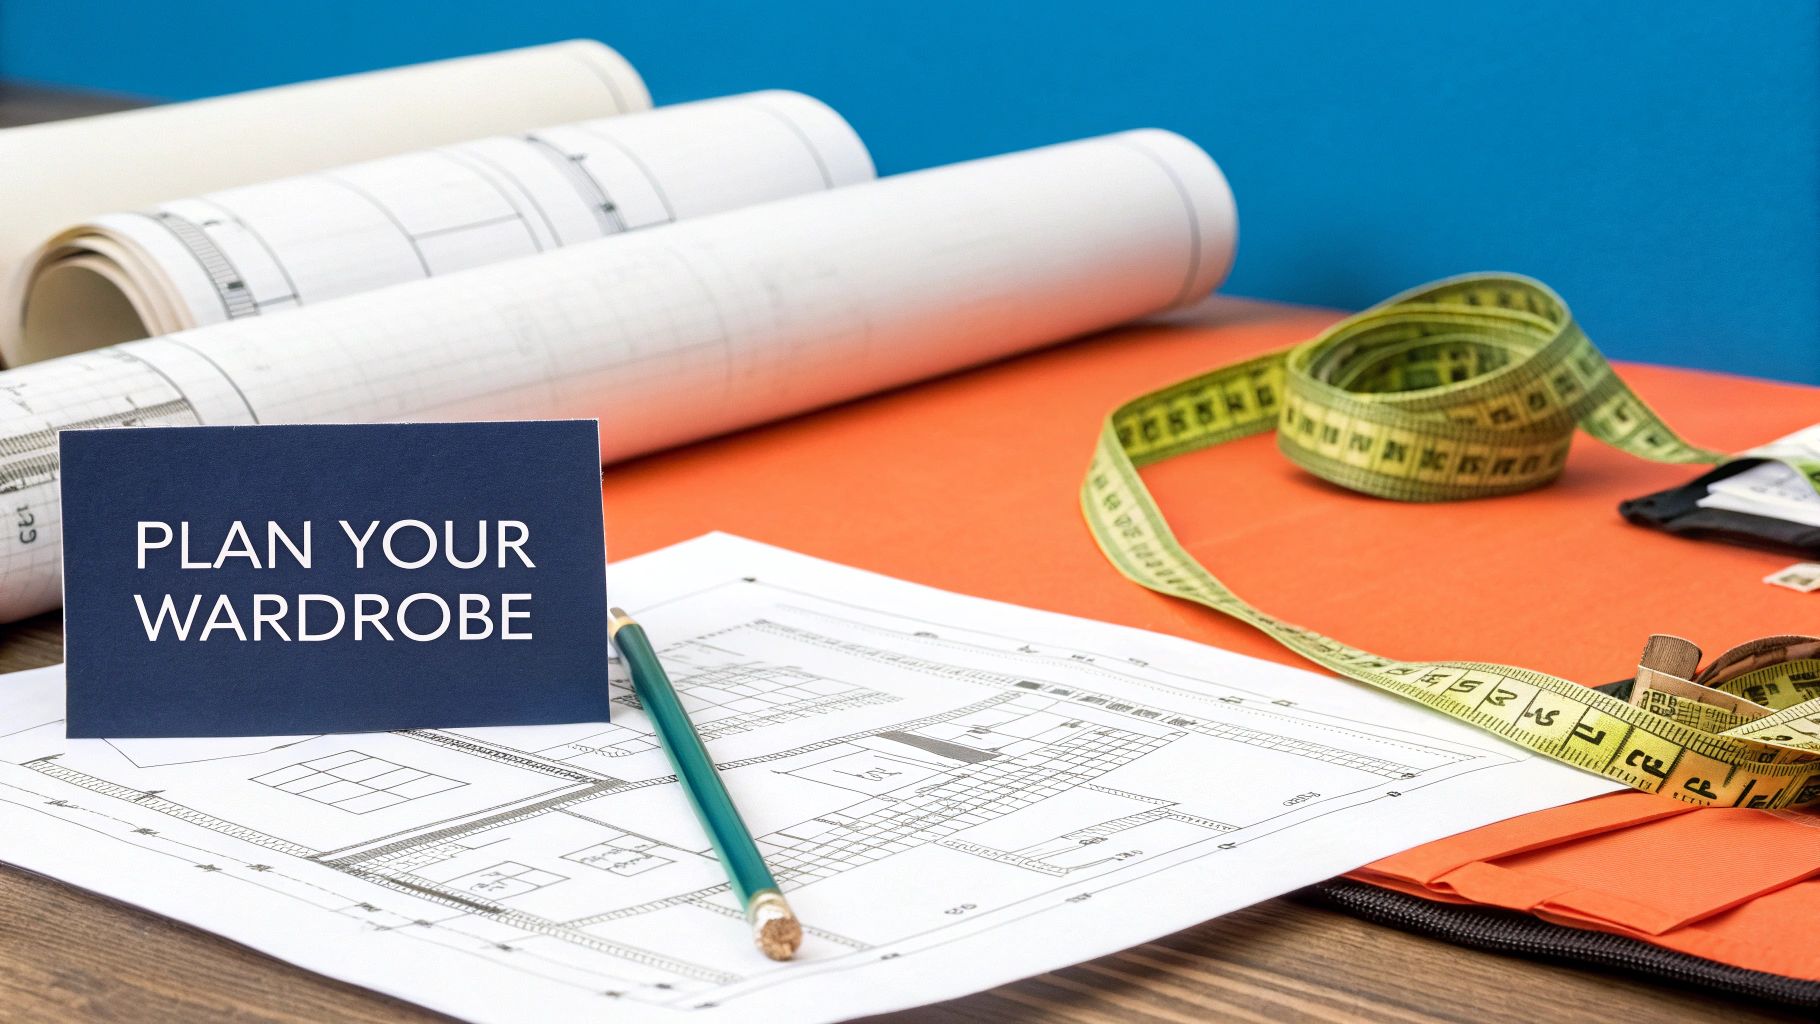
But before you even think about buying a single piece of wood, you need a crystal-clear plan. This blueprint is without a doubt the most crucial part of building a wardrobe you'll be proud of for years to come.
Your first big decision is figuring out which style of wardrobe makes the most sense for your home and your current skill level. Each one comes with its own set of challenges and rewards.
Deciding between a freestanding, built-in, or walk-in wardrobe is a big deal. Your choice will shape your budget, the complexity of the project, and the final look. Here’s a quick breakdown to help you weigh your options.
| Wardrobe Type | Best For | Skill Level | Typical Cost |
|---|---|---|---|
| Freestanding | Renters, beginners, or those who like to rearrange furniture. Offers great flexibility. | Beginner | Low to Moderate |
| Built-in | Homeowners wanting a high-end, seamless look that maximizes every inch of space. | Intermediate to Advanced | Moderate to High |
| Walk-in | Those with a spare room or a very large bedroom looking for the ultimate storage solution. | Advanced | High |
Making the right choice comes down to being honest about your space, your budget, and your own abilities. A well-executed freestanding wardrobe is often a much better first project than a half-finished built-in.
The key takeaway here is to be realistic. While a floor-to-ceiling built-in might be the dream, a well-made freestanding wardrobe is often a more practical and satisfying first project. If you're new to this, it might be worth checking out our guide on https://assemblysmart.com/how-to-assemble-ikea-furniture/ just to get a feel for the basics.
Once you've settled on a design, it's time to talk logistics. Setting a realistic budget from the get-go is the best way to avoid nasty surprises later on.
As you flesh out your wardrobe blueprint, nailing down the finances is absolutely key. Using some effective budget templates can give you a solid framework to track and manage all your project costs.
This drive for personalization isn't just a hunch; it's a huge market force. The global wardrobe market was valued at an incredible USD 66.31 billion in 2024 and is expected to keep growing. This just shows how much people want storage solutions that are made for them.
Once you’ve finalized your wardrobe design, the real fun begins: gathering your supplies. This is the stage where your wardrobe's personality, durability, and final cost really start to take shape. Getting this right from the jump means your project will go a whole lot smoother and you'll have a finished piece that's built to last.
The choice between different materials often boils down to your budget and the look you're going for. Solid woods like oak or pine are classics for a reason—they offer incredible durability and a timeless feel. But, they also come with a higher price tag and demand a bit more skill to work with.
For most DIY projects, engineered woods are a fantastic and incredibly popular alternative. Materials like MDF (Medium-Density Fiberboard) and high-quality plywood are more affordable, incredibly stable, and way less prone to warping than solid wood.
If you plan on painting your wardrobe, MDF is your best friend. It gives you a perfectly smooth surface. Plywood, on the other hand, brings excellent structural strength to the table, making it ideal for the wardrobe's main frame.
Beyond the big sheets of wood, it's the small hardware components that make a wardrobe truly functional. Don't cheap out here. Trust me, nothing ruins a beautifully built piece of furniture faster than flimsy hardware.
Your hardware shopping list should definitely include:
You absolutely do not need a professional-grade workshop to build an amazing wardrobe. However, having the right tools makes the job infinitely easier, safer, and more precise. There are some tools you just can't get by without, and others that just make the whole process cleaner and more professional.
My Two Cents: If you invest in anything, make it a good-quality tape measure and a reliable combination square. Almost every single step in building furniture relies on accurate measurements and perfectly square angles. A tiny error here can snowball into a massive headache later on.
For a successful project, you’ll need this core set of tools. Think of these as your non-negotiables:
A pocket hole jig is a fantastic “nice-to-have” tool. It's a game-changer for creating strong, hidden joints that give your project a truly professional finish. For a more detailed breakdown, check out our comprehensive guide on essential furniture assembly tools.
Having everything you need ready to go before you make the first cut saves you from those frustrating mid-project runs to the hardware store.
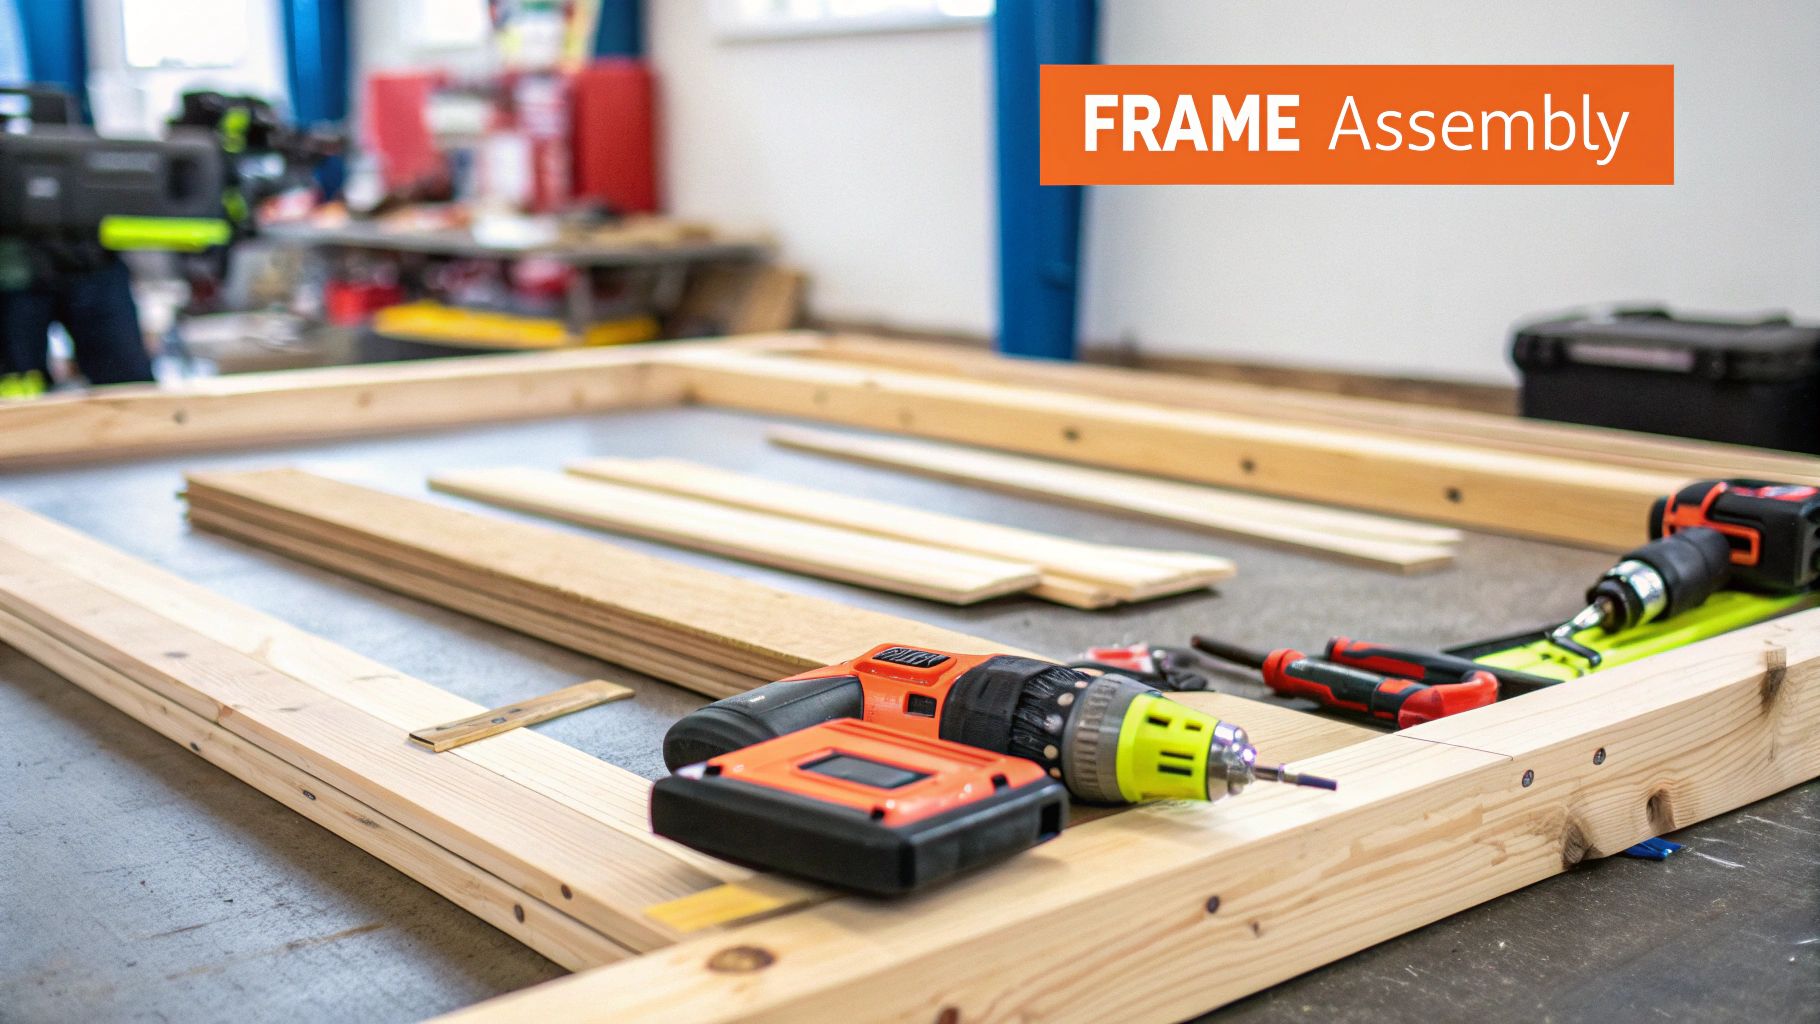
Alright, this is where the real work begins. Your DIY wardrobe project is officially moving from paper plans to physical pieces. How carefully you handle this stage will make or break the final product. There's an old saying every woodworker lives by: "measure twice, cut once." It’s a classic for a reason—it’s the single best piece of advice to avoid wasting expensive materials and hours of your time.
Getting your measurements spot-on is about more than just reading a tape measure. Let's be honest, homes are never perfect. You’ll quickly discover that your walls, floor, or ceiling probably aren't perfectly straight or square.
That's why you need to take multiple measurements for every single dimension. When checking the height for the wardrobe, measure on the left, in the center, and on the right side of the space. Do the same thing for the width—measure at the top, middle, and bottom. Always, and I mean always, use the smallest measurement for your final plan. This guarantees your wardrobe will actually fit, even in the tightest spot.
Once you have your final dimensions locked in, it's time to draft a detailed cutting list. This isn't just a simple list of parts; it's your game plan for getting the most out of your wood sheets and keeping waste to a minimum. Pull out your design sketch and list every single component you'll need:
Next to each part, write down the exact length and width. This list becomes your bible when you start cutting. It prevents any confusion and ensures you have every piece accounted for. If you want to get really granular, our guide on how to measure furniture has some extra techniques that are a huge help at this stage.
Now for the fun part. You don't need a high-end table saw to get straight, splinter-free cuts with a circular saw. The secret weapon here is a straightedge guide. This can be as simple as a long level, the factory-cut edge from another piece of plywood, or a purpose-built track saw guide.
Pro Tip: When cutting plywood or MDF, lay down painter's tape along your cut line before you start sawing. It’s a simple trick, but it makes a world of difference in preventing tear-out and chipping. The result is a much cleaner, professional-looking edge.
Clamp your guide down firmly, making sure your saw's base plate will run right up against it. It's also crucial to support both sides of the wood sheet. You don't want the piece you cut off to drop, as it can splinter the edge or even create a dangerous kickback situation.
Most importantly, be safe. Always wear your safety glasses and hearing protection. Keep your hands well away from the blade's path and never, ever try to adjust anything while the saw is powered on. A successful project is a safe one, period.
Now for the fun part. With all your pieces cut and ready, it's time to see your wardrobe take shape. This is where those flat panels finally start looking like a piece of furniture. We'll kick things off by building the main frame, what we call the carcass, which is the skeleton of the whole project.
Find a clean, level spot on the floor—this will be your best friend for the next hour. Lay one of the side panels down flat. You're about to attach the top and bottom panels, which is the first step in creating the wardrobe's structure and strength.
How you join these first few pieces together really dictates how sturdy and professional the final product will look. A simple, no-fuss method is to drive screws directly through the side panels into the edges of the top and bottom panels. Just do yourself a favor and pre-drill the holes to keep the wood from splitting.
If you want a cleaner, more finished look with no screw heads showing, a pocket hole jig is a fantastic tool to have. It lets you drill angled holes on the inside of your top and bottom panels. The screws then go into the side panels from the inside, creating a super strong joint that's completely invisible from the outside.
The single most important thing to get right here is making sure your frame is perfectly square. Grab a large carpenter's square or use the "diagonal measurement" trick. Measure diagonally from corner to corner, then measure the other diagonal. If those two numbers match exactly, you've nailed it. Your frame is square.
Once one side is on, carefully flip the unit over and attach the second side panel using the same technique. Before you tighten every last screw, check for square one more time. Trust me, a slightly wonky frame now will turn into a massive headache when you're trying to hang doors or fit drawers later.
With the main frame standing, you can start bringing the inside of your wardrobe to life. This means fitting your fixed shelves, vertical dividers, and any drawer supports you included in your design. At this stage, accurate spacing is everything.
Use a tape measure and pencil to mark the precise positions for each interior piece on both side panels. A combination square is perfect for drawing perfectly level lines across the inside of the carcass to guide your installation.
You've got a few options for securing the interior parts:
When you're figuring out the best construction methods, it can be helpful to look at how professionals handle custom cabinetry. Their techniques for building strong, integrated units are spot-on. This visual guide shows the critical steps for hanging doors, which is a key part of the final assembly.
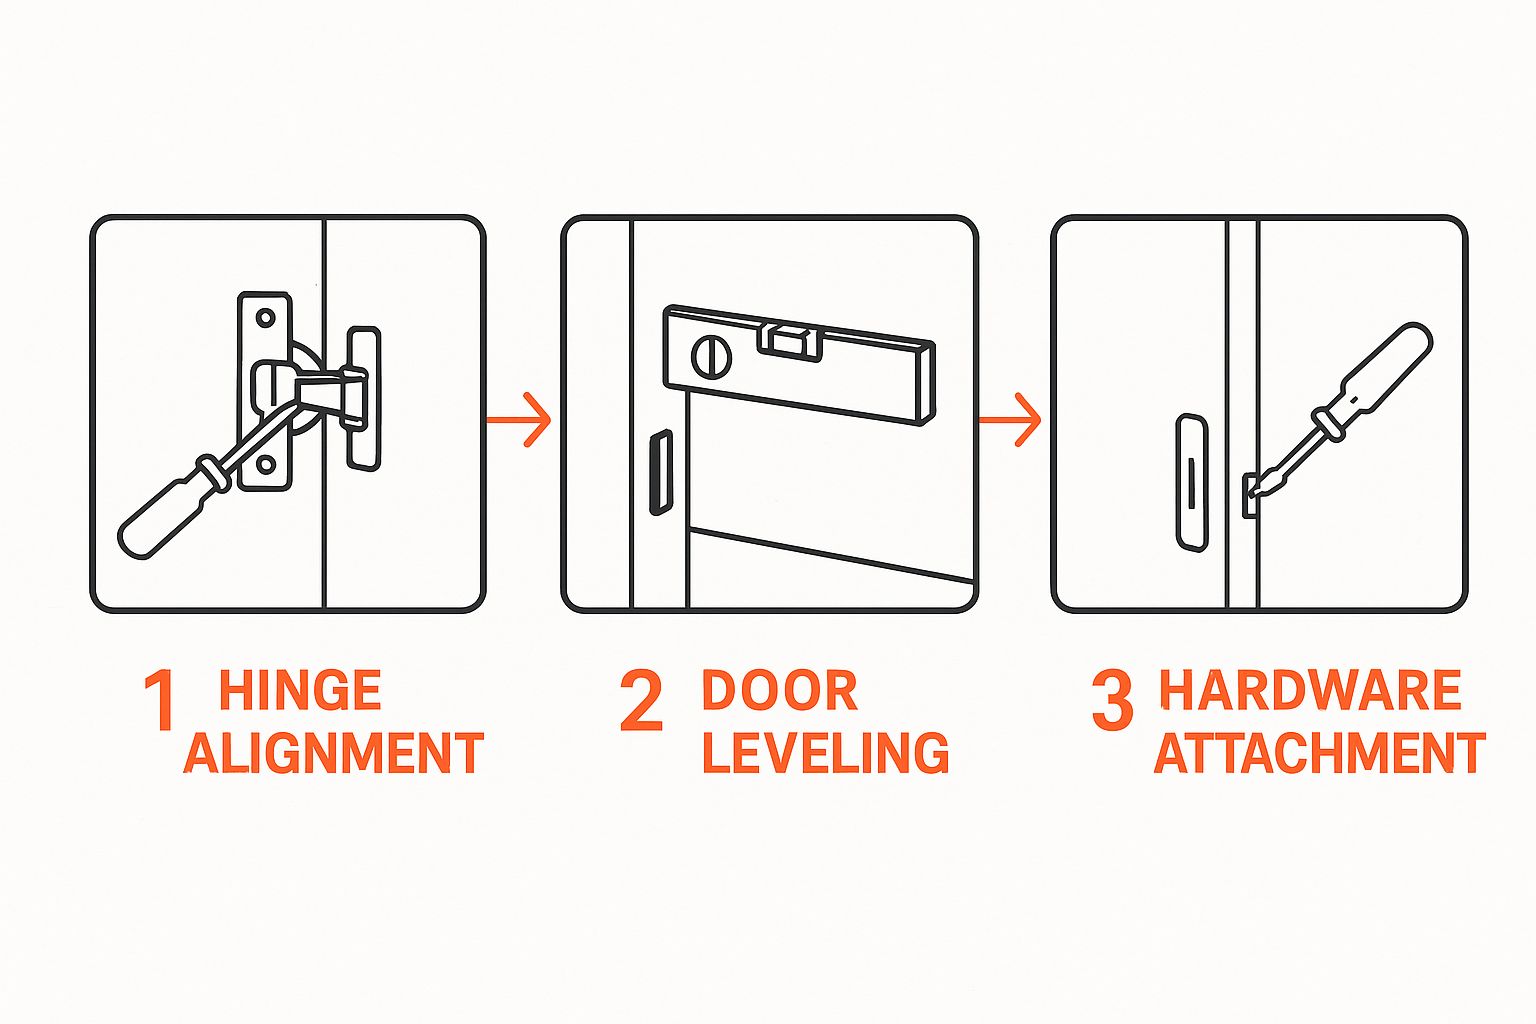
As you can see, getting the alignment and leveling just right is what makes the difference between a DIY project and a professional-looking piece of furniture.
Finally, attach the thin back panel to the frame using small nails or screws. It might not seem like much, but this one step adds a huge amount of rigidity to the entire structure and stops it from wobbling. Don't skip it
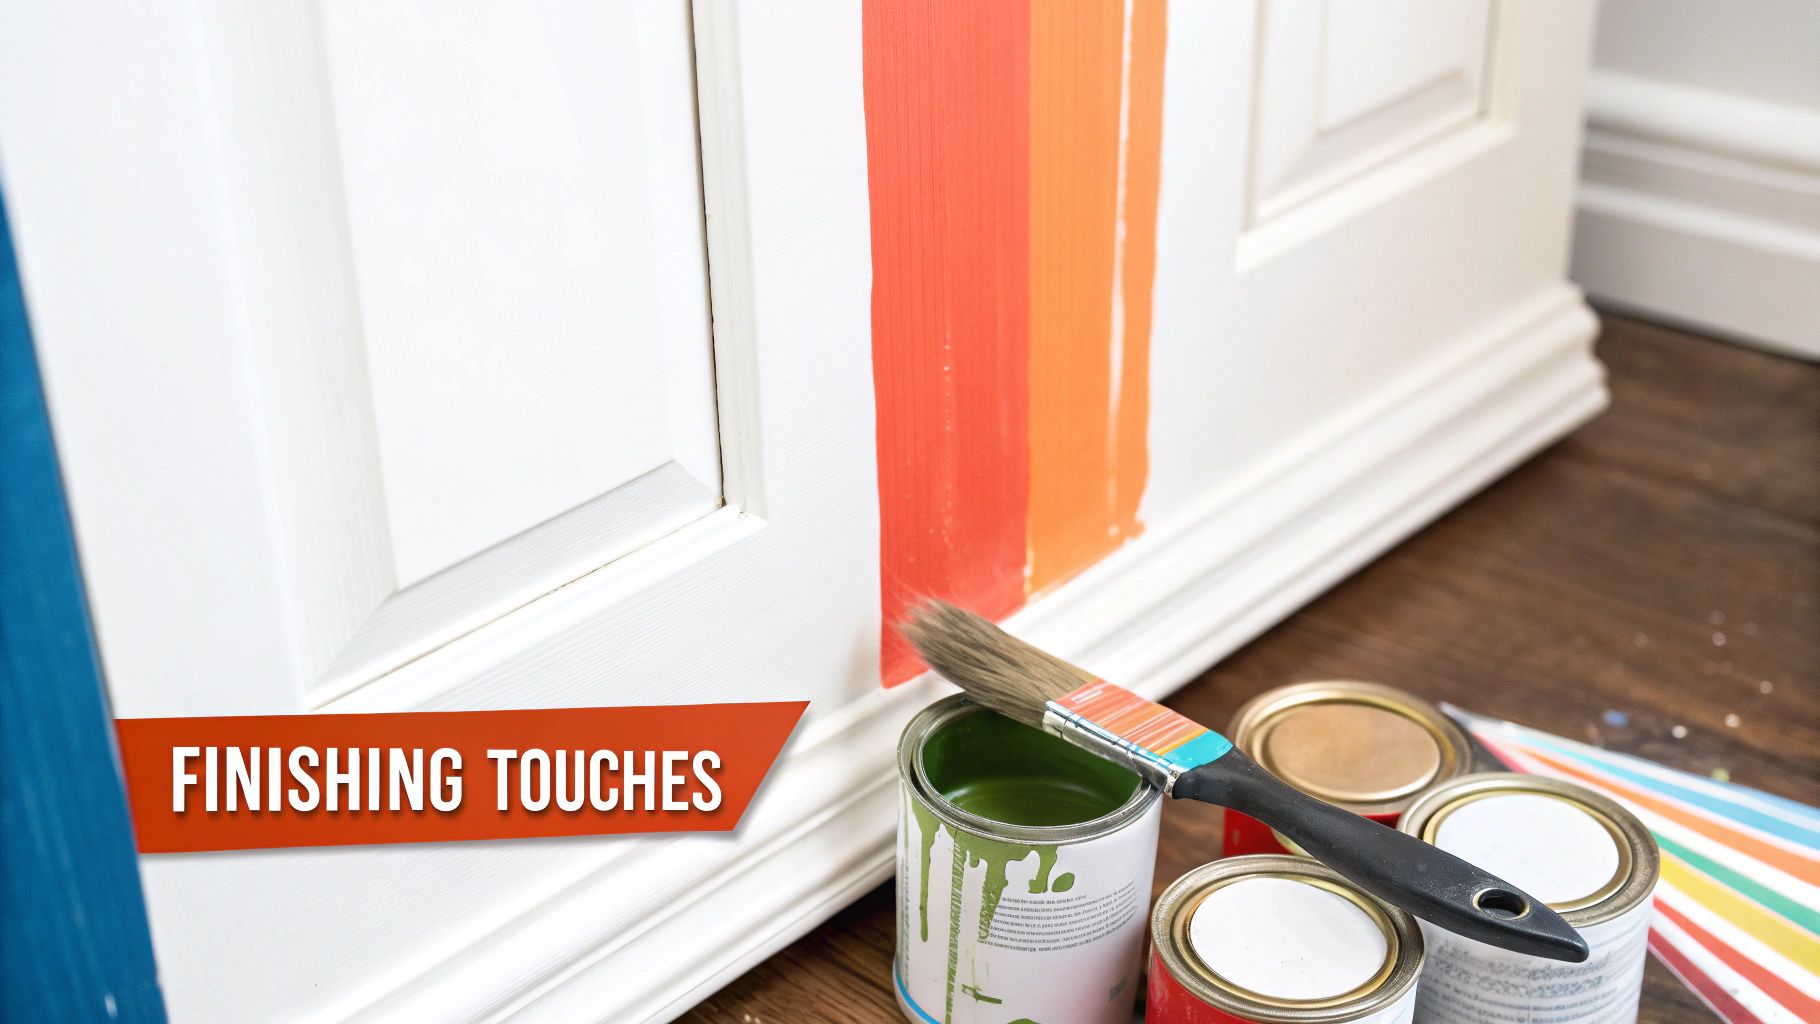
This is where the magic really happens. The final steps of any wardrobe build are what elevate it from just a wooden box into a polished, professional piece of furniture. All that careful work comes together here, turning your raw structure into a storage solution that looks like it was always meant to be in your home.
It all comes down to precision. From hanging doors so they swing without a whisper to ensuring drawers glide open effortlessly, your attention to detail is what counts. It might feel like a big final push, but if you break it down, it's totally manageable.
For a clean, modern look, you can't beat concealed Euro-style hinges. I use these all the time. They're fantastic because they let you adjust the door in three different directions (up/down, in/out, and side-to-side) after it's already hanging. This is an absolute lifesaver for getting those door gaps perfectly even.
When it comes to drawers, your two biggest priorities are building sturdy boxes and picking the right slides. I almost always recommend ball-bearing slides. They give you that smooth, quiet action that just feels high-quality. Installing them takes some careful measuring to make sure the drawer front sits perfectly flush and doesn't scrape, but it's well worth the effort.
Here's a pro-tip I learned the hard way: always install hardware like hinges and handles on the doors and drawers before you hang them. It's so much easier to do this with the pieces lying flat on a workbench instead of trying to juggle a heavy door while drilling.
The finish you choose is more than just a final coat; it protects the wood and truly defines the final look of your wardrobe. Whether you're going with paint, stain, or a simple varnish, the one non-negotiable step is surface prep. You have to sand everything down until it's perfectly smooth and then meticulously clean off every speck of dust before you even think about opening a can of paint.
Picking a finish can feel overwhelming with all the options out there. This table breaks down the most common choices to help you decide what's best for your project, skill level, and desired look.
| Finish Type | Appearance | Durability | Application Difficulty |
|---|---|---|---|
| Paint | Opaque, solid color. Hides wood grain. | High | Moderate |
| Stain | Transparent. Enhances wood grain. | Low (needs topcoat) | Easy to Moderate |
| Varnish | Clear, protective film. Glossy or satin. | High | Moderate to Hard |
| Polyurethane | Clear plastic resin. Extremely durable. | Very High | Moderate |
Each finish has its place. Paint is great for a seamless, modern look on MDF, while a good stain on solid wood is classic for a reason. Don't be afraid to combine them, like a painted frame with stained drawer fronts.
For a really professional and long-lasting paint job, look into the best paint for trim. These products are designed to handle the wear and tear of high-touch areas, which is perfect for a wardrobe you'll be using every day.
This focus on a quality finish reflects a bigger trend. People want furniture that is both functional and stylish, which is why the global wardrobe market is expected to reach USD 123.79 billion by 2034. Consumers are looking for custom pieces that fit their lives, not just generic boxes.
Now for the jewelry of your wardrobe: the handles, knobs, and hanging rods. This is the last touch that pulls the whole project together. A simple drilling jig is a great little tool to help you place your handles in the exact same spot on every door and drawer for a clean, consistent look.
If tackling all this final hardware feels like a step too far, don't sweat it. After all the work of building the main structure, it's not uncommon to feel a bit burned out. If you've ever been defeated by a flat-pack project, you might find some helpful tips in our guide to IKEA furniture assembly, as many of the principles are the same.
Even when you’ve got a solid plan, building a wardrobe from the ground up can feel like a puzzle with a few tricky pieces. It's totally normal for questions to pop up mid-project, and you're certainly not the first person to get stuck. Let's tackle some of the most common things people ask when they're figuring out how to build their own wardrobes, so you can keep your project moving forward.
One of the very first things most people wonder is what material to use. Solid wood is gorgeous, no doubt, but it can be pricey and pretty unforgiving if you're new to woodworking. For your first go, I'd strongly recommend high-quality MDF (Medium-Density Fiberboard) or birch plywood. They're both fantastic starting points.
If you're planning to paint your wardrobe, MDF is your best friend. Its surface is dense and smooth, which means it takes paint beautifully for a finish that looks like it came from a high-end shop. Plywood, on the other hand, has superior structural strength. This makes it a great choice for the main frame or "carcass," as it’s much less likely to sag over long spans, like your shelves.
Honestly, setting a budget isn't about finding a magic number—it’s all about the choices you make. The final price tag for your wardrobe really boils down to three key things:
For a ballpark figure, you could probably build a simple, freestanding wardrobe out of MDF for somewhere between $200 and $400 in materials. If you’re dreaming bigger with a complex built-in unit made from high-grade plywood and premium hardware, you’re likely looking at a budget in the $700 to $1,200 range, or even more. Always tack on an extra 10-15% to your initial guess for those little surprises, like needing more screws or accidentally ruining a piece of wood.
My biggest piece of advice? Price your hardware early. It's the one expense almost everyone underestimates. A full set of quality hinges, drawer slides, and handles can add up in a hurry, so get those costs into your budget from day one.
Getting that clean, truly "built-in" look is all about hiding the gaps between your wardrobe and the surrounding walls and ceiling. Let’s be real, no room is perfectly square, so you're going to have small, uneven gaps. The pro trick is to hide them with trim and filler strips.
Once you have the main wardrobe box installed, measure those gaps carefully. Then you'll cut strips of wood or MDF—these are your filler strips—to fit perfectly into those spaces. After you attach them, you can use painter's caulk to blend the joints where the strips meet the wall, making it look totally seamless.
To finish it off, install decorative molding that matches what's already in the room, like crown molding at the top or baseboards along the bottom. This little detail is what makes the wardrobe look like it was always meant to be there, a true part of the room's architecture.
Feeling like this project might be a bit more than you signed up for? If the thought of all that cutting, assembling, and finishing is starting to feel overwhelming, you can always let the pros handle it. Assembly Smart offers professional, in-home furniture assembly services that take all the stress out of your hands. Get a free, transparent quote and enjoy a perfectly assembled piece of furniture without lifting a finger.
