-
CALL US:
- (866) 952-3456
You wouldn't start a road trip without checking the oil and tires, right? The same logic applies to moving your furniture. Proper protection begins long before you even touch a roll of packing tape. Taking the time to document, clean, and measure everything is the single best thing you can do to prevent those heartbreaking scratches, dings, and costly damages.
I've seen it countless times: people jump straight to wrapping their furniture, only to find damage at their new home. A successful move isn't about brute force; it's about smart, upfront preparation. A few key steps now will save you a world of frustration later.
And the stakes are higher than you might think. A recent study found that Americans have shelled out around $23.5 billion to fix or replace furniture damaged during a move, with the average repair bill hitting $287. When you think about what you paid for that dining set or your favorite armchair, an hour of prep work suddenly seems like a pretty good investment.
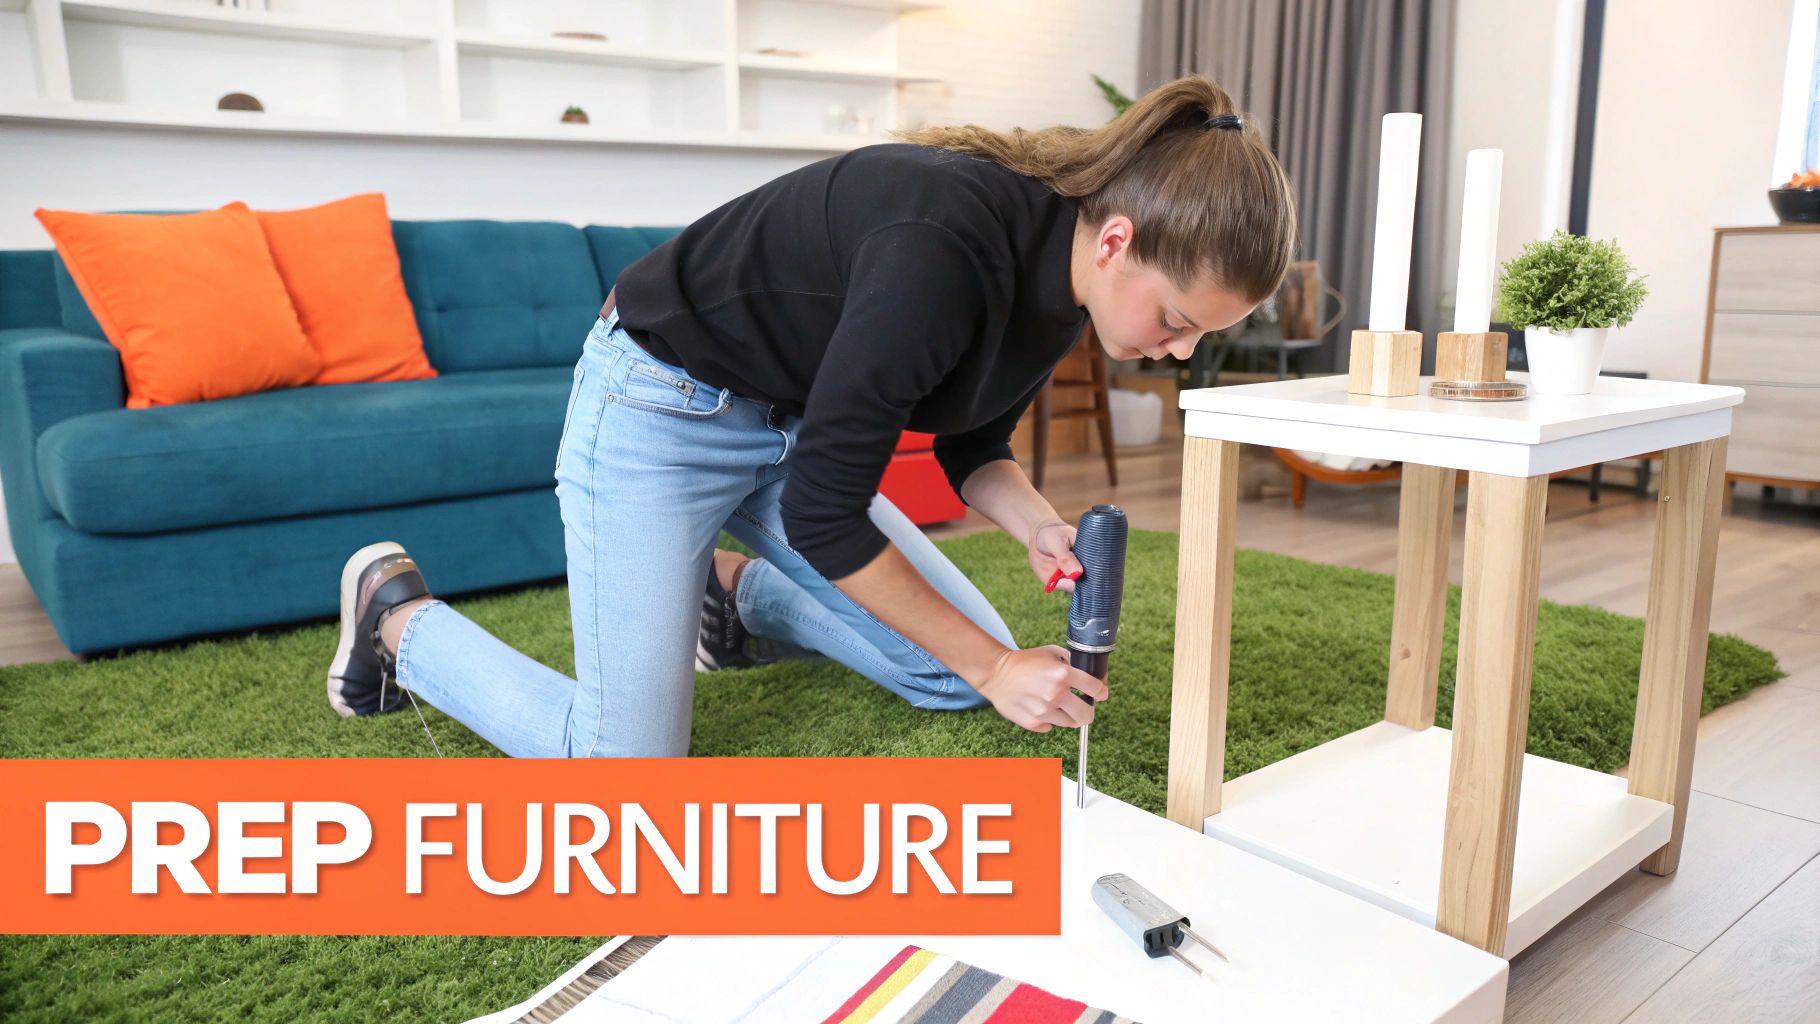
First things first, create a quick visual inventory. Walk through your home with your phone and snap clear photos or a short video of each piece of furniture. Make sure to get shots from multiple angles.
Get up close and document any existing character marks—a small scratch on a table leg, a scuff on a dresser's side. This isn't about being nitpicky; it's about being prepared.
Pro Tip: This documentation is your "before" photo. If something unfortunate happens during the move, you'll have a clear record to back up any potential insurance claims. It’s a simple step that provides powerful protection and avoids any "he said, she said" debates.
Next up, give every piece a good wipe-down. Dust, grit, and other tiny bits of debris left on a surface can act like sandpaper when trapped under a moving blanket. The constant vibration and friction in the truck can easily cause fine scratches and wear away the finish.
Here's a quick breakdown:
If you have pets, this is also the perfect time to tackle any lingering smells. A guide on removing stubborn pet odors from furniture can be a lifesaver, ensuring your pieces arrive fresh and clean.
To make this even easier, here’s a quick checklist to keep you on track.
This table is your quick-reference guide to make sure you've covered all the essential prep work before the heavy lifting begins.
| Task | Why It's Important | Pro Tip |
|---|---|---|
| Visual Inventory | Provides proof of pre-move condition for insurance claims. | Take photos and a short video walkthrough for comprehensive coverage. |
| Deep Clean | Removes abrasive dust and grit that can scratch surfaces during transit. | Use a microfiber cloth; its fibers are excellent at trapping fine dust particles. |
| Measure Furniture | Ensures items will fit through doorways, stairs, and hallways. | Write dimensions directly on a sticky note and place it on the item itself. |
| Measure Pathways | Prevents damage to both the furniture and your home (walls, doorframes). | Don't forget to measure tight corners and stairwell landings—they're common trouble spots. |
Completing these simple tasks creates a solid foundation for the rest of your packing process and dramatically increases the odds of a damage-free move.
Finally, live by the old carpenter’s rule: measure twice, move once. Take your tape measure and get the dimensions of your largest pieces—your sofa, that antique armoire, the king-size bed frame.
Then, go measure the doorways, hallways, and any stairwells they need to navigate. This simple task helps you spot potential bottlenecks ahead of time and map out a clear exit strategy. It's a game plan that prevents you from getting a sofa wedged in a staircase. Plus, this forethought comes in handy later when you’re figuring out placement and need to know how to secure furniture to the wall safely in your new space.
Trying to protect your furniture for a move without the right supplies is a recipe for disaster. I've seen it countless times—people think a few old towels and some duct tape will do the trick, only to end up with scratches, dents, or worse. If you want to avoid damage, you need to invest in a proper toolkit. This isn't just about buying stuff; it's about understanding what each tool does and why it's essential for a smooth, damage-free move.
Think of professional-grade moving blankets as your first line of defense. They’re not like your grandma's old quilt. These are thick, padded workhorses designed to absorb impacts and shield surfaces. A single good blanket can be the difference between a pristine wood table and one with a deep, heartbreaking gouge.
Of course, a blanket is only useful if it stays put. That’s where stretch wrap comes in. The beauty of this stuff is that it clings to itself, not your furniture, so you won't be left with a sticky mess to clean up later. It’s perfect for holding blankets tightly against a dresser or keeping those pesky cabinet doors and drawers from flying open in the truck.
A lot of people get confused between stretch wrap and bubble wrap, but they have very different jobs. It's a critical distinction.
Whatever you do, never apply bubble wrap directly to wood or leather furniture. The plastic can trap moisture and heat, which can completely ruin the finish, especially if you're moving long-distance in the summer.
Pro Tip: Don't skimp on the small stuff. Cardboard corner protectors might seem minor, but they are lifesavers. Corners on dressers, tables, and bookcases are magnets for dings and chips when navigating tight hallways and doorways. These little things prevent the most common type of damage I see.
So, how much should you get? A solid rule of thumb is to have at least two moving blankets for every large piece of furniture like a sofa, armoire, or dining table. For stretch wrap, one large roll will usually cover four to five big items. I always recommend grabbing an extra roll; it’s far better to have too much than to run out mid-wrap.
You don't have to break the bank, either. You can often rent high-quality moving blankets from truck rental agencies, which is much cheaper than buying them outright. For everything else, buying in bulk from a dedicated moving supply store is almost always a better deal than running to the local hardware store multiple times.
Getting your supplies in order is just as important as the disassembly itself. And if you're thinking ahead to the other end of the move, our guide on how to prepare for your furniture assembly project offers some great tips for making the reassembly process just as smooth.
I get it—the thought of taking your furniture apart can feel like just one more chore on an endless moving checklist. But trust me on this one: it's one of the smartest things you can do to protect your bulky or oddly-shaped pieces. A massive dining table that seems impossible to move suddenly becomes a manageable tabletop and four separate legs. Easy.
This isn't about creating more work; it's about reducing risk. When you break down a large item, you're making it lighter and way less awkward to carry. This simple step dramatically cuts down the odds of scraping the furniture itself or, just as frustratingly, gouging your walls, floors, and doorframes on the way out.
Just picture your big, comfy sectional sofa. Trying to wrestle that L-shape around a tight hallway corner is a recipe for disaster. But if you separate it into its individual sections, that one stressful task becomes a few simple, straightforward carries.
You don't need to disassemble everything you own, so a little bit of strategy here goes a long way. The goal is simply to make items easier to handle and protect.
Here are the usual suspects I always recommend taking apart:
Now, for pieces like antique armoires or solid wood dressers that weren't built to be taken apart, it's almost always better to leave them be. Trying to force these can cause serious, permanent damage. If you're ever on the fence, the safest bet is to leave the item intact and focus on wrapping it extremely well.
The single biggest headache I see people run into is lost hardware. There's nothing worse than getting to your new home, ready to set up your bed, only to find you have a pile of wood and no idea where the bolts are.
The Hardware System: For every single piece of furniture you take apart, put all of its unique screws, bolts, and washers into a small, sealable plastic bag. Immediately label that bag with a permanent marker (e.g., "Dining Table Legs," "Master Bed Frame"). Then, securely tape that bag directly onto the largest component it belongs to.
This one small step is an absolute game-changer. It takes all the frantic searching and guesswork out of reassembly. Instead of a frustrating puzzle, you have a simple, follow-the-label task. This organized method is a crucial part of learning how to protect furniture when moving because it preserves both the condition of your items and your own sanity.
Alright, you've got your furniture prepped and your supplies laid out. Now comes the part that really counts. Every piece of furniture is different, and you can't just throw a blanket over everything and call it a day. A solid oak dresser needs a completely different approach than your favorite upholstered armchair or that glass coffee table you love.
Learning a few specific wrapping techniques is the real secret to how to protect furniture when moving. These are the methods we pros use, honed over years of experience to prevent everything from annoying scuffs to heartbreaking structural damage.
This image gives you a quick rundown of the basic prep work before you even start wrapping.
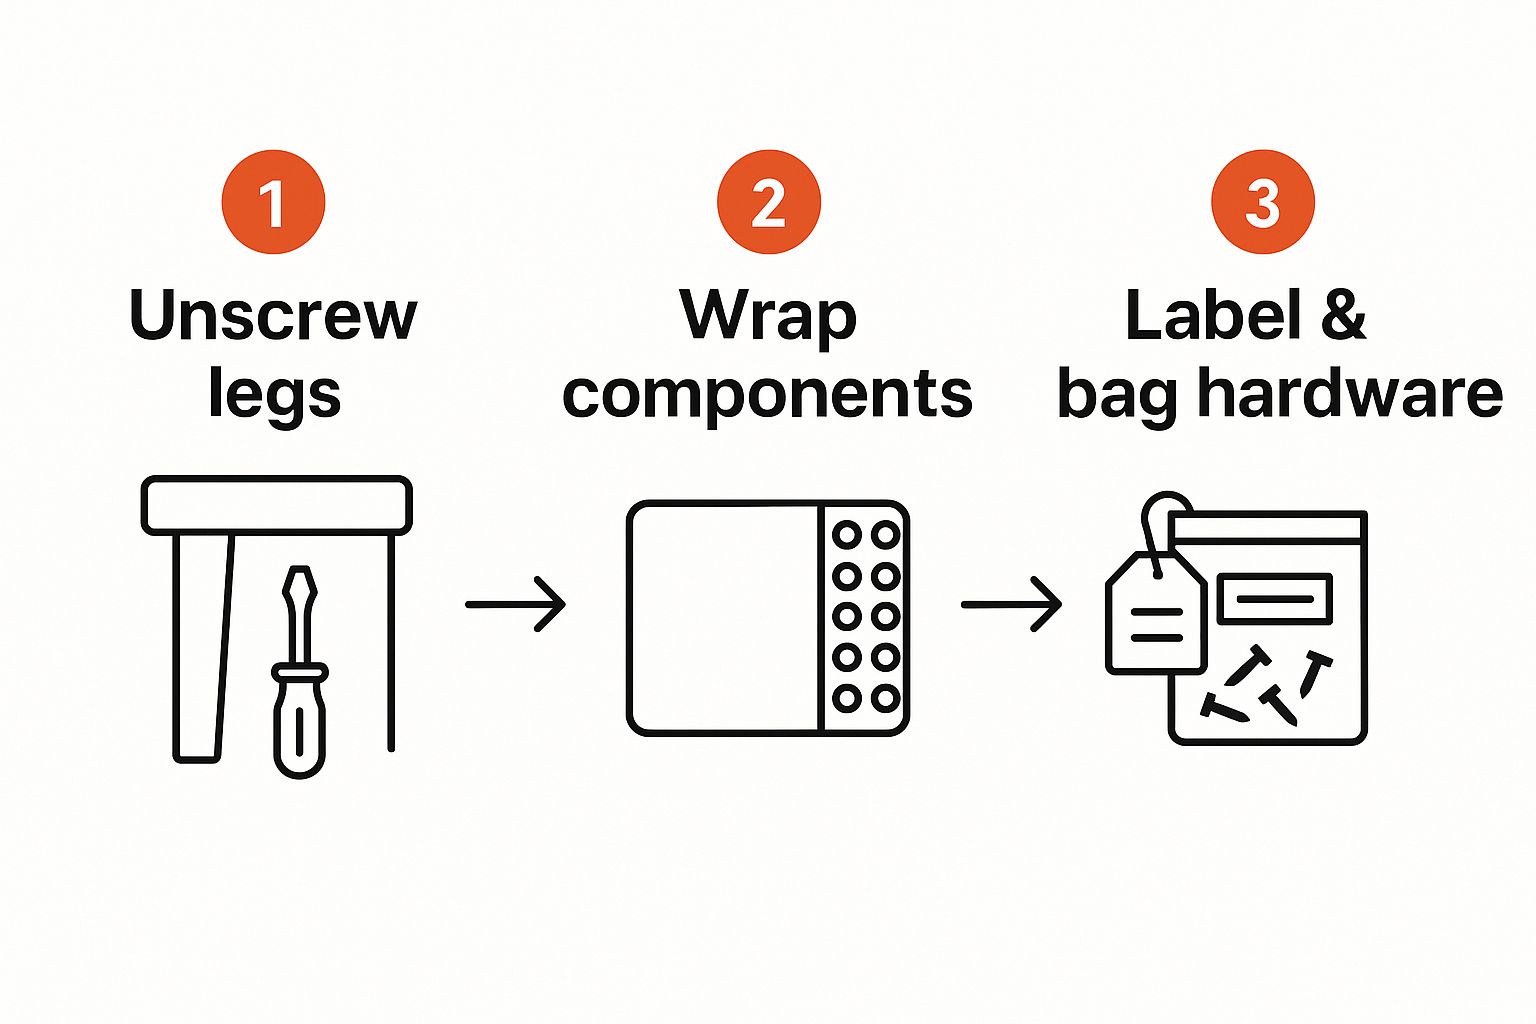
As you can see, taking things apart and keeping track of all the little bits and pieces first makes the actual wrapping process a whole lot smoother.
For your wood pieces—dressers, tables, bookcases, you name it—the goal is to create a thick, protective cocoon.
Start by draping a heavy-duty moving blanket over the entire piece. Make sure it's completely covered. You'll want to pay extra attention to the corners and edges, as those are the first places to get dinged when navigating tight spaces.
Once the blanket is positioned just right, grab your stretch wrap. Begin at the bottom and wrap your way up, overlapping each layer as you go. The tension from the wrap is what holds the blanket snugly against the wood, stopping it from slipping off or snagging on a doorway. This simple one-two punch is your best defense against scratches and dents.
Ask any moving professional and they'll tell you: most damage comes from bad packing. People either skip the padding altogether or don't secure it properly, leading to nicks and scratches. Unsecured items sliding around in the truck is another huge culprit for structural breaks. You can read more about common moving damage on Headband.biz to see what you're up against.
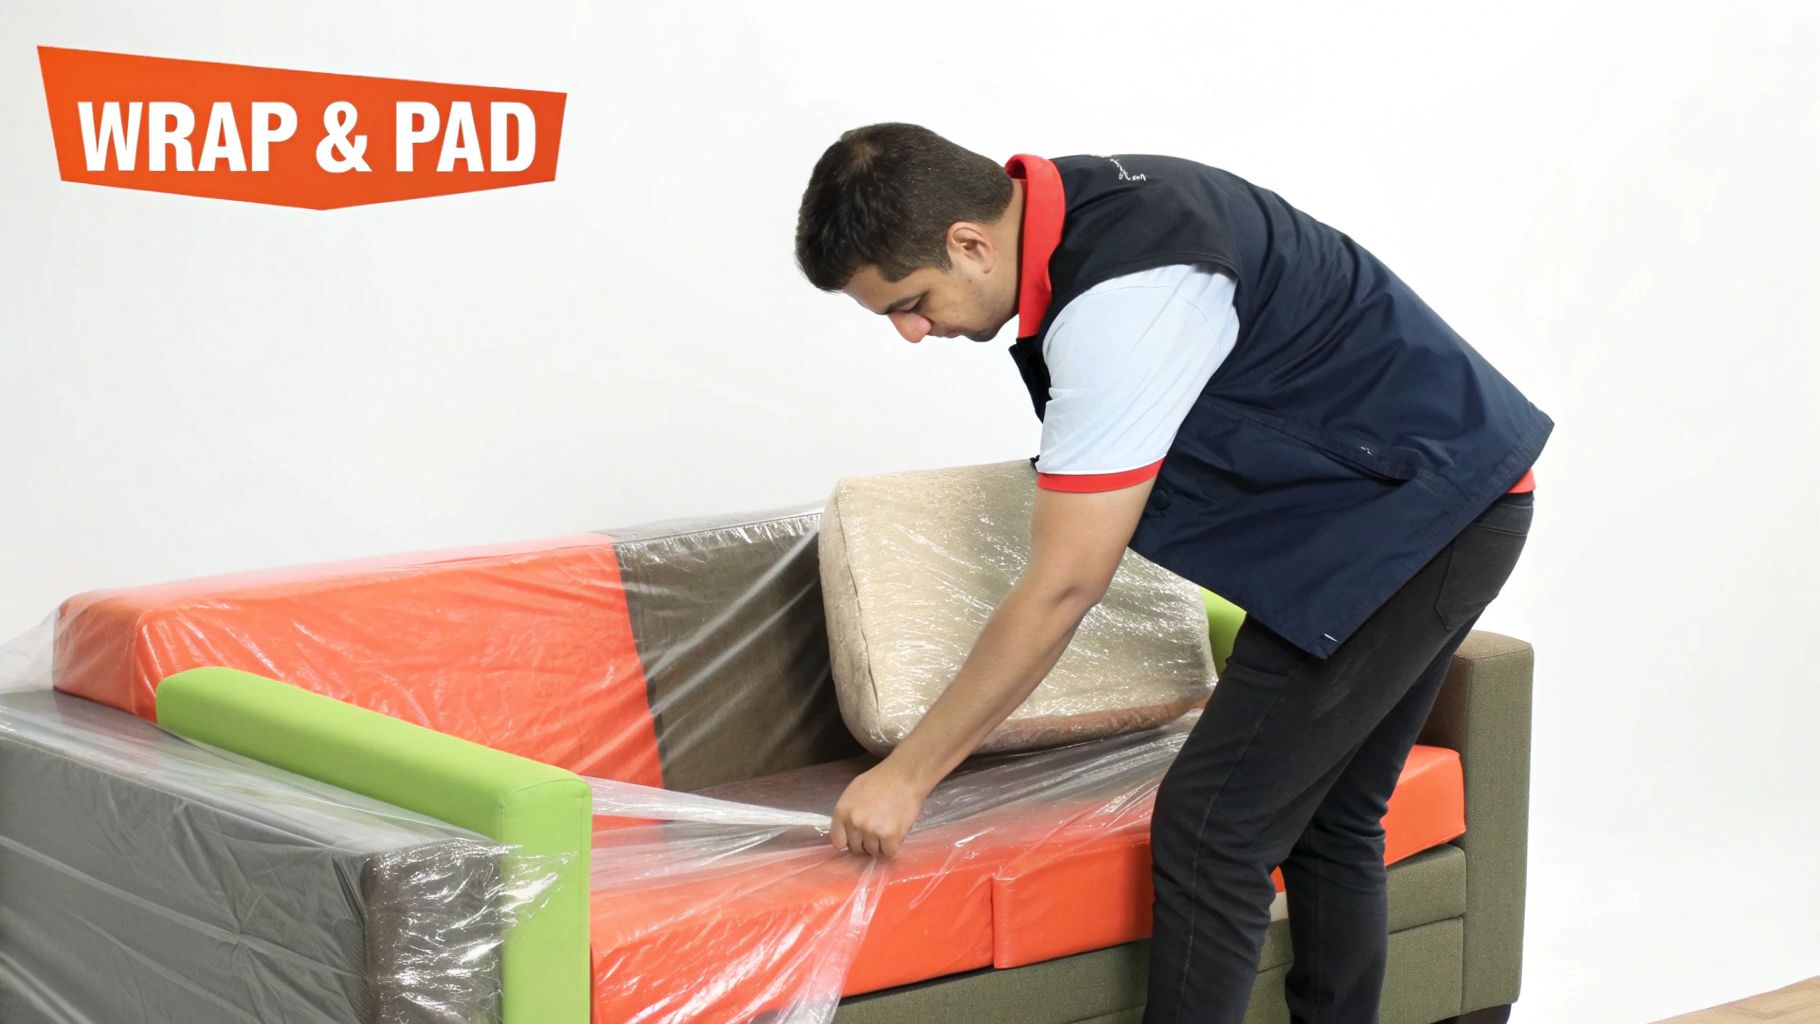
When you’re dealing with sofas, armchairs, and anything with fabric, your primary concerns are dirt, dust, and moisture. A moving blanket is great for padding, but you need a first line of defense to keep the fabric itself clean.
Before you even think about a blanket, cover the entire piece with a plastic sofa or chair cover. These are purpose-built for moving. Unlike a simple plastic sheet, they're designed to be breathable, which is critical for preventing condensation that can lead to mildew. After the plastic cover is on, then you can wrap it in a moving blanket for cushioning and use a light layer of stretch wrap to hold it all together.
Glass tabletops, large mirrors, and framed art demand the highest level of care. For these, we use what’s called the "sandwich" technique. It’s the industry gold standard for a reason.
Here’s the breakdown:
One last critical tip: Always, always, always transport these "sandwiched" items on their edge. Never lay them flat. If you do, they become incredibly vulnerable to shattering if something heavy gets stacked on top. Getting these details right is what separates a smooth move from a stressful one.
How you load the truck is every bit as important as how well you wrapped each piece. A sloppy packing job means shifting, sliding, and impact—the three things that will absolutely destroy your furniture. The real goal isn't just to make it all fit; it's to create a solid, tightly packed load where nothing can move an inch.
I always tell people to think of it like a high-stakes game of Tetris. The strategy the pros use is to build solid "walls" of boxes and furniture, working from the floor all the way up to the ceiling. This creates stable tiers and stops things from toppling over when the truck hits a bump.
The first rule of loading is a simple one: heavy items go in first and stay on the bottom. This means your absolute heaviest pieces—we're talking washing machines, solid wood armoires, and refrigerators—get loaded first. They need to go right up against the front wall of the truck, the one closest to the cab.
Positioning them at the front puts most of the weight over the truck's front axle, which makes for a much safer, more stable drive. You never want your heaviest stuff at the back; that's how you get that dangerous fishtailing sway on the highway. If you need more tips for wrangling these beasts, our guide on easy ways to move heavy furniture has some great strategies.
Once your bulkiest items are set, you can start building out your first tier. A good loading order looks something like this:
With your base firmly in place, you can start on the next layer. This is where your medium-weight boxes and lighter furniture come in. The mission here is to create tight, interlocking sections with no wiggle room.
Think in columns. Stacking boxes of similar sizes on top of each other builds stable pillars. It sounds obvious, but when you're in a rush, it's easy to forget: heavier boxes always go on the bottom of a stack, with lighter ones on top. A box of books under a box of pillows is perfect. The other way around is a disaster waiting to happen.
Pro Tip: Never leave empty space. Gaps are the enemy because they let items shift and gain momentum before they collide. You have to fill every nook and cranny. Use soft items like bags of clothes, pillows, cushions, or even rolled-up rugs to brace the entire load. It's like adding an extra layer of shock absorption.
Finally, as you complete each major section of the truck—about every 5-8 feet—it's time to use your ratchet straps or moving ropes. Run them from one side of the truck to the other, hooking them into the built-in E-track rails or wooden slats along the walls.
Crank those straps down as tight as you possibly can. They're your final line of defense. They lock your carefully built tiers together and prevent anything from shifting forward or backward when the truck inevitably stops and starts. A properly strapped load is a safe load, and it's the key to making sure your furniture arrives looking exactly as it did when you packed it.
Even the most seasoned movers run into tricky situations. When it comes to protecting your furniture, a few common questions always seem to surface. Let's clear up some of the most frequent queries so you can feel totally prepared when moving day arrives.
It's a common thought—why spend money on moving pads when you have a closet full of old blankets and comforters? Honestly, it's a gamble that almost never pays off. Your household blankets are just too thin and weren't designed to handle this kind of abuse.
Think of it this way: professional moving pads are built for one job. They have thick, dense batting specifically engineered to absorb the shock from a jolt or impact, preventing deep gouges and dents. A bed quilt might prevent a minor surface scuff, but it's no match for the sharp corner of a bookshelf when the moving truck hits an unexpected pothole.
Think of moving pads as armor for your furniture; a regular blanket is more like a thin t-shirt. It's just not the same level of protection.
Yes, you absolutely do. This is a non-negotiable step. Leaving clothes, books, or anything else in your drawers creates two huge risks.
First, the extra weight makes the furniture incredibly awkward and heavy, dramatically increasing the chances of it being dropped. Second, everything inside will shift and slam around during transport. This can easily damage the interior of the drawers or even cause the bottoms to break out. An unstable, top-heavy dresser with drawers flying open is a recipe for disaster on a staircase.
A Pro's Perspective: When moving companies assess damage claims, their responsibility is often linked to whether the items were packed correctly. While movers are liable for damage caused by their own negligence, leaving drawers full could be considered improper preparation on your part, potentially affecting a claim.
If you can, always remove the legs. It’s the single best thing you can do. This takes the most fragile and easily-snapped part of the furniture out of the equation. Just wrap each leg individually in bubble wrap or a moving blanket, put all the screws and bolts into a labeled Ziploc bag, and tape that bag securely to the underside of the main piece.
For legs that don't come off, your best bet is to wrap each one meticulously. Use several layers of bubble wrap, covering the entire leg from top to bottom, and then secure it tightly with packing tape or stretch wrap. You want to create a thick, shock-absorbing cushion that can stand up to bumps and scrapes in the truck.
For more answers to specific questions like this one, our general furniture moving FAQ page is a great resource.
And once you're settled in, keeping your pieces in great shape is the next step. You might even consider a professional furniture and upholstery cleaning to give everything a fresh start in your new home.
