-
CALL US:
- (866) 952-3456
Let's be honest, furniture stores aren't exactly shouting from the rooftops about the potential dangers lurking in your stylish new bookcase. They're showcasing aesthetics, not the physics of a 200-pound piece of furniture deciding to take a tumble. I've chatted with ER staff and insurance adjusters, and let me tell you, their stories about furniture tip-over accidents are enough to make your hair stand on end. These accidents are far more frequent than you'd imagine, and the consequences can be truly devastating. We're not just talking scuffed walls; we're talking serious injuries, even fatalities.
Even furniture that appears incredibly stable can unexpectedly become a hazard. A friend once told me about their toddler climbing on a dresser that seemed utterly immovable. Suddenly, it tipped, trapping the child underneath. Thankfully, they were close by and reacted quickly, but that experience completely shifted their perspective – and mine – on home safety. For added peace of mind, consider using specialized straps like these: furniture child safety straps.
Certain areas in your home are inherently riskier than others. Think about nurseries and kids' bedrooms, where dressers are often piled high with clothes, making them top-heavy and prone to tipping. Living rooms with large entertainment centers are another potential danger zone, particularly with energetic kids or pets who might try to climb or pull on them. And here’s a sobering statistic: the global furniture market was estimated at USD 666.5 billion in 2024 and is projected to hit USD 1.09 trillion by 2034, growing at a CAGR of 5.2%. More furniture means a greater risk of tip-overs. You can find more info on this here.
That's why anchoring your furniture, even if it seems excessive, is absolutely crucial. It's a straightforward weekend project – honestly, securing furniture to the wall is easier than you think – that could prevent a real tragedy. The stats speak for themselves; these accidents happen more often than we realize. Taking these proactive steps now is one of the smartest things you can do to protect your family.
Let's be honest, not all walls are built the same. I've learned this the hard way – that tiny drywall anchor claiming it can hold 75 pounds? Well, that might be a bit of an exaggeration, depending on what kind of wall you're dealing with. Picking the right anchor for your specific wall type is absolutely key if you want your furniture to stay put. So, here's the inside scoop on figuring out your wall situation and choosing an anchor that actually does the job.
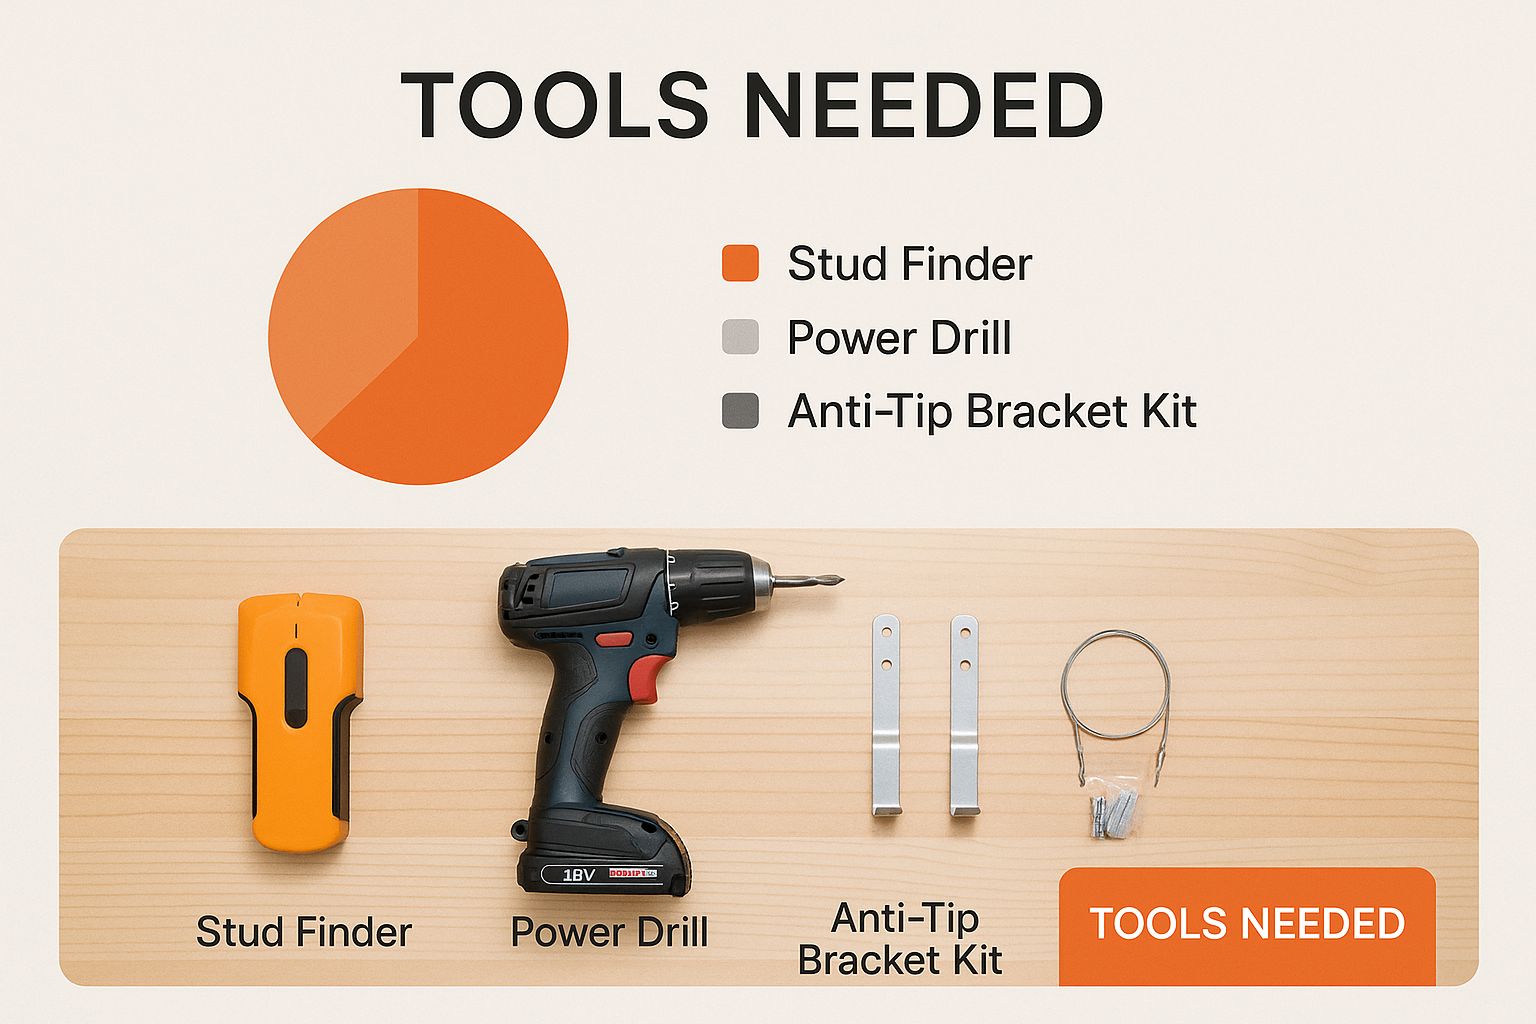
The infographic above shows some essential tools – a stud finder, drill, and anti-tip brackets. These are your best friends for a successful anchoring project. Trust me, having the right tools for the job, especially when you're working with different wall materials, makes a world of difference.
Before you even think about grabbing an anchor, you need to know what you're working with. Are you dealing with hollow drywall, solid plaster, or maybe even concrete block? This is the first step, because it determines your entire anchoring game plan. A good trick is to tap on the wall. A hollow sound usually means drywall, while a solid thud suggests plaster or concrete. Still not sure? A small pilot hole in an out-of-the-way spot will give you a definitive answer.
Once you've identified your wall type, choosing the right anchor is crucial. For hollow drywall, toggle bolts are a lifesaver, particularly for heavier items. They distribute the weight behind the wall, giving you a much stronger hold than those flimsy standard drywall anchors. Just be aware, they can be a bit tricky to install if you accidentally hit a wire or pipe, so proceed with caution. For solid walls like plaster or concrete, masonry anchors are your go-to solution. These require drilling a pilot hole and hammering the anchor in, creating a super strong, rock-solid hold. And remember, even with the right anchors, weight limits are essential. Overloading an anchor is just asking for trouble, so always check the manufacturer’s specifications.
While an electronic stud finder can be useful, they can also be a bit unreliable, especially in older houses with quirky framing. Honestly, the old-fashioned tapping method often works wonders. Start near an electrical outlet (they're typically attached to a stud) and tap lightly, listening for the sound to change from hollow to solid. Once you locate a stud, measure 16 inches to either side – that's the standard distance between studs in most homes. If you can anchor directly into a stud, do it! It’s the most secure option, hands down.
Let's talk anchors. I've put together a handy table summarizing my go-to anchor choices for different wall types. It also includes realistic weight capacities (based on my experience, not just what the package says!), and how tricky they are to install.
Wall Types and Anchor Systems That Actually Work
Real-world comparison of wall materials with proven anchor types, true weight capacities, and honest difficulty assessments
| Wall Type | Best Anchor Type | Real Weight Capacity | Installation Reality | Investment Required |
|---|---|---|---|---|
| Drywall | Toggle Bolt | 50-75 lbs (Heavier items) | Can be tricky if you hit wiring/pipes | Low |
| Drywall | Drywall Anchor (Plastic) | 10-25 lbs (Lighter items) | Easy, but can pull out if overloaded | Very Low |
| Plaster | Masonry Anchor | 75+ lbs (Heavy items) | Requires drilling, but very secure | Low |
| Concrete Block | Masonry Anchor | 100+ lbs (Very heavy items) | Requires a hammer drill & some muscle | Medium |
| Wood Stud | Wood Screw | Depends on screw size & wood type, but very strong | Easiest and most secure if you find a stud | Very Low |
So, there you have it – my tried-and-true advice for anchoring furniture like a pro. This table should make choosing the right anchor a little less intimidating, and help you avoid any wall-mounting mishaps. Remember, a little prep work goes a long way in ensuring your furniture stays exactly where you want it.
So, you're ready to tackle that furniture anchoring project. Excellent! But before you even think about picking up a screwdriver, let's talk tools. Over the years, I've anchored enough furniture to fill a warehouse, and trust me, having the right tools can make or break the entire experience. A little prep work here will save you a whole lot of headache later.
First things first, gather your core tools. You'll absolutely need a stud finder, a drill (cordless is your best friend for maneuverability), a good set of drill bits (make sure you have the right sizes for both pilot holes and your anchors), a screwdriver (or drill bits that also function as screwdrivers), a level, and a measuring tape. Think of these as your anchoring dream team. You probably already have most of these lying around, which is a bonus for your wallet.
By the way, if you're working with IKEA furniture or other ready-to-assemble pieces, you might find this guide helpful for the initial build: Check out our guide on how to assemble IKEA furniture.
Now, let me introduce you to my personal game-changer: the right-angle drill attachment. This little guy is an absolute lifesaver for those awkward, tight spaces where a regular drill just won't cut it. Imagine trying to anchor a dresser to the wall, only to realize your drill is too bulky to fit behind it. Frustrating, right? The right-angle attachment solves that problem. It's a worthwhile investment, even if you only pull it out occasionally.
Working with a tighter budget? No problem. A good old-fashioned manual screwdriver can do the trick instead of a drill for driving screws into the anchors. Sure, it might require a bit more muscle, but it gets the job done. And if your stud finder is being finicky (it happens!), you can always rely on the tapping method. Just tap along the wall and listen for the sound to change from hollow to solid. A good starting point is near an electrical outlet, as they're typically mounted on a stud. Standard stud spacing is usually 16 inches, so once you find one, measure out from there to locate the others.
Having the right tools for anchoring furniture is like the difference between night and day. It's not just about making the job easier; it's about ensuring a secure and professional result. Proper tools help you get the job done right the first time, giving you peace of mind and a beautifully anchored piece of furniture.
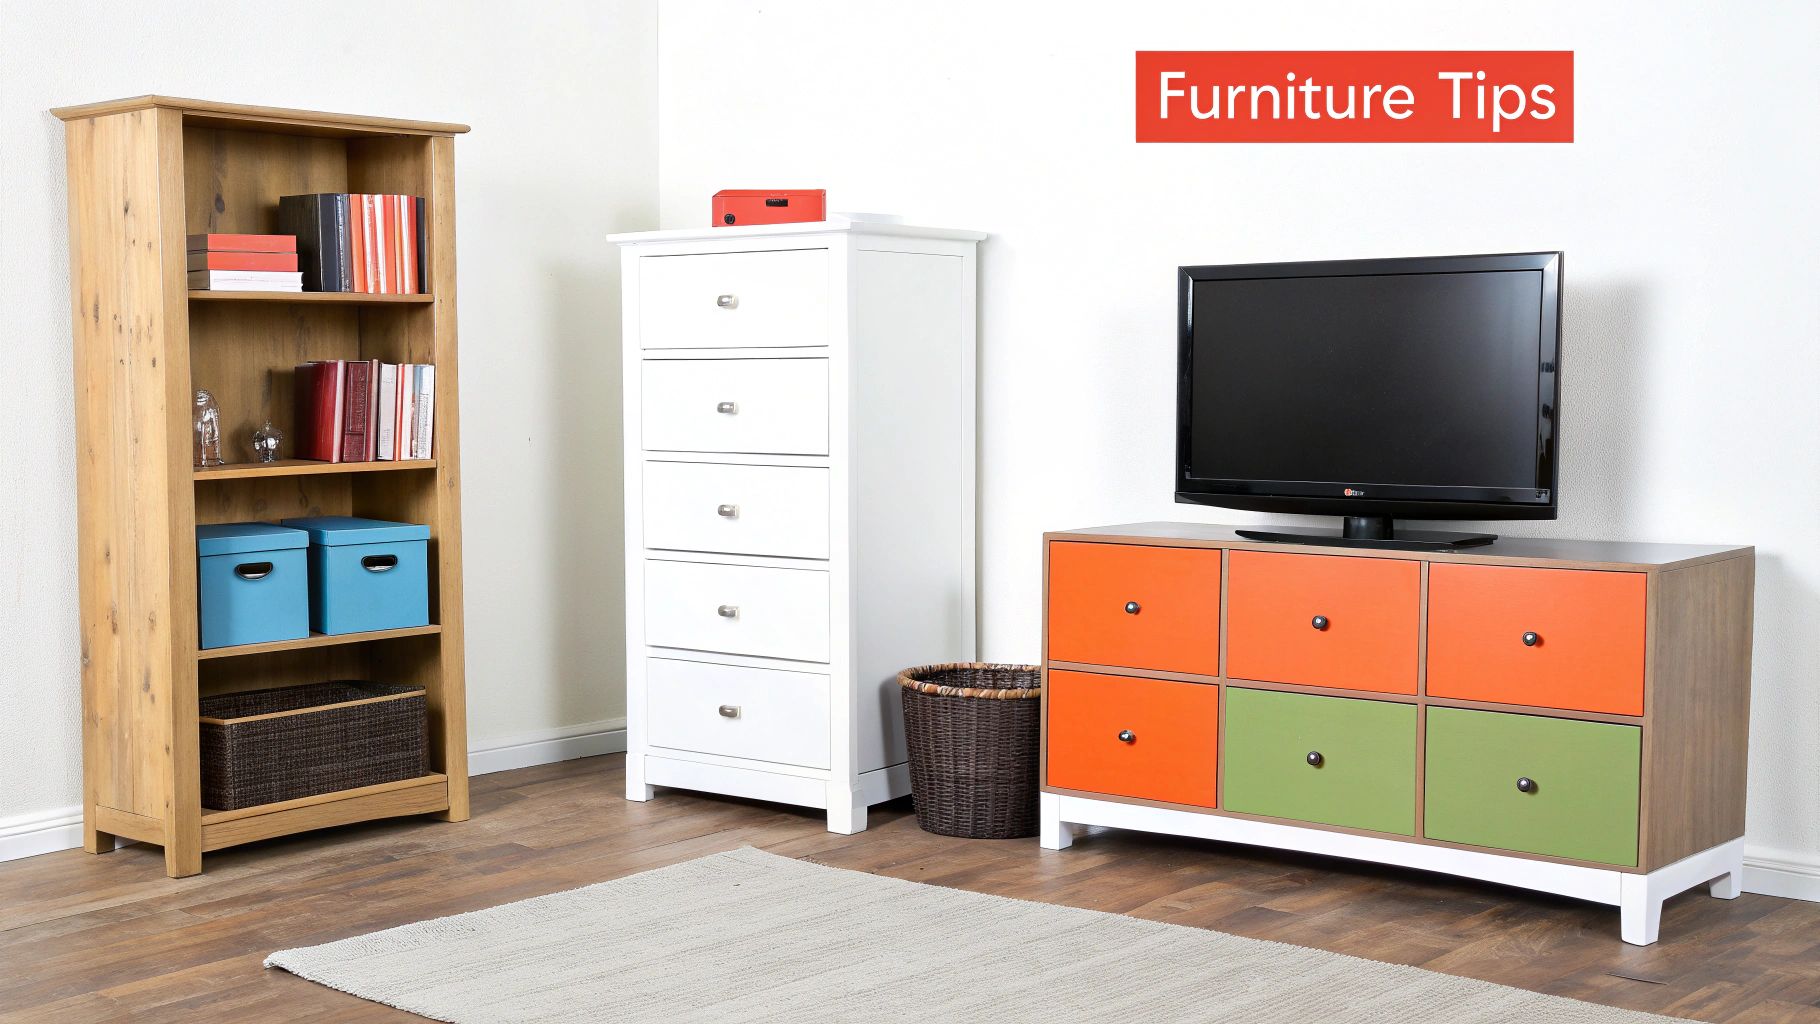
We've talked walls and anchors, so now let's dive into the real nitty-gritty: securing different furniture pieces. A tall, thin bookcase is a whole different animal than a long, low dresser. Trust me, even the best hardware won't save you from a furniture-related disaster if you use the wrong approach.
I've seen some seriously strange furniture back panels. Flimsy, oddly shaped, practically non-existent – you name it. The trick with these tricky panels is to distribute the load. Don't rely on just one anchor; use several along the top and sides. This spreads the weight and prevents too much stress on any single point.
Let's say you're anchoring a tall, narrow bookcase with a thin back. Forget the back panel altogether and focus on the sides. Try securing metal L-brackets to the bookcase sides and anchoring those directly into wall studs. It creates a rock-solid connection. Having the right tools is only half the battle; knowing how to use them effectively is crucial. Check out this helpful guide on installing building hardware for a deeper understanding.
What about furniture at an angle or tucked into a corner? Standard anchoring methods won't cut it. Angled brackets are your secret weapon here. They let you secure furniture to the wall at an angle, providing stability even in unconventional setups. Think corner desks or shelves – perfect for angled brackets.
Sometimes, there are just no obvious mounting points. So, what then? Get creative! One trick is to attach a strong wooden cleat to the back of the furniture and then anchor the cleat to the wall. It's a hidden, secure mounting point. Just make sure you use sturdy wood and screws. Working with IKEA furniture? You can find some IKEA-specific instructions that might help.
Another option? Heavy-duty adhesive strips alongside traditional anchors. These add extra support, especially for lighter items or delicate walls. They're also a lifesaver for things with no accessible back panel, like mirrors or some artwork. Just double-check those weight limits!
Speaking of wall units, have you seen how popular they're getting? The global wall units market was valued at USD 100 billion in 2023 and is projected to hit USD 168.37 billion by 2032. That's a 5.96% CAGR! Secure installations are more important than ever to prevent damage and accidents. You can find more info about the wall units market here.
Remember, anchor placement is often more important than the anchor itself. Strategically positioning your anchors for maximum support makes all the difference in long-term stability. Don't be afraid to adjust your plan if it's not working. There's always a solution, even for the trickiest pieces. With these furniture-specific strategies, you're well on your way to a safer, more secure home.
So, you've gathered your anchors, figured out your wall type, and you're ready to turn your house into an impenetrable fortress of furniture. Hold up a sec. There's a world of difference between just sticking some anchors in the wall and creating a truly secure, rock-solid installation. This is where knowing a few tricks of the trade really makes a difference. Let's dive into the methods that separate the DIY newbies from the seasoned pros when it comes to securing furniture to the wall.
Accurate measurements are the name of the game. I can’t emphasize this enough. Grab a good quality measuring tape (none of that flimsy stuff) and mark your anchor points precisely. Here’s a tip I’ve learned the hard way: measure twice, drill once. This little mantra has saved me countless trips back to the hardware store.
After measuring, use a level to make sure everything is perfectly aligned. A crooked bookcase or a leaning dresser isn't just an eyesore, it can also weaken the whole installation. Trust me, taking a few extra seconds to double-check your work now will save you a lot of frustration later.
Drilling can be a little nerve-wracking, especially if you're worried about messing up your walls. Start with a pilot hole slightly smaller than your anchor screw. This keeps the wall from cracking and gives you a clean entry point for the screw. Another handy trick? Use painter's tape over the area you're drilling. This helps prevent chipping, especially on delicate surfaces.
When you’re using multiple anchors, the order you install them actually matters. Start with the topmost anchor, making sure it’s perfectly level. Then, work your way down, using the first anchor as a guide for the others. This keeps everything aligned and prevents the furniture from twisting during installation.
Textured walls? Rental with strict rules about wall damage? Measurements that just won't line up? These are the kinds of challenges that really test your DIY skills. For textured walls, use spacers to make sure the furniture sits flush, even with the uneven surface. In rentals, consider adhesive-based mounting systems – they minimize wall damage and work well for lighter items. If you're aiming for a stylish and easy furniture assembly, check out our IKEA assembly guide: You might be interested in: IKEA Furniture Assembly Made Easy: Expert Tips & Tricks.
Sometimes, even the best measurements don’t quite match up in real life. Be ready to make small adjustments as you go. This might involve using shims to fill gaps or slightly moving your anchor points. Don't be afraid to deviate from the plan – flexibility is key! Speaking of real-world applications, the sheer amount of furniture out there emphasizes the importance of proper anchoring. In North America, the office furniture market alone was huge – USD 14.83 billion in the US in 2020, with Canada and Mexico adding USD 1.06 billion and USD 600 million, respectively. This just shows how crucial secure installations are in both homes and workplaces. Discover more insights here.
Working alone? Use props to support the furniture while you drill and install anchors. Got a helper? Communication is your best friend. Assign roles and talk through each step to avoid any mishaps.
Once the furniture is secured, give it a stress test. Push and pull on it to make sure it's really solid. If anything feels loose, go back and check those anchors. These little checks can prevent a big headache later on. With these pro tips, you can tackle any furniture anchoring project with confidence.
Here's a handy table I put together to help you out:
Furniture-Specific Installation Requirements That Actually Work
This table offers proven requirements for securing different furniture types, with realistic anchor recommendations and honest difficulty assessments. It’s a quick reference guide based on my own experience, so hopefully it saves you some time and trouble.
| Furniture Type | Critical Anchor Points | Hardware That Works | Real-World Challenges | Skill Level Required |
|---|---|---|---|---|
| Bookshelves | Top corners, back | Toggle bolts, heavy-duty wall anchors | Ensuring shelves are level, dealing with varying wall materials | Intermediate |
| Dressers | Back, potentially top corners | Wall anchors, furniture straps | Preventing tipping, especially with children present | Beginner |
| TV Stands | Back, depending on design | Wall anchors, TV-specific mounting brackets | Hiding cables, ensuring proper TV alignment | Intermediate |
| Wall-Mounted Cabinets | Back, sides | Wall studs, heavy-duty screws | Locating studs, ensuring cabinet is securely fastened | Advanced |
| Mirrors | Back, depending on size and weight | Mirror clips, adhesive hangers | Preventing breakage, ensuring mirror hangs flush | Beginner to Intermediate |
So, there you have it! This table gives you a starting point for choosing the right hardware and anticipating potential challenges. Remember to always consider the specific weight and design of your furniture, along with the type of wall you’re working with. Safety first!
So, you've anchored your furniture. Fantastic! But the job's not quite finished. Just like anything else in your home, anchored furniture needs a little ongoing attention to make sure it stays secure.
Once you've finished anchoring, give everything a good tug. I like to pull in different directions – forward, backward, and side-to-side. This simulates the everyday stresses your furniture experiences. If anything feels loose or wobbly, you'll know to go back and check those anchors. This is especially important for heavy items like bookshelves or media consoles.
I remember once anchoring a large bookcase, and while it seemed fine initially, a gentle push revealed a weak anchor. Thankfully, I caught it early!
You might be surprised to learn that temperature and humidity changes can affect your anchors. Wood expands and contracts with the seasons, and this can gradually loosen anchors over time, especially in older homes. So, it's smart to check your anchors more often during periods of significant temperature swings. A quick look and a few turns of the screwdriver can save you a lot of trouble later.
A simple maintenance routine is key. I make a habit of checking all my anchors every six months or so, just to be sure everything is still tight. It only takes a few minutes, and it's much easier than fixing a damaged wall or replacing a toppled bookcase. You can find helpful information about tools for assembly and maintenance at Assembly Smart: Furniture Assembly Tools.
Anytime you move furniture, even just for cleaning or rearranging, double-check your anchors. Even a slight shift can loosen things up. I learned this the hard way after moving my sofa to vacuum. One of the anchors had come loose! It was a quick fix, but it taught me how easily these things can happen.
Anchors, like any other hardware, have a limited lifespan. They can corrode, wear down, or simply lose their grip. Knowing the lifespan of your particular anchor type helps you plan for replacements before problems arise. Plastic anchors, for instance, tend to wear faster than metal ones. If you see any signs of damage, it's always best to replace the anchor.
By following these simple checks and maintenance tips, you can ensure your furniture stays put – safely and securely anchored to the wall, protecting your family and your home.
So, you've got the lowdown on how to anchor furniture. Now, let's talk strategy. Making your home a safe zone doesn't have to be a huge undertaking. I've found breaking it down room by room, and focusing on the riskiest pieces first, makes the whole project much less intimidating.
Begin with the high-risk areas: nurseries, kids' bedrooms, and any rooms with tall, heavy furniture. Dressers are a major tip-over hazard, especially in kids' rooms. Securing these should be your top priority. Next, move on to entertainment centers and bookshelves, particularly in living rooms and family rooms. These often hold heavy electronics and can be unstable if climbed on. Realistically, this first round might take a weekend, depending on how much furniture you have.
Think of it one room at a time. Make a list of the furniture that needs anchoring in each room. Prioritize them based on weight, height, and how likely it is that someone will interact with them (like a child climbing or pulling). For example, in a nursery:
This helps you tackle the most important pieces first.
Anchoring furniture doesn't have to blow your budget. If money's tight, you can do this project in stages. Buy anchors and hardware for one or two rooms at a time. Spread the cost out over a few weeks or months. This makes the project easier on your wallet and keeps you from feeling overwhelmed.
Also, if you need a hand, don't be shy about asking! Get a friend or family member to help. An extra set of hands makes things go so much faster, especially with heavier or awkward pieces. You can even make it a pizza-and-anchoring party!
Securing your furniture is a big win for home safety. As you finish each room, take a moment to appreciate what you've accomplished. This helps you keep going and reinforces how important this project is. Knowing your furniture is secure brings incredible peace of mind. It's one less thing to worry about, letting you relax and enjoy your home. Ready to make your home safer and more secure? Assembly Smart can help! Our professional assembly service specializes in securing furniture to walls, protecting your home from tip-over accidents. From dressers to bookshelves, we handle it all. We serve Texas, Florida, and nationwide. Visit Assembly Smart today for a free estimate and let us take the hassle out of securing your furniture.
