-
CALL US:
- (866) 952-3456
Getting your ikea bed assembly instructions right starts long before you ever crack open the manual. I've seen it time and time again: a successful, stress-free build comes down to what you do before you start. It’s all about preparation—clearing a proper workspace, getting your parts in order, and knowing what’s coming next.
I know the temptation is strong to just rip open the boxes and get going. But trust me, a little patience now pays off big time later. A well-prepared space not only makes the whole process faster but also prevents those heartbreaking, accidental scratches on your new furniture or your floors.
Think of it like cooking a meal. You wouldn't just start throwing ingredients in a pan without reading the recipe and chopping your veggies first, right? The same logic applies here. Taking just 20-30 minutes to set the stage can save you from hours of frustration. For a deeper dive, our guide on https://assemblysmart.com/how-to-prepare-for-your-furniture-assembly-project/ offers even more great tips.
First thing’s first: clear way more space than you think you'll need. You’re going to be wrangling large, awkward pieces like headboards and side rails. The bedroom where the bed will actually live is the ideal spot—trying to move a fully assembled bed frame is a job nobody wants.
Next, protect your floors. Lay down the flattened cardboard boxes the bed came in or an old blanket. This gives you a soft surface that prevents scratches and makes it way easier to slide components around without causing any damage.
Whatever you do, don't just dump all the screws and bolts into one big pile. This is the classic mistake that leads to mass confusion and, inevitably, using the wrong hardware in the wrong place.
The goal of all this prep isn't just about being tidy. It’s about creating a system that lets you focus on the instructions without getting sidetracked searching for Part #11342 in a sea of nearly identical screws.
This methodical, do-it-yourself approach is what IKEA is all about. The company has been providing downloadable PDF instructions for decades, empowering customers to handle assembly themselves. It's a huge part of how they keep costs down, and it's a system the vast majority of customers rely on; only about 10-15% of buyers in major markets ever opt for professional assembly.
While building an IKEA bed is a pretty straightforward DIY task for most, it never hurts to know your limits. For more complex projects, or if you ever feel like you're in over your head, it's worth checking out some general DIY wisdom on when to seek professional help. Having that perspective helps you tackle any project with confidence.
Let's talk about that little Allen key IKEA gives you in the box. It’s a nice thought, but relying on it to build an entire bed is like trying to paint a house with a toothbrush. Sure, you’ll get there eventually, but you'll be tired, frustrated, and probably sore before you're even halfway done.
Upgrading your toolkit is the single best move you can make to make following those ikea bed assembly instructions a whole lot smoother. Think of the included tool as a fallback, not your primary weapon. When you're facing dozens of identical screws, having the right gear transforms a tedious chore into a pretty satisfying project.
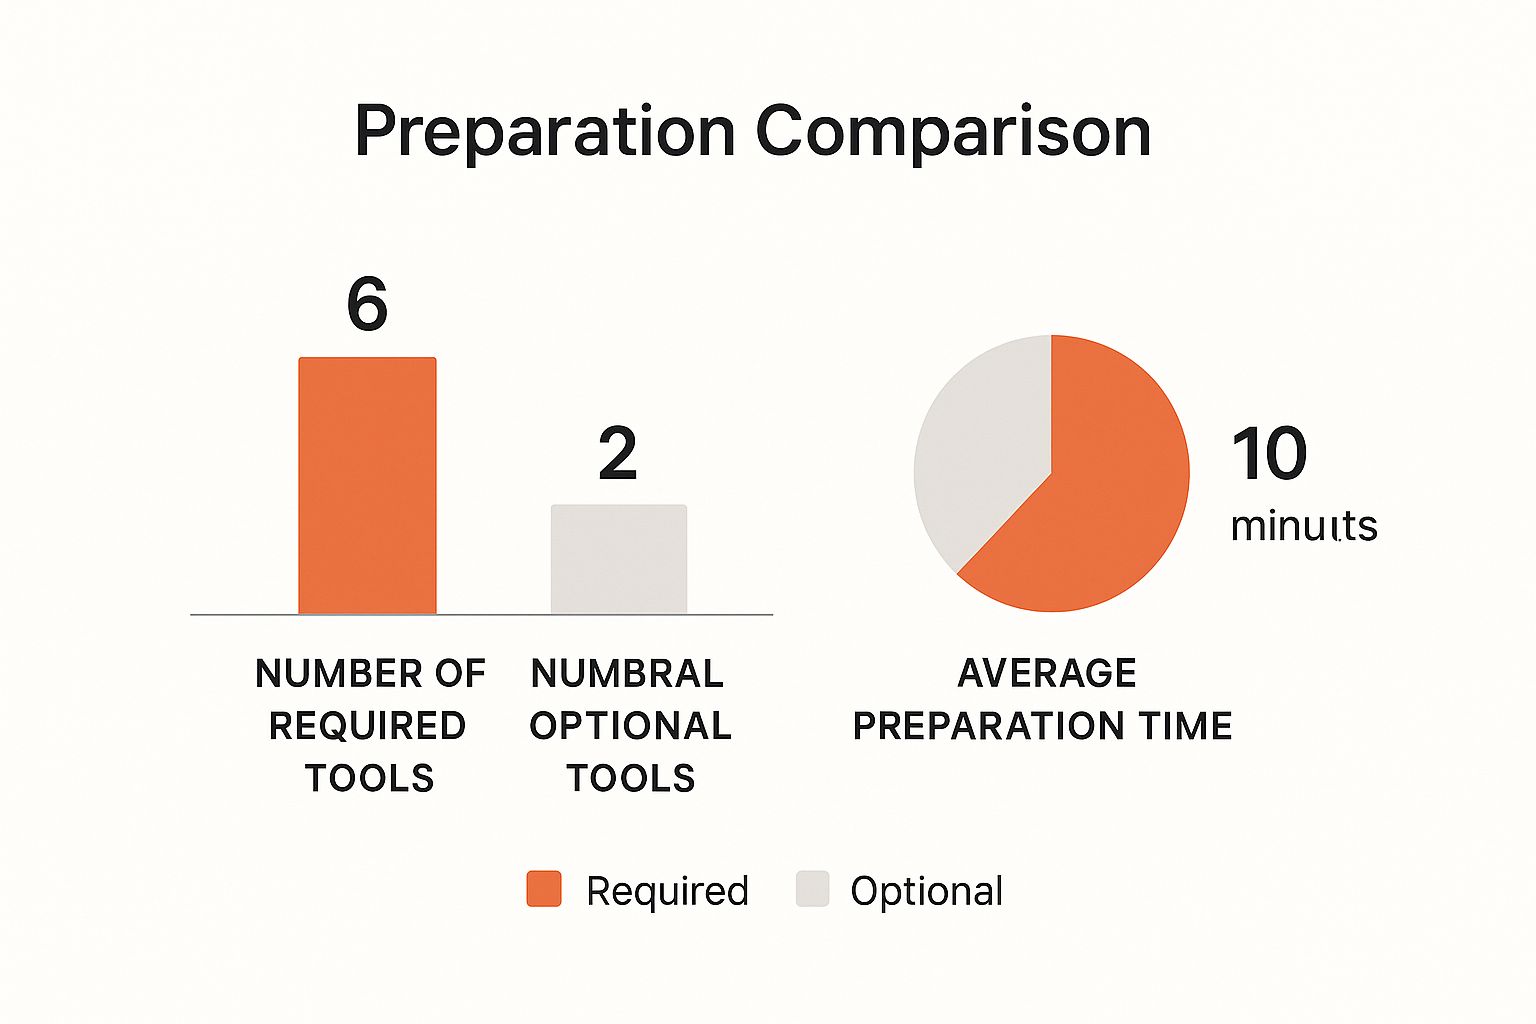
As you can see, a few smart additions will not only save your wrist from endless twisting but also guarantee a sturdier, more solid final product. We're only talking about six key items and a few minutes of prep—a tiny investment for hours of saved time and effort.
Before we dive into the specifics, it helps to see exactly what a small upgrade can do for you. The difference between the bare minimum and a well-equipped toolkit is night and day.
| Tool | Basic Toolkit (Included/Minimum) | Upgraded Toolkit (Recommended) | Why It Helps |
|---|---|---|---|
| Screwdriver | Included L-shaped Allen key | Ratcheting screwdriver with hex bits | Eliminates constant turning, saving your wrist and cutting time dramatically. |
| Hammer | Standard claw hammer (if you have one) | Soft rubber mallet | Lets you tap in wooden dowels securely without denting or cracking the finish. |
| Leveling | Eyeballing it | A simple torpedo level | Ensures the frame is perfectly square, preventing that dreaded wobble later on. |
| Power Tool | None | Cordless drill (on low torque!) | Speeds up screwing in long bolts, but requires careful use to avoid damage. |
Having these recommended tools on hand turns a potentially frustrating afternoon into a straightforward and even enjoyable project.
You don't need a massive, expensive tool chest. Just a few key items will make a world of difference. Honestly, these should be considered mandatory for any flat-pack furniture job.
Ratcheting Screwdriver with Hex Bits: This is your new best friend. Instead of the endless turn-and-reposition dance, you just use a simple back-and-forth wrist motion. It saves an incredible amount of strain, especially on those long bolts that hold the main bed frame together.
Soft Rubber Mallet: Lots of IKEA beds use wooden dowels for alignment. If you try to tap them in with a regular hammer, you can easily dent or even crack the particleboard. A rubber mallet lets you gently but firmly seat those dowels without leaving a single mark.
A Simple Level: Your floor might look flat, but I can almost guarantee it isn't perfectly level. Using a small level when you attach the headboard and side rails ensures the frame is perfectly square. This little step is the secret to preventing that annoying, persistent wobble.
Ready to feel like an assembly expert? Adding a power tool can safely slice your build time in half, but it comes with one very important rule.
CRITICAL TIP: If you use a cordless drill, you MUST use it on its lowest torque (power) setting. High torque will overtighten screws, stripping the heads and cracking the wood. A drill is for speed, not brute force.
For the last few turns on any screw, I always switch back to a manual screwdriver. This gives you that tactile feedback you need to get the connection snug without over-tightening—a classic mistake that can compromise the bed's integrity down the road.
Building your toolkit is just one piece of the puzzle. For more practical advice, check out our guide on 12 helpful tips for assembling IKEA furniture to master the entire process.
When you first open an IKEA manual, it can feel a bit like trying to read ancient hieroglyphics. There are no words—just pages of simple diagrams, pointing hands, and a few odd symbols. But once you get the hang of it, you'll see it’s a brilliant system designed to work in any language. Let's break down how to turn those pictures into a sturdy bed frame you can be proud of.
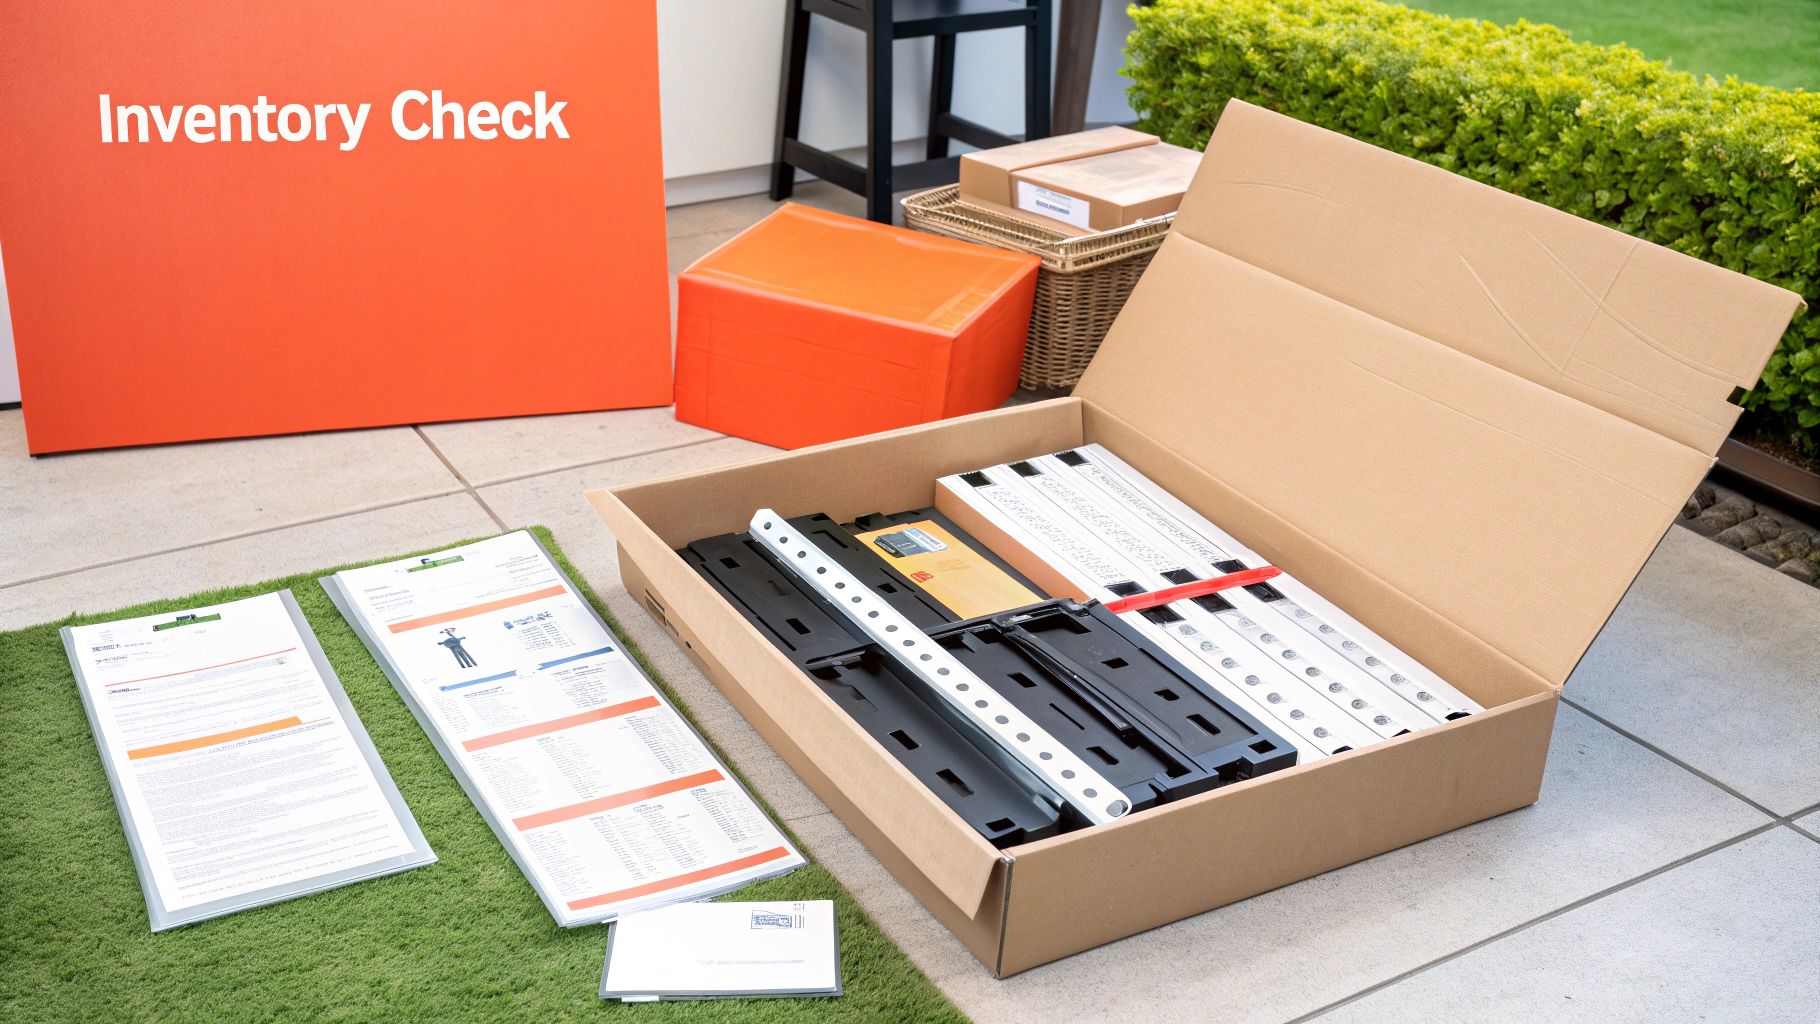
The first few pages are your Rosetta Stone. This is where you'll find a complete inventory of every panel, screw, dowel, and Allen key. Before you even think about putting pieces together, lay everything out and check it against this list. Trust me, this simple five-minute check can save you from a major headache an hour into the build when you realize a critical part is missing.
IKEA uses a handful of symbols consistently across all its manuals. Learning these is the key to mastering the ikea bed assembly instructions and avoiding common mistakes. Think of them as the basic grammar for your project.
These symbols are your best friend during the assembly. They flag potential problems and point out the moments that need your full attention, so you don’t have to waste time backtracking.
The heart and soul of most IKEA furniture, including popular beds like the MALM or HEMNES, is the cam lock and dowel system. Getting this right is absolutely non-negotiable for a stable frame. The instructions lay out a very specific sequence for this.
First, you'll screw the long metal bolts (the cam lock screws) into their pre-drilled holes on one of the panels. The trick here is to stop twisting the moment the smooth collar of the screw is flush with the wood. Don't overtighten it. Next, gently tap the wooden dowels into their holes with a rubber mallet.
Now for the magic. Line up the dowels and screws with the holes on the piece you're connecting. Once the panels are flush, drop the cam lock nut into the large circular hole.
Key Takeaway: The arrow on the cam lock nut must be pointing toward the head of the screw it's meant to grab. If it's facing the wrong way, it simply won't lock. Use a flathead screwdriver to turn the cam lock about a half-turn clockwise until it feels snug. You should feel a distinct "locking" click. Don't try to force it past this point.
A wobbly IKEA bed is almost always caused by a poorly secured cam lock. Take your time with these connections, and your bed will feel solid for years. After all, a bed that’s taken apart and rebuilt a few times can lose its sturdiness, so getting it right the first time is a big deal. For a deeper dive into these core techniques, check out our guide on how to assemble IKEA furniture.
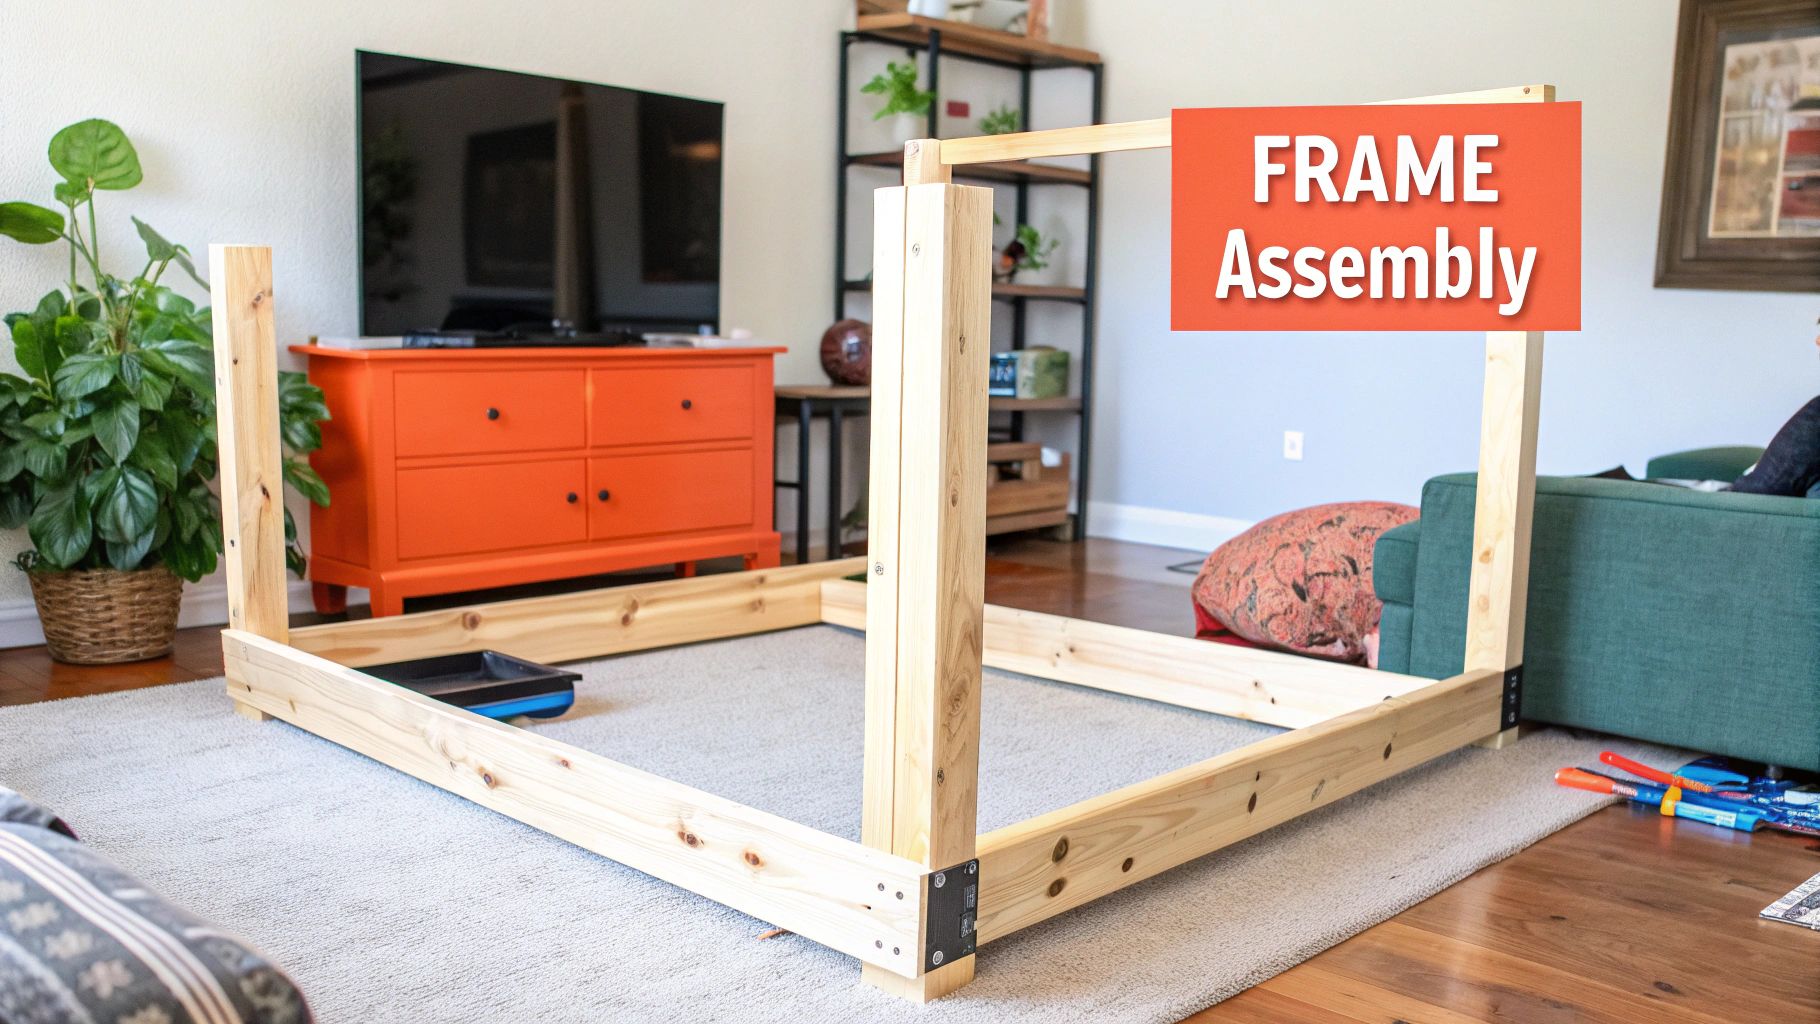
Once you're comfortable with the hardware, building the main frame gets a lot more intuitive. The diagrams will typically walk you through assembling the headboard and footboard as separate units first.
Pay close attention to any drawings that show the orientation of finished versus unfinished edges. With a model like the MALM, making sure the veneered edge faces outward is just for looks, but for structural pieces, getting the orientation right is crucial for everything to fit together later on.
Connecting the side rails is almost always a two-person job. The manual will show two little figures lifting the long rails to attach them to the headboard and footboard, using that cam lock and dowel system you just practiced. A level can be really helpful here to ensure the frame is perfectly square before you tighten everything down for good.
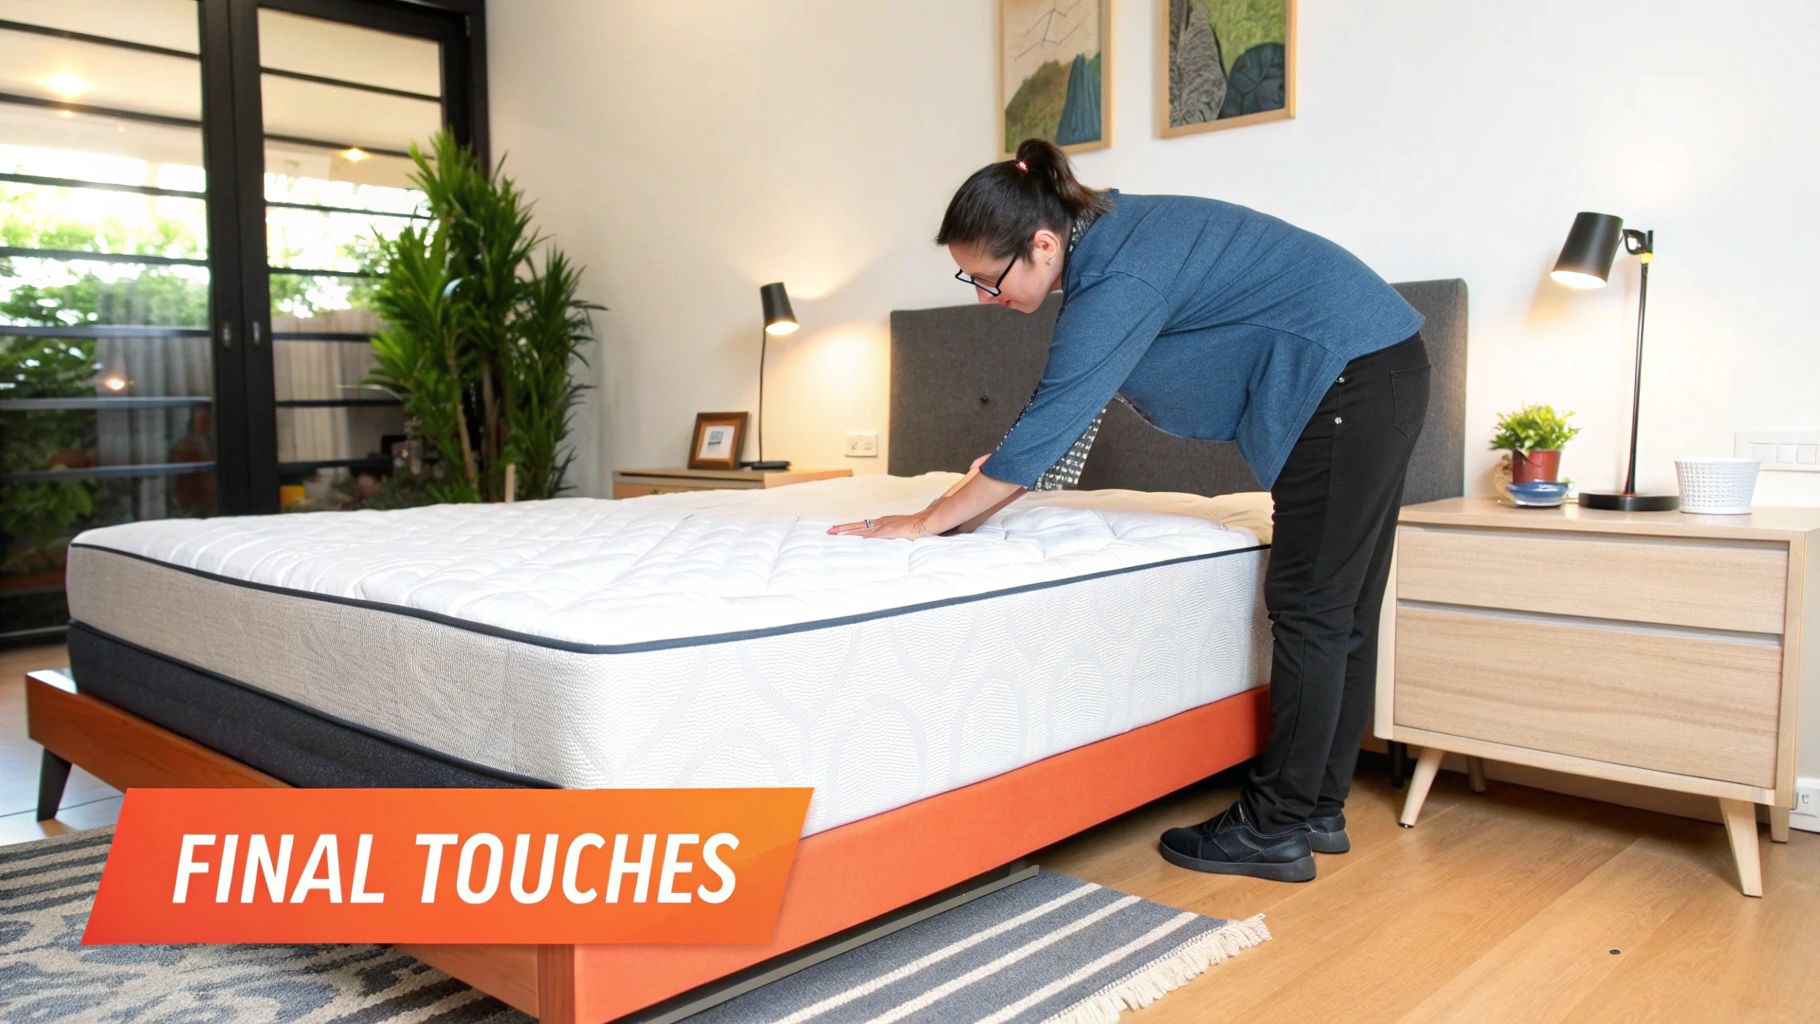
The final steps are what give your bed its real strength. The SKORVA central support beam (or whatever your bed's equivalent is) acts as the spine. The instructions will clearly show how it slots into the brackets on the headboard and footboard. Make absolutely sure it's seated securely.
Lastly, it's time to unroll the bed slats—like the LURÖY slatted base. The pictures will show you the exact spacing and how to secure them to the side rails. There are usually small plastic stoppers or screws that keep the slats from sliding around. Don't skip this part; it's what provides even support for your mattress and prevents the slats from clattering or falling through. By following each diagram step-by-step, you're not just building a bed—you're learning a visual language that will help you tackle any flat-pack project with confidence.
Stepping up to an IKEA bed with built-in storage, like the classic BRIMNES or the super-flexible NORDLI, is a whole new ballgame. You're moving beyond a simple frame and into something way more functional. But with great storage comes greater responsibility—and a bit more complexity.
The secret is to stop thinking of it as building one big bed. Instead, picture yourself assembling a collection of smaller, individual pieces that all have to connect perfectly.
Most of the time, the bed frame itself isn't the part that trips people up. It's the drawers. A drawer that sticks, scrapes, or just looks wonky can sour the whole experience. And nine times out of ten, the culprit is the same: the metal drawer runners.
Pay close attention when you get to the pages in the manual about the drawer runners. IKEA often uses those little "magnifying glass" icons here, which is their way of screaming, "Don't mess this part up!" Don't just glance at these diagrams—really study them.
Here's a pro tip I've picked up over the years: Lay the two big frame panels side-by-side on the floor and install their runners at the same time. It's much easier to mirror the process and catch a mistake before you start attaching them to the rest of the bed.
The drawer boxes themselves are just as critical as the runners. A drawer that isn't perfectly square is never going to slide smoothly, no matter how perfectly you aligned the metal bits. This is where a little patience goes a long way.
As you put the four sides of a drawer together, just lightly tighten the cam locks. You want the box to have a little bit of give. Now, grab a tape measure. Measure diagonally from one corner to the other, then measure the opposite diagonal. Are the two numbers exactly the same? Perfect, your box is square. If they're different, just give the corners a gentle nudge until they match up.
Once you've got it square, you can nail on the thin bottom panel. The manual shows a specific nailing pattern for a good reason—it locks the box into that perfect square shape. Put a nail in each corner first, then one in the middle of each side. After that, you can fill in the rest. This little trick keeps the whole thing from shifting around while you work.
Then you have beds like the MALM ottoman, which uses a hydraulic lift system to raise the whole mattress platform, revealing a huge storage space underneath. These parts are under serious tension, so you need to be laser-focused on safety.
The instructions will always show two people doing this part, and trust me, that is not a suggestion. The gas pistons are incredibly strong and trying to compress and align them by yourself is a recipe for disaster. You have to install them exactly as shown and double-check that every bolt is tight.
And whatever you do, never try to work the lift mechanism until the mattress is on the frame. The weight of the mattress acts as a counterbalance. Without it, the lift can spring open with enough force to cause a serious injury. These detailed steps in the ikea bed assembly instructions are there for a reason—to keep you safe and make sure your new storage bed works like a dream.
Even when you follow the ikea bed assembly instructions to the letter, things can go wrong. We’ve all been there. You finish the final step, give the bed a little test shake, and feel a dreaded wobble. Or maybe a panel isn't sitting quite flush. Don't start tearing it all apart just yet.
Most of these common hiccups are surprisingly easy to fix. This isn't about you making a mistake; it's just a normal part of the build process. Think of the next few paragraphs as your first-aid kit for furniture assembly. We'll walk through the most common frustrations and get your bed frame solid and ready for a good night's sleep.
A wobbly bed is easily the most frequent—and annoying—problem you'll run into. The good news? It's almost always a simple fix that comes down to a few connections that aren't quite tight enough.
Your first move should be to go back and methodically re-tighten every single screw, bolt, and cam lock. Don't just eyeball it. Start at one corner and work your way around the entire frame. You'd be amazed how often a screw that felt tight has another quarter-turn left in it.
Pro Tip: Grab a friend and have them gently rock the frame while you put your hand on each joint. You'll literally feel the source of the movement, which tells you exactly which connection needs to be cranked down.
If everything is tight and it still wobbles, the culprit might be your floor, not the furniture. Uneven floors are incredibly common. Use a level to check. If that's the issue, a simple furniture shim or even a folded piece of cardboard tucked under a leg will solve it instantly. These same ideas work for other pieces of furniture, too; we cover similar solutions in our guide on how to fix a wobbly table.
It is incredibly easy to over-tighten a screw in particleboard, stripping the hole so it no longer has any grip. It feels like a total disaster, but it's a classic problem with an old-school, reliable fix.
All you need is some wood glue and a few wooden toothpicks.
You've just created a brand-new, solid surface for the screw to bite into. When you drive the screw back in, it will hold just as well as it did the first time.
Sometimes you'll notice a drawer front or a panel just isn't lining up right. This is usually caused by an over-tightened cam lock pulling one side in more than the other. These little locking mechanisms are meant to be snug, not torqued down with all your might.
The fix is easy. Just slightly loosen all the cam locks that hold the misaligned panel in place. This gives you a little bit of play. Gently nudge and adjust the panel until it's perfectly aligned, then carefully re-tighten the cam locks until they're snug. You’ll feel a distinct stopping point; pushing past that is what causes the problems. This tiny adjustment can make a massive difference in the final look.
Even with IKEA's picture-book instructions, it's totally normal for questions to pop up. Let's be honest, building furniture can feel like a high-stakes game of Tetris, and a little uncertainty is part of the process. Think of this as your go-to guide for tackling the most common head-scratchers people run into.
We’ve pulled together the questions we get asked all the time and laid out some straightforward, practical answers. From the classic "I'm missing a screw!" to the great power drill debate, we'll get you through it with confidence.
First off, don't panic. Before you do anything else, go back and meticulously check every piece of packaging. I can't tell you how many times a crucial little dowel or cam lock has been found hiding in a cardboard fold or tucked inside a larger piece.
If it's truly gone, your next move is to find its part number. Flip to the first few pages of your instruction manual, and you'll see an inventory list with a six-digit number next to each part. Once you have that number, you've got two easy options:
This is the classic "it depends" answer, but it's the truth. The time it takes can swing wildly depending on the bed's complexity and your own comfort level with this kind of project.
A super simple frame like the NEIDEN might only take a single person about an hour. On the other hand, a big storage bed with multiple drawers, like the BRIMNES, could easily stretch into a 3-4 hour project, especially if you're flying solo. Bringing in a friend to help hold the big, heavy pieces steady can be a game-changer and shave a surprising amount of time off the clock.
My best advice? Block out way more time than you think you'll need. Rushing is the #1 reason people make mistakes. A slow, steady pace is always faster than a frantic rush that forces you to undo and redo three different steps.
Yes, you absolutely can. Most IKEA furniture is designed to be disassembled. The big "but" here is that furniture made from particleboard can get a little less sturdy each time you take it apart and put it back together. The screw holes can widen over time, making the joints feel a bit less solid.
To give your bed the best shot at a second life:
Lots of people move their IKEA beds multiple times without a problem, but just know there's a slight trade-off between convenience and the furniture's long-term sturdiness.
A power drill can be your best friend or your worst enemy on an IKEA project. It's a huge time-saver, but you have to be careful.
If you're going to use one, always set it to the absolute lowest torque (power) setting. Cranking up the torque is the fastest way to over-tighten a screw, which can strip the head, crack the wood, or break the hardware. A drill is fantastic for driving in long screws most of the way, but I always recommend switching to a regular screwdriver for the final few turns. It gives you a much better feel for when the connection is perfectly snug.
Feeling like this is all a bit much or just don't have the time? Let the pros at Assembly Smart take it from here. We offer fast, reliable, and insured assembly for all your IKEA furniture, making sure you get a perfect, solid build every time. Book your stress-free assembly today!
