-
CALL US:
- (866) 952-3456
Let's be honest, most folks dive headfirst into workout equipment assembly, thinking it's all about following instructions. After wrestling with everything from simple treadmills to monster multi-gyms, I've learned it's actually about preparation. Your workspace can be the difference between a satisfying build and a total meltdown. It's more than just clearing some floor space. Think systematic part layout, decent lighting, and protection for both your floors and the shiny new equipment.
Before we even touch a wrench, check out this helpful exercise blog for some extra tips. Now, back to your space. I always clear out double the area I think I need. Seriously, you don't want to be playing furniture Tetris mid-assembly. Laying everything out systematically prevents that dreaded "where's that darn bolt?" moment. I once tackled a complicated cable machine and pre-sorted all the hardware into labeled ziplock bags. Seemed a bit much at the time, but saved me hours of searching later.
Good lighting is essential. I learned this the hard way, assembling a weight bench in my dimly lit garage. Let's just say my eyes still haven't forgiven me. Now, I combine overhead shop lights with a focused LED work lamp. This isn't just for preventing eye strain, it makes it way easier to find those tiny part numbers and fiddly connections. And speaking of preparation, the home fitness scene is booming. The global fitness equipment market is expected to hit somewhere between $13.19 billion and $36.58 billion by 2025. Discover more insights. This just shows you how important it is to get your assembly right.
Protecting your floors and equipment is key. A drop cloth or some cardboard shields your floors from scratches, and a soft blanket keeps your new gear from getting dinged up. Don't forget the mental game. Building a large piece of equipment can take hours. Break it down into smaller chunks to avoid feeling overwhelmed. This guide on preparing for your furniture assembly project offers some excellent insights on project planning.
Finally, organization is your best friend. A magnetic tray keeps screws and bolts from escaping, and labeled containers prevent part mix-ups. A well-prepared workspace sets you up for a smooth and satisfying assembly experience.
Let me tell you, those flimsy tools included with your workout equipment? They're barely adequate. I learned this the hard way assembling a weight bench, wrestling with a stripped hex key for what felt like an eternity. The right tools can transform a frustrating assembly into a smooth, even enjoyable, process. The key is having them ready before you even rip open the first box.
My game-changer? A decent socket set. It paid for itself on the first major equipment assembly, cutting my time in half. Trust me, the upgrade is worth it. A good rubber mallet is another unsung hero. It’s perfect for gently tapping parts into place without damaging the finish – absolutely essential for protecting your investment. And when it comes to screwdrivers, look for comfortable handles and magnetic tips. You'll be using them a lot, and those features make a world of difference during a long assembly.
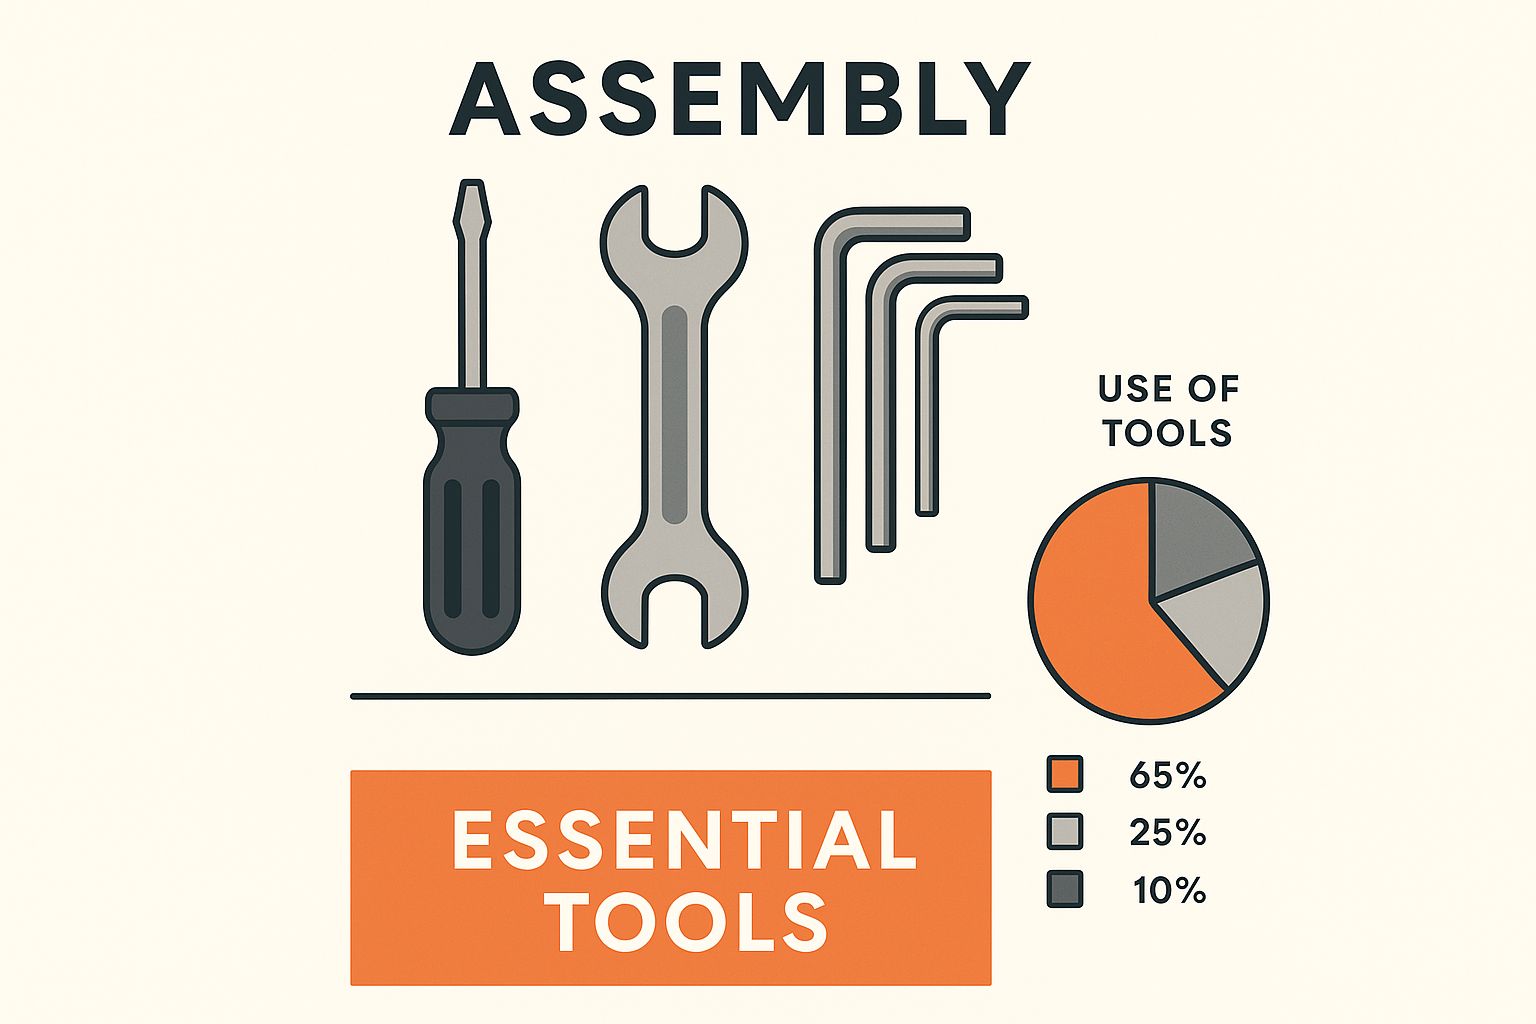
This infographic shows the essential tools: a quality screwdriver, wrench, and a set of Allen keys. Having these readily available will streamline the process significantly. The difference between these and the included tools is substantial, impacting both the speed and quality of the assembly.
Beyond the basics, some specialized tools are worth considering. A torque wrench, for example, prevents over-tightening, which can damage your equipment. It might seem like an unnecessary expense, but it’s a lifesaver for delicate parts. Also, don't underestimate consumable supplies. Threadlocker, spare washers, and even good electrical tape are must-haves. These little things ensure a secure and professional-looking finished product.
Think of your assembly toolkit as an investment. Start with the essentials:
From there, you can add specialized tools as needed. For example, a bike repair stand can be surprisingly helpful for assembling certain types of cardio equipment.
Upgrading your basic tools is where you'll see the biggest return. Those flimsy Allen keys included with most equipment are notorious for stripping screws. Invest in a set of high-quality, ball-end Allen keys – the ball-end allows you to work at an angle, incredibly useful in tight spaces. Similarly, upgrade your included wrench to a ratcheting wrench set. The ratcheting mechanism saves time and effort, especially when dealing with lots of bolts.
Before we go any further, let's talk about the right tools. Having the correct tools can drastically reduce your assembly time and frustration. Below is a comparison of the tools that typically come with your equipment versus some recommended upgrades:
Essential Assembly Tools Comparison
| Tool Type | Included Version | Recommended Upgrade | Time Saved | Cost |
|---|---|---|---|---|
| Allen Keys | Small, flimsy, limited sizes | Ball-end Allen key set (metric and imperial) | Significant (up to 50%) | $20-$50 |
| Wrench | Basic adjustable wrench | Ratcheting wrench set | Moderate (20-30%) | $30-$70 |
| Screwdriver | Small, uncomfortable handles | Magnetic tip screwdriver set | Moderate (15-25%) | $20-$40 |
| Mallet | Often not included | Rubber mallet | Minor (10-15%) | $15-$25 |
As you can see, investing in better tools can significantly reduce your assembly time, and the cost is often recouped in the time saved and frustration avoided.
Don't forget safety gear! Safety glasses protect your eyes from flying debris, and work gloves provide a better grip and prevent blisters. Building a comprehensive toolkit takes time, but it's an investment that pays off with every successful workout equipment assembly. You'll save time, reduce frustration, and ensure your equipment is assembled correctly and safely. Plus, there's the satisfaction of knowing you can tackle any assembly project. This approach transforms workout equipment assembly from a dreaded chore into a manageable, even rewarding, task. You’ll be surprised by the sense of accomplishment you feel after successfully assembling a complex piece of equipment with your own two hands and the right tools.
Let's face it, workout equipment manuals are notorious for being awful. They're written by folks who know the equipment like the back of their hand, but completely forget what it's like to see it for the first time. Diagrams look like abstract art, part numbers seem random, and you'd think you need an engineering degree just to get started. But here's the thing: there's a way to crack the code of even the most confusing instructions.
My go-to strategy? Mental rehearsal. Before I even pick up a tool, I spend time looking over the diagrams and instructions, visualizing the process in my head. This "pre-assembly walkthrough" has saved me countless hours of having to backtrack. Think of it like planning a route before a road trip – it helps you avoid those frustrating "wrong turn" moments. This is especially useful for complex assemblies with lots of moving parts. You can even use this time to locate all the parts beforehand, making the actual assembly go much smoother.
One thing manuals rarely tell you is when you absolutely need an extra set of hands. I learned this the hard way wrestling with a heavy-duty squat rack by myself. Gravity won. Look for steps that involve large, unwieldy parts or finicky alignments. These are your two-person cues, even if the manual doesn't explicitly say so. You might be surprised, but the same teamwork principles used for assembling IKEA furniture apply to workout equipment too!
Another trick I’ve picked up over time? Progress photos. As you complete major sections, snap a quick picture. It’s like leaving a trail of breadcrumbs. This creates a visual record of how things fit together, which can be incredibly helpful if you ever need to disassemble and reassemble. These photos are also useful for troubleshooting. If something goes wrong, you can easily see what the correct configuration should look like. This is a lifesaver when dealing with cable routing or those tricky spring mechanisms.
Manuals often present steps in an order that makes sense to the engineers, not the person putting the thing together. That’s why I create my own assembly checklist. I break down complex steps into smaller, more manageable tasks and check them off as I go. This keeps you organized and prevents those “wait, did I miss something important?” moments that can lead to having to redo a bunch of work. It's especially helpful during those marathon assembly sessions.
Part identification can be a real pain when the manual’s pictures look nothing like the actual hardware. My solution? Organize the hardware. I sort screws, bolts, and washers into labeled containers or ziplock bags. This takes the guesswork out of finding the right piece and helps you spot any missing or extra parts early on. Trust me, even a small difference in hardware can cause big problems later. Taking the time to organize your parts makes the entire process smoother and way less frustrating.

Let's talk real-world assembly tricks. These aren't the usual tips you see in manuals; they’re the hard-won lessons I've learned building my own home gym. First up: the "loose assembly" method. Don't crank down every bolt immediately. Leave things a bit loose until major sections are together. This gives you flexibility for adjustments and saves you from getting stuck in a bad position. I learned this the hard way with a power cage. Tightening too early made aligning the uprights a total nightmare. Loose assembly changed the game.
Proper tightening is like building a house of cards. If you don’t support each level, the whole thing collapses. Workout equipment is the same. Tighten bolts in a specific order to distribute stress and build a rock-solid structure. For example, on a weight bench, tighten frame bolts in a criss-cross pattern. This prevents warping and makes the bench super stable under heavy weight.
Spring-loaded parts are notorious for launching across the room. I've had a few near misses myself! My solution? Clamps or zip ties. Use them to control the spring tension while you attach the component. No more projectile parts. A magnetic parts tray is also a lifesaver. It keeps small bits organized and stops them from disappearing at critical moments.
Cable routing can make your finished equipment look professional or… not so much. A tangled mess looks amateur and can even affect how the equipment functions. Take your time to route cables neatly, securing them with zip ties or clips. This keeps things tidy and prevents snags. For more assembly tips, check out our exercise equipment assembly page.
At every major stage, I do a stability check. Just a gentle shake and wiggle to find any loose connections or wobbly bits. This catches problems early and saves major headaches later. Sometimes parts just won't cooperate, even when they should fit. This is where patience comes in. Double-check the instructions, clear any obstructions, and try different angles. A small adjustment often does the trick. Interestingly, the fitness equipment market varies geographically. Europe is projected to have the largest market share in 2025, showing a strong focus on health and fitness. Discover more insights.
As you assemble, notice how the equipment feels. Solid connections and smooth movements are good signs. Wobbly joints or loose-fitting parts suggest potential issues. These small details can tell you a lot about the quality and durability. By learning these techniques, you'll not only build your equipment efficiently but also understand how it works, making maintenance and troubleshooting easier. With some practice, you'll be assembling like a pro in no time.
Every seasoned furniture assembler has a war story or two (or ten!) about assembly mistakes – usually learned the hard way. I'm no different. Let me share some common pitfalls, the ones that not only slow you down but can actually damage your new equipment and force a complete restart. I once wasted an entire evening because I installed a leg upside down. A simple trick I'll share later could have saved me that frustration.
It happens to the best of us, right? But forewarned is forearmed, as they say!
Rushing through the early steps of equipment assembly almost always backfires. It's like building a house on a shaky foundation. Take your time with the initial steps, double-checking alignments and making sure parts are correctly oriented. This slower approach actually saves time in the long run. Trust me, I’ve learned this the hard way more times than I care to admit.
Another trap is fake progress. This is when you think you're cruising along, but you're actually setting yourself up for a major headache later. For example, tightening all the bolts before the entire frame is assembled can lock you into a position that just doesn't work. It's like forcing puzzle pieces together when they don't quite fit. You end up having to take it apart and start again.
Perhaps the costliest mistake beginners make is over-tightening bolts. This can strip the threads, damaging the equipment and potentially voiding your warranty. Think of it like driving a screw too hard into wood. It can crack the wood. Similarly, over-tightening bolts on workout equipment can weaken the frame or break crucial parts. I’ve been there, and it’s painful – both for my pride and my wallet.
My trick for getting that "just right" tightness? A torque wrench. Torque Wrench It might seem like an extra expense, but it’s a game-changer. Alternatively, you can develop a "feel" for proper tightness with practice. Start by tightening gradually, checking for resistance. Stop as soon as you feel significant pushback.
Look, we all make mistakes. Even seasoned assemblers mess up sometimes. The key is knowing how to recover. Sometimes, you can salvage the situation with a little ingenuity. A slightly misaligned hole can often be corrected with a rubber mallet or by carefully filing down any burrs. Other times, you might need to disassemble and start over. It's frustrating, but it's better than a wobbly or unsafe piece of equipment.
Knowing when to call it quits and retrace your steps is a valuable skill. If you’re wrestling with a single step for hours, or you notice significant damage, it might be time for a do-over. This can save you time and prevent further damage in the long run.
Before we wrap up, I’ve put together a handy table that outlines common workout equipment assembly errors, their consequences, and how to prevent them. This should give you a good overview of the key things to watch out for.
| Mistake | Consequence | Prevention Strategy | Fix Difficulty | Time Impact |
|---|---|---|---|---|
| Installing parts upside down or backward | Misalignment, instability, functional issues | Carefully examine diagrams, double-check orientation before tightening | Moderate to High | Significant (hours) |
| Over-tightening bolts | Stripped threads, damaged equipment, voided warranty | Use a torque wrench, develop a "feel" for proper tightness | Difficult to impossible | Significant (equipment replacement) |
| Rushing early steps | Misalignment, cumulative errors later | Take your time, double-check alignments | Moderate | Moderate (rework) |
| Ignoring warning signs (wobbly parts, mismatched holes) | Instability, unsafe equipment | Regularly check for stability, address issues immediately | Varies | Minor to significant |
| Missing parts | Incomplete assembly, functional issues | Organize hardware, check for missing parts before starting | Easy (if replacement part available) | Moderate (waiting for parts) |
By understanding these common mistakes, you can save yourself a lot of time and frustration. Learning from the mistakes of others is the smartest way to avoid repeating them yourself. With a little patience and attention to detail, you can transform workout equipment assembly from a dreaded chore into a satisfying accomplishment.
Putting together your new workout equipment is exciting, but let's be real, it can also be a bit of a beast. I've learned the hard way that assembly injuries are more common than you think, and trust me, you don't want to be sidelined before you even start your workout routine. I've had a few near misses myself, like almost dropping a weight stack on my foot (yikes!). So, over the years, through chats with physical therapists, safety experts, and just plain experience, I've picked up some safety tips that really make a difference. Hopefully, they'll help you keep all your fingers and toes intact!
Ergonomics isn’t just for office drones; it's key for assembling workout equipment, too. Think about it: you’re bending, lifting, and twisting for potentially hours. A good setup can save you from aches and pains. I always try to work at a comfortable height. A workbench is ideal, but even a sturdy table can do the trick. For floor-level work, knee pads or a thick mat are lifesavers. Seriously, your knees will thank you later.
Speaking of lifting, use your legs, not your back! Keep the weight close to your body and avoid twisting motions. If something feels too heavy, ask a friend for help. There's no shame in getting a second pair of hands, especially when it comes to safety. I’ve learned that lesson the hard way!
Also, remember to take breaks! I set a timer on my phone for 30 minutes to remind me to stand up, stretch, and walk around. This prevents muscle strain and keeps you focused, reducing the chances of making mistakes.
Workout equipment has its own unique set of assembly hazards. Spring-loaded mechanisms, for example, can be tricky. I like to use clamps or zip ties to control the tension while I'm working. Pinch points are another thing to watch out for. Be extra careful with your fingers, especially around moving parts. Taking your time and being mindful of where your hands are can prevent a lot of pain.
Good lighting is also essential. It's not just about seeing what you're doing; it's about safety. I use a combination of overhead lighting and a task lamp. A headlamp is great for those hard-to-reach spots, too.
Finally, don't mess around with electrical safety, especially for powered equipment. Unplug everything before you start working on any electrical connections. If you're not comfortable with wiring, call a qualified electrician. It's better to be safe than sorry! Always double-check your connections before plugging the equipment back in. These precautions may seem like small things, but they can really add up to a smoother, safer assembly experience.
After years of assembling workout equipment, I can tell you there’s no shame in admitting when a DIY project is just too much. Trust me, I've been there! It’s all about weighing the costs – not just money, but your time, frustration, and even the risk of injury – against the benefits of professional assembly. Some equipment is notoriously tricky, even for seasoned DIYers. I'm here to help you spot those challenges before you're knee-deep in nuts and bolts.
For example, think about those complex cable machines or heavy-duty power racks. These often require specialized tools and a real understanding of how the body moves to ensure they’re safe and effective. These projects can easily become a multi-day ordeal, especially if you run into missing parts or unexpected snags. And don't forget about warranties! Some manufacturers void them if you assemble the equipment yourself, while others actually require professional installation for coverage.
Honestly assessing your DIY skills is key. If you’re handy with basic tools and have put together furniture before, you can probably manage simpler workout equipment. But if the instruction manual looks like a foreign language or the equipment involves complicated wiring or heavy lifting, calling a pro might be the smarter move. Safety is paramount with workout equipment, so check out these tips on safety maintenance.
When you're looking for professional assemblers, find someone with specific experience in fitness equipment. You want someone who knows these machines inside and out, not just someone who can assemble a bookshelf. Check online reviews and don't hesitate to ask for references. A reputable assembler will be insured and bonded, protecting you if anything goes wrong.
Even with professional assembly, a little prep work goes a long way. Clear the area, lay out the parts, and have your tools handy (even if the pros bring their own). This helps them work efficiently, saving you time and money.
Here’s an example of what you might see when booking a professional:
TaskRabbit is a handy platform for finding professionals for all sorts of assembly tasks. This screenshot shows the different services they offer and gives you cost estimates, which makes budgeting and comparing options easier. You might also find this helpful: professional furniture assembly.
Another option is a hybrid approach. Handle the easier parts yourself and then call in the pros for the more complicated bits. This can be a good way to save money and still get the satisfaction of doing some of the work yourself. Just be sure to communicate clearly with the assemblers about who’s doing what to avoid confusion and ensure everything fits together correctly. This teamwork approach works particularly well for larger, more complex equipment.
Want a simpler solution and the peace of mind knowing your workout equipment is assembled safely and correctly? Check out Assembly Smart for professional, reliable assembly services.
