-
CALL US:
- (866) 952-3456
I've been assembling equipment for a long time, and I can tell you this: a successful build starts way before you even pick up a wrench. It all begins with a solid plan.
Honestly, just taking the time to prep your space and do a quick inventory of the parts can prevent 90% of the usual headaches. We're talking about avoiding those moments where you realize a bolt is missing or, worse, that the brand-new treadmill won't actually fit in your room.
The thrill of unboxing new fitness equipment can fade pretty fast if you haven't done the groundwork. It's so tempting to just dive right in, but that’s how you end up discovering a missing piece halfway through or realizing your new machine blocks the closet door. The real secret to a frustration-free build is a methodical pre-assembly process. It's all about setting yourself up for success before the first bolt even gets tightened.
And this has never been more important. The home gym market is booming—it's expected to blow past USD 31 billion by 2025. With so much equipment making its way into our homes, getting the assembly right is non-negotiable for safety and for the machine to actually work properly.
First things first, figure out exactly where this machine is going to live before you open the box. This spot should be its final home, because trust me, trying to move a fully assembled, 300-pound elliptical is a workout you didn't sign up for.
Think about these key things when picking your spot:
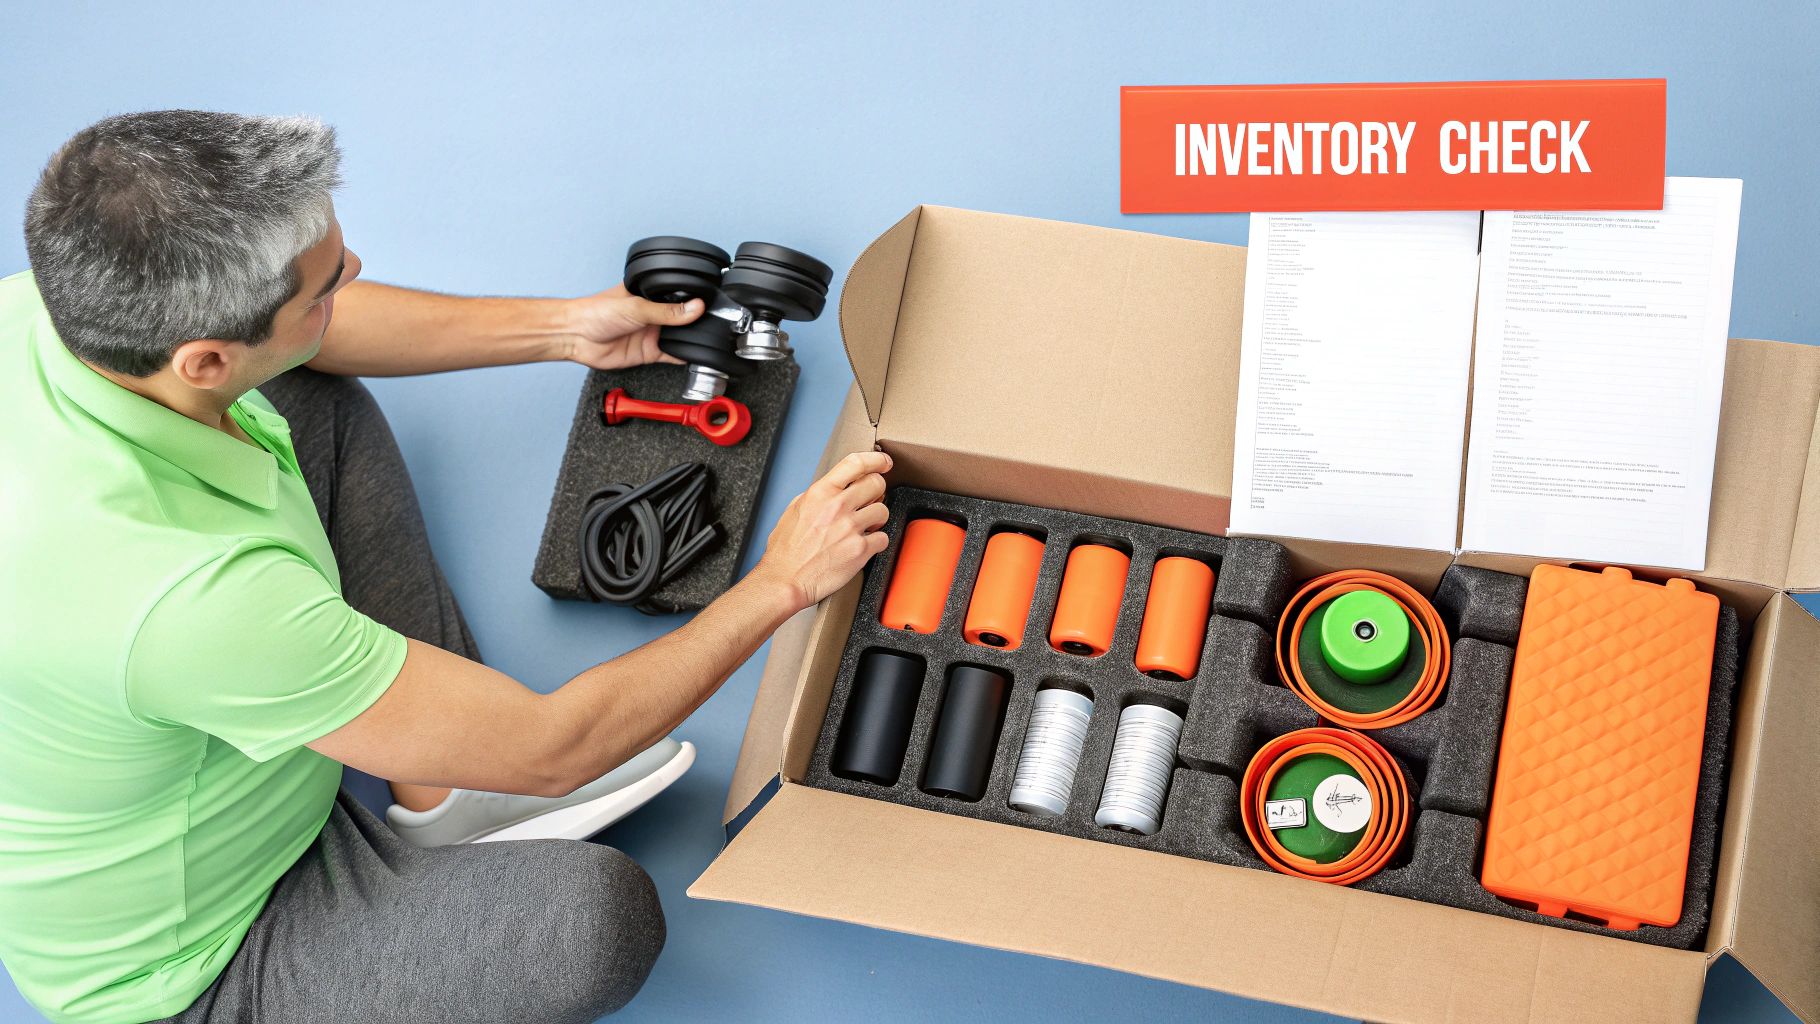
Alright, space is prepped. Now it's time to unbox. I know you want to tear into it, but hold back. Treat it like a careful excavation. I like to lay down a blanket or use the flattened cardboard from the box itself. This protects both your floor and the new equipment parts from getting scratched up.
Next up is the most crucial part: a detailed inventory. Grab the parts list from the manual and physically check off every single nut, bolt, washer, and frame piece. Manufacturers are getting better at this, often packing all the little hardware bits in clearly labeled blister packs, which definitely helps. This simple check ensures you have everything you need before you start, saving you from that gut-sinking feeling of stopping mid-build because a single M8 bolt is nowhere to be found.
The same planning principles apply to all sorts of big projects. For instance, this guide to metal building installation shows just how critical a thorough inventory and site prep are, no matter what you're building.
Before we move on, let's put all that into a quick, scannable checklist you can use for any assembly project.
Here’s a quick-reference table to run through before you start. Taking these few extra minutes upfront will save you hours of frustration later.
| Checklist Item | Why It's Important | Pro Tip |
|---|---|---|
| Measure the Space | Ensures the equipment fits with enough clearance for safe use. | Use painter's tape on the floor to mark the machine's footprint plus the 2-3 ft safety bubble. |
| Confirm Level Floor | Prevents wobbling, which can damage the machine and be unsafe. | Use a carpenter's level to check the spot. If it's uneven, an equipment mat can help compensate. |
| Check Power Outlet Access | Avoids the use of hazardous, potentially overloaded extension cords. | Uncoil the machine's power cord to see its true length before you decide on the final placement. |
| Perform a Full Parts Inventory | Guarantees you have every nut, bolt, and component before starting. | Use small containers or a muffin tin to organize hardware after you've checked it off the list. |
| Read the Manual Thoroughly | Provides critical safety warnings and step-by-step instructions. | Highlight key steps or warnings as you read through it the first time. |
Following this checklist sets the stage for a much smoother assembly, turning what could be a headache into a straightforward task.
Pro Tip: If you find a damaged or missing part during your inventory, just stop. Don't try to make it work. Get on the phone with the manufacturer's customer support and give them the part number from the manual. Rigging it with a substitute part can void your warranty and, more importantly, create a serious safety risk.
If you take only one piece of advice from this, let it be this: read the instruction manual from cover to cover. It's so easy to just look at the pictures and think you've got it, but that’s a classic mistake.
That manual is your bible for the next couple of hours. It has critical safety warnings, specific sequences for tightening bolts (yes, it matters!), and troubleshooting tips that can save you from a world of hurt. Visualizing the entire process beforehand—which is just as vital for gym gear as when you prepare for a furniture assembly project—turns a confusing puzzle into a clear, manageable job.
Let’s be real for a minute. That tiny, stamped-metal wrench they throw in the box is more of a cruel joke than a real tool. Trust me, trying to build a power rack with it is a one-way ticket to busted knuckles and a wobbly, unsafe machine.
A proper, sturdy, and safe gym equipment assembly all comes down to having real tools that give you the right leverage and fit. Think of investing in a decent toolkit not just for this one project, but for all the little jobs that will pop up for years to come.
Before you even slice open the box, you need to have a few key players on your side. These are the tools that will handle almost everything you’ll encounter, from treadmills and ellipticals to weight benches and squat racks. They provide the muscle you need to properly torque down heavy-duty frames, ensuring your gear is solid and secure.
Here’s your must-have list:
Got the basics covered? Great. Now, a few other tools can take the experience from a frustrating chore to a surprisingly smooth process. They aren't strictly required, but once you use them, you’ll see why they're worth it.
Consider adding these to your arsenal:
Having these tools on hand will prepare you for just about any assembly challenge. The logic is universal—you can see a similar lineup in our complete guide to essential furniture assembly tools.
I see this all the time: someone trying to tighten the main frame bolts on a power rack. The manual calls for 70-80 ft-lbs of torque, but the included wrench can't even get close. Using a proper socket wrench is the only way to make that rack rock-solid so it won't sway under a heavy barbell. It’s a huge safety issue.
Bottom line? The right tools are your best insurance against a frustrating build and, more importantly, an unsafe piece of equipment. They let you do the job right.
Look, whether you're staring at a box for a simple weight bench or a complex treadmill with a thousand parts, the logic behind gym equipment assembly is pretty much the same. The trick is to stop seeing it as one giant, intimidating project. You just need to break it down into a series of smaller, more manageable phases.
This isn't just about making your life easier; it's critical for the equipment's performance and your safety. I've seen it countless times—improper assembly is a leading cause of equipment failing way too soon. With the U.S. fitness industry projected to hit $45.7 billion by 2025, you want to make sure your investment lasts. Simple mistakes during the build can dramatically increase the risk of malfunctions and accidents down the line.
The image below lays out the prep work that really sets the stage for a smooth build.
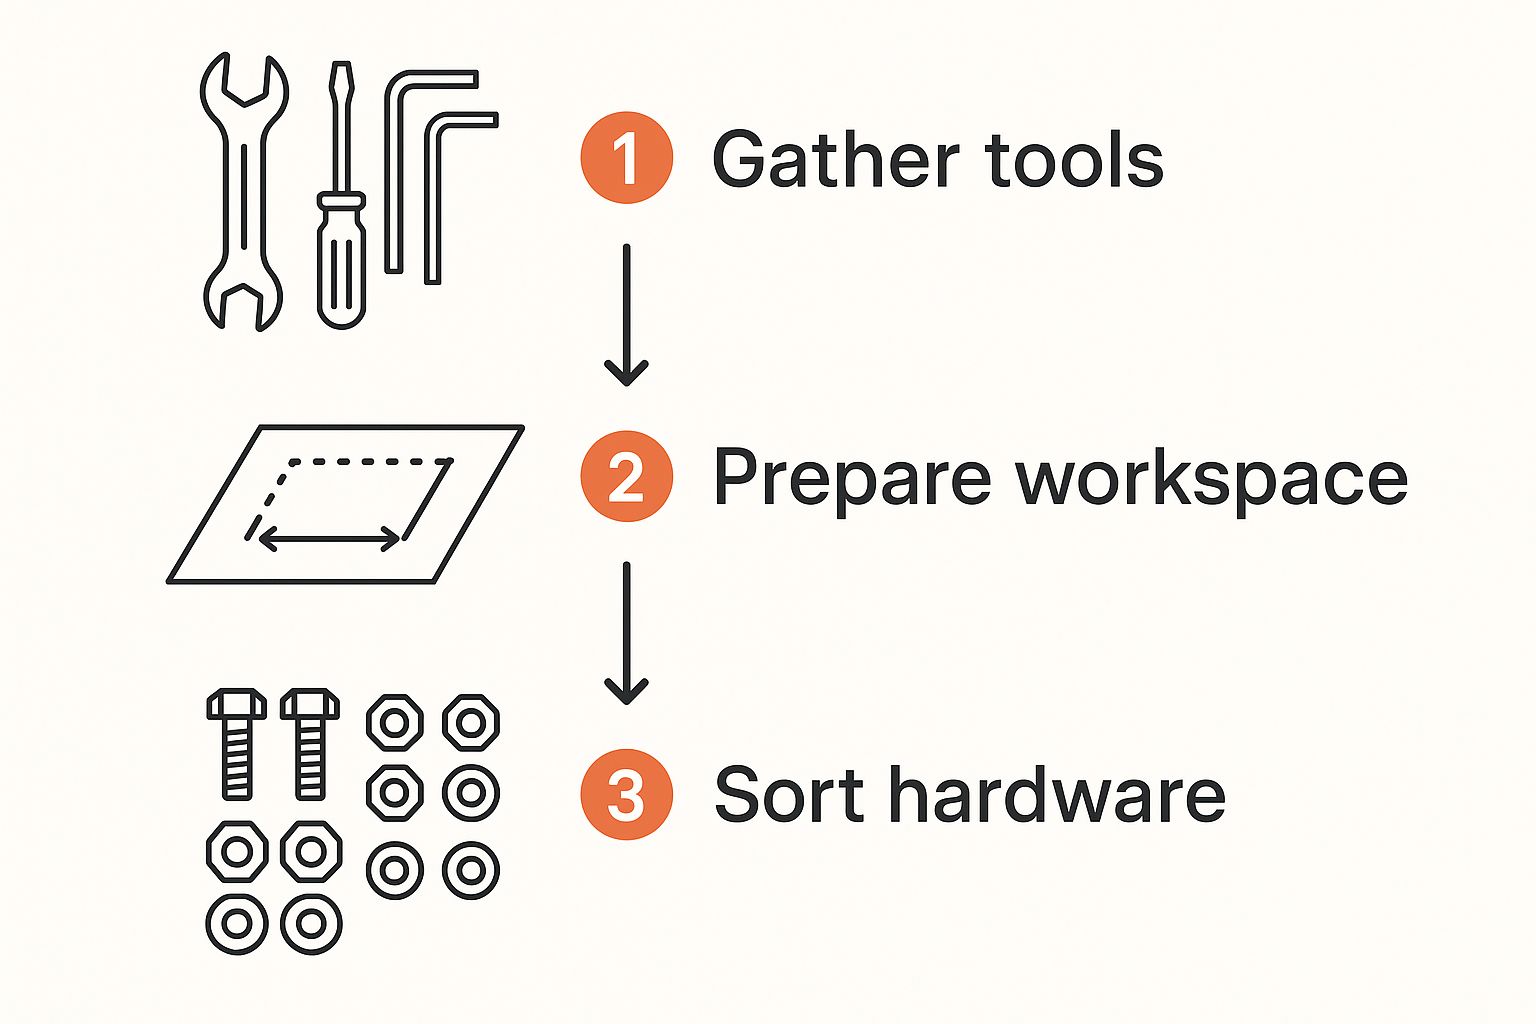
It’s a simple but powerful truth: gathering your tools, clearing the space, and sorting your hardware are the real cornerstones of an efficient assembly.
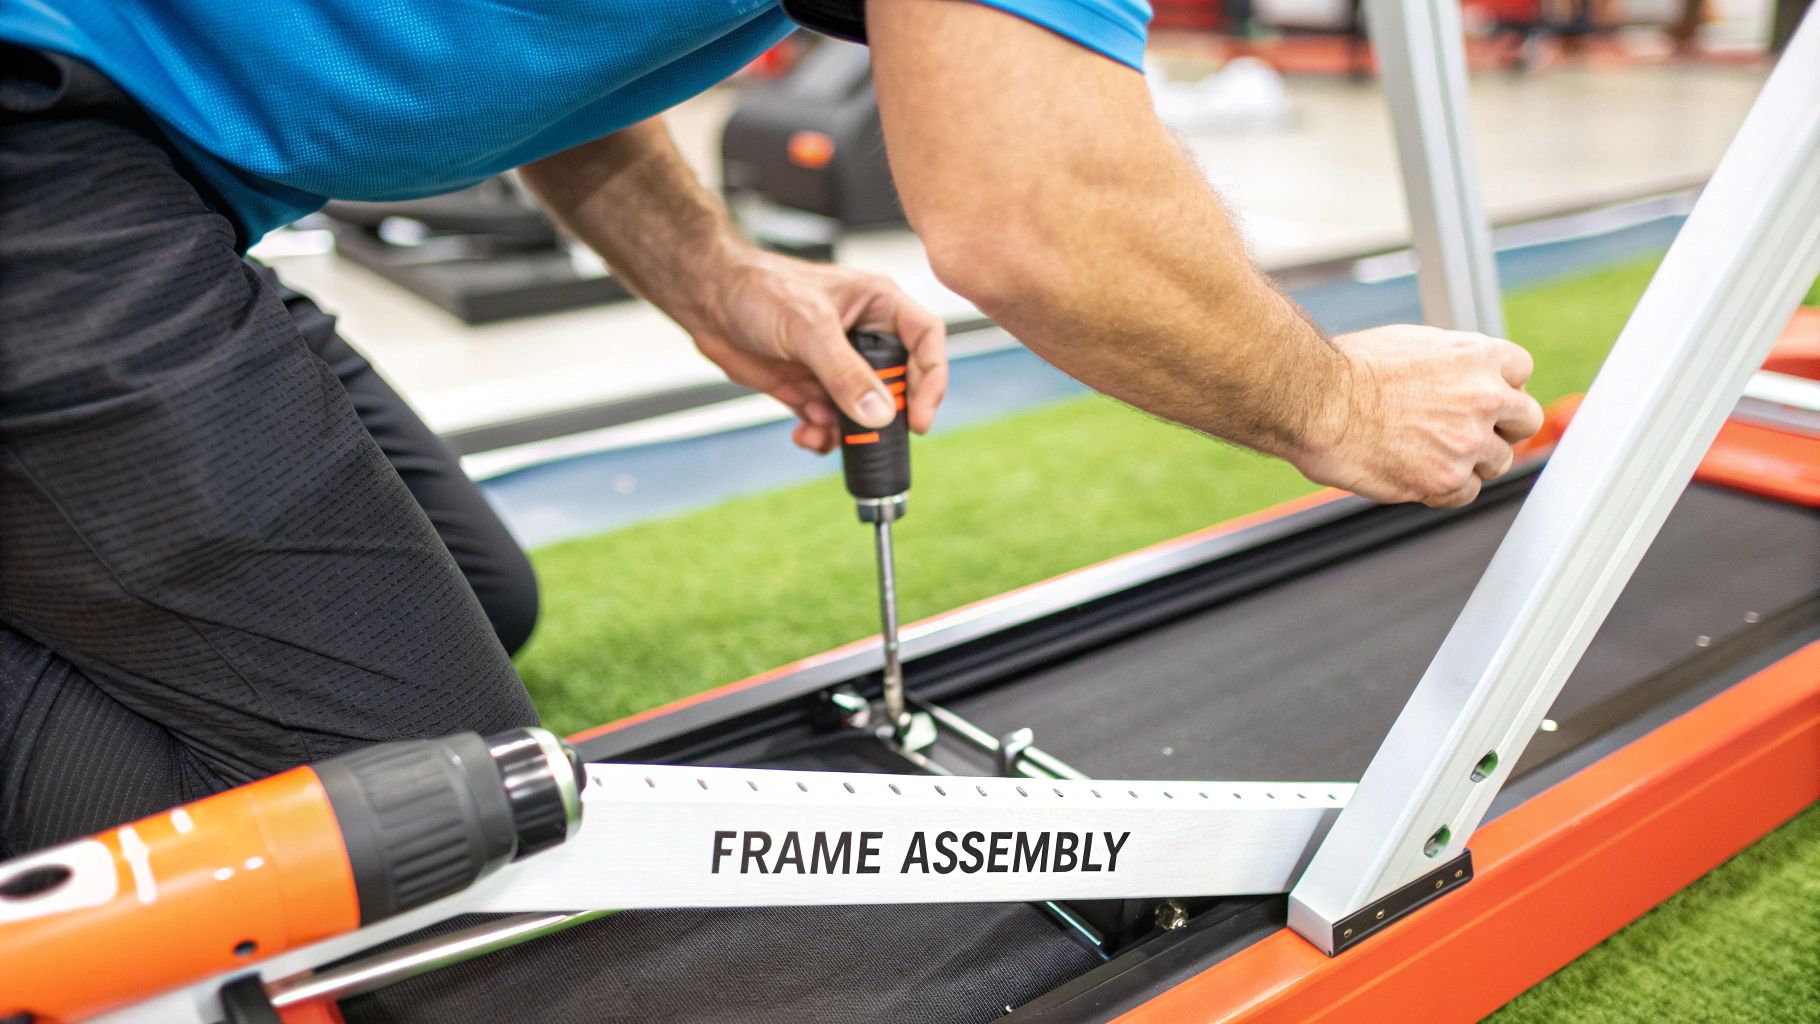
Every single piece of equipment, from a squat rack to an elliptical, starts with a base. This is the part that sits on the floor and gives the whole machine its stability. Your first job is to hunt down these foundational pieces—they’re usually the heaviest and most awkward parts in the box.
For a weight bench, this might be the two main floor supports. For a treadmill, it's that huge, heavy deck and frame assembly. Just follow the manual to get these first pieces connected.
The Golden Rule of Assembly: Only hand-tighten your bolts when you're first putting the frame together. You'll need that little bit of wiggle room to get everything else to line up later. The final, serious tightening comes at the very end.
This "loose assembly" trick is non-negotiable for the pros. It lets you make tiny adjustments as you go, ensuring all the bolt holes line up without you having to fight them.
Once you have the base sorted, you can start building up. This next part is all about attaching the main vertical structures that give the machine its height and shape.
This is often the point where you’ll wish you had a second person. Trying to hold a heavy upright steady with one hand while fumbling with a bolt and washer is a recipe for pure frustration.
With the static frame loosely in place, it's time to add all the parts that are supposed to move. This is where you really need to pay attention to detail, because this is what makes the machine actually work. Get this part wrong, and you can expect poor performance, weird noises, or even a total breakdown.
You’ll be doing things like:
Keep a close eye on all the little washers, bushings, and spacers here. These tiny parts are crucial for smooth, friction-free movement. I've seen a single misplaced plastic washer cause nasty metal-on-metal grinding that wears down components in no time.
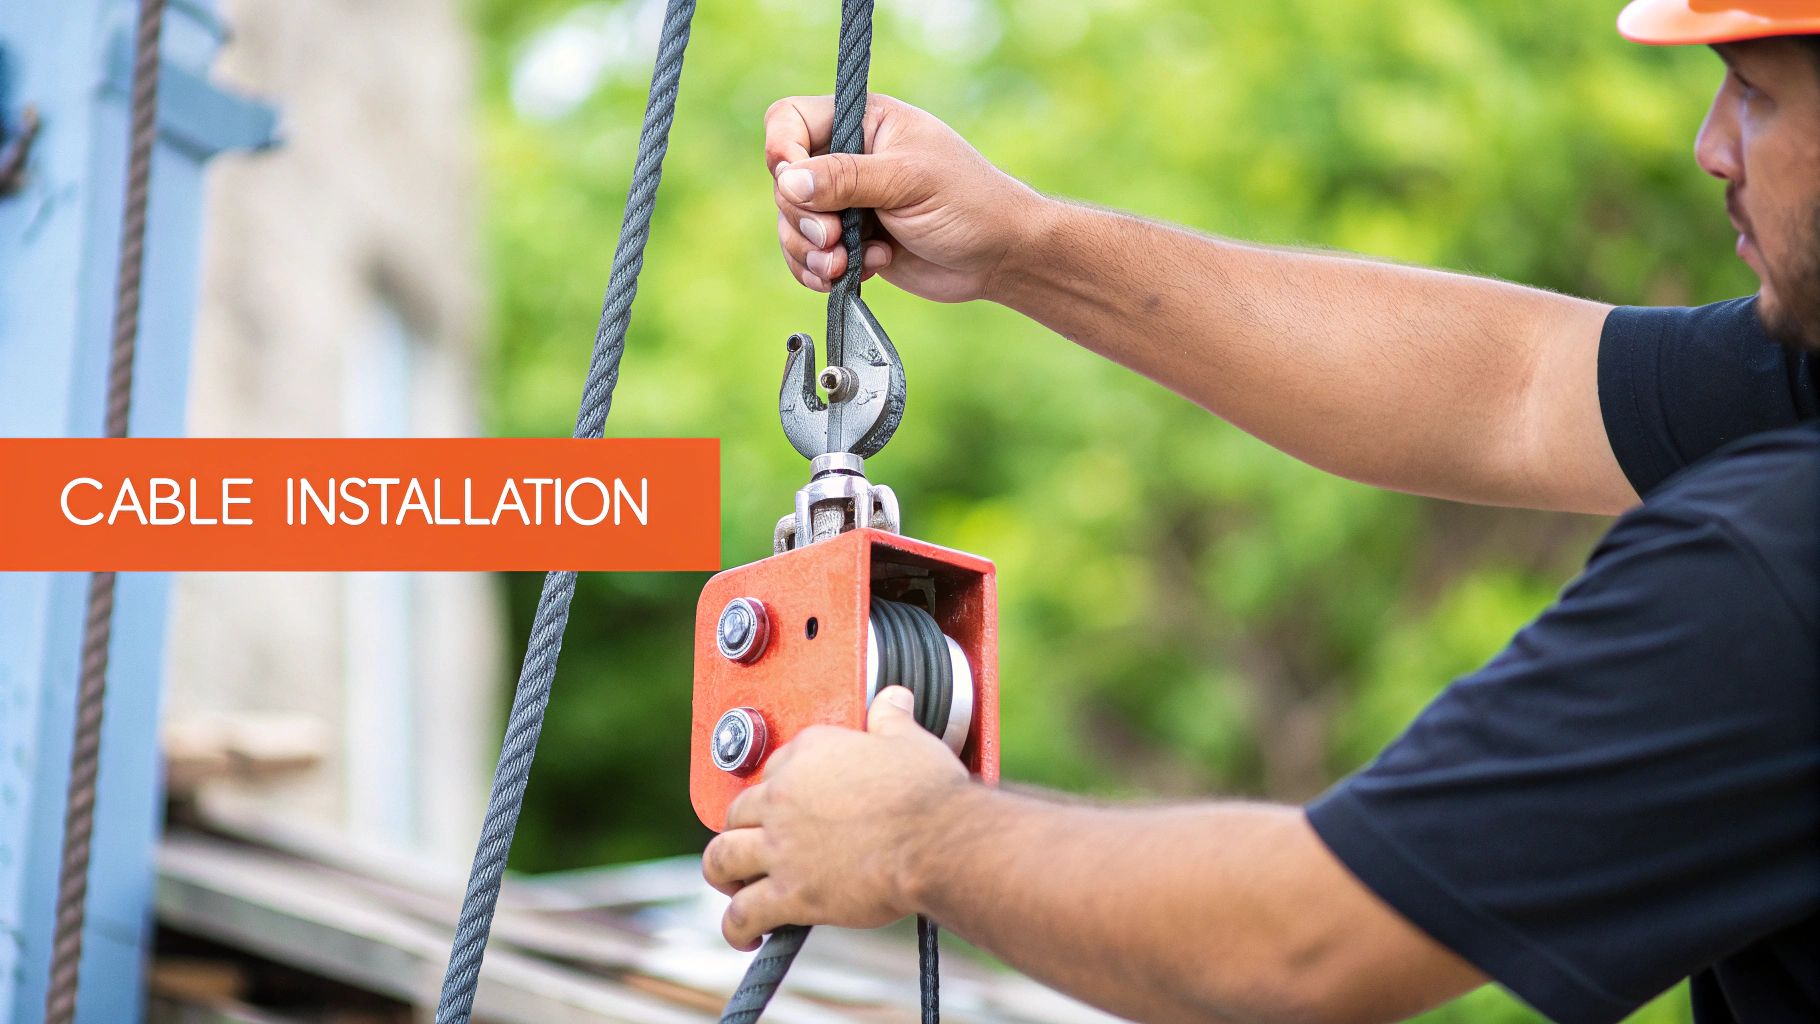
If you hit a wall during this or any other phase, remember you can always call in a professional. Getting an expert to install fitness equipment is a great way to make sure the job's done right, especially with the more complicated machines.
For cardio machines, the next-to-last step is hooking up all the electronics. This usually means carefully routing sensor wires and power cables through the frame before you attach the main console.
Be incredibly careful here. These wires can be delicate and are easily pinched or even severed if you don't run them through the designated channels in the frame. A pinched wire is one of the most common reasons a brand-new machine's console won't even power on. Use the zip ties or clips they give you to keep the cables tidy and safely out of the way of any moving parts.
Alright, with everything loosely in place, you can finally begin the most critical phase: the final tightening. This isn’t just about cranking down on every bolt you see. It's a methodical process that ensures the frame is square, stable, and totally secure.
Here’s how the pros do it:
Even with the best prep work, you can hit a wall during a build. It’s that moment when a straightforward DIY project suddenly feels like a massive headache. This is where most people get bogged down, but trust me, these common issues are almost always fixable with a bit of patience and the right approach.
Let's walk through the most frequent snags you'll run into and the field-tested solutions to get you moving again. We'll turn those potential showstoppers into minor bumps in the road.
This is, hands down, the most common and frustrating problem. You’re trying to connect two heavy frame pieces, and the bolt holes are off by just a fraction of an inch. It’s maddening, but whatever you do, don't try to force it—you'll risk cross-threading the bolt and permanently damaging the frame.
The culprit is almost always tension in the frame because other bolts are already cinched down too tight. Remember the golden rule? Keep everything hand-tight until the very end. If you’ve already done that and still have an issue, try these tricks:
For a really heavy piece, like the base of a power rack, a small car jack can be your secret weapon. Just be sure to place a piece of wood on the jack to protect the equipment's finish and use it to gently lift one side of the frame into perfect alignment.
A stripped screw head can bring your entire project to a screeching halt. This usually happens from using the wrong size screwdriver bit, a cheap Allen key that rounds off, or applying way too much torque with a power drill.
When the head is stripped, your tool can't get a grip to turn it. Don't panic; you have options. For minor stripping, try placing a wide rubber band between the screw head and your screwdriver. It can sometimes provide enough extra friction to back the screw out.
If that doesn't do the trick, you'll need a more direct approach. You might be able to grab the outside of the screw head with locking pliers and turn it. For more severe cases, learning how to get a stubborn screw out with a dedicated screw extractor kit is a skill that will save you countless times.
You've laid everything out, but halfway through the build, you realize a critical bolt is gone or a plastic cover is cracked. Whatever you do, don't try to find a substitute from your random-parts bin in the garage. Using the wrong hardware can compromise the machine's structural integrity, which is a serious safety risk.
Stop Immediately: The moment you discover a missing or damaged part, stop the assembly. Find the manufacturer's customer support line, have your model number ready, and tell them the specific part number you need from the manual. They will ship you the correct replacement.
Yes, it's an annoying delay, but it’s the only safe move. Trying to "make it work" is how equipment fails down the road. In fact, roughly 64% of gym owners need equipment service within 18 months of initial use, and many of these issues stem from minor assembly errors or using incorrect parts. Treadmills are the biggest offenders, making up about 35% of all repair calls, which just goes to show how vital that initial setup is.
Sometimes the problem isn't the hardware; it's the manual. Vague diagrams and confusing text can make a simple step feel like rocket science. When you're staring at a diagram that makes zero sense, just take a break and reset.
Just because you've tightened the last bolt doesn't mean you can hop on for a workout. Not yet. The final steps in any gym equipment assembly are arguably the most important, turning your hard work into a safe, reliable machine you can trust for years.
Think of this as your final quality check. It's where you spot the tiny issues—a slightly wobbly frame, a bolt that settled—before they have a chance to become big, expensive problems. A small flaw can lead to premature wear or, worse, a complete equipment failure right in the middle of a workout.
Before you even think about breaking a sweat, it's time for a top-to-bottom inspection. This isn't a quick glance; it's a methodical pass to make sure everything is perfect.
First, go back to every single nut and bolt you tightened. It's amazing how a fastener can feel snug during the build but loosen up once the frame is bearing its own weight. Grab your socket wrench and do one last tightening pass, confirming everything is locked down to the manual's specs.
Next up, give the machine a good shake from a few different angles. You're looking for rock-solid stability. If there's any wobble at all, the usual suspects are bolts that need that final crank or an uneven floor. An equipment mat is a great fix for minor floor imperfections.
Finally, it's time to test the mechanics by hand.
Listen carefully. You want to hear… nothing. Smooth, silent operation is the gold standard. Any grinding, catching, or unusual resistance means something needs another look.
Your new gym equipment is a serious investment. Like any machine, a little regular upkeep is the key to keeping it running smoothly and avoiding headaches down the line. A proactive maintenance routine doesn't need to be a huge time-sink.
A consistent schedule helps you catch things like a fraying cable or a loose pedal long before they become a safety hazard. It's a simple habit that protects both your gear and yourself.
Expert Insight: The vast majority of service calls we see for home gym equipment trace back to issues that basic maintenance could have easily prevented. A weekly wipe-down and a monthly bolt check can literally add years to your machine's life.
Here's a straightforward schedule to keep your equipment in peak condition.
This simple plan will help you keep your newly assembled gear in top shape and head off the most common problems before they start.
| Frequency | Task Description | Equipment Examples |
|---|---|---|
| Weekly | Wipe down all surfaces to remove sweat and dust. Check for and tighten any loose plastic covers or accessories. | Treadmills, Weight Benches, Ellipticals |
| Monthly | Perform a full bolt check, re-tightening any structural hardware that has loosened. Lubricate moving parts as specified in the manual. | Power Racks, Cable Machines, Stationary Bikes |
| Quarterly | Inspect all cables, belts, and upholstery for signs of wear, fraying, or cracks. Test all electronic functions and display readouts. | All Cardio Equipment, Home Gyms |
Sticking to a simple checklist like this ensures your equipment stays safe, reliable, and ready for every workout you throw at it.
https://www.youtube.com/embed/q0Rk-eIzsuk
Even with the world's best instruction manual, a few questions always seem to pop up in the middle of a big project. If this is your first time putting together a serious piece of gym equipment, it's completely normal to feel a bit uncertain. Let's clear the air on some of the most common things people ask.
When you're stuck, hitting up a frequently asked questions page can be a lifesaver. My goal here is to give you that same kind of quick, practical clarity right now.
This is the big one, and the only honest answer is: it depends. A simple weight bench? You might be done in under an hour. But for a beast of a machine like a multi-station home gym or a high-end treadmill, you should probably block off four to six hours. And yes, that’s even for someone who's done this before.
A few things can really swing that timeline:
Take your time. When you rush, you put a part on backward or strip a bolt, and those little mistakes turn into massive headaches later. It’s always better to block off too much time than not enough.
Look, there’s a real sense of accomplishment that comes from building something yourself, not to mention the money you save. If you have a basic set of tools, the patience to follow directions without skipping steps, and you’re okay with some lifting, you can absolutely tackle this on your own.
On the other hand, bringing in a professional to handle your gym equipment assembly is a very smart call if you're:
Hiring a pro isn't just about getting it done faster. It’s about peace of mind. They ensure it's built correctly and safely, which protects your investment and prevents the kind of incorrect assembly that can void your warranty. Weigh the value of your time against the importance of a perfectly built machine—the right answer is the one that gets you working out safely and without all the stress.
Don't let a complicated assembly process stand between you and your fitness goals. If you want a perfect, stress-free setup, trust the experts. Assembly Smart offers professional, insured, and reliable gym equipment assembly services, ensuring your machine is built right the first time. Book your appointment online today and start your workout with confidence.
