-
CALL US:
- (866) 952-3456
Before you even dream of the first bounce, a little prep work goes a long way. Think of it like this: spending 30 minutes on the ground now can save you hours of frustration later. Getting these first few steps right is the secret to a smooth, headache-free assembly.
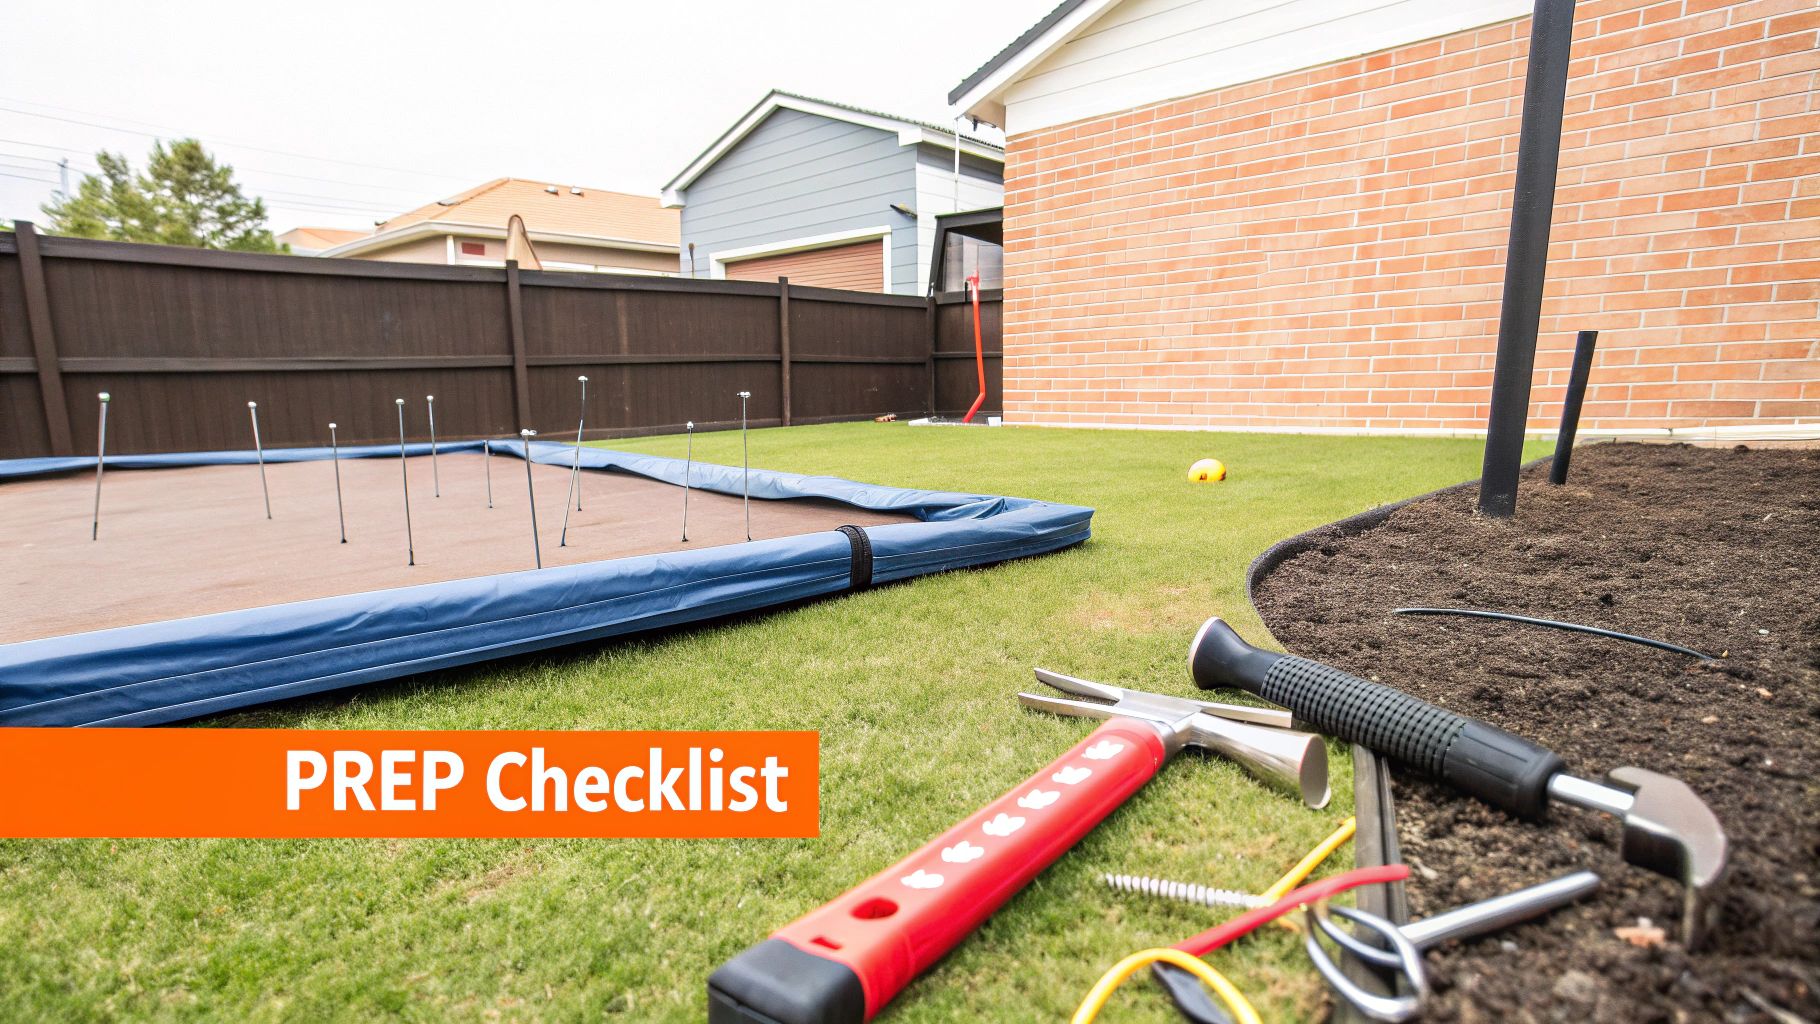
The first, most critical decision is where this trampoline will live. You're looking for a spot that is completely level. Even a minor slope can put uneven stress on the frame over time, creating a serious safety risk and potentially leading to tipping.
Once you’ve found that perfect flat patch of grass, get out your tape measure. You need 3-5 feet of clear, open space around the entire perimeter of the trampoline. That means no fences, no tree branches, no sheds—nothing. This safety buffer is absolutely non-negotiable.
Okay, you've got the perfect spot. Now it’s time to crack open the boxes, but hold off on building just yet. Your first task is a full inventory check. Lay out every single nut, bolt, pole, and spring, and meticulously check it against the parts list in your instruction manual. Trust me, finding out you're short one bolt halfway through is a massive pain.
Next, let's talk tools. The little wrench they throw in the box is technically a tool, but you'll thank yourself for grabbing some real equipment. Having the right gear makes the job faster, easier, and a whole lot safer.
Here’s a quick rundown of what you’ll want to have ready before you start.
| Item Category | Specific Item | Why You Need It |
|---|---|---|
| Safety Gear | Work Gloves | Protects your hands from getting pinched or scraped, especially when handling springs. |
| Assembly Tools | Spring Puller (T-Hook) | This is non-negotiable. It gives you the leverage to safely attach springs without straining your muscles. |
| Rubber Mallet | Perfect for tapping frame pieces together securely without denting the metal finish. | |
| Socket Wrench Set | Much faster and more effective than the small, flat wrench that comes with the kit. |
Having these items on hand before you begin will make the entire process feel less like a chore and more like a satisfying project.
So, how long is this actually going to take? Be realistic. A standard backyard trampoline will probably take you between 1 to 2 hours. But if you've got a massive 15-foot model, you could be looking at 3 to 6 hours of work.
There are a lot of springs and safety features to get through, and it all adds up. Here's a pro tip: using a proper spring puller can cut the time it takes to attach each spring from a couple of minutes down to about 30 seconds. That's a huge time-saver.
If you want a more detailed breakdown of what to expect, check out our guide on how long it takes to assemble a trampoline. Getting your prep work done right is the key to a successful build without any show-stopping surprises.
Alright, with your parts all laid out on a nice, level patch of ground, it's time to get down to business. This is the stage where that intimidating pile of metal tubes starts to actually look like a trampoline. The frame is the literal foundation for every single bounce, so getting this part right is absolutely critical for safety.
First things first, you'll want to lay out the curved or straight top rail pieces to form the main ring (or rectangle, depending on your model). Just check your manual to see how many pieces make up the circle. Your goal here is to connect these tubes using the T-sockets—they're the joints that hold the frame together and give the legs a place to connect.
As you start sliding the frame tubes into the T-sockets, you might find the fit is a little snug. Don't worry, that’s actually a good sign of quality manufacturing. It can, however, be a bit frustrating if a piece feels like it's stuck.
Whatever you do, don't try to force it. That's a quick way to bend the metal. Instead, just grab your rubber mallet. A few gentle but firm taps should be all it takes to seat the tube securely inside the socket. This little trick prevents you from scratching up the powder coating and ensures you get a tight, wobble-free connection.
Pro Tip: Here’s a piece of advice we give everyone: don't fully tighten any of the bolts or screws just yet. Go ahead and assemble the entire frame ring first, but leave all the hardware just hand-tight. This gives you a little wiggle room to make adjustments and ensures all the holes line up perfectly before you lock everything down.
Once you have the top frame loosely assembled, it’s time to give it some legs.
The legs are what provide the trampoline's height and, more importantly, its stability. Most designs use U-shaped or W-shaped leg pieces that slide right into the T-sockets you just installed. But pay close attention to which way they're facing.
Manufacturers often design the legs to curve slightly outward at the base. This creates a wider, more stable footprint. We've seen it happen—installing a leg backward can really compromise the trampoline's balance.
This "hand-tighten first" approach is probably the single most important tip for assembling a trampoline. It prevents that common headache where you tighten one section too early, only to find the holes on the opposite side are now completely out of alignment. Trust us, everything will fit together much more smoothly this way.
Now that the entire frame and all the legs are connected, the structure should be standing on its own. It's time to make it solid. Go back to where you started and begin systematically tightening all the bolts with your socket wrench. A good technique is to work your way around the trampoline in a cross-pattern—tighten one bolt, then move to the one on the opposite side.
This method ensures you're applying even pressure across the entire frame, pulling it into perfect alignment. It's the same principle mechanics use when tightening the lug nuts on a car tire. Give every single bolt a final, firm turn until it's completely secure.
Once you're done, give the frame a good push. It should feel solid as a rock, with no wobbles at all.
Alright, now we get to the part that takes a bit of elbow grease. Attaching the jumping mat and all those springs is usually where the frustration kicks in for most people, but trust me, a little strategy goes a long way. This is the step that transforms that metal circle into an actual trampoline, and getting the tension just right is critical.
The secret here isn't about brute strength—it's about working smarter. If you just start hooking on springs from one side and try to work your way around, you'll create a nightmare scenario. The tension will build up so unevenly that those last few springs will feel physically impossible to stretch. This is hands-down the most common mistake people make, and it almost always ends with having to take everything off and start over.
To sidestep that common headache, we use a technique called the "clock method." It's simple: just picture your trampoline frame as a giant clock face. The goal is to attach the first four springs at the main points—12, 6, 3, and 9—to spread the tension out evenly right from the get-go.
It feels like you're jumping around a bit, but this method guarantees you won't be wrestling with insane tension later on.
With those four initial springs locked in, the mat will be floating nicely in the center with perfectly balanced tension. Now, you're ready to start filling in the rest.
This diagram shows the frame assembly, which is the foundation you need to have solid before you even think about grabbing a spring.
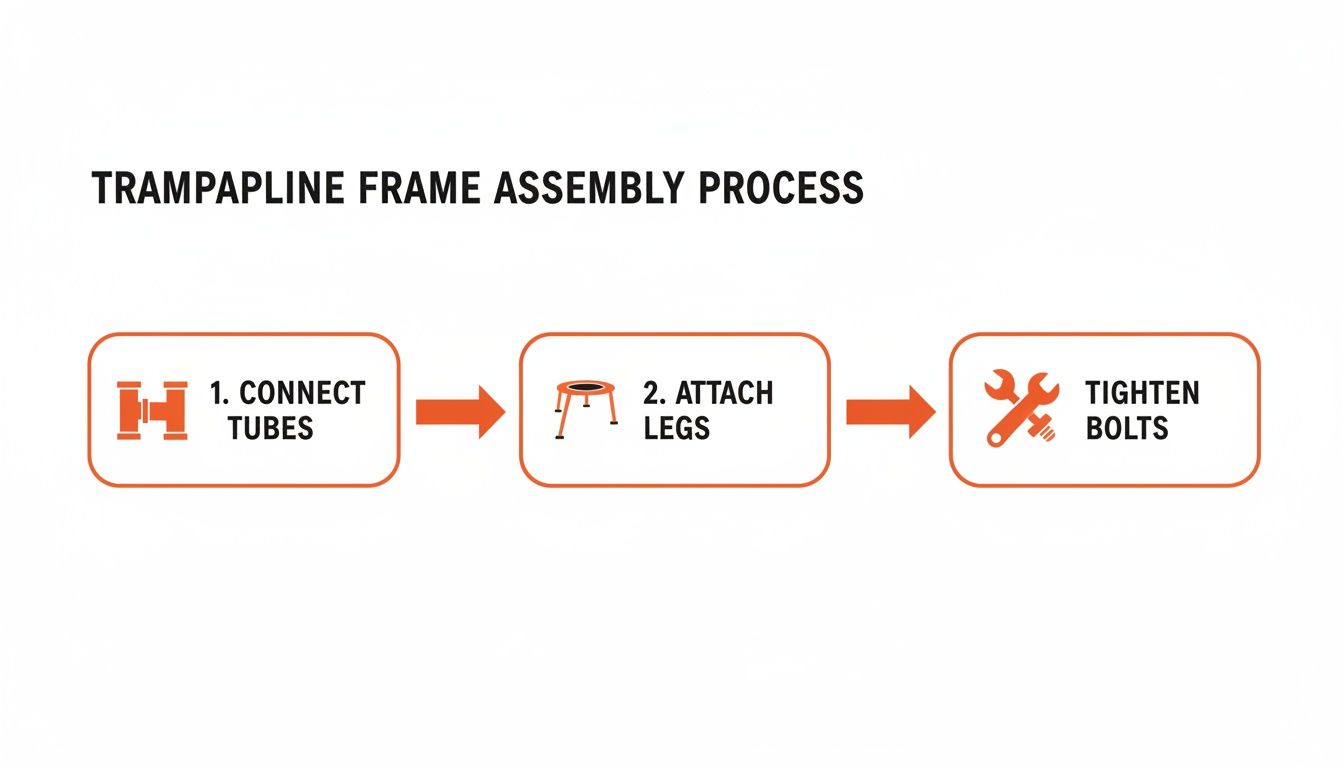
As you can see, a sturdy build starts with getting the tubes connected, legs attached, and all bolts tightened down. Nail these steps first.
That little T-shaped tool, the spring puller, is about to become your best friend. Don't even think about trying to attach these by hand—it’s a surefire way to pinch your fingers, and you just won't have the leverage you need.
Take a look at the spring itself. You'll notice one end has a more open hook; that's the side that latches onto the frame. The tighter, more closed hook connects to the V-ring on the mat.
Here's the motion:
A typical trampoline has anywhere from 48 to 120 springs. When you're dealing with that many, getting the sequence wrong is a big deal—it accounts for 70% of common assembly failures that force you to start over. Pulling unevenly creates so much tension that the last few springs feel impossible. You can learn more about how the pros tackle this by checking out these detailed assembly steps.
Now that your four "clock" springs are in, you just need to fill in the gaps. The key is to keep things balanced. Do not just go around in a circle.
Instead, keep using that opposite-pairing pattern. If you attach a spring at the 1 o'clock position, your very next one should go at 7 o'clock. Then maybe move to 2 o'clock, followed immediately by 8 o'clock, and so on. This "star pattern" method keeps the mat centered and lets the tension build up gradually and evenly across the entire surface.
The table below breaks down the right way versus the wrong way to think about this process. Following the "Do" column will save you a world of hurt.
| Action | The Right Way (Do) | The Wrong Way (Don't) |
|---|---|---|
| Starting Out | Attach the first four springs at 12, 6, 3, and 9 o'clock to create a balanced foundation. | Attach all the springs on one side first before moving to the other. |
| Continuing | Follow a "star pattern," always attaching a spring on the opposite side immediately after. | Work your way around the trampoline in a clockwise or counter-clockwise circle. |
| Using the Tool | Use the spring puller (T-hook) for leverage and safety on every single spring. | Try to pull springs into place by hand, especially toward the end. |
| Pacing | Take your time and stick to the sequence, even if it feels slower at first. | Rush through the process, ignoring the pattern to try and finish faster. |
As you get more springs attached, the tension will naturally get higher. That's totally normal. You'll have to give the T-hook a stronger pull for the last dozen or so, but since the tension is balanced, it will always be manageable.
Once they're all in place, do a quick walk-around and visually inspect each one. Make sure every spring is securely hooked in on both the mat side and the frame side.

The heavy lifting is officially over. With the frame solid and the mat perfectly tensioned, you’re now moving on to the crucial safety features that turn this into a truly family-friendly piece of equipment.
These final layers—the spring pad and the enclosure net—are what provide peace of mind. But don't rush through this part. Properly installing these components is just as important as building a sturdy frame. A loose pad or a saggy net can create hazards that undermine all your hard work.
Let's get these final details right.
First up is the spring cover pad. This is the thick, cushioned ring that lays over the entire spring system, creating a protective barrier between jumpers and the hard metal parts. Its job is simple: to prevent feet or hands from slipping between the springs during a bounce.
Unfold the pad and lay it over the frame and springs, making sure the padded side is facing up. You'll see a series of elastic straps or ties on the underside—these are what hold it firmly in place.
Once all the ties are secured, walk around the trampoline and give the pad a few good tugs. It shouldn't move or lift easily. A securely fitted pad is your first line of defense against spring-related injuries.
With the padding in place, it’s time to build the support structure for the safety net. The enclosure poles usually come in multiple sections that slide together, a lot like tent poles. Most will also come with thick foam sleeves for protection.
Here’s a tip from experience: slide the foam sleeves over each pole section before you connect them. It’s a real pain to try and do this after the poles are fully assembled. Once the poles are built and padded, you’ll attach them to the trampoline's legs using the provided clamps or U-bolts.
A well-installed safety net is a critical feature. For families with young children, choosing a model with an integrated, no-gap enclosure is one of the best ways to ensure a secure jumping environment. For more insights, you can explore this guide to the safest trampolines for kids to see how different safety designs compare.
Attach the poles loosely at first, making sure they are evenly spaced around the trampoline. Once they are all in position, go back around and tighten the hardware securely with your wrench. Each pole should stand straight and feel completely rigid when you're done.
The final piece of the puzzle is hanging the net itself. Start by sliding the net over the tops of the enclosure poles. Most nets have sleeves or caps at the top that fit snugly over the pole ends.
With the net hanging, you can now secure the bottom edge. This is a critical step for creating a gap-free enclosure. The bottom of the net will have a series of straps, ropes, or clips that connect directly to the mat's V-rings—the very same rings the springs are attached to.
After it's fully attached, zip the enclosure door shut and test the tension by pushing gently against the net from the inside. It should feel secure and spring back into place, ready for countless hours of safe and exciting fun.
Your trampoline is standing tall, but don't let the kids start bouncing just yet. Before anyone takes that first flight, a final, thorough inspection is absolutely essential. This isn't just a friendly suggestion; it’s the most critical step in making sure your newly built trampoline is a genuinely safe place for your family to play.
Think of it as your own personal quality control. A single loose bolt or an unsecured strap can put the whole structure at risk. Taking an extra 15 minutes for this final once-over provides peace of mind that'll last for years.
It's time for a walk-around. You need to perform a hands-on check of every single component. Don't just look—physically touch, push, and test everything. A methodical approach like this helps you catch any small oversight that might have slipped past during the build.
Here’s exactly what to look for:
Once everything on this list gets a green light, your trampoline is officially open for business.
Now, let's talk about a crucial long-term safety step: anchoring. An unanchored trampoline is basically a giant, awkward kite. In high winds, it can lift right off the ground, becoming a dangerous projectile that could wreck your fence, your neighbor's roof, or worse. This isn't an exaggeration; it's a common and very costly problem for trampoline owners.
Securing your trampoline isn't just for hurricane-prone areas. A strong thunderstorm can produce wind gusts powerful enough to send a trampoline flying across the yard. Investing in a quality anchor kit is one of the smartest, most affordable insurance policies you can buy for your new equipment.
Trampoline anchor kits are made specifically for this. They usually come with corkscrew-style stakes you drive deep into the ground and heavy-duty straps that connect those stakes to the trampoline frame. This is what keeps it planted firmly on the ground when the weather gets ugly.
A trampoline is not a "set it and forget it" kind of thing. Regular check-ups are vital to catch wear and tear before it turns into a real safety hazard. A quick inspection every couple of weeks, especially during peak jumping season, is all it really takes.
Here’s a simple routine to get into:
If you ever feel like the assembly or ongoing maintenance is more than you want to handle, it's always smart to call in an expert. Getting help from a service that offers professional trampoline installation ensures every component is put together perfectly and securely from day one.
Let's be real—even with the best instructions, you can run into a few head-scratchers during assembly. You might be staring at a frame piece that just refuses to line up, or maybe you're wrestling with a spring that feels like it’s mocking you. Don't sweat it. Most of these issues are totally normal and just need a little patience to solve.
One of the most common snags is a misaligned frame. This usually happens with the very last piece, where the bolt holes just don't seem to match up. Nine times out of ten, this is because you fully tightened the other bolts too early. The fix is simple: go back and loosen all the frame bolts until they're just hand-tight. That little bit of play is usually all you need to get that last section into place before you go around and tighten everything down for good.
Another classic struggle is attaching those last few springs. As you add more springs, the tension across the mat builds, and getting the final 10-15% of them on can feel like an Olympic sport. If you hit a wall, first, double-check that you're following the "star pattern" we covered earlier. If you are, the trick is to use your body weight—not just your arms—when you pull the T-hook tool. A little extra leverage makes all the difference.
Sometimes, what looks like a minor hiccup is actually a sign of a bigger issue, and trying to force it can be a genuine safety risk. Knowing when to pause the DIY heroics and call for backup isn't a sign of defeat; it’s a smart move to make sure the trampoline is 100% safe for your family.
You should stop what you’re doing and think about getting professional help if you run into:
Choosing to get help isn't giving up; it's about prioritizing safety and getting the job done right. A professional service like Assembly Smart can jump in at any point, making sure your trampoline is put together perfectly to manufacturer specs, no guesswork involved. It’s the best way to guarantee your family's fun isn't held up by a frustrating assembly snag.
Even with a perfect set of instructions, you're bound to have a few questions pop up during the assembly process. Let's tackle some of the most common ones we hear from people putting together a trampoline for the first time.
One of the biggest questions is always: "Are trampolines actually hard to assemble?" The honest answer is, they can be a real headache. This is especially true when you're wrestling with those notoriously vague paper manuals or trying to figure out the best way to attach a hundred springs. The secret isn't about brute force; it's about following the sequence perfectly, especially with the springs, to get that tension just right.
While you might technically be able to build a tiny trampoline by yourself, we strongly recommend having a second person on hand. You’ll be glad you did.
Lifting and lining up those big, awkward frame pieces is so much easier and safer with an extra set of hands. And when it's time to stretch the springs, a partner can hold the mat in place, which makes a world of difference and saves a ton of frustration.
A lot of the time, the struggle isn't about a lack of skill—it's about trying to decipher diagrams that leave you guessing. Getting the fundamentals down is key. For more on this, a general guide on assembling and disassembling offers some great foundational insights.
It happens to the best of us—a tiny nut or bolt goes missing in action. If you find yourself in this situation, do not substitute it with a random one from your garage toolbox, unless you are 100% certain it's an identical match in size, length, and grade.
Using the wrong hardware can seriously compromise the frame's structural integrity. The safest move is to stop what you're doing and contact the manufacturer right away to get an official replacement part sent out.
Finally, many people wonder if it's worth shelling out the extra cash for a professional to build it. While it is an added expense, hiring a pro takes all the guesswork out of the equation and gives you peace of mind that the build is done correctly and safely. If you're on the fence, you can learn more about what to expect by checking out the typical trampoline assembly cost to see if it makes sense for you.
Feeling overwhelmed by the instructions or just short on time? Let the experts at Assembly Smart handle it. We offer fast, reliable, and professional assembly services to get your family bouncing safely in no time. Book your stress-free assembly today!
